Panasonic PVGS70D PVGS70D User Guide - Page 39
USING THE BUILT-IN FLASH, Press the [PHOTO SHOT] Button or Recording Start
 |
View all Panasonic PVGS70D manuals
Add to My Manuals
Save this manual to your list of manuals |
Page 39 highlights
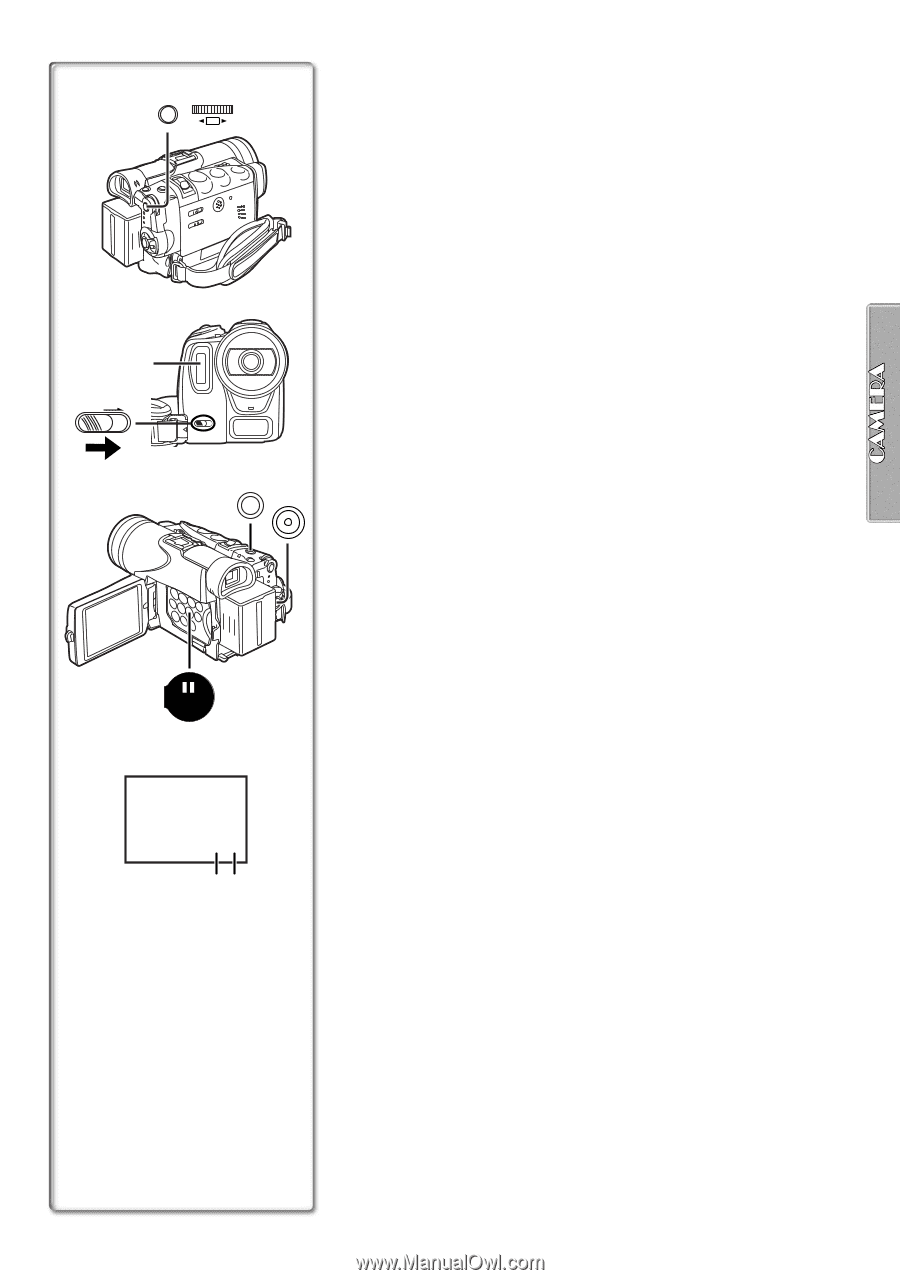
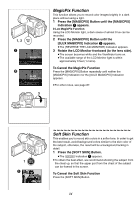
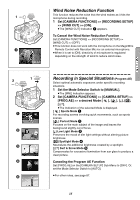
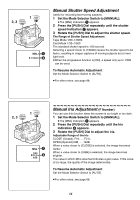
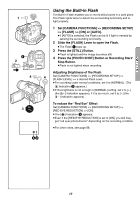
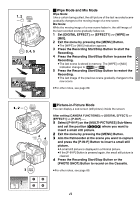
1 MENU WB/SHUTTER IRIS/MF/VOL/JOG PUSH 1 2 FLASH 4 PHOTO SHOT 4 3 STILL £ß 32 Using the Built-in Flash The Built-in Flash enables you to record still pictures in a dark place. The Flash lights twice to detect the surrounding luminosity and to light properly. 1 Set [CAMERA FUNCTIONS] >> [RECORDING SETUP] >> [FLASH] >> [ON] or [AUTO]. ≥If [AUTO] is selected, the Flash can be lit if light is needed by sensing the surrounding luminosity. 2 Slide the [FLASH] Lever to open the Flash. ≥The Flash 1 pops up. 3 Press the [STILL] Button. ≥Flash is lighted and the image becomes still. 4 Press the [PHOTO SHOT] Button or Recording Start/ Stop Button. ≥Flash is not lighted when recording. Adjusting Brightness of the Flash Set [CAMERA FUNCTIONS] >> [RECORDING SETUP] >> [FLASH LEVEL] >> a desired Flash Level. ≥For recording under normal conditions, set it to [NORMAL]. (The [ß] Indication 2 appears.) ≥If the brightness is not enough in [NORMAL] setting, set it to [i] (the [ßi] Indication appears), if it is too much, set it to [j] (the [ßj] Indication appears). To reduce the "Red Eye" Effect Set [CAMERA FUNCTIONS] >> [RECORDING SETUP] >> [RED EYE REDUCTION] >> [ON]. ≥The [£] Indication 3 appears. ≥Even if the [RED EYE REDUCTION] is set to [ON], you still may get "red eyes phenomenon" depending on the recording condition. ≥For other notes, see page 88. 39
-
 1
1 -
2
-
3
-
4
-
5
-
6
-
7
-
8
-
9
-
10
-
11
-
12
-
13
-
14
-
15
-
16
-
17
-
18
-
19
-
20
-
21
-
22
-
23
-
24
-
25
-
26
-
27
-
28
-
29
-
30
-
31
-
32
-
33
-
 34
34 -
 35
35 -
 36
36 -
 37
37 -
 38
38 -
 39
39 -
 40
40 -
 41
41 -
 42
42 -
 43
43 -
 44
44 -
45
-
46
-
47
-
48
-
49
-
50
-
51
-
52
-
53
-
54
-
55
-
56
-
57
-
58
-
59
-
60
-
61
-
62
-
63
-
64
-
65
-
66
-
67
-
68
-
69
-
70
-
71
-
72
-
73
-
74
-
75
-
76
-
77
-
78
-
79
-
80
-
81
-
82
-
83
-
84
-
85
-
86
-
87
-
88
-
89
-
90
-
91
-
92
-
93
-
94
-
95
-
96
-
97
-
98
-
99
-
100
-
101
-
102
-
103
-
104
-
105
-
106
-
107
-
108
-
109
-
110
-
111
-
112
-
113
-
114
 |
 |