Panasonic PVGS70D PVGS70D User Guide - Page 70
INSTALLING USB DRIVER, For Windows 98SE/Me Users
 |
View all Panasonic PVGS70D manuals
Add to My Manuals
Save this manual to your list of manuals |
Page 70 highlights
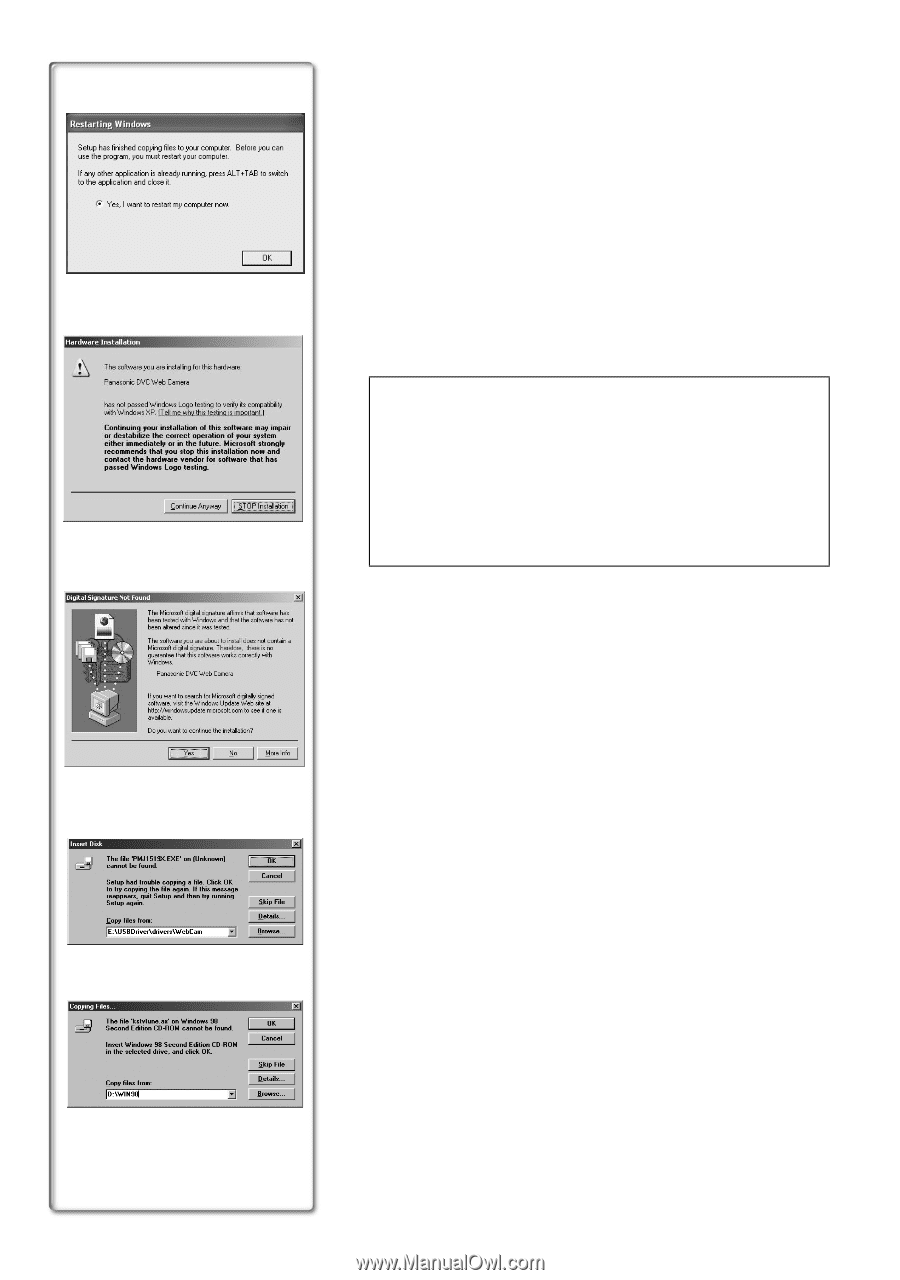
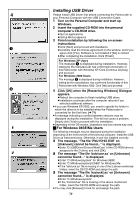
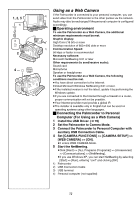
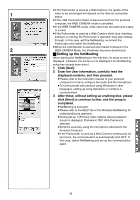
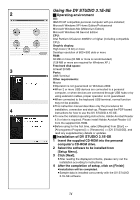
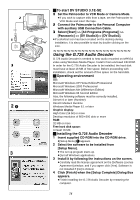
Installing USB Driver 4 Please install USB Driver first before connecting the Palmcorder to your Personal Computer with the USB Connection Cable. 1 Turn on the Personal Computer and start up Windows. 2 Insert the supplied CD-ROM into the personal computer's CD-ROM drive. ≥Quit all applications. ≥[Setup Menu] appears. 3 Finish installation by following the on-screen instructions. 1 ≥Click [Next] and proceed with installation. ≥Carefully read the license agreement on the window, and if you agree click [Yes]. Software is not installed if [No] is clicked. ≥After completing the installation, Click [Finish]. For Windows XP Users The message 1 is displayed during installation. However, testing by the manufacturer has confirmed functionality of this Palmcorder with Windows XP. Click [Continue Anyway] and proceed. For Windows 2000 Users The message 2 is displayed during installation. However, testing by the manufacturer has confirmed functionality of this Palmcorder with Windows 2000. Click [Yes] and proceed. 2 4 Click [OK] when the [Restarting Windows] Dialogue appears. ≥Reboot the computer to finish installing USB driver. ≥Installation continues after the computer reboots if you selected additional software. ≥If you use Windows XP/2000, you need to specify the folder in which the driver is to be installed when the Palmcorder is connected for the first time. (l 71) ≥A message indicating a conflict between versions may be displayed during the installation. This will not cause a problem. Simply click [Yes] to proceed with the installation. 1 ≥Depending on the OS version, illustrations and icon names may vary. ª For Windows 98SE/Me Users The following messages may be displayed during the installation depending on the environment of the personal computer. Install the USB Driver as instructed below. Otherwise, it won't be installed correctly. 1 The message, "The file 'PMJ1519X.EXE' on [Unknown] cannot be found..." is displayed. ≥Enter "D:\USBDriver\Drivers\WebCam" (if the CD-ROM drive is 2 assigned to the D drive) and click [OK]. 2 The message "The file 'kstvtune.ax' on [Unknown] cannot be found..." is displayed. ≥Enter "C:\Windows\system" for Windows 98SE. ≥Enter "C:\Windows\options\CABS" for Windows Me. ≥If the "kstvtune.ax" file is missing in one of the 2 above-mentioned folders, insert the OS CD-ROM and assign the path. 3 The message "The file 'ksclockf.ax' on [Unknown] cannot be found..." is displayed. ≥Enter "C:\Windows\system". ≥If the "ksclockf.ax" file is missing in the above mentioned folder, insert the OS CD-ROM and assign the path. ≥You may click [Browse] to look for and assign the path. 70
-
 1
1 -
2
-
3
-
4
-
5
-
6
-
7
-
8
-
9
-
10
-
11
-
12
-
13
-
14
-
15
-
16
-
17
-
18
-
19
-
20
-
21
-
22
-
23
-
24
-
25
-
26
-
27
-
28
-
29
-
30
-
31
-
32
-
33
-
34
-
35
-
36
-
37
-
38
-
39
-
40
-
41
-
42
-
43
-
44
-
45
-
46
-
47
-
48
-
49
-
50
-
51
-
52
-
53
-
54
-
55
-
56
-
57
-
58
-
59
-
60
-
61
-
62
-
63
-
64
-
 65
65 -
 66
66 -
 67
67 -
 68
68 -
 69
69 -
 70
70 -
 71
71 -
 72
72 -
 73
73 -
 74
74 -
 75
75 -
76
-
77
-
78
-
79
-
80
-
81
-
82
-
83
-
84
-
85
-
86
-
87
-
88
-
89
-
90
-
91
-
92
-
93
-
94
-
95
-
96
-
97
-
98
-
99
-
100
-
101
-
102
-
103
-
104
-
105
-
106
-
107
-
108
-
109
-
110
-
111
-
112
-
113
-
114
 |
 |