Panasonic PVGS70D PVGS70D User Guide - Page 71
CONNECTING COMPUTER AND PALMCORDER, For Windows XP/2000 Users
 |
View all Panasonic PVGS70D manuals
Add to My Manuals
Save this manual to your list of manuals |
Page 71 highlights
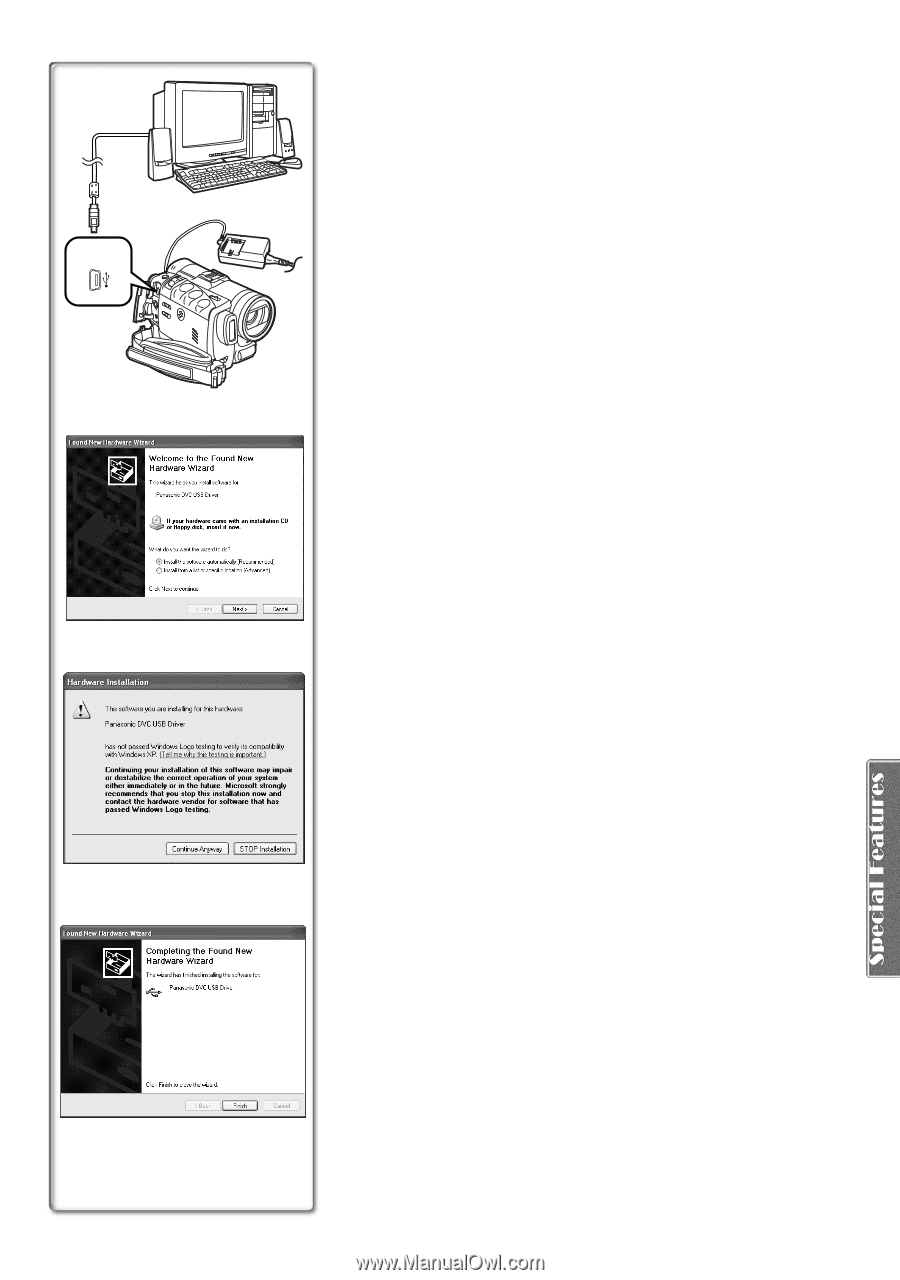
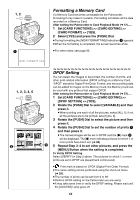
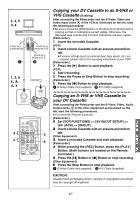
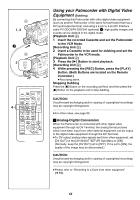
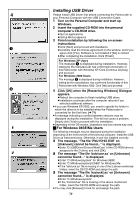
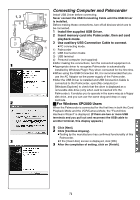
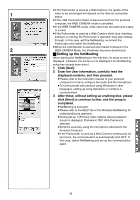
1, 3 2) 3) 2 1 2 3 Connecting Computer and Palmcorder 4) Install USB Driver before connecting. Never connect the USB Connecting Cable until the USB Driver is installed. Before making these connections, turn off all devices which are to be connected. 1 Install the supplied USB Driver. 2 Insert memory card into Palmcorder, then set card playback mode. 3 Use auxiliary USB Connection Cable to connect. 1) ≥PC connecting mode. 1) Palmcorder 2) USB Connection Cable 3) USB terminal 4) Personal computer (not supplied) ≥After making the connections, turn the connected equipment on. ≥Appropriate driver to recognize Palmcorder is automatically installed by Windows Plug'n Play when connected for the first time. ≥When using the USB Connection Kit, it is recommended that you use the AC Adaptor as the power supply of the Palmcorder. ≥After the USB Driver is installed and USB Connection Cable is connected to the Palmcorder, open [My computer] or [Windows Explorer] to check that the drive is displayed as a removable disk drive (only when card is inserted into the Palmcorder). It enables you to operate in the same way as a floppy disk drive, and you can use the same drag and drop or copy methods. ª For Windows XP/2000 Users When the Palmcorder is connected for the first time in both the Card Playback Mode and the VCR/Camera Mode, the "Found New Hardware Wizard" is displayed. (If there are two or more USB terminals and you pull out and reconnect the USB cable to another terminal, this display appears.) 1 Click [Next]. 2 Click [Continue Anyway]. ≥Testing by the manufacturer has confirmed functionality of this Palmcorder. ≥If the [Insert disc] screen is displayed, click [OK]. 3 After the completion of setting, click on [Finish]. 71
-
 1
1 -
2
-
3
-
4
-
5
-
6
-
7
-
8
-
9
-
10
-
11
-
12
-
13
-
14
-
15
-
16
-
17
-
18
-
19
-
20
-
21
-
22
-
23
-
24
-
25
-
26
-
27
-
28
-
29
-
30
-
31
-
32
-
33
-
34
-
35
-
36
-
37
-
38
-
39
-
40
-
41
-
42
-
43
-
44
-
45
-
46
-
47
-
48
-
49
-
50
-
51
-
52
-
53
-
54
-
55
-
56
-
57
-
58
-
59
-
60
-
61
-
62
-
63
-
64
-
65
-
 66
66 -
 67
67 -
 68
68 -
 69
69 -
 70
70 -
 71
71 -
 72
72 -
 73
73 -
 74
74 -
 75
75 -
 76
76 -
77
-
78
-
79
-
80
-
81
-
82
-
83
-
84
-
85
-
86
-
87
-
88
-
89
-
90
-
91
-
92
-
93
-
94
-
95
-
96
-
97
-
98
-
99
-
100
-
101
-
102
-
103
-
104
-
105
-
106
-
107
-
108
-
109
-
110
-
111
-
112
-
113
-
114
 |
 |