Panasonic SAPT480 SAPT480 User Guide - Page 7
Do not, Audio and video connections - home theater
 |
View all Panasonic SAPT480 manuals
Add to My Manuals
Save this manual to your list of manuals |
Page 7 highlights
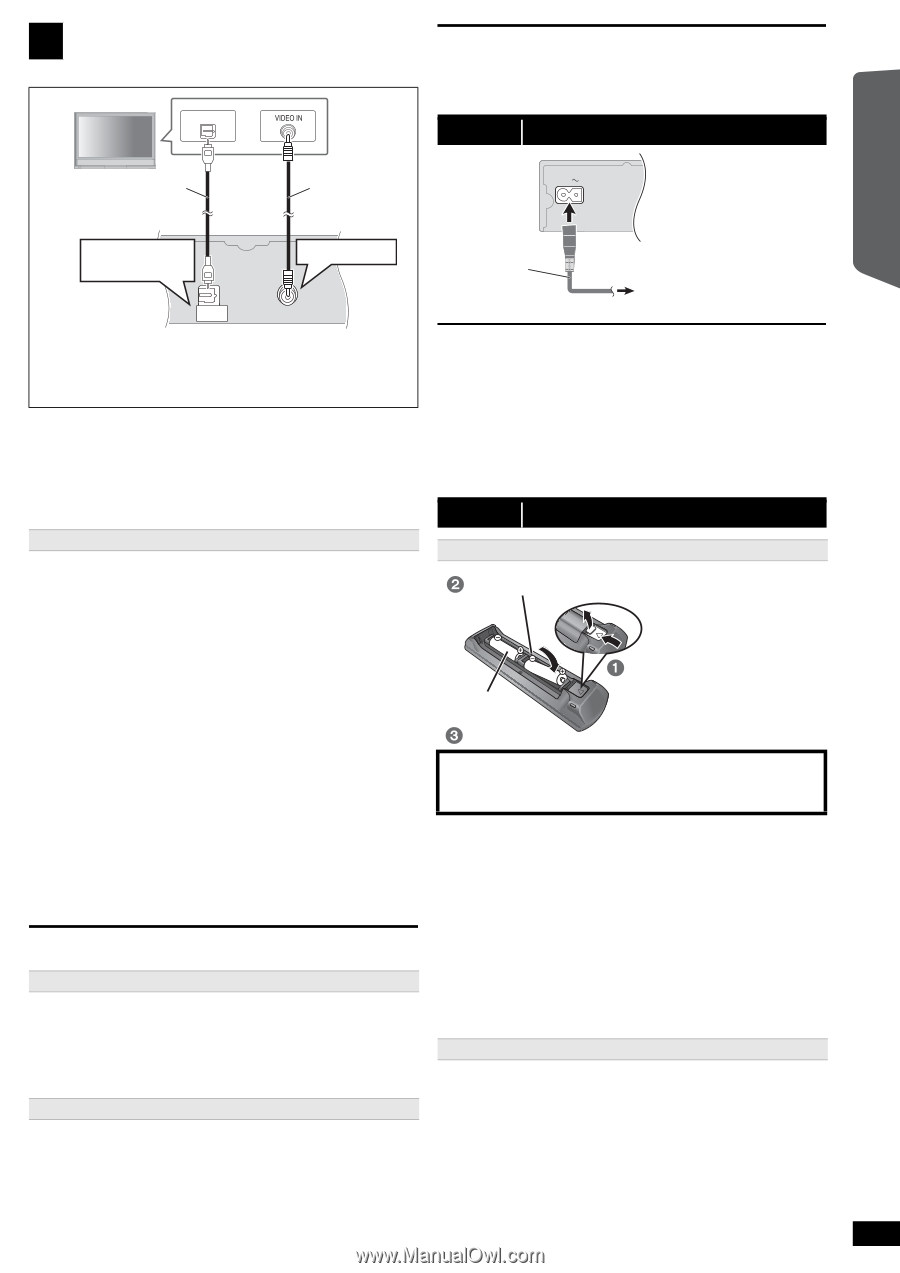
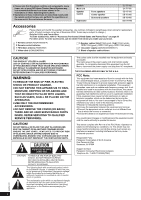
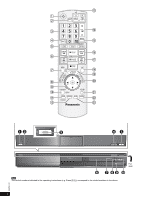
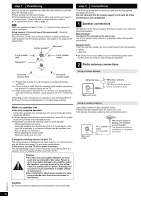
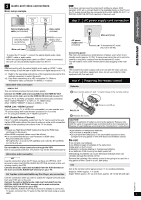
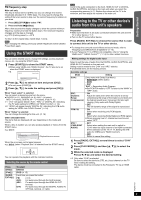
3 Audio and video connections Basic setup example TV OPTICAL OUT [Note] If you have various sound sources (such as Blu-ray player, DVD recorder, VCR, etc.), connect them to the available inputs on the TV and the TV output should then be connected to the AUX, HDMI AV OUT§2 or DIGITAL AUDIO IN OPTICAL terminal of the main unit. step 3 AC power supply cord connection Getting Started Quick Start Guide Optical digital audio cable (not included) Video cable (included) AC IN 6 5 2 14 Main unit (rear) R L R SUBWOOFER CENTER FRONT SUR DIGITAL AUDIO IN OPTICAL VIDEO OUT Main unit (rear) DIGITAL AUDIO IN OPTICAL VIDEO OUT To output the TV audio§1, connect the optical digital audio cable, HDMI§2 cable or audio cable. When the optical digital audio cable or HDMI§2 cable is connected, this unit can decode Dolby Digital audio from the TV. [Note] After connecting with the optical digital audio cable or HDMI§2 cable, make settings to suit the type of audio from your digital equipment (B 9). §1 Refer to the operating instructions of the respective devices for the settings necessary to output the audio. §2 Only when connecting to a ARC compatible TV. Refer to "Alternative video connection" for details. (B below) AC power supply cord (included) To household AC outlet (AC 120 V, 60 Hz) Conserving power The main unit consumes a small amount of power, even when it is in standby mode (approx. 0.2 W). To save power when the unit is not to be used for a long time, unplug it from the household AC outlet. You will need to reset some memory items after plugging in the main unit. [Note] The included AC power supply cord is for use with the main unit only. Do not use it with other equipment. Also, do not use cords for other equipment with the main unit. step 4 Preparing the remote control Alternative video connection [\\\\\HDMI\AV\OUT\\\\\] This connection provides the best picture quality. Connect the HDMI cable (not included) from the HDMI AV OUT terminal on the main unit to the HDMI AV IN terminal on your TV. ≥ If your TV is not ARC compatible, make the extra audio connection. ≥ Set "VIDEO PRIORITY" to "ON" (B 17, HDMI menu). ≥ Set "VIDEO FORMAT" in Menu 4 (HDMI) (B 13). VIERA Link "HDAVI Control" If your Panasonic TV is VIERA Link compatible, you can operate your TV synchronizing with home theater operations or vice versa (B 14, Using the VIERA LinkTM "HDAVI ControlTM"). ARC (Audio Return Channel) If the TV is ARC compatible, audio from the TV can be sent to this unit via the HDMI cable without the need to make an extra audio connection. ≥ Refer to the operating instructions of the TV for details. [Note] ≥ Please use High Speed HDMI Cables that have the HDMI logo (as shown on the cover). ≥ Non-HDMI-compliant cables cannot be utilized. ≥ It is recommended that you use Panasonic's HDMI cable. Recommended part number: RP-CDHS15 (1.5 m/4.9 ft), RP-CDHS30 (3.0 m/9.8 ft), RP-CDHS50 (5.0 m/16.4 ft), etc. Do not make the video connections through the VCR. Due to copy guard protection, the picture may not be displayed properly. Alternative audio connection [\\\\\\\\\\\AUX\\\\\\\\\\] Use this connection when the TV does not have an OPTICAL OUT terminal or when the DIGITAL AUDIO IN OPTICAL terminal on this unit is being used by the STB. Connect the audio cable (not included) from the AUX terminal on the main unit to the AUDIO OUT terminal on your TV. Set Top Box (cable/satellite/Blu-ray Disc Player, etc) connection Batteries Insert so the poles ( and ) match those in the remote control. Press in and lift up. R6/LR6, AA Replace the cover. CAUTION Danger of explosion if battery is incorrectly replaced. Replace only with the same or equivalent type recommended by the manufacturer. Dispose of used batteries according to the manufacturer's instructions. ≥ Use alkaline or manganese batteries. ≥ Do not heat or expose to flame. ≥ Do not leave the battery(ies) in an automobile exposed to direct sunlight for a long period of time with doors and windows closed. Do not: ≥ mix old and new batteries. ≥ use different types of batteries at the same time. ≥ take apart or short circuit. ≥ attempt to recharge alkaline or manganese batteries. ≥ use batteries if the covering has been peeled off. Mishandling of batteries can cause electrolyte leakage which can severely damage the remote control. Remove the batteries if the remote control is not going to be used for a long period of time. Store in a cool, dark place. Use Aim at the remote control signal sensor (B 4), avoiding obstacles. Distance: Within approx. 7 m (23 ft) Angle: Within approx. 20° up and down, approx. 30° to the left and right Use this connection when you want to output the original surround audio from your STB, etc. to this unit. Connect the optical digital audio cable (not included) from the RQTX1101 DIGITAL AUDIO IN OPTICAL terminal on the main unit to the OPTICAL OUT terminal on your STB. ≥ If the DIGITAL AUDIO IN OPTICAL terminal is already in use for the TV audio, reconnect the TV audio to the AUX terminal using an audio cable. 7
-
 1
1 -
 2
2 -
 3
3 -
 4
4 -
 5
5 -
 6
6 -
 7
7 -
 8
8 -
 9
9 -
 10
10 -
 11
11 -
 12
12 -
13
-
14
-
15
-
16
-
17
-
18
-
19
-
20
-
21
-
22
-
23
-
24
-
25
-
26
 |
 |