Panasonic SDR S7 SDRH100P User Guide
Panasonic SDR S7 - Flash Memory Camcorder Manual
 |
UPC - 037988256716
View all Panasonic SDR S7 manuals
Add to My Manuals
Save this manual to your list of manuals |
Panasonic SDR S7 manual content summary:
- Panasonic SDR S7 | SDRH100P User Guide - Page 1
Owner's Manual SD Video Camera Model No. SDR-S70P/PC SDR-S71P/PC SDR-T70P/PC SD/HDD Video Camera Model No. SDR-H100P/PC Before connecting, operating or adjusting this product, please read the instructions completely. Spanish Quick Use Guide is included. Guía para rápida consulta en español está - Panasonic SDR S7 | SDRH100P User Guide - Page 2
Panasonic camera. Be sure to retain this manual as your convenient camera information source. Safety Precautions Date of Purchase Dealer Purchased From Dealer Address Dealer Phone BACK); THERE ARE NO USER SERVICEABLE PARTS INSIDE. REFER SERVICING TO QUALIFIED SERVICE PERSONNEL. CAUTION! DO NOT - Panasonic SDR S7 | SDRH100P User Guide - Page 3
the limits for a Class B digital device, pursuant to Part 15 the attached installation instructions and use only Panasonic Model No.: SDR-S70P/SDR-S71P/SDR-T70P/SDR-H100P Responsible party: Panasonic Corporation of North America One Panasonic Way, Secaucus, NJ 07094 Support Contact: Panasonic - Panasonic SDR S7 | SDRH100P User Guide - Page 4
power from the unit, unplug the power cord from the AC power outlet. ∫ Product Identification Marking Product SD Video Camera SD/HDD Video Camera AC adaptor Bottom Bottom Bottom Location U.S.A./CANADA CONSUMERS: ATTENTION: A lithium ion/polymer battery that is recyclable powers the product - Panasonic SDR S7 | SDRH100P User Guide - Page 5
block any ventilation openings. Install in accordance with the manufacturer's instructions. 8) Do not install near any heat sources such as unused for long periods of time. 14) Refer all servicing to qualified service personnel. Servicing is required when the apparatus has been damaged in any - Panasonic SDR S7 | SDRH100P User Guide - Page 6
a pool or even a cup of coffee. This action could permanently damage the internal parts of your camera. Do not attempt to disassemble this unit. There are no user serviceable parts inside. Unplug your camera from the power supply before cleaning. ≥ AS WITH ANY SMALL OBJECT, SD CARDS CAN BE SWALLOWED - Panasonic SDR S7 | SDRH100P User Guide - Page 7
Panasonic does not accept any responsibility for damages directly or indirectly due to any type of problems manual. ≥ Pages for reference are indicated by an arrow, for example: l 00 ∫ Handling of built-in memory [SDR- contact consumer support. (l 124, 125) Once the HDD is out of order - Panasonic SDR S7 | SDRH100P User Guide - Page 8
laws, other materials cannot be used without obtaining permission from the holders of the copyrights. This owner's manual is designed for use with models SDR-S70 , SDR-S71 , SDR-T70 and SDR-H100 . Pictures may be slightly different from the original. 8 VQT3E42 ≥ The illustrations used in this owner - Panasonic SDR S7 | SDRH100P User Guide - Page 9
≥ Other names of systems and products mentioned in these instructions are usually the registered trademarks or trademarks of the manufacturers who developed the system or product concerned. This product is licensed under the AVC patent - Panasonic SDR S7 | SDRH100P User Guide - Page 10
a media to record [SDR-T70]/[SDR-H100 42 Recording modes/approximate recordable time 43 Audio recording modes 44 Shooting guide 44 [3] Recording still 47 Enhanced optical zoom 47 Digital zoom function 47 Image stabilizer function 48 Recording with the video light [SDR-S71 48 [5] AF/AE - Panasonic SDR S7 | SDRH100P User Guide - Page 11
Suite 3.5 ..... 98 Reading the operating instructions of the software applications 98 [2] If using Mac 99 Others Indications [1] Indications 100 [2] Messages 103 About recovery 104 Helpful hints [1] Functions that cannot be used simultaneously 105 [2] Troubleshooting 106 Cautions for use 110 - Panasonic SDR S7 | SDRH100P User Guide - Page 12
to prevent swallowing. Product numbers correct as of December 2010. These may be subject to change. Battery pack VW-VBL090 (SDR-S70/SDR-S71) (SDR-T70) Battery pack VW-VBK180 (SDR-H100) AC adaptor VSK0711 AC cable K2CA2CA00025 AV cable K2KC4CB00027 USB cable K1HA05AD0007 CD-ROM Software 12 VQT3E42 - Panasonic SDR S7 | SDRH100P User Guide - Page 13
Quick Guide ∫ Inserting the battery Install the battery by inserting it in the direction shown in the figure. A Insert the battery until it clicks and locks. ∫ Charging - Panasonic SDR S7 | SDRH100P User Guide - Page 14
monitor. 2) Press the recording start/stop button to start recording. A VIDEO/SD CARD B VIDEO/Built-inMemory C PICTURE/SD CARD D PICTURE/Built-inMemory SDR-H100 ≥ When you begin recording, ; changes to ¥. ∫ Recording still pictures 1) Change the mode to and open the LCD monitor. E VIDEO/SD CARD - Panasonic SDR S7 | SDRH100P User Guide - Page 15
playback 1) Change the mode to . 2) Use the joystick to select the Play Mode Select icon A, then press the center of the joystick. 3) SDR-S70 / SDR-S71 Select [VIDEO], then press the center of the joystick. SDR-T70 Select [SD CARD]/[Built-inMemory] and [VIDEO], then press the center of the joystick - Panasonic SDR S7 | SDRH100P User Guide - Page 16
[iA/MANUAL] (l 38) 3 Optical image stabilizer button [ O.I.S.] (l 48) 4 Power button [ ] (l 25) 5 Delete button [ ] (l 70)/ Light/Delete button [LIGHT/ ] (SDR-S71) (l 48, 70) 6 Audio-video output terminal [A/V] (l 77, 85) ≥ Use the AV cable (only the supplied cable). 7 USB terminal - Panasonic SDR S7 | SDRH100P User Guide - Page 17
16 17 20 11 Video light (SDR-S71) (l 48) 12 Lens cover 13 Lens 14 Open Set by pressing the center. ≥ Menu screen operations (l 27) ≥ To select the recording functions (l 50) ≥ To adjust manually (l 58) ≥ Playback operations (l 62, 67) 18 Mode switch (l 26) 19 Recording start/stop button (l 41) 20 - Panasonic SDR S7 | SDRH100P User Guide - Page 18
(l 47) When playing back: Thumbnail display switch [ / ] (l 63)/ Volume lever [sVOLr] (l 64) 24 Speaker 25 Status indicator (l 25) 26 HDD access lamp [ACCESS HDD] (SDR-H100) (l 8) 27 DC input terminal [DC IN] (l 20) ≥ Do not use any other AC adaptors except the supplied one. 28 Grip belt Adjust the - Panasonic SDR S7 | SDRH100P User Guide - Page 19
is VW-VBK180/VW-VBK360. ≥ SDR-H100 The unit has a function for distinguishing batteries which can be used safely. The dedicated battery (VW-VBK180/VW-VBK360) supports this function. The only batteries suitable for use with this unit are genuine Panasonic products and batteries manufactured by other - Panasonic SDR S7 | SDRH100P User Guide - Page 20
unit for use. ≥ Refer to page 113 when status indicator flashes either rapidly or slowly. ≥ We recommend using Panasonic batteries. (l 12, 21, 120) ≥ If you use other batteries, we cannot guarantee the quality of this product of used batteries according to the manufacturer's instructions. 20 VQT3E42 - Panasonic SDR S7 | SDRH100P User Guide - Page 21
/Capacity (minimum)] Supplied battery/ VW-VBL090 (optional) [3.6 V/895 mAh] VW-VBK180 (optional) [3.6 V/1790 mAh] VW-VBK360 (optional) [3.6 V/3580 mAh] SDR-S70/SDR-S71/SDR-T70 Charging time Maximum continuously recordable time 2 h 20 min 1 h 20 min 2 h 25 min 4 h 20 min 2 h 55 min 6h Actual - Panasonic SDR S7 | SDRH100P User Guide - Page 22
reduces. # # # # If the indication becomes , the icon will become red. If the battery discharges, then ( ) will flash. SDR-H100 ≥ The remaining battery capacity is displayed when using the Panasonic battery that you can use for this unit. It may take time to display the remaining battery - Panasonic SDR S7 | SDRH100P User Guide - Page 23
Preparation Setup 2 Recording to a card The unit can record still pictures or motion pictures to an SD card, built-in memory, or HDD. To record to an SD card, read the following. This unit (an SDXC compatible device) is compatible with SD Memory Cards, SDHC Memory Cards and SDXC Memory Cards. - Panasonic SDR S7 | SDRH100P User Guide - Page 24
Inserting/removing an SD card When using an SD card not from Panasonic, or one previously used on other equipment, for the first time on this unit, format the SD card. (l 76) When the SD card is formatted, - Panasonic SDR S7 | SDRH100P User Guide - Page 25
Preparation Setup 3 Turning the unit on/off You can turn the power on and off using the power button or by opening and closing the LCD monitor. Turning the power on and off with the power button Press the power button to turn on the power. To turn off the power Hold down the power button until - Panasonic SDR S7 | SDRH100P User Guide - Page 26
Preparation Setup 4 Selecting a mode Change the mode to recording or playback. Operate the mode switch to change the mode to or . Recording mode (l 41, 45) Playback mode (l 62, 67) 26 VQT3E42 - Panasonic SDR S7 | SDRH100P User Guide - Page 27
Preparation Setup 5 Using the menu screen ENTER MENU 1 Press the MENU button. 2 Select the desired top menu A, then move the joystick right or press the joystick. 4 Select the desired setting, then press the joystick to enter the selection. 3 Select the submenu item B, then move the joystick - Panasonic SDR S7 | SDRH100P User Guide - Page 28
-S70 / SDR-S71 . *6 SDR-T70 / SDR-H100 It will be displayed only when the [MEDIA SELECT] is set to [VIDEO]/[SD CARD]. *7 SDR-T70 It will be displayed only when the [MEDIA SELECT] is set to [Built-inMemory]. RECORD SETUP [SCENE MODE] [D.ZOOM] [REC MODE] [RELAY REC]*7 [ASPECT] [FACE FRAMING]*2 [GUIDE - Panasonic SDR S7 | SDRH100P User Guide - Page 29
When recording to the SD card, select [SD CARD]. When recording to the built-in memory, select [Built-inMemory]. (l 42, 62, 67) SDR-H100 When recording to the SD card, select [SD CARD]. When recording to the HDD, select [HDD]. (l 42, 62, 67) SETUP [DISPLAY] The screen display - Panasonic SDR S7 | SDRH100P User Guide - Page 30
[ALERT SOUND] The starting and stopping of a recording or power on/off can be confirmed with this sound. 2 Beeps for 4 times When an error occurs. Check the sentence displayed on the screen. (l 103) [POWER LCD] [LCD SET] [TV ASPECT] (l 35) (l 35) (l 78) [INITIAL SET] Set to [YES] for changing - Panasonic SDR S7 | SDRH100P User Guide - Page 31
This appears only when the [Built-inMemory]/[VIDEO] is selected. *7 SDR-H100 This appears only when the [HDD]/[VIDEO] is selected. VIDEO SETUP [REPEAT PLAY] [RESUME PLAY] [SCENE PROTECT]*1 [GUIDE LINES] (l 66) (l 66) (l 71) (l 52) DISC SETUP*2 [FORMAT DISC] [AUTO PROTECT] [CANCEL PROTECT] [DISC - Panasonic SDR S7 | SDRH100P User Guide - Page 32
Preparation Setup 6 Setting date and time When the unit is turned on for the first time, a message asking you to set the date and time will appear. Select [YES] and perform steps 2 to 3 below to set the date and time. ¬ Change the mode to . 1 Select the menu. (l 27) [SETUP] # [CLOCK SET] 2 - Panasonic SDR S7 | SDRH100P User Guide - Page 33
World time setting (Displaying the time of the travel destination) It is possible to display and record the time at the travel destination by selecting your home region and the travel destination. 1 Select the menu. (l 27) [SETUP] # [SET WORLD TIME] ≥ If the clock is not set, adjust the clock to - Panasonic SDR S7 | SDRH100P User Guide - Page 34
≥ To set to daylight savings time, press the joystick forward. appears and the summer time setting is turned on. The clock and time difference from the home region time are set forward by one hour. Press the joystick forward again to return to standard time. ≥ Close the setting by pressing - Panasonic SDR S7 | SDRH100P User Guide - Page 35
(l 27) [SETUP] # [POWER LCD] +2 : Makes even brighter / +1 : Makes brighter / 0 : No setting (normal) / -1 : Makes darker / A : Auto* * It is not displayed in the Manual Mode or in the playback mode. ≥ If you use the AC adaptor, the +1 indication appears and the screen becomes brighter automatically - Panasonic SDR S7 | SDRH100P User Guide - Page 36
Recording Yourself ¬ Change the mode to . Rotate the LCD monitor towards the lens side. ≥ The image is horizontally flipped as if you see a mirror image. (However, the image recorded is the same as a normal recording.) ≥ When the LCD monitor is rotated towards the lens side, the icon will not be - Panasonic SDR S7 | SDRH100P User Guide - Page 37
Recording 1 Recording (Basic) Before recording ∫ Basic camera positioning 1 Hold the unit with both hands. 2 Put your hand through the grip belt. ≥ When recording, make sure your footing is stable and there is - Panasonic SDR S7 | SDRH100P User Guide - Page 38
want to record. /MANUAL Intelligent auto/Manual button [iA/MANUAL] Press this button to change the mode to Intelligent Auto Mode or Manual Mode. ≥ Please refer to page 58 about Manual Mode. Mode Portrait faces are of certain sizes or at certain angles or when digital zoom is used. 38 VQT3E42 - Panasonic SDR S7 | SDRH100P User Guide - Page 39
56, 59) Auto focus The unit focuses automatically. ≥ Auto focus does not work correctly in the following situations. Record pictures in the Manual Focus Mode. (l 61) j Recording distant and close-up objects at the same time j Recording a subject behind a dirty or dusty window j Recording a subject - Panasonic SDR S7 | SDRH100P User Guide - Page 40
Quick start This unit will resume recording pause mode about 0.8 seconds after the LCD monitor is reopened. ¬ Change the mode to . 1 Select the menu. (l 27) [SETUP] # [QUICK START] # [ON] 2 Close the LCD monitor while the mode is set to . Quick power on When the power is turned on with the mode set - Panasonic SDR S7 | SDRH100P User Guide - Page 41
, the counter display will be reset to "0h00m00s". ("h" is an abbreviation for hour, "m" for minute and "s" for second.) Built-in Memory/HDD SDR-T70 / SDR-H100 Maximum number of recordable scenes: 98901 Maximum number of different dates: 999 (l 65) When either of them reaches to the maximum limit - Panasonic SDR S7 | SDRH100P User Guide - Page 42
] Select the media to record motion pictures or still pictures, then press the center of the joystick. SDR-T70 : A VIDEO/SD CARD B VIDEO/Built-inMemory C PICTURE/SD CARD D PICTURE/Built-inMemory SDR-H100 : E VIDEO/SD CARD F VIDEO/HDD G PICTURE/SD CARD H PICTURE/HDD ≥ Media set for still pictures and - Panasonic SDR S7 | SDRH100P User Guide - Page 43
times are the approximate recordable times for continuous recording. Recording mode 4 GB 8 GB SD card 16 GB 32 GB 48 GB 64 GB SDR-T70 Built-in memory 4 GB SDR-H100 HDD 80 GB XP 50 min 1 h 45 min 3 h 30 min 7 h 30 min 11 h 15 h 50 min 18 h 30 min SP 1 h 40 - Panasonic SDR S7 | SDRH100P User Guide - Page 44
guide You may switch the audio recording method for motion picture recording on the SD Card. ¬ SDR-T70 / SDR-H100 Select [VIDEO]/[SD CARD] in [MEDIA SELECT]. Select the menu. (l 27) [SETUP] # [AUDIO REC] # [DOLBY] or [MPEG] [DOLBY] (Dolby Digital # [SHOOTING GUIDE] # [ON] When "CAMERA PANNING IS TOO - Panasonic SDR S7 | SDRH100P User Guide - Page 45
Recording 3 Recording (Basic) Recording still pictures ≥ Open the lens cover before turning on the power. (l 17) Still pictures can also be recorded while recording motion pictures. ≥ Refer to page 42 for methods for selecting recording media. 1 Change the mode to and open the LCD monitor. 2 - Panasonic SDR S7 | SDRH100P User Guide - Page 46
. Picture size SD card 4 GB 8 GB 16 GB 32 GB 48 GB 64 GB 640k480 640k360 30000 60500 99999* 99999* 99999* 99999* SDR-T70 4 GB Built-in memory SDR-H100 HDD 80 GB 30000 99999* * Maximum number of recordable pictures that can be displayed is 99999. If the number of recordable pictures - Panasonic SDR S7 | SDRH100P User Guide - Page 47
only (Up to 78k) [100k]: Up to 100k [3500k]: Up to 3500k ≥ If [100k] or [3500k] is selected, the digital zoom range is displayed in blue while zooming. ≥ The larger the digital zoom magnification, the more the image quality is degraded. ≥ If you take your finger off the zoom lever during - Panasonic SDR S7 | SDRH100P User Guide - Page 48
function Optical Image stabilizer can stabilize the image without decreasing the image quality. ¬ Change the mode to . Recording with the video light [SDR-S71] The video light enables brightening of the images taken in a dimly-lit place. ¬ Change the mode to . LIGHT/ Optical image stabilizer - Panasonic SDR S7 | SDRH100P User Guide - Page 49
then disappear. Realign the subject with the target frame and repress the AF/AE button to regain target lock. ≥ This function cannot be used in Manual Mode. ≥ It may track different objects or may not lock the target depending on the recording conditions such as the following: j When the object is - Panasonic SDR S7 | SDRH100P User Guide - Page 50
≥ The indication disappears when the center of the joystick is pressed again. 2 (e.g. Backlight compensation) Select an icon with the joystick. 1/2 NEXT Guide line PRE-REC Intelligent contrast control* Soft skin mode* Color night rec* * Not displayed when the Intelligent Auto Mode is on. ≥ The - Panasonic SDR S7 | SDRH100P User Guide - Page 51
Function Backlight compensation Fade (Fade in) (Fade out) Effect This makes the image brighter to prevent darkening of a backlit subject. When you start recording, the image/audio gradually appears. (Fade in) When you pause recording, the image/audio gradually disappears. (Fade out) ≥ The Fade - Panasonic SDR S7 | SDRH100P User Guide - Page 52
not appear on the images actually recorded. ∫ Selecting the type of Guide line Select the menu. (l 27) [RECORD SETUP] # [GUIDE LINES] # desired setting ∫ Displaying Guide lines at playback ≥ Change the mode to . [VIDEO SETUP] # [GUIDE LINES] # desired setting ≥ Set to [OFF] to cancel the - Panasonic SDR S7 | SDRH100P User Guide - Page 53
Function Soft skin mode Color night rec Effect This makes skin colors appear softer for a more attractive appearance. This is more effective if you record a person closely from the torso up. This function allows you to record color images in very low light situations. (Minimum required illumination - Panasonic SDR S7 | SDRH100P User Guide - Page 54
Recording Recording (Advanced) 2 Recording functions of menus Function SCENE MODE Effect/Setting method When you record images in different situations, this mode automatically sets optimum shutter speeds and apertures. ≥ Change the mode to . Select the menu. (l 27) [RECORD SETUP] # [SCENE - Panasonic SDR S7 | SDRH100P User Guide - Page 55
Function SDR-T70 RELAY REC ASPECT FACE FRAMING [OFF]: Cancel the setting [PRIMARY]: Only the prioritized face framing is displayed. [ALL]: All face detection framings are displayed. - Panasonic SDR S7 | SDRH100P User Guide - Page 56
WB ADJUST Effect/Setting method You can record bright pictures even in dark places by slowing the shutter speed. ≥ Change the mode to . ≥ Select the Manual Mode. (l 58) Select the menu. (l 27) [RECORD SETUP] # [AUTO SLOW SHTR] # [ON] ≥ The shutter speed is set to 1/30 or more depending on the - Panasonic SDR S7 | SDRH100P User Guide - Page 57
Function SELF TIMER SHTR SOUND Effect/Setting method This is for recording still pictures using the timer. ≥ Change the mode to . Select the menu. (l 27) [PICTURE] # [SELF TIMER] # desired setting Ø10 (Records after 10 seconds) Ø2 (Records after 2 seconds) ≥ When the button is pressed, a - Panasonic SDR S7 | SDRH100P User Guide - Page 58
≥ This will allow you to switch between Manual Mode and Manual Focus Mode. MNL MNL 5/5 NEXT 1 Manual Mode 2 Manual focus mode 5/5 NEXT [MF] icon shown in the illustration appears. Manual focus adjustment (l 61) ∫ To release the Manual Mode ≥ Press the iA/MANUAL button again. 58 VQT3E42 - Panasonic SDR S7 | SDRH100P User Guide - Page 59
mode with the joystick. MNL ≥ To return to automatic settings, either switch to Auto Mode AWB , or press the iA/MANUAL button again. ∫ To set the white balance manually 1) Select with the joystick, and fill the screen with a white subject. 2) Select with the joystick. BACK MNL ≥ Select the optimal - Panasonic SDR S7 | SDRH100P User Guide - Page 60
Hz, or 1/100 in areas of 50 Hz. 1/100 OPEN BACK A Shutter speed: 1/60 to 1/8000 ≥ If [AUTO SLOW SHTR] is set to [ON], the Manual iris/gain adjustment ≥ If the gain value is increased, the noise on the screen increases. ≥ Depending on the zoom magnification, there are iris values that - Panasonic SDR S7 | SDRH100P User Guide - Page 61
set to [OFF], the blue area is not displayed. ≥ To return to Auto focus, either switch to [AF] as in step 2, or repress the iA/ MANUAL button. ≥ The blue display does not appear in the motion picture that is actually recorded. 61 VQT3E42 - Panasonic SDR S7 | SDRH100P User Guide - Page 62
-T70 Select [SD CARD]/ [Built-inMemory] and [VIDEO], then press the center of the joystick. 3 SDR-S70 / SDR-S71 Select [VIDEO], then press the center of the joystick. SDR-H100 Select [SD CARD]/[HDD] and [VIDEO], then press the center of the joystick. 62 VQT3E42 ≥ Select [ENTER], then press the - Panasonic SDR S7 | SDRH100P User Guide - Page 63
4 Select the scene to be played back, then press the joystick. ≥ The operation icon will be displayed or hidden each time the center of the joystick is pressed. ≥ Next (previous) page can be displayed by selecting / . 5 Select the playback operation with the joystick. 0h00m00s ∫ Change the - Panasonic SDR S7 | SDRH100P User Guide - Page 64
∫ Speaker volume adjustment Move the volume lever to adjust the speaker volume during playback. ヷヰロ ヸ ヵ Towards "r": Increases the volume Towards "s": Decreases the volume ∫ Fast forward/rewind playback Move the joystick left or right during playback. ≥ Move the joystick again to increase the - Panasonic SDR S7 | SDRH100P User Guide - Page 65
Time frame index One-scene images will be displayed as thumbnails under the set search conditions. It is possible to play back the scene from any desired point. ≥ Move the zoom lever to side and change over the thumbnail display to Time frame index. (l 63) 1 Use the joystick to select search - Panasonic SDR S7 | SDRH100P User Guide - Page 66
Repeat playback Playback of the first scene starts after playback of the last scene finishes. Select the menu. (l 27) [VIDEO SETUP] # [REPEAT PLAY] # [ON] The indication appears on the full screen views. ≥ All the scenes are played back repeatedly. (When playing back motion pictures by date, all the - Panasonic SDR S7 | SDRH100P User Guide - Page 67
-T70 Select [SD CARD]/ [Built-inMemory] and [PICTURE], then press the center of the joystick. 3 SDR-S70 / SDR-S71 Select [PICTURE], then press the center of the joystick. SDR-H100 Select [SD CARD]/[HDD] and [PICTURE], then press the center of the joystick. ≥ Select [ENTER], then press the center - Panasonic SDR S7 | SDRH100P User Guide - Page 68
≥ This unit is compliant with the unified standard DCF (Design rule for Camera File system) established by JEITA (Japan Electronics and Information Technology Industries Association). ≥ The file format of still pictures supported by this unit is JPEG. (Not all JPEG formatted files will be played - Panasonic SDR S7 | SDRH100P User Guide - Page 69
Playing back still pictures by date Still pictures recorded on the same day can be played back in succession. 1 Select the date select icon and press the joystick. Changing the playback setting and playing back the slide show 1 Select and press the joystick. A Date select icon 2 Select the - Panasonic SDR S7 | SDRH100P User Guide - Page 70
Playback Editing 1 Deleting scenes/still pictures Deleted scenes/still pictures cannot be restored, so perform appropriate confirmation of the contents before proceeding with deletion. ¬ Change the mode to . To delete by confirming images being played back Press the button while scenes or still - Panasonic SDR S7 | SDRH100P User Guide - Page 71
When you stop deleting halfway Press the MENU button while deleting. ≥ The scenes or still pictures that have already been deleted when the deletion is canceled cannot be restored. To complete editing Press the MENU button. ≥ You can also delete scenes by pressing the MENU button, selecting [EDIT - Panasonic SDR S7 | SDRH100P User Guide - Page 72
] This divides the recorded scenes in two and deletes the front half or back half. SDR-T70 ¬ Change the mode to [VIDEO] (l 62) , and switch play mode selection to [Built-inMemory]/ SDR-H100 ¬ Change the mode to (l 62) , and switch play mode selection to [HDD]/[VIDEO] 1 Select the menu. (l 27 - Panasonic SDR S7 | SDRH100P User Guide - Page 73
digital camera to define which captured images on the SD card are to be printed, together with information on the number of copies they wish to print. (Please note: Not all commercial printing services support with the DPOF settings. SDR-T70 / SDR-H100 ≥ Copy still pictures saved in the built - Panasonic SDR S7 | SDRH100P User Guide - Page 74
enough, you can copy to multiple SD cards following the instructions on the screen. ¬ Change the mode to . Select the menu. (l 27 will be displayed. ≥ SDR-T70 Press the center of the joystick to switch display between SD card and built-in memory. ≥ SDR-H100 Press the center of - Panasonic SDR S7 | SDRH100P User Guide - Page 75
more SD cards are necessary to copy, change the card following the instructions on the screen. 4 Press the MENU button after the copying complete message appears. built-in memory, then press the center of the joystick to confirm. SDR-H100 ≥ Select to copy information from the HDD to the SD card, - Panasonic SDR S7 | SDRH100P User Guide - Page 76
on the medium will be erased and cannot be restored. Back up important data on a PC, DVD disc etc. (l 79, 86) Select the menu. (l 27) SDR-S70 / SDR-S71 [SETUP] # [FORMAT CARD] Select [YES], then press the joystick. ≥ After formatting is complete, press the MENU button to close the message screen - Panasonic SDR S7 | SDRH100P User Guide - Page 77
SD card slot, the motion pictures and still pictures recorded on an SD card may be played back on the TV. (Refer to the operating instructions of the TV for details about TV compatibility.) VIDEO IN AUDIO IN A AV cable (supplied) ≥ Insert the plugs as far as they will go. ≥ Do - Panasonic SDR S7 | SDRH100P User Guide - Page 78
, adjust the aspect setting on the TV. (Refer to the operating instructions of the TV for details.) Refer to the following support site for information about Panasonic TVs with an SD card slot for playing back your pictures. http://panasonic.net/ ≥ For details on how to play back, please read the - Panasonic SDR S7 | SDRH100P User Guide - Page 79
with DVD burner). The copied DVD disc can also be played back. ≥ Please read the operating instructions of the DVD burner for how to use it. Preparing for copying/playing back We recommend using Panasonic DVD burner VW-BN01. ∫ About discs that can be used for copying Disc type Copy*1 Additional - Panasonic SDR S7 | SDRH100P User Guide - Page 80
1 Connect the AC adaptor (supplied with DVD burner) to the DVD burner. ≥ You cannot supply power to the DVD burner from this unit. 2 Connect this unit to the AC adaptor and change the mode to . 3 Connect this unit to the DVD burner with the USB Connection Cable (supplied with DVD burner). A USB - Panasonic SDR S7 | SDRH100P User Guide - Page 81
in succession. 3 Select [START], then press the center of the joystick. ≥ When 2 or more discs are necessary for copying, follow the on-screen instructions to switch discs. ≥ You may need more discs than displayed number of discs when you are copying additionally to a used DVD-RAM. ≥ Eject the - Panasonic SDR S7 | SDRH100P User Guide - Page 82
Important Notice ≥ When inserting a disc containing recorded motion/still pictures into other devices, a message prompting you to format the disc may be displayed. Do not format the disc, since deleted data cannot be restored later. Approximate time for copying to a disc To copy motion pictures to - Panasonic SDR S7 | SDRH100P User Guide - Page 83
Playing back the copied disc ≥ Only discs that have been copied by connecting this unit to the DVD burner or created with VideoCam Suite 3.5 can be played back. A USB Connection Cable (supplied with DVD burner) 1 Connect this unit to the DVD burner to prepare for playback. (l 80) ≥ When playing back - Panasonic SDR S7 | SDRH100P User Guide - Page 84
Managing the copied disc ≥ Connect this unit to a DVD burner, use the joystick to select [PLAY DISC], then press the center of the joystick. (l 80) ∫ Formatting discs This is for initializing DVD-RAM and DVD-RW/+RW discs. Please be aware that if a disc is formatted, then all the data recorded on - Panasonic SDR S7 | SDRH100P User Guide - Page 85
recorded by this unit can be copied (dubbed) onto the hard disk or a DVD disc. Refer to the operating instructions of your DVD recorder for information about whether or not it supports copying (dubbing) from an SD card or a USB terminal. When using a USB terminal Connect this unit to a DVD recorder - Panasonic SDR S7 | SDRH100P User Guide - Page 86
or write to media like DVD discs or SD cards using VideoCam Suite 3.5, the software installed in the supplied CD-ROM. Refer to the operating instructions of VideoCam Suite 3.5 (PDF file) for details on how to use it. ∫ Smart wizard The Smart wizard screen is automatically displayed when you connect - Panasonic SDR S7 | SDRH100P User Guide - Page 87
, then all the data recorded on the media will be erased.) http://panasonic.net/avc/sdcard/information/SDXC.html ≥ VideoCam Suite 3.5 can handle images 3.5. Images created with other video cameras, DVD recorders, software and commercial DVD-Videos are not supported. ≥ We cannot guarantee proper - Panasonic SDR S7 | SDRH100P User Guide - Page 88
return the Software to Panasonic Corporation ("Panasonic"), its distributors or dealers from which you made the purchase. Article 1 License Licensee is granted the right to use the software, including the information recorded or described on the CD-ROM, instruction manuals, and any other media - Panasonic SDR S7 | SDRH100P User Guide - Page 89
2 Operating environment ≥ Even if the system requirements mentioned in this owner's manual are fulfilled, some PCs cannot be used. ≥ A CD-ROM drive pixels or more recommended) Video card supporting DirectX 9.0c (supports overlay of DirectDraw) PCI Express™k16 compatible recommended 89 VQT3E42 - Panasonic SDR S7 | SDRH100P User Guide - Page 90
) ≥ When writing to a DVD/SD, more than double the amount of free space as the disc being created is necessary. Sound DirectSound Support Interface Other requirements USB port [Hi-Speed USB (USB 2.0)] Mouse or equivalent pointing device SD card read/Writer Internet connection ≥ Supplied CD-ROM - Panasonic SDR S7 | SDRH100P User Guide - Page 91
∫ Operating environment for the card reader function (mass storage) PC IBM PC/AT compatible PC OS Windows 7 (32 bit/64 bit) Windows Vista (32 bit) SP1/SP2 Windows XP (32 bit) SP3 CPU Windows 7/Windows Vista: 1.0 GHz or higher Windows XP: Intel Pentium III 450 MHz or higher or Intel Celeron - Panasonic SDR S7 | SDRH100P User Guide - Page 92
7 or the following screen is not displayed automatically, select [Start] # [Computer] (or doubleclick on [Computer] on the desktop), and then double-click [Panasonic]. 4 Select the country or region where you live, then click [Next]. ≥ If the country or region cannot be selected, select [NTSC Area - Panasonic SDR S7 | SDRH100P User Guide - Page 93
]. The PC must be rebooted for the application to work. 2 Select [VideoCam Suite 3.5], then click [Uninstall]. ≥ Proceed with the uninstallation by following the on-screen instructions. ≥ After uninstalling the software, be sure to reboot the PC. 93 VQT3E42 - Panasonic SDR S7 | SDRH100P User Guide - Page 94
when a SDXC card is read. (Please be aware that if a media is formatted, then all the data recorded on the media will be erased.) http://panasonic.net/avc/sdcard/ information/SDXC.html 94 VQT3E42 - Panasonic SDR S7 | SDRH100P User Guide - Page 95
[USB Mass Storage Device] and click [Stop]. 3 SDR-S70 Verify [MATSHITA SDR-S70/SD USB Device] is selected and click [OK]. SDR-S71 Verify [MATSHITA SDR-S71/SD USB Device] is selected and click [OK]. SDR-T70 Verify [MATSHITA SDR-T70/SD USB Device] or [MATSHITA SDR-T70/MEM USB Device] is selected and - Panasonic SDR S7 | SDRH100P User Guide - Page 96
the battery by connecting it to different devices When using the battery, if you turn off the unit and connect it to a PC, Panasonic Blu-ray disc recorder or Panasonic DVD recorder, the battery will charge. ≥ When connecting this unit to a PC for the first time, make sure to connect this unit - Panasonic SDR S7 | SDRH100P User Guide - Page 97
* [CAM_MEM] is displayed SDR-H100 * [CAM_HDD] is displayed. ≥ Do not delete the SD card's folders. Doing so may make the SD card unusable in this unit. ≥ When data not supported by this unit has been recorded on a PC, it will not be recognized by this unit. ≥ Always use this unit to format - Panasonic SDR S7 | SDRH100P User Guide - Page 98
(On the PC) Select [start] # [All Programs (Programs)] # [Panasonic] # [VideoCam Suite 3.5] # [VideoCam Suite]. ≥ For details on how to use the software applications, read the PDF operating instructions of the software. Reading the operating instructions of the software applications ≥ You will need - Panasonic SDR S7 | SDRH100P User Guide - Page 99
memory cards cannot be used on Mac. ≥ iMovie'11 supported. For details about iMovie'11, please contact Apple Inc the system requirements mentioned in this owner's manual are fulfilled, some PCs cannot be used. desktop. ≥ SDR-T70 [CAM_SD] and [CAM_MEM] are displayed on the desktop. ≥ SDR-H100 [CAM_SD - Panasonic SDR S7 | SDRH100P User Guide - Page 100
Indications 1 Indications ∫ Recording indications *1 SDR-S71 only *2 SDR-T70 only *3 SDR-H100 only A MF AWB 1/100 (Green) Recording pause 100 VQT3E42 PRE-REC MNL PRE-REC (l 52) Manual Mode (l 58) //// Intelligent Auto Mode (l 38) MF Manual focus (l 61) AWB / / / / / White balance (l 59) - Panasonic SDR S7 | SDRH100P User Guide - Page 101
Ø10/Ø2 Self-timer recording (l 57) R3000 Remaining number of still pictures (l 45) (White) Still picture recording possible status (Red) Recording still picture G HDD Falling detection (l 8)*3 ∫ Playback indications 1/;/5/ /6/ /7/8/D/E/ ;1/2; Display during playback (l 62, 67) 0h00m00s - Panasonic SDR S7 | SDRH100P User Guide - Page 102
∫ Indication of connection to other devices Accessing the card (l 95) Accessing the built-in memory (l 95)*2 Accessing the HDD (l 95)*3 ∫ Confirmatory indications -- (Time The built-in battery is low. display) (l 32) Warning for face-to-face recording (l 36) SD card is not inserted or is non- - Panasonic SDR S7 | SDRH100P User Guide - Page 103
to be indicated on the screen in text. *1 SDR-T70 only *2 SDR-H100 only RECOMMEND DATA BACK UP PERIODICALLY.*1*2 We problem with the HDD. Copy the motion pictures and still pictures stored on the HDD to a PC or a DVD disc immediately (l 79, 86), and detach the power and contact consumer support - Panasonic SDR S7 | SDRH100P User Guide - Page 104
that is compatible with this unit. (l 19) If using a Panasonic battery compatible with this unit, remove the battery and then insert after repeating this several times, this unit needs repair. Detach the power and contact consumer support. (l 124, 125) Do not attempt to repair it by yourself. ≥ You - Panasonic SDR S7 | SDRH100P User Guide - Page 105
night rec Shutter sound Shooting guide Zoom microphone Soft skin mode disable the functions ≥ In Manual Mode ≥ When the Color night rec function is used ≥ In Manual Mode ≥ When the Color on ≥ While recording ≥ When PRE-REC is used ≥ When Digital Zoom (78k or higher) is used ≥ When the Color night - Panasonic SDR S7 | SDRH100P User Guide - Page 106
Others Helpful hints 2 Troubleshooting Problem This unit cannot be turned on. This unit does not stay on long enough. Battery runs down quickly. This unit is turned off automatically. A clicking sound is heard when the unit is shaken. SDR-H100 Remaining battery indication is not displayed - Panasonic SDR S7 | SDRH100P User Guide - Page 107
Problem is still not restored, detach the power connected, and contact consumer support. (l 124, 125) ≥ If you set [SETUP] > , built-in memory or HDD (l 76) SDR-H100 ≥ If the unit is exposed to hard to bring into focus in Auto Focus Mode, use the Manual Focus Mode to adjust the focus. (l 38, 61) ≥ - Panasonic SDR S7 | SDRH100P User Guide - Page 108
Problem Any scenes/ Card/SDHC Memory Card/SDXC Memory Card) that you inserted. Refer to the operating instructions of the device for details. ≥ The unit has automatically detected an error. Restart contact consumer support. (l 124, 125) Do not attempt to repair the unit by yourself. 108 VQT3E42 - Panasonic SDR S7 | SDRH100P User Guide - Page 109
Problem When connected by the USB cable, this unit is not detected by the PC. AC adaptor. ≥ To disconnect the USB cable safely, double-click the icon in the task tray and follow the instructions on the screen. ≥ When the unit is connected to the DVD burner, use the respective AC adaptors for both - Panasonic SDR S7 | SDRH100P User Guide - Page 110
by electromagnetic wave radiation. ≥ Do not use this unit near cell phones because doing so may result in noise adversely affecting the pictures and/or alter the camera body or peel the surface finish. Do not use these solvents. ≥ When using a chemical dust cloth, follow the instructions that came - Panasonic SDR S7 | SDRH100P User Guide - Page 111
is recommended that you place a desiccant (silica gel) in with it. SDR-T70 / SDR-H100 When disposing of or giving away this unit, note that: ≥ then follow the on-screen instructions. ≥ Please look after the data in your built-in memory or HDD carefully. Panasonic will not be held responsible in - Panasonic SDR S7 | SDRH100P User Guide - Page 112
temperature: 15 °C to 25 °C (59 °F to 77 °F), Recommended humidity: 40%RH to 60%RH) ≥ Extremely high temperatures or low temperatures will shorten the life of the battery. ≥ If the battery is kept in high-temperature, high-humidity, or oily-smoky places, the terminals may rust and cause malfunctions - Panasonic SDR S7 | SDRH100P User Guide - Page 113
finished. ≥ If the status indicator stays off despite the charging being unfinished, there may be a fault in the unit, battery or AC adaptor. Contact consumer support. (l 124, 125) Refer to page 111 for details on the battery. About SD cards ≥ The memory capacity indicated on the label of an SD - Panasonic SDR S7 | SDRH100P User Guide - Page 114
≥ SDR-S70 / SDR-S71 To physically format an SD card, connect the unit via the seconds. When an SD card data deletion screen appears, select [YES], and then follow the on-screen instructions. ≥ SDR-T70 / SDR-H100 To physically format an SD card, connect the unit via the AC adaptor, select [SETUP] # - Panasonic SDR S7 | SDRH100P User Guide - Page 115
About condensation When condensation forms on the unit, the lens will cloud up and the unit may not work properly. Make every effort to ensure that condensation does not form. If it does form, take the actions described below. Causes of condensation Condensation takes place when the ambient - Panasonic SDR S7 | SDRH100P User Guide - Page 116
Camera SDR-S70 / SDR-S71 / SDR-T70 SD/HDD Video Camera SDR-H100 Information for your safety Power source: Power consumption: DC 5.0 V (When using AC adaptor) DC 3.6 V (When using battery) Recording: SDR-S71 3.1 W SDR-S70 / 2.9 W SDR-H100 3.6 W SDR-T70 Charging: SDR-S71 7.7 W SDR-S70 / 7.7 W SDR - Panasonic SDR S7 | SDRH100P User Guide - Page 117
night rec function 1.0 Vp-p, 75 h, NTSC system 316 mV, 600 h Read/Write (No copyright protection support) SDR-T70 Read only SDR-H100 Read only Hi-Speed USB (USB 2.0), USB terminal Type Mini AB SDR-S70 / SDR-S71 / SDR-T70 SDR-H100 54.9 mm (W)k64 mm (H)k107.3 mm (D) [2.16 q (W)k2.52 q (H)k4.22 - Panasonic SDR S7 | SDRH100P User Guide - Page 118
SDR-S70 / SDR-S71 Approx. 239 g (Approx. 0.53 lbs.) [with battery (supplied) and an SD card (optional)] SDR-T70 Approx. 238 g (Approx. 0.52 lbs.) [with battery (supplied)] SDR SDXC Memory Card: 48 GB, 64 GB (exFAT system compliant) SDR-T70 4 GB SDR-H100 80 GB MPEG-2 XP: Approx. 10 Mbps (VBR) - Panasonic SDR S7 | SDRH100P User Guide - Page 119
, 16 GB, 24 GB, 32 GB (FAT32 system compliant) SDXC Memory Card: 48 GB, 64 GB (exFAT system compliant) SDR-T70 4 GB SDR-H100 80 GB JPEG (Design rule for Camera File system, based on Exif 2.2 standard), DPOF corresponding 640k480 (4:3), 640k360 (16:9) Refer to page 46 for the number of recordable - Panasonic SDR S7 | SDRH100P User Guide - Page 120
Optional accessories Accessory No. VW-BC10PP Figure Description Battery Charger VW-VBL090*1 (SDR-S70/SDR-S71) (SDR-T70) VW-VBK180*1 VW-VBK360*1 VW-LDC103PP*2 Rechargeable Lithium Ion Battery Pack Rechargeable Lithium Ion Battery Pack Rechargeable Lithium Ion Battery Pack Video DC Light - Panasonic SDR S7 | SDRH100P User Guide - Page 121
Accessory No. RP-SDN16GU1A RP-SDN08GU1A RP-SDN04GU1A RP-SDN02GU1A RP-SDW64GU1K RP-SDW48GU1K RP-SDW32GU1K RP-SDW16GU1K RP-SDW08GU1K RP-SDW04GU1K VW-BN01 Figure Description Class 4 16 GB SDHC Memory Card Class 4 8 GB SDHC Memory Card Class 4 4 GB SDHC Memory Card Class 4 2 GB SD Memory Card Class 10 - Panasonic SDR S7 | SDRH100P User Guide - Page 122
Last State Zip Phone#: Day ( ) Night ( ) TO OBTAIN ANY OF OUR ACCESSORIES YOU CAN DO ANY OF THE FOLLOWING: VISIT YOUR LOCAL PANASONIC DEALER OR CALL PANASONIC'S ACCESSORY ORDER LINE AT 1-800-332-5368 [6 AM-6 PM M-F, PACIFIC TIME] OR MAIL THIS ORDER TO: PANASONIC SERVICE AND TECHNOLOGY COMPANY - Panasonic SDR S7 | SDRH100P User Guide - Page 123
was not sold "as is". Carry-In or Mail-In Service To find a service center please visit http://www.panasonic.com/help or call 1-800-211-PANA (7262). When letter detailing the complaint, a return address and provide a daytime phone number where you can be reached. A valid registered receipt is - Panasonic SDR S7 | SDRH100P User Guide - Page 124
Rico) Purchase Parts, Accessories and Instruction Books online for all Panasonic Products by visiting our Web Site at: http://www.pstc.panasonic.com Or, send your request by E-mail to: [email protected] You may also contact us directly at: 1-800-332-5368 (Phone) 1-800-237-9080 (Fax Only - Panasonic SDR S7 | SDRH100P User Guide - Page 125
above sold by an authorized Panasonic dealer in Canada and purchased and used in Canada, which product was not sold "as is", and which product was delivered to you in new condition in the original packaging. IN ORDER TO BE ELIGIBLE TO RECEIVE WARRANTY SERVICE HEREUNDER, A PURCHASE RECEIPT OR OTHER - Panasonic SDR S7 | SDRH100P User Guide - Page 126
Date and time setting 32 Delete 70 Demo mode 30 Digital zoom 47 Display 29 Dividing a scene to partially 64 ∫G Gain 60 Grip belt 18 Guide line 52 ∫H HDD 7 HDD information Limited Warranty (USA and Puerto Rico 123 ∫M Manual focus 61 Manual focus mode 58 Media select 29, 42 Menu - Panasonic SDR S7 | SDRH100P User Guide - Page 127
SD Memory Card 23 SD Speed Class Rating 23 SDHC Memory Card 23 SDXC Memory Card 23 Self-recording 36 Self-timer recording 57 Shooting guide 44 Shutter sound 57 Shutter speed 60 Simultaneous recording 46 Slide show 68 Slow-motion playback 64 Soft skin mode 53 Still picture compatibility - Panasonic SDR S7 | SDRH100P User Guide - Page 128
Spanish Quick Use Guide/Guía española para el uso rápido ∫ Cómo insertar la batería Meta la batería insertándola en la dirección señalada en la figura. 1) Abrir - Panasonic SDR S7 | SDRH100P User Guide - Page 129
grabación. ∫ Cómo seleccionar un medio para grabar [SDR-T70]/ [SDR-H100] Seleccione el menú. (l 27) [SELEC MEDIO] SDR-T70 A VÍDEO/TARJETA SD B VÍDEO/MEM INTERNA C IMAGEN/TARJETA SD D IMAGEN/MEM INTERNA SDR-H100 ≥ Cuando se comienza a grabar, ; cambia a ¥. ∫ Grabación - Panasonic SDR S7 | SDRH100P User Guide - Page 130
seleccionar el ícono de Selección de Modo de Reproducción A, luego presionar el centro del joystick. 3) SDR-S70 / SDR-S71 Seleccione [VÍDEO], luego presione el centro de la palanca de mando. SDR-T70 Seleccione [TARJETA SD]/[MEM INTERNA] y [VÍDEO], luego presione el centro de la palanca de mando - Panasonic SDR S7 | SDRH100P User Guide - Page 131
131 VQT3E42 - Panasonic SDR S7 | SDRH100P User Guide - Page 132
Panasonic Consumer Electronics Company, Division of Panasonic Corporation of North America One Panasonic Way, Secaucus, NJ 07094 Panasonic Canada Inc. 5770 Ambler Drive, Mississauga, Ontario, L4W 2T3 P VQT3E42 F1210RN0 © Panasonic Corporation 2010 Printed in Malaysia
-
 1
1 -
 2
2 -
 3
3 -
 4
4 -
 5
5 -
 6
6 -
 7
7 -
8
-
9
-
10
-
11
-
12
-
13
-
14
-
15
-
16
-
17
-
18
-
19
-
20
-
21
-
22
-
23
-
24
-
25
-
26
-
27
-
28
-
29
-
30
-
31
-
32
-
33
-
34
-
35
-
36
-
37
-
38
-
39
-
40
-
41
-
42
-
43
-
44
-
45
-
46
-
47
-
48
-
49
-
50
-
51
-
52
-
53
-
54
-
55
-
56
-
57
-
58
-
59
-
60
-
61
-
62
-
63
-
64
-
65
-
66
-
67
-
68
-
69
-
70
-
71
-
72
-
73
-
74
-
75
-
76
-
77
-
78
-
79
-
80
-
81
-
82
-
83
-
84
-
85
-
86
-
87
-
88
-
89
-
90
-
91
-
92
-
93
-
94
-
95
-
96
-
97
-
98
-
99
-
100
-
101
-
102
-
103
-
104
-
105
-
106
-
107
-
108
-
109
-
110
-
111
-
112
-
113
-
114
-
115
-
116
-
117
-
118
-
119
-
120
-
121
-
122
-
123
-
124
-
125
-
126
-
127
-
128
-
129
-
130
-
131
-
132
 |
 |
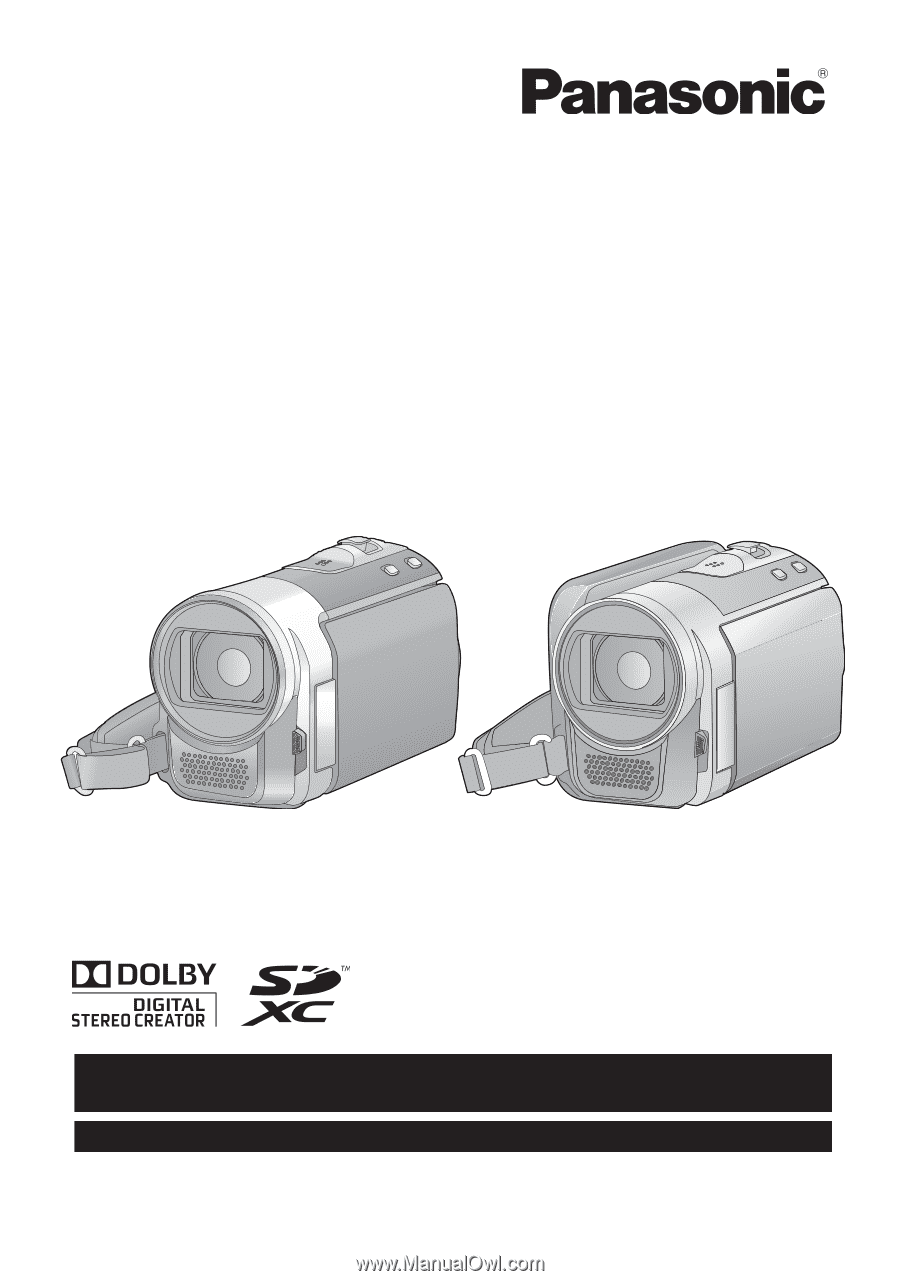
Owner’s Manual
Before connecting, operating or adjusting this product, please read the instructions completely.
Spanish Quick Use Guide is included.
Guía para rápida consulta en español está incluida.
VQT3E42
For USA and Puerto Rico assistance, please call: 1-800-211-PANA(7262) or,
contact us via the web at: http://www.panasonic.com/contactinfo
For Canadian assistance, please call: 1-800-561-5505 or visit us at www.panasonic.ca
SD Video Camera
Model No.
SDR-S70P/PC
SDR-S71P/PC
SDR-T70P/PC
SD/HDD Video Camera
Model No.
SDR-H100P/PC