Panasonic VDRD250 VDRD250 User Guide
Panasonic VDRD250 - DVD MOVIE CAMERA Manual
 |
UPC - 037988980222
View all Panasonic VDRD250 manuals
Add to My Manuals
Save this manual to your list of manuals |
Panasonic VDRD250 manual content summary:
- Panasonic VDRD250 | VDRD250 User Guide - Page 1
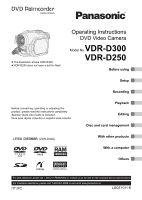
does not have a built-in flash. Operating Instructions DVD Video Camera Model No.VDR-D300 VDR-D250 Before using Setup Recording Before connecting, operating or adjusting this product, please read the instructions completely. Spanish Quick Use Guide is included. Guía para rápida consulta en espa - Panasonic VDRD250 | VDRD250 User Guide - Page 2
RECOMMENDED ACCESSORIES ONLY. CAUTION: DANGER OF EXPLOSION IF BATTERY IS part of this unit. This symbol alerts the user that important literature concerning the operation and maintenance of this unit has been included. Therefore, it should be read carefully in order to avoid any problems. AC Adaptor - Panasonic VDRD250 | VDRD250 User Guide - Page 3
installation instructions and use user's authority to operate this equipment. Declaration of Conformity (U.S.A. only) Trade Name: Panasonic Model No.: VDR-D250/VDR-D300 Responsible party: Panasonic Corporation of North America One Panasonic Way, Secaucus, NJ 07094 Support Contact: Panasonic - Panasonic VDRD250 | VDRD250 User Guide - Page 4
Install in accordance with the manufacturer's instructions. 8) Do not install near any the apparatus. 11) Only use attachments/accessories specified by the manufacturer. 12) Use time. S3125A 14) Refer all servicing to qualified service personnel. Servicing is required when the apparatus has - Panasonic VDRD250 | VDRD250 User Guide - Page 5
or a direct splashing from a pool or even a cup of coffee. This action could permanently damage the internal parts of your camera. Do not attempt to disassemble this unit. There are no user serviceable parts inside. Unplug your camera from the power supply before cleaning. CAUTION ≥ DO NOT AIM YOUR - Panasonic VDRD250 | VDRD250 User Guide - Page 6
Leica Camera AG. ≥ Microsoft®, Windows® and . ≥ Macintosh, Mac OS and QuickTime are instructions are designed for use with models VDR-D300 and VDR-D250. Pictures may be slightly different from the original. ≥ The illustrations used in these operating instructions show model VDR-D300, however, parts - Panasonic VDRD250 | VDRD250 User Guide - Page 7
Guide 11 Accessories 14 Parts handling 27 Setup Power supply 28 Charging the battery 28 Connecting to the AC outlet 30 Turning the unit on/off 30 VDR-D300 only 68 Manual recording functions 70 Scene mode 70 Manual focus adjustment 72 White balance 73 Manual -finalizing a DVD-RW 101 Protecting - Panasonic VDRD250 | VDRD250 User Guide - Page 8
asked questions 150 Troubleshooting 152 Cautions for use 159 Explanation of terms 163 Specifications 165 Number of recordable pictures on an SD card 167 Optional accessories 168 DVD video camera accessories 168 Accessory Order Form (For USA Customers 169 Request for Service Notice (USA Only - Panasonic VDRD250 | VDRD250 User Guide - Page 9
scenes are displayed as thumbnails. You can easily search for the scenes you want to watch. ∫ Editing scenes! (l 81, 85) You can create an original video (playlist) by collecting your favorite scenes together and then easily record (dub) this - Panasonic VDRD250 | VDRD250 User Guide - Page 10
with this unit on it. If you have a DVD recorder with hard disk, you can copy (dub) scenes recorded on a disc with this unit to the hard disk. ∫ Using with a computer! (l 111) You can enjoy editing scenes with the software on the supplied CD-ROM and creating original DVD-Video discs. 10 LSQT1011 - Panasonic VDRD250 | VDRD250 User Guide - Page 11
Quick Guide Quick Guide ∫ Charging the battery 1 Connect the AC cable to the AC adaptor and the AC outlet. 2 Put the battery on the battery mount by aligning the mark, and then securely plug it in. ∫ How to turn on/off the power While pressing the button A, set the OFF/ - Panasonic VDRD250 | VDRD250 User Guide - Page 12
Quick Guide ∫ Inserting/removing an SD card 1 Open the card slot cover. ∫ Recording still pictures ≥ Rotate the mode dial to select . 2 Insert/remove the SD card into/ - Panasonic VDRD250 | VDRD250 User Guide - Page 13
to select . ∫ Still picture playback ≥ Rotate the mode dial to select Quick Guide . 1 Select the scene to be played back. 1 Select the file to be Playback/Pause : (Move): Skip playback (backward) : (Move and hold): Review playback 9 (Move): Skip playback (forward) 9 (Move and hold): Cue - Panasonic VDRD250 | VDRD250 User Guide - Page 14
the accessories before using this unit. Battery pack CGA-DU12 AC adaptor PV-DAC14D Remote control N2QAEC000019 Button-type battery CR2025 Shoulder strap VFC3506-1A AC cable K2CA2CA00029 or K2CA2CA00025 DC cable K2GJ2DZ00018 USB cable K1HA05CD0014 CD-ROM LSFT0643 AV/S cable K2KZ9CB00001 (VDR-D250 - Panasonic VDRD250 | VDRD250 User Guide - Page 15
Before using Parts identification and handling Parts identification and handling 1 Lens (LEICA DICOMAR) (VDR-D300) Lens (VDR-D250) 1 2 Built-in flash (VDR-D300 only) (l 68) 3 Recording lamp (l 144) 4 White balance/remote control sensor (l 74, 21) 2 8 5 Terminal cover 6 Audio-video output - Panasonic VDRD250 | VDRD250 User Guide - Page 16
Before using Parts identification and handling 25 Card slot cover (l 34) 26 Card slot (l 34) 27 Tripod receptacle (l 18) 28 Card access lamp (l 34) 29 Battery release lever [BATTERY RELEASE] (l 28) 30 Speaker 31 LCD monitor (l 19) Due to limitations in LCD production technology, there may be some - Panasonic VDRD250 | VDRD250 User Guide - Page 17
strap through A and attach it in the same way. Parts identification and handling 2 1 3 A Lens hood In order to remove the lens hood, rotate it counter-clockwise A. In order to attach it, place into slot B, and then rotate it clockwise C. ≥ (VDR-D300 only) The lens hood has a built-in lens cover - Panasonic VDRD250 | VDRD250 User Guide - Page 18
Before using Parts identification and handling Attaching the lens cap (VDR-D250 only) Attach the lens cap to protect is a hole for attaching the unit to the optional tripod. (Please carefully read the operating instructions for how to attach the tripod to the unit.) ≥ When the tripod is used, the - Panasonic VDRD250 | VDRD250 User Guide - Page 19
Before using Parts identification and handling Using the LCD monitor You can record the image while viewing it on the LCD monitor. 1 Place your finger on OPEN and - Panasonic VDRD250 | VDRD250 User Guide - Page 20
manufacturer. Discard used batteries according to manufacturer's instructions. Risk of fire, battery out of the reach of children. Never put Button-Type battery in mouth. If swallowed, call your doctor. 20 LSQT1011 Replace battery with Panasonic PART NO. CR2025 only. Use of another battery - Panasonic VDRD250 | VDRD250 User Guide - Page 21
Parts identification and handling ∫ Remote control usable range The distance between the remote control and the unit's remote control sensor A: Within approx. 5 m (16 feet) Angle: Approx. - Panasonic VDRD250 | VDRD250 User Guide - Page 22
Parts identification and handling Using the Magic Wire Remote Control (optional) This remote control can be used from different high and low angles. It is also handy when a tripod is used. When you do not use the remote control, attach the clip to the grip belt. Left-handed users can use this - Panasonic VDRD250 | VDRD250 User Guide - Page 23
for General Ver. 2.0) DVD Video Recording format (VR format) DVD Video Recording format (VR format) DVD-Video format (Video format) DVD-Video format (Video format) Rewritable disc Rewritable disc One time One time recording disc*1 recording disc Indication in these instructions (RAM) (-RW - Panasonic VDRD250 | VDRD250 User Guide - Page 24
confirmed as compatible by Panasonic. http://panasonic.co.jp/pavc/global/cs/e_cam (This website is in English only.) ≥ Discs recorded on this unit may not be playable on other products. ≥ Recording on DVD-R in DVD Video Recording format is not supported. ≥ When using DVD-RW or DVD-R, do not perform - Panasonic VDRD250 | VDRD250 User Guide - Page 25
unit, the screen on the right appears. Select [YES], then press the joystick. 2 Select format type, then press the joystick. VIDEO: DVD-Video format VR: DVD Video Recording format 3 When the confirm screen appears, select [YES], then press the joystick. ≥ To change the format type, format the - Panasonic VDRD250 | VDRD250 User Guide - Page 26
English only.) http://panasonic.co.jp/pavc/global/cs/e_cam ≥ For the purposes of these operating instructions, SD Memory Card and miniSD™ Card are referred to as the "SD card". ≥ This unit supports SD cards formatted in FAT12 system and FAT16 system based on SD Memory Card Specifications. ≥ Use this - Panasonic VDRD250 | VDRD250 User Guide - Page 27
Before using Disc and card handling ∫ How to hold a disc or card Do not touch the recorded surface or the terminal surface. Discs and cards ∫ If there is dirt or condensation on the disc Wipe with a damp cloth and then wipe dry. ∫ Handling precautions ≥ Be careful about scratches and dirt. ≥ Do - Panasonic VDRD250 | VDRD250 User Guide - Page 28
using this unit. ≥ If the DC cable is connected to the AC adaptor, then the battery will not charge. Remove the DC cable from the AC adaptor. 1 Connect the AC cable to the AC adaptor and the A AC outlet. 2 Put the battery on the battery mount by aligning the mark, and then securely plug it in - Panasonic VDRD250 | VDRD250 User Guide - Page 29
is used. The times in parentheses indicate the recordable time when the LCD monitor is used. (When using a DVD-RAM disc) Battery model number Voltage/ capacity Recording mode Maximum continuously recordable time VDR-D300 VDR-D250 XP 1 h 25 min (1 h 20 min) 1 h 30 min (1 h 25 min) Supplied - Panasonic VDRD250 | VDRD250 User Guide - Page 30
cable from other equipment for this unit. ≥ While the DC cable is connected to the AC adaptor, the battery will not charge. Turning the unit on/off ≥ (VDR-D250 only) When recording, remove the lens cap before turning the unit on. If the unit is turned on with the lens cap attached, the automatic - Panasonic VDRD250 | VDRD250 User Guide - Page 31
the power is turned on for the first time after changing the disc or battery, the unit carries out a recognition procedure to check that there are no problems with the disc. This takes approximately 25 seconds with DVD-RAM. If you want to start using the unit as soon as you turn on - Panasonic VDRD250 | VDRD250 User Guide - Page 32
Inserting/removing a disc Inserting/removing a disc When inserting or removing the disc, fit the charged battery pack or connect the AC adaptor to the unit. The cover of the disc compartment will not open unless the unit is powered. 1 Slide the DISC EJECT lever once and release - Panasonic VDRD250 | VDRD250 User Guide - Page 33
cover will not open. If this happens, reattach the battery pack or reconnect the AC adaptor, slide the DISC EJECT lever once, and then release it (3z) DVD-RAM, DVD-RW or DVD-R disc into the disc compartment. Doing so could cause malfunctions. ≥ Do not touch the pickup lens or other parts inside the - Panasonic VDRD250 | VDRD250 User Guide - Page 34
recorded data may be damaged or this unit may malfunction. - Removing the SD card - Operating the OFF/ON switch or the mode dial - Removing the battery or disconnecting the AC adaptor 34 LSQT1011 - Panasonic VDRD250 | VDRD250 User Guide - Page 35
Selecting a mode The mode dial is used to switch between recording and playback modes. Rotate the mode dial slowly but surely. Rotate the mode dial, and set the desired mode pictograph to the position shown in the illustration. Selecting a mode Disc recording mode (l 50) Disc playback mode (l 76) - Panasonic VDRD250 | VDRD250 User Guide - Page 36
How to use the joystick How to use the joystick This unit has a joystick for selecting functions, performing operations, etc. so it is easy to operate this unit with one hand. Basic operations Operations on the menu screen and selection of files on the thumbnail view screen, etc. Move the - Panasonic VDRD250 | VDRD250 User Guide - Page 37
, the operation icon appears or disappears. Setup About the operations icons displayed in each mode About auto mode and manual mode (l 49) Disc recording mode 1/3 NEXT 2/3 NEXT 3/3 NEXT 4/4 NEXT 5/5 NEXT Icon Direction Function 3 Backlight compensation (1/3) 2 Fade 1 Help mode - Panasonic VDRD250 | VDRD250 User Guide - Page 38
77 Card recording mode 1/2 NEXT 2/2 NEXT 3/3 NEXT 4/4 NEXT Icon Direction Function (1/2) 3 Backlight compensation Ø 2 Self timer 1 Help mode (2/2) In manual mode (3/3) In manual focus mode (4/4) 2 1 3 2 1 21 Soft skin mode Tele macro White balance Iris or gain value Shutter speed - Panasonic VDRD250 | VDRD250 User Guide - Page 39
Card playback mode (When [PICTURE] is selected) How to use the joystick Icon ∫ E D Direction 4 2 1 Function Stop playback and show thumbnails Playback previous picture Playback next picture Card playback mode (When [SLIDE SHOW] is selected) Page 79 79 79 Icon 1/; ∫ E D Direction 3 4 2 1 - Panasonic VDRD250 | VDRD250 User Guide - Page 40
How to use the joystick ∫ Help mode The help mode explains the operation icons displayed when the AUTO/MANUAL/FOCUS switch is set to AUTO in disc/card recording mode. ¬ Rotate the mode dial to select or . 1 Press the joystick to display the icon - Panasonic VDRD250 | VDRD250 User Guide - Page 41
Switching the language Switching the language You can switch the language on the screen display or the menu screen. 1 Press the MENU button, then select [ LANGUAGE] and press the joystick. 2 Select [English] and press the joystick. Setup 41 LSQT1011 - Panasonic VDRD250 | VDRD250 User Guide - Page 42
Using the menu screen Using the menu screen Refer to "Menu list" (l 142) for information about the menus. 1 While stopped, press the MENU button. The menu displayed differs depending on the position of the mode dial. ≥ Do not switch the mode dial when the menu is displayed. MENU 2 Move the - Panasonic VDRD250 | VDRD250 User Guide - Page 43
5 Move the joystick right or press the joystick. 6 Move the joystick up or down in order to select the desired item. 7 Press the joystick to enter the selection. Using the menu screen To get back to the previous screen Move the joystick left. To exit the menu screen Press the MENU button. ≥ The - Panasonic VDRD250 | VDRD250 User Guide - Page 44
Using the menu screen Operating with remote control The menu screen transition is the same as when the buttons on the main unit are used. 1 Press the MENU button. MENU ENTER 2 Select a menu item. ≥ Use the direction buttons (3,4,2,1) and ENTER button in place of the joystick on the main unit. MENU - Panasonic VDRD250 | VDRD250 User Guide - Page 45
Setting date and time Setting date and time When the unit is turned on for the first time, a message asking you to set the date and time will appear. ≥ Select [YES] and press the joystick. Perform steps 2 and 3 below to set the date and time. If the screen shows the incorrect date and time, then - Panasonic VDRD250 | VDRD250 User Guide - Page 46
you to set the date and time will appear. Select [YES] and set the date and time. To recharge the built-in lithium battery Connect the AC adaptor or attach the battery to the unit, and the built-in lithium battery will be recharged. Leave the unit as is for approx. 24 hours, and the - Panasonic VDRD250 | VDRD250 User Guide - Page 47
and the original brightness is restored. ≥ This will not affect the images to be recorded. ≥ If you turn on the unit when the AC adaptor is used, this function will automatically be activated. Adjusting the field of view Adjust the focus by sliding the eyepiece corrector knob. 1122..1155 - Panasonic VDRD250 | VDRD250 User Guide - Page 48
Recording Before recording Before recording Basic camera positioning 1 Recording 4 2 3 5 1 Hold the camera with both hands. 2 Run your hand through the grip belt. 3 Do not cover the microphones or sensors with your hands. 4 Keep your arms near your - Panasonic VDRD250 | VDRD250 User Guide - Page 49
may not be adjusted automatically depending on light sources or scenes. If so, manually adjust these settings. - Scene mode setting (l 70) - White balance Focus setting (l 72) ∫ Auto Ground-directional Standby (AGS) (VDR-D300 only) This function prevents unnecessary recording when you forget to - Panasonic VDRD250 | VDRD250 User Guide - Page 50
the images or when watching them on the connected TV (l 105). ≥ (VDR-D250 only) Remove the lens cap before turning the unit on. If the unit without any operation in recording pause, the unit automatically turns off to prevent the battery from running down. When you want to use the unit, turn it on - Panasonic VDRD250 | VDRD250 User Guide - Page 51
even if the LCD monitor is closed and the viewfinder is retracted. ≥ While "WRITING THE INFORMATION ON THE DISC." is displayed, do not disconnect the AC adaptor or remove the battery as doing so may make the disc unusable. ≥ While motion picture recording is in progress, do not disconnect the - Panasonic VDRD250 | VDRD250 User Guide - Page 52
unit is purchased, [PICTURE SIZE] is set to [ 2 ] (VDR-D300)/[ 1.7 ] (VDR-D250) for recording pictures compatible with a wide-screen TV (16:9). To record when the PHOTO SHOT button is not pressed halfway. Please use it as a guide for recording. ¥ (The green lamp lights up.): When in focus and a - Panasonic VDRD250 | VDRD250 User Guide - Page 53
5 Press the PHOTO SHOT button fully to take the picture. Recording still pictures ≥ For information about the number of recordable still pictures on an SD card (l 167) ≥ When the [PICTURE SIZE] is set to other than [ 0.3M ], the mega pixel recording mode is set. ≥ The sound cannot be recorded. ≥ - Panasonic VDRD250 | VDRD250 User Guide - Page 54
When the scene is dark. - When there is a bright part in the scene. - When the scene is filled with only still difficult to focus, adjust the focus manually. Number of pixels and picture quality for still SIZE] is set to [ 2 ] (VDR-D300)/[ 1.7 ] (VDR-D250). The sides of pictures recorded with a 16 - Panasonic VDRD250 | VDRD250 User Guide - Page 55
∫ PICT. QUALITY Selecting the picture quality. Press the MENU button, then select [ BASIC] # [ PICT. QUALITY] # desired item and press the joystick. : Still pictures with a high picture quality are recorded. : Priority is given to the number of still pictures recorded. Still pictures are recorded in - Panasonic VDRD250 | VDRD250 User Guide - Page 56
this unit by hand, we recommend using the image stabilizer function. (l 67) ≥ When distant subjects are brought closer, they are focused at about 1 m (3.3 feet) (VDR-D300)/1.2 m (3.9 feet) (VDR-D250) or more. ≥ When the zoom magnification is 1k, this unit can focus on a subject approx. 3.5 cm (1.4z - Panasonic VDRD250 | VDRD250 User Guide - Page 57
. ≥ When the recording aspect is 16:9, the image displayed on the viewfinder screen is squeezed horizontally, but this is normal and not a sign of any trouble. ≥ When the LCD monitor is rotated towards the lens side, the icon will not be displayed even if you press the joystick. ≥ Only some - Panasonic VDRD250 | VDRD250 User Guide - Page 58
Recording Various recording functions Backlight compensation function This is for protecting a backlit subject from being darkened. (RAM) (-RW‹VR›) (-RW‹V›) (-R) (SD) Use this function when the light is emanating from behind the subject and the subject appears dark. ¬ Rotate the mode dial to select - Panasonic VDRD250 | VDRD250 User Guide - Page 59
Fade in/fade out function Fade in: The image and audio gradually appear. Fade out: The image and audio gradually disappear. Various recording functions (RAM) (-RW‹VR›) (-RW‹V›) (-R) ¬ Rotate the mode dial to select . To fade in 1 While recording is paused, press the joystick. Then move the - Panasonic VDRD250 | VDRD250 User Guide - Page 60
Various recording functions 3 Press the recording start/stop button. Pause recording. (fade out) The image/audio gradually disappears. After the image/audio completely disappears, recording stops. ≥ After recording, the fade setting is canceled. To cancel fading Select [ ] again. To select the - Panasonic VDRD250 | VDRD250 User Guide - Page 61
Various recording functions Soft skin mode This makes skin colors appear softer for a more attractive appearance. (RAM) (-RW‹VR›) (-RW‹V›) (-R) (SD) This is more effective if you record the bust image of a person. ¬ Rotate the mode dial to select or . 1 Press the joystick. Then move the joystick - Panasonic VDRD250 | VDRD250 User Guide - Page 62
background, the image can be impressive. VDR-D300 This unit can focus on the subject at a distance of approx. 50 cm (20z). VDR-D250 This unit can focus on the ] again. ≥ If a sharper focus cannot be achieved, adjust the focus manually. (l 72) ≥ In the following cases, the tele macro function is - Panasonic VDRD250 | VDRD250 User Guide - Page 63
in dark locations to stand out against the background. Attach this unit to a tripod, and you can record images free from vibration. ≥ Only manual focusing can be used. ≥ Recorded scene is seen as if frames were missed. MagicPix function: You can record dark locations brightly in color. 0 Lux - Panasonic VDRD250 | VDRD250 User Guide - Page 64
Various recording functions Self-timer recording This is for recording shots of yourself as well. You can record still pictures on an SD card using the timer. ¬ Rotate the mode dial to select . 1 Press the joystick. Then move the joystick down to display the icon shown in the illustration. 2 Move - Panasonic VDRD250 | VDRD250 User Guide - Page 65
Various recording functions Wind noise reduction function This is for reducing the wind noise coming into the microphone when recording. (RAM) (-RW‹VR›) (-RW‹V›) (-R) ¬ Rotate the mode dial to select . Press the MENU button, then select [ BASIC] # [ WIND CUT] # [ON] and press the joystick. To - Panasonic VDRD250 | VDRD250 User Guide - Page 66
Recording Various recording functions Wide mode This is for selecting the screen's aspect ratio when recording motion pictures. (RAM) (-RW‹VR›) (-RW‹V›) (-R) This allows you to record images compatible with wide-screen TVs (16:9) and regular TVs (4:3). ∫ Recording images with a 16:9 aspect ratio ¬ - Panasonic VDRD250 | VDRD250 User Guide - Page 67
-D300 ¬ Rotate the mode dial to select or . Press the MENU button, then select [ ADVANCED] # [ O.I.S. O.I.S.] # [ON] and press the joystick. ∫ VDR-D250 ≥ The image stabilizer function does not work in card recording mode. ¬ Rotate the mode dial to select . Press the MENU button, then select [ and - Panasonic VDRD250 | VDRD250 User Guide - Page 68
Various recording functions Built-in flash (VDR-D300 only) Use the built-in flash in order to or faster to 1/500. ≥ The picture may become out of focus in dark places. If so, adjust the focus manually. ≥ The picture may appear dark if flash is lit in front of a white background. ≥ Set the flash - Panasonic VDRD250 | VDRD250 User Guide - Page 69
Various recording functions Red eye reduction function Reduces the phenomena where human eyes become red from flashes. Press the MENU button, then select [ ADVANCED] # [ RED EYE] # [ON] and press the joystick. ≥ The flash is activated 2 times. Do not move until the second flash is finished. ≥ Use - Panasonic VDRD250 | VDRD250 User Guide - Page 70
situations, this mode automatically sets optimum shutter speeds and apertures. ¬ Rotate the mode dial to select or . 1 Set the AUTO/MANUAL/FOCUS switch to MANUAL. 2 Press the MENU button, then select [ BASIC] # [ SCENE MODE] # desired item and press the joystick. Display 5 Mode Sports Portrait - Panasonic VDRD250 | VDRD250 User Guide - Page 71
joystick. ≥ You can also cancel the scene mode function by setting the AUTO/MANUAL/FOCUS switch to AUTO. Sports mode ≥ For slow-motion playback or playback pause of recorded pictures, this mode helps diminish camera shake. ≥ During normal playback, the image movement may not look smooth. ≥ Avoid - Panasonic VDRD250 | VDRD250 User Guide - Page 72
in. First, zoom in on the subject, and then focus on it. MNL 5/5 NEXT MNL 5/5 NEXT To restore to the automatic adjustment Press the AUTO/MANUAL/FOCUS switch down again to the FOCUS position. ≥ You can also restore the auto focusing by setting the AUTO - Panasonic VDRD250 | VDRD250 User Guide - Page 73
colors depending on the scenes or lighting conditions. If so, you can adjust the white balance manually. ¬ Rotate the mode dial to select or . 1 Set the AUTO/MANUAL/FOCUS switch to MANUAL. The icon shown in the illustration is displayed automatically. MNL 4/4 NEXT 2 Move the joystick up to - Panasonic VDRD250 | VDRD250 User Guide - Page 74
the [ ] display flashes white, the manual white balance previously adjusted is stored. Whenever recording conditions change, re-set the white balance for correct adjustment. ≥ When setting both the white balance and the iris/ gain, set the white balance first. ≥ (VDR-D250 only) When the unit is - Panasonic VDRD250 | VDRD250 User Guide - Page 75
. A MNL A Shutter speed: 1/60 to 1/8000 1/100 B OPEN VDR-D300 1/30 to 1/2000 BACK VDR-D250 1/30 to 1/500 ≥ The shutter speed closer to 1/8000 is faster to the gain value. To restore to automatic adjustment Set the AUTO/MANUAL/FOCUS switch to AUTO. ≥ When setting both the shutter speed and - Panasonic VDRD250 | VDRD250 User Guide - Page 76
to select . The motion pictures recorded on the disc are displayed as thumbnails. ≥ (VDR-D300 only) The lens cover closes. (RAM) (-RW‹VR›) (-RW‹V›) (-R) Playback/Pause : (Move): Skip playback (backward) : (Move and hold): Review playback* 9 (Move): Skip playback (forward) 9 (Move and hold): Cue - Panasonic VDRD250 | VDRD250 User Guide - Page 77
Slow-motion playback 1 Move the joystick up during playback to pause the playback. 2 Move and hold the joystick right. (Slow-motion pictures will be played back in reverse when you move and hold the joystick left.) ≥ Normal playback is restored when you move the joystick up. ∫ Operating with the - Panasonic VDRD250 | VDRD250 User Guide - Page 78
Motion picture playback Playing back motion pictures by date Recorded scenes are grouped by date on this unit. Scenes recorded on the same day can be played back in succession. 1 Press the MENU button, then select [ PLAY SETUP] # [ PLAY MODE] # [BY DATE] and press the joystick. ≥ When [PLAY MODE] is - Panasonic VDRD250 | VDRD250 User Guide - Page 79
still pictures recorded on the card. 1 Rotate the mode dial to select . The still pictures recorded on the SD card are displayed as thumbnails. ≥ (VDR-D300 only) The lens cover closes. Still picture playback (SD) 2 Select the file to be played back. A File number B Scroll bar display The selected - Panasonic VDRD250 | VDRD250 User Guide - Page 80
compatibility ≥ This unit is compliant with the unified standard DCF (Design rule for Camera File system) established by JEITA (Japan Electronics and Information Technology Industries Association). ≥ The file format supported by this unit is JPEG. (Not all JPEG formatted files will be played back - Panasonic VDRD250 | VDRD250 User Guide - Page 81
Editing Editing scenes Deleting scenes This is for deleting scenes recorded on discs. The deleted scenes cannot be restored. ≥ Scenes on DVD-RW (Video format) and DVD-R cannot be deleted. Deleting scenes one at a time ¬ Rotate the mode dial to select . 1 Press the button during playback. Editing - Panasonic VDRD250 | VDRD250 User Guide - Page 82
first, and then delete the unnecessary part. (l 83) ≥ In case of [ALL], the deletion may take time if there are many scenes on the disc. ≥ Do not turn off this unit while deleting. ≥ When you delete scenes, use a battery with sufficient battery power or use the AC adaptor. ≥ It may not be possible - Panasonic VDRD250 | VDRD250 User Guide - Page 83
Editing scenes Dividing a scene This is for dividing a scene into two. (RAM) (-RW‹VR›) To delete unnecessary portion of scene, first divide the scene, and then delete the unnecessary portion. ¬ Rotate the mode dial to select . 1 Press the MENU button, then select [ EDIT SCENE] # [ DIVIDE] and press - Panasonic VDRD250 | VDRD250 User Guide - Page 84
Editing scenes Combining scenes This function is only for combining two consecutive scenes into one. ¬ Rotate the mode dial to select . (RAM) (-RW‹VR›) 1 Press the MENU button, then select [ EDIT SCENE] # [ COMBINE] and press the joystick. 2 Select the scene to be combined, then press the - Panasonic VDRD250 | VDRD250 User Guide - Page 85
Using playlists Using playlists What is a playlist? You can create a playlist by gathering your favorites from the recorded scenes. Since the playlist is not created by copying data, you will consume little of the disc capacity by making a playlist. ≥ If you create or delete playlists, the - Panasonic VDRD250 | VDRD250 User Guide - Page 86
Using playlists Creating a new playlist ¬ Rotate the mode dial to select . 1 Press the MENU button, then select [ PLAY SETUP] # [ PLAY MODE] # [PLAYLIST] and press the joystick. 2 Select [CREATE], then press the joystick. (RAM) (-RW‹VR›) 3 Select the scene to be added to the playlist, then press - Panasonic VDRD250 | VDRD250 User Guide - Page 87
Playing back a playlist ¬ Rotate the mode dial to select . 1 Press the MENU button, then select [ PLAY SETUP] # [ PLAY MODE] # [PLAYLIST] and press the joystick. 2 Select the playlist to be played back, then press the joystick. Scenes in the selected playlist are displayed as thumbnails. 3 Select - Panasonic VDRD250 | VDRD250 User Guide - Page 88
Using playlists Editing a playlist Editing scenes on a playlist will not affect the original scenes. Adding scenes to playlist ¬ Select playlist playback mode. (l 87, steps 1 and 2) 1 Press the MENU button, then select [ EDIT] and press the joystick. (RAM) (-RW‹VR›) 2 Select the playlist to be - Panasonic VDRD250 | VDRD250 User Guide - Page 89
Moving scenes The scenes in a playlist can be moved. ¬ Select playlist playback mode. (l 87, steps 1 and 2) 1 Press the MENU button, then select [ EDIT] and press the joystick. 2 Select the playlist to be edited, then press the joystick. 3 Select [ MOVE], then press the joystick. Using playlists 4 - Panasonic VDRD250 | VDRD250 User Guide - Page 90
Using playlists Dividing a scene You can divide a scene into two parts. ≥ Dividing scenes on a playlist will not affect the original scenes. ¬ Select playlist playback mode. (l 87, steps 1 and 2) 1 Press the MENU button, then select [ EDIT] and - Panasonic VDRD250 | VDRD250 User Guide - Page 91
Combining scenes Two consecutive scenes can be combined into one. ≥ Combining scenes on a playlist will not affect the original scenes. ¬ Select playlist playback mode. (l 87, steps 1 and 2) 1 Press the MENU button, then select [ EDIT] and press the joystick. 2 Select the playlist to be edited, then - Panasonic VDRD250 | VDRD250 User Guide - Page 92
Using playlists Deleting scenes ≥ Deleting scenes on a playlist will not affect the original scenes. Deleting scenes one at a time: ¬ Select playlist playback mode. (l 87, steps 1 and 2) 1 Press the button during playback. 2 When the confirmation message appears, select [YES], then press the - Panasonic VDRD250 | VDRD250 User Guide - Page 93
5 (Only when [SELECT] is selected in step 3) Press the button. Using playlists 6 When the confirmation message appears, select [YES], then press the joystick. (Only when [SELECT] is selected in step 3) To continue deleting other scenes Repeat steps 4-6. To complete editing Press the MENU button. - Panasonic VDRD250 | VDRD250 User Guide - Page 94
Editing still pictures Editing still pictures Deleting still pictures This is for deleting still picture files recorded on SD cards. The deleted files cannot be restored. (SD) Deleting files one at a time ¬ Rotate the mode dial to select . 1 Press the button during playback. Editing 2 When the - Panasonic VDRD250 | VDRD250 User Guide - Page 95
if there are many files on the SD card. ≥ Do not turn off this unit while deleting. ≥ When you delete files, use a battery with sufficient battery power or use the AC adaptor. ≥ Do not remove the SD card while deleting. ≥ If files conforming to DCF standard are deleted, all the data related to the - Panasonic VDRD250 | VDRD250 User Guide - Page 96
Editing still pictures Locking still pictures This is for preventing still picture files from being deleted by mistake. (SD) Still picture files recorded on an SD card can be locked so that they may not be deleted by mistake. (However even if you lock some files on an SD card, formatting the card - Panasonic VDRD250 | VDRD250 User Guide - Page 97
0 to 999. (The selected number of pictures can be printed with the printer supporting DPOF.) ≥ To cancel the setting, set the number of prints to [0]. ≥ You be written onto an SD card so that it can be used on a system supporting DPOF. ≥ The DPOF setting can be established for up to 999 files. ≥ - Panasonic VDRD250 | VDRD250 User Guide - Page 98
you format the disc, use a battery with sufficient battery power or the AC adaptor. Formatting DVD-RAM: ≥ We recommend formatting on this unit. If formatting on a computer, use the supplied software. For more details, refer to the operating instructions of the software. If you connect this unit to - Panasonic VDRD250 | VDRD250 User Guide - Page 99
SD card being used, it may take time to format. ≥ During formatting, do not turn this unit off. ≥ When you format the SD card, use a battery with sufficient battery power or the AC adaptor. ≥ Do not remove the SD card while formatting. Disc and card management 99 LSQT1011 - Panasonic VDRD250 | VDRD250 User Guide - Page 100
(-R) To play back a DVD-RW (Video format) or a DVD-R on other devices e.g. a DVD player, finalize the disc. ∫ Finalizing video format discs Be sure to way as DVD-RW (VR format) before finalization. ¬ Connect this unit to the AC adaptor. (Finalization cannot be executed using a battery.) ¬ Rotate - Panasonic VDRD250 | VDRD250 User Guide - Page 101
-RW This is for un-finalizing a DVD-RW (Video format) so that it can be used for recording. ¬ Rotate the mode dial to way as DVD-RW (VR format) before finalization. ≥ DVD-R cannot be un-finalized. ≥ When you un-finalize the disc, use a battery with sufficient battery power or the AC adaptor. Disc - Panasonic VDRD250 | VDRD250 User Guide - Page 102
Disc and card management Protecting a disc Protecting a disc (RAM) (-RW‹VR›) This is for preventing recorded contents from being deleted or edited by mistake. Further recording and editing is not possible on protected discs until the protection is released. ¬ Rotate the mode dial to select . 1 - Panasonic VDRD250 | VDRD250 User Guide - Page 103
Displaying disc information Displaying disc information (RAM) (-RW‹VR›) (-RW‹V›) (-R) Information such as the number of recorded scenes, the remaining space and whether or not the disc is finalized or protected is displayed. ¬ Rotate the mode dial to select . Press the MENU button, then select [ - Panasonic VDRD250 | VDRD250 User Guide - Page 104
unit can be played back on a TV. ≥ Use the AC adaptor to free you from worrying about the battery running down. 1 Connect this unit and a TV. A AV input setting (input switch). (For more information, please read the operating instructions for the TV.) ≥ If the images are not displayed correctly on - Panasonic VDRD250 | VDRD250 User Guide - Page 105
a 16:9 aspect ratio ([PICTURE SIZE] was set to [ 2 ] (VDR-D300)/ [ 1.7 ] (VDR-D250)) on a TV with a 4:3 aspect ratio, the images may be squeezed may not be displayed correctly. For more information, please read the operating instructions of your TV.) Press the MENU button, then select [ SETUP] - Panasonic VDRD250 | VDRD250 User Guide - Page 106
on devices that support 8 cm (3z) DVD-RAM or DVD-RW (VR format). See the operating instructions for DVD recorder/player. ≥ DVD-RW (VR format disc. Playing back a DVD-RW (Video format) or a DVD-R 1 Finalize the disc on this unit. (l 100) 2 Insert the disc in the DVD recorder/player, then play - Panasonic VDRD250 | VDRD250 User Guide - Page 107
the hard disk, refer to the operating instructions of the DVD recorder. ≥ DVD-RW (VR format) may have to be finalized. In this case, finalize the disc on this unit. (l 100) ≥ Do not insert a DVD-RW (Video format) or DVD-R that has not been finalized into a DVD recorder: the disc may be unusable - Panasonic VDRD250 | VDRD250 User Guide - Page 108
devices. (l 86) ≥ Use the AC adaptor to free you from worrying about the battery running down. 1 Connect this unit and a video device. A AV/S cable (supplied) start recording on the connected device. ≥ See the operating instructions of the video device for details. To stop recording (dubbing) Stop - Panasonic VDRD250 | VDRD250 User Guide - Page 109
by directly connecting this unit to the printer, use a printer compatible with PictBridge. (Read the operating instructions for the printer.) (SD) ≥ Use the AC adaptor to free you from worrying about the battery running down. ¬ Insert an SD card with recorded images in the unit, turn on the unit - Panasonic VDRD250 | VDRD250 User Guide - Page 110
recorded when [ 2 ] (VDR-D300)/[ 1.7 ] (VDR-D250) is set may be cut at printing. Check before printing. When using the printer with a trimming feature or other feature which cuts out both edges of the pictures, cancel the feature for printing. (Refer to the operating instructions of the printer for - Panasonic VDRD250 | VDRD250 User Guide - Page 111
used Commercially available DVD-Video playback software ∫ When using an SD card recorded on this unit Can do Playing back on a computer Copying files to a computer Software used Standard Windows picture viewer or a commercially available picture viewer Windows Explorer ≥ We will not guarantee - Panasonic VDRD250 | VDRD250 User Guide - Page 112
a computer (Windows) Contents on provided CD-ROM The following software applications are contained on the provided CD-ROM. ∫ DVD-RAM Driver This is necessary to configure the unit as a drive on a computer. DVDForm: This is used to format DVD-RAM on a computer. ∫ DVD-MovieAlbum DVD-MovieAlbumSE - Panasonic VDRD250 | VDRD250 User Guide - Page 113
using with a computer (Windows) ∫ DVDfunSTUDIO This software is for creating a DVD-Video disc. Use this software when burning a DVD-Video disc from motion pictures edited using DVD-MovieAlbumSE. For details, refer to page 127. 1 DVD-RAM/ DVD-RW(VR) 2 DVD-RW/ DVD-R A 3 DVD-Video B C 1 Export the - Panasonic VDRD250 | VDRD250 User Guide - Page 114
more DirectX 8.1, 9.0, 9.0a, 9.0b, 9.0c Necessary software Acrobat Reader 5.0 or later DVD-RAM Driver Sound DirectSound Support Windows compatible sound device 114 LSQT1011 ≥ Even if the system requirements mentioned in these operating instructions are fulfilled, some computers cannot be used - Panasonic VDRD250 | VDRD250 User Guide - Page 115
/AT compatible. ≥ Input is not supported in languages other than English, French and Spanish. ≥ Operation cannot be guaranteed on all DVD drives. ≥ DVD discs authored with this software are not guaranteed to play in all DVD players. ≥ Operation on Microsoft Windows XP Media Center Edition and Tablet - Panasonic VDRD250 | VDRD250 User Guide - Page 116
2000 Professional OS Microsoft Windows XP Home Edition Microsoft Windows XP Professional CPU Intel Pentium II 300 MHz or higher RAM 32 MB or more (64 MB or more recommended) Interface USB 1.1 or later - A type ≥ The USB equipment operates with the driver installed as standard in OS. With - Panasonic VDRD250 | VDRD250 User Guide - Page 117
. Article 1 License Licensee is granted the right to use the software, including the information recorded or described on the CD-ROM, instruction manuals, and any other media provided to Licensee (collectively "Software"), but all applicable rights to patents, copyrights, trademarks and trade - Panasonic VDRD250 | VDRD250 User Guide - Page 118
(Windows) When installing the software, log on to your computer as the Administrator or with a user name with equivalent authorization. (If you do not have authorization to do this, consult your manager.) Do not connect the USB cable before installing the DVD-RAM Driver. If the DVD-RAM Driver is - Panasonic VDRD250 | VDRD250 User Guide - Page 119
] of the [Hardware] tab. ∫ About the [RAMASST] support tool: [RAMASST] is a support tool for Windows XP that disables the drive's CD writing function so that data can be written from a computer to a DVD-RAM. When you install the DVD-RAM Driver, [RAMASST] is automatically installed and displayed in - Panasonic VDRD250 | VDRD250 User Guide - Page 120
Installation (Windows) Installing DVD-MovieAlbumSE 1 Insert the CD-ROM into the computer. The [Setup Menu] screen will appear. ≥ If the [Setup Menu] screen does not appear, double-click the CD-ROM drive icon in [My Computer]. 2 Click [DVD-MovieAlbum]. ≥ The software application may not run properly - Panasonic VDRD250 | VDRD250 User Guide - Page 121
Installing DVDfunSTUDIO Installation (Windows) 1 Insert the CD-ROM into the computer. The [Setup Menu] screen will appear. ≥ If the [Setup Menu] screen does not appear, double-click the CD-ROM drive icon in [My Computer]. 2 Click [DVDfunSTUDIO]. ≥ The software application may not run properly if - Panasonic VDRD250 | VDRD250 User Guide - Page 122
# [DVD-RAM] # [DVD-RAM Driver] # [Using DVD-RAM disc]. ∫ DVD-MovieAlbumSE Select [start] # [All Programs (Programs)] # [Panasonic] # [DVD-MovieAlbumSE] # [Operation Manual]. ∫ DVDfunSTUDIO Select [start] # [All Programs (Programs)] # [Panasonic] # [DVDfunSTUDIO] # [Operating instructions]. Software - Panasonic VDRD250 | VDRD250 User Guide - Page 123
or recognition procedure properly. ≥ Be sure to finalize DVD-RW (VR format), DVD-RW (Video format) and DVD-R on this unit, before using them on the computer. Un-finalized discs will not be recognized by the computer. ¬ Connect this unit to the AC adaptor. 1 Insert a disc or card with recorded images - Panasonic VDRD250 | VDRD250 User Guide - Page 124
Use Windows Explorer to right-click the drive icon for this unit and select [Eject]. ≥ When a computer is accessing a disc or card in this unit, the ACCESS/PC lamp or card access lamp lights. (When a card is being accessed, appears on the LCD monitor.) Do not disconnect the USB cable or AC adaptor - Panasonic VDRD250 | VDRD250 User Guide - Page 125
recognition (Windows) ∫ in the [100CDPFP] folder. These can be opened with picture software that supports JPEG pictures. ≥ Up to 999 files can be recorded in Storage Device] and click [Stop]. 3 Verify [MATSHITA DVD-RAM LMXK1931 USB Device] or [MATSHITA DVD Cam USB Device] is selected and click [OK]. - Panasonic VDRD250 | VDRD250 User Guide - Page 126
Consult the manufacturer or follow the steps in your computer's operating instructions to establish a mode in which all the functions can be used, ∫ If the driver has been recognized properly When using a disc: Windows XP: ≥ [MATSHITA DVD-RAM LMXK1931 USB Device] is displayed at [DVD/CDROM drives]. - Panasonic VDRD250 | VDRD250 User Guide - Page 127
, you cannot use the applications. ≥ The End User License Agreement is displayed when the software is first started so read carefully through its terms and conditions, then click [I agree.]. ¬ Connect this unit to the AC adaptor. 1 Insert a DVD-RAM or DVD-RW (VR format) with recorded images in the - Panasonic VDRD250 | VDRD250 User Guide - Page 128
DVD-Video disc on a computer (Windows) 3 (On the computer) Select [start] # [All Programs (Programs)] # [Panasonic] # [DVD-MovieAlbumSE] # [DVD-MovieAlbumSE]. DVD-MovieAlbumSE starts and the images recorded on the disc are displayed. When starting DVD at top right of DVD-MovieAlbumSE screen, and - Panasonic VDRD250 | VDRD250 User Guide - Page 129
when the unit is connected to a computer. Use the software's eject button to eject the disc. (When not using the software, use Windows Explorer to rightclick the drive icon for this unit and select [Eject]. ≥ Title names set using DVD-MovieAlbumSE cannot be displayed on this unit. Also, the names - Panasonic VDRD250 | VDRD250 User Guide - Page 130
motion pictures on a computer Editing motion pictures Creating a DVD-Video disc Software used DVD-RAM or DVD-RW (VR format): Playback is not possible DVD-RW (Video format) or DVD-R: Standard OS or commercially available DVD-Video playback software Pixe VRF Browser EX (supplied) Pixe VRF Browser EX - Panasonic VDRD250 | VDRD250 User Guide - Page 131
pictures saved on the computer with this software become the contents of the DVD-Video or Video CD disc created with ImageMixer VCD/DVD2. A D B C E F A Preview window B Program List/Playlist/Title List window C Drive select button D Video List window The contents of the program etc. selected - Panasonic VDRD250 | VDRD250 User Guide - Page 132
VCD/DVD2 This software is for creating DVD-Video and Video CD discs. Use this software when burning a DVD-Video or Video CD disc from motion pictures saved using Pixe VRF Browser EX. For details, refer to page 137. ≥ To create a DVD-Video disc, a separate DVD-RW/DVD-R/+RW/+R drive is required - Panasonic VDRD250 | VDRD250 User Guide - Page 133
than 256 colors. Other requirements DVD Video Recording format: DVD-RAM and DVD-RW discs DVD-Video format: DVD-RW and DVD-R discs ∫ Pixe VRF Browser EX specifications Compatible formats DVD Video Recording format (DVD-RAM/DVD-RW) DVD-Video format (DVD-RW/DVD-R) Save formats MPEG2 motion - Panasonic VDRD250 | VDRD250 User Guide - Page 134
equipment operates with the driver installed as standard in OS. For technical inquiries about these software applications, contact the PIXELA Customer Support Center in your region. U.S. and Canada (Toll-Free) +1-800-458-4029 Website: http://www.pixela.co.jp/oem/panasonic/e/index.html (This website - Panasonic VDRD250 | VDRD250 User Guide - Page 135
≥ Do not perform any other operations on your computer while the software is being installed. 1 Insert the CD-ROM into the computer. [PANASONIC] CD-ROM icon appears. 2 Double-click [PANASONIC] # [Imx for Panasonic] # [ImageMixer.pkg]. The installer setup screen appears. 3 Click [Continue]. 4 Read - Panasonic VDRD250 | VDRD250 User Guide - Page 136
Installation (Macintosh) Reading the operating instructions of the software applications For details on how to use the software applications, read the help. ∫ Pixe VRF Browser EX After starting Pixe VRF Browser EX, select [Help] # [Pixe VRF Browser EX Help] from the Menu Bar. ∫ - Panasonic VDRD250 | VDRD250 User Guide - Page 137
create a DVD-Video disc, a separate DVD-RW/DVD-R/+RW/+R drive is required. ≥ Before initial use, select the software's [ReadMe] in the folder in which the software is installed and then read through the additional instructions or updated information. ¬ Connect this unit to the AC adaptor. 1 Remove - Panasonic VDRD250 | VDRD250 User Guide - Page 138
Check that a disc is not inserted in the drive. 9 Double-click the [ImageMixerVCDDVD2] icon in the [ImageMixer for Panasonic] folder you installed. ImageMixer VCD/DVD2 starts. 10 Click the [DVD-Video] button. 11 Use [Select folder] to select the folder containing the MPEG files saved with Pixe VRF - Panasonic VDRD250 | VDRD250 User Guide - Page 139
or DVD-R disc into the disc drive and click [OK]. ≥ 12 cm (5z) iRW and iR discs can also be used if the disc drive supports them. software's eject button to eject the disc. ≥ When a computer is accessing a disc in this unit, the ACCESS/PC lamp lights. Do not disconnect the USB cable or AC adaptor - Panasonic VDRD250 | VDRD250 User Guide - Page 140
Using an SD card on a computer (Macintosh) Using an SD card on a computer (Macintosh) Connection ¬ Connect this unit to the AC adaptor. ¬ Insert an SD card with recorded images in the unit, turn on the unit and then rotate the mode dial to select . 1 Press the MENU - Panasonic VDRD250 | VDRD250 User Guide - Page 141
SD card: DCIM 100CDPFP MISC ≥ JPEG format still pictures (IMGA0001.JPG etc.) are stored in the [100CDPFP] folder. These can be opened with picture software that supports JPEG pictures. ≥ Up to 999 files can be recorded in the [100CDPFP] or other such folder. ≥ The DPOF setting files are recorded in - Panasonic VDRD250 | VDRD250 User Guide - Page 142
MODE] (l 70) [ WIND CUT] (l 65) [ REC MODE] (l 51) [ ASPECT] (l 66) [ CLOCK SET] (l 45) ∫ [ ADVANCED] [ D.ZOOM] (l 56) [ O.I.S. O.I.S.] (VDR-D300) (l 67) [ EIS EIS] (VDR-D250) (l 67) [ FADE COLOR] (l 60) [ REC LAMP] (l 144) [ ZOOM MIC] (l 57) ∫ [ SETUP] [ DISPLAY] (l 144) [ DATE/TIME] (l 46) [ DATE - Panasonic VDRD250 | VDRD250 User Guide - Page 143
Motion picture playback menus Menus Still picture playback menus ∫ [ DELETE] (Only when [PLAY MODE] is set to [VIEW ALL] or [BY DATE]) [ SELECT] (l 81) [ ALL] (l 81) ∫ [ PLAY SETUP] [ PLAY MODE] (l 78, 86, 87) [ RESUME PLAY] (l 78) ∫ [ EDIT SCENE] (Only when [PLAY MODE] is set to [VIEW ALL] or [BY - Panasonic VDRD250 | VDRD250 User Guide - Page 144
operation, this unit automatically turns off to prevent the battery from running down. When you use this unit, turn it on again. ≥ In the following cases, the unit may not turn off even when you set this to [5 MINUTES]. - When using the AC adaptor - When connecting the unit to a computer or printer - Panasonic VDRD250 | VDRD250 User Guide - Page 145
format) DVD-RW (Video format) DVD-RW (unformatted) DVD-R Flash (VDR-D300 only) Red eye reduction (VDR-D300 only) Shutter chance mark Self-Timer recording MEGA OIS (VDR-D300 only) Number of recording pixels for still pictures VDR-D300 2048k1512 1920k1080 VDR-D250 1760k1320 1760k992 VDR-D300/VDR-D250 - Panasonic VDRD250 | VDRD250 User Guide - Page 146
VDR-D250 2.3M 1760k1320 1.7 1760k992 VDR-D300/VDR-D250 1M 1280k960 0.3M 640k480 The picture size is not displayed for still pictures recorded with other products that have different picture sizes from the sizes shown above. ∫ Confirmatory indications -- (Time display) The built-in battery - Panasonic VDRD250 | VDRD250 User Guide - Page 147
CHECK THE DISC. You inserted a disc that cannot be read on this unit (a disc recorded in PAL video format etc.). RECOMMENDED TO USE PANASONIC DISC You inserted a disc that does not meet the DVD standard for quality and performance so you may not be able to record normally. Refer to the following - Panasonic VDRD250 | VDRD250 User Guide - Page 148
MANUAL MODE. CANCEL MAGICPIX MODE. You are attempting to use a function that cannot be used simultaneously. TURN OFF POWER LCD. CANNOT SET. With DVD-RW (Video format) and DVD you repair the disc, use a battery with sufficient battery power or the AC adaptor. ≥ Depending on the condition of the - Panasonic VDRD250 | VDRD250 User Guide - Page 149
(VDR-D250 only) Flash (VDR-D300 only) ≥ In disc recording mode Zoom microphone Wind noise reduction ≥ An external microphone is used Functions Scene mode Change of white balance Adjusting the shutter speed, iris/gain Conditions which disable the functions ≥ When setting the AUTO/MANUAL/ FOCUS - Panasonic VDRD250 | VDRD250 User Guide - Page 150
supports DVD-RAM or DVD-RW (VR format). Refer to the operating instructions of the DVD recorder or DVD player. ≥ DVD-RW (VR format) may have to be finalized. In this case, finalize the disc on this unit. For information about software from other companies, contact the makers of the software. DVD - Panasonic VDRD250 | VDRD250 User Guide - Page 151
on a standard OS or commercially available DVD-Video playback software. SD card: Use picture viewer software. Use [MPEG Editor] in Pixe VRF using DVD-RW (VR format), DVD-RW (Video format) or DVD-R on a computer, finalize them on this unit. SD card: Copy with the Finder. What version of Mac OS - Panasonic VDRD250 | VDRD250 User Guide - Page 152
not operate normally. The screen has changed suddenly. Check points ≥ Is the battery fully charged? # Charge the battery using the AC adaptor. (l 28) ≥ The battery protection circuit may have operated. Attach the battery to the AC adaptor for 5 to 10 seconds. If the unit still cannot be used, the - Panasonic VDRD250 | VDRD250 User Guide - Page 153
Troubleshooting Problem open unless the unit is powered. # Connect a charged battery or AC adaptor. ≥ The DISC EJECT lever does not work when the DVD-RW (Video format) or DVD-R been finalized? # After finalizing, the discs become play-only and cannot record. If you un-finalize a DVD-RW (Video format - Panasonic VDRD250 | VDRD250 User Guide - Page 154
Troubleshooting Problem manual mode. ≥ Is the volume too low? # During playback, move the volume lever to display the volume indication and adjust it. (l 77) ≥ Have you selected video input on the TV? # Please read the operating instructions joystick. ≥ Is the DVD-RAM or the DVD-RW (VR format) write - Panasonic VDRD250 | VDRD250 User Guide - Page 155
Troubleshooting Problem The images on the SD card do not look normal. Even if a power to this unit. If the power cannot be turned off, press the RESET button, or remove the battery or AC adaptor and then reattach it. After that, turn on the power again. If normal operation is still not restored, - Panasonic VDRD250 | VDRD250 User Guide - Page 156
click [OK]. DVD-RW (Video format) or DVD-R cannot be played back on DVD-MovieAlbumSE. ≥ DVD-MovieAlbumSE does not support playback or data read of DVD-RW (Video format) or DVD-R. # Use optional-user provided DVD-Video playback software to play back DVD-RW (Video format) or DVD-R on the computer - Panasonic VDRD250 | VDRD250 User Guide - Page 157
Troubleshooting Problem Check points Cannot write to DVDRAM. Cannot format a disc with the DVD-RAM Driver. ≥ (Windows follow the instructions on the screen. With a computer (Macintosh) Problem Check DVD-RAM or DVD-RW (VR format) icon is not displayed on the desktop. ≥ What version of Mac - Panasonic VDRD250 | VDRD250 User Guide - Page 158
Troubleshooting Problem to this unit with ImageMixer VCD/DVD2. # To create a DVD-Video disc, a separate DVD-RW/DVD-R/ +RW/+R drive is required. ≥ If there is a disc does not work after the unit is connected to the computer. Use the software's eject button to eject the disc. ≥ When the drive icon is - Panasonic VDRD250 | VDRD250 User Guide - Page 159
mobile phones, microwave ovens, TVs and video game products. ≥ If you use the battery or AC adaptor. Then connect the battery or AC adaptor the battery or pull out the AC cable from the AC outlet. ≥ The camera body use a chemical dust cloth, follow the instructions that came with the cloth. Do - Panasonic VDRD250 | VDRD250 User Guide - Page 160
accidentally, check to see if the terminals are damaged. ≥ Attaching a battery with damaged terminals can damage the unit or AC adaptor. Do not throw old battery into fire. ≥ Heating a battery or throwing it into a fire may result in an explosion. ≥ If the operating time is very short even after - Panasonic VDRD250 | VDRD250 User Guide - Page 161
battery or AC adaptor. Contact your dealer. ≥ If you use the AC adaptor near a radio, radio reception may be disturbed. Keep the AC adaptor 1 m (3.3 feet) or more away from the radio. ≥ When using the AC adaptor - Delay between video and audio ≥ When it. DVD-R ≥ For optimum recording on DVD-R disc - Panasonic VDRD250 | VDRD250 User Guide - Page 162
the unit is close to the ambient temperature of the room, then use it. What to do with the lens is fogged up. Remove the battery or AC adaptor and leave the unit for about 1 hour. When the unit becomes close to the ambient temperature, the fog disappears naturally. - Panasonic VDRD250 | VDRD250 User Guide - Page 163
may not function properly if there is more than one light source. For light outside the functional automatic white balance adjustment range, use the manual white balance adjustment mode. White balance The images recorded by the unit may become bluish or reddish under the influence of certain light - Panasonic VDRD250 | VDRD250 User Guide - Page 164
does not work correctly in the following situations. Record pictures in the manual focus mode. Recording distant and close-up objects at the same time behind dirty or dusty window The subject behind the window will not be focused because the focus is on the dirty window. Similarly, when recording - Panasonic VDRD250 | VDRD250 User Guide - Page 165
Specifications DVD Video Camera: Information for your safety Power source: DC 7.9 V/7.2 V Power consumption: VDR-D300 8.0 W/VDR-D250 7.5 W Specifications Signal system Recording format Image sensor Lens Filter diameter Zoom Monitor Viewfinder Microphone Speaker Standard illumination Minimum - Panasonic VDRD250 | VDRD250 User Guide - Page 166
Specifications Dimensions (excluding projecting parts) Mass (without supplied battery, lens cap and a disc) Operating temperature Operating humidity VDR-D300 Approx. 63 mm (W) k 87 mm (H) k 138 mm (D) [Approx. 2.48 inch (W) k 3.43 inch (H) k 5.43 inch (D)] VDR-D250 Approx. 63 mm (W) k 87 mm (H) k - Panasonic VDRD250 | VDRD250 User Guide - Page 167
Specifications Number of recordable pictures on an SD card VDR-D300 Picture size Picture quality 8 MB 16 MB 32 MB 64 MB 1760k992) 7 18 40 83 160 330 660 1330 2700 11 28 61 125 240 510 1010 2010 4100 VDR-D300/VDR-D250 Picture size Picture quality 8 MB 16 MB 32 MB 64 MB 128 MB 256 MB 512 MB 1 GB - Panasonic VDRD250 | VDRD250 User Guide - Page 168
DVD video camera accessories Accessory No. LM-AF30U LM-AF60U LM-RW30U LM-RW60U LM-RF30V Figure Description 8 cm (3z) DVD-RAM (single sided) 8 cm (3z) DVD-RAM (double sided) 8 cm (3z) DVD-RW (single sided) 8 cm (3z) DVD-RW (double sided) 8 cm (3z) DVD-R (single sided) PV-DAC14 AC adaptor with AC - Panasonic VDRD250 | VDRD250 User Guide - Page 169
Items Ordered Accessory # Description Price Each Quantity Optional accessories Total Price Subtotal Your State PANASONIC DEALER OR CALL PANASONIC'S ACCESSORY ORDER LINE AT 1-800-332-5368 [6 AM-5 PM M-F, 6 AM-10:30 AM SAT, PACIFIC TIME] OR MAIL THIS ORDER TO: PANASONIC SERVICES COMPANY ACCESSORY - Panasonic VDRD250 | VDRD250 User Guide - Page 170
is wrong with the unit and any symptom it is exhibiting. Mail this completed form and your Proof of Purchase along with your unit to: Panasonic Services Company 410B Airport Road Elgin, IL 60123-9333 Attn: Camcorder Repair 170 LSQT1011 Others - Panasonic VDRD250 | VDRD250 User Guide - Page 171
replace will be made by the warrantor. Product Camcorder Parts Labor One (1) Year (except CCD Image Sensor) Ninety (90) Days CCD Image Sensor - 6 (Six) Months Ninety (90) Days Service Carry-In or Mail-In Contact Number 1-800-211-PANA(7262) DVD/VCR Deck, A/V Mixer One (1) Year TV/VCR, TV - Panasonic VDRD250 | VDRD250 User Guide - Page 172
-Sunday 10 am-7 pm, EST For hearing or speech impaired TTY users, TTY : 1-877-833-8855 Accessory Purchases Purchase Parts, Accessories and Instruction Books online for all Panasonic Products by visiting our Web Site at: http://www.pasc.panasonic.com or, send your request by E-mail to: npcparts@us - Panasonic VDRD250 | VDRD250 User Guide - Page 173
. Dry cell batteries are also excluded from coverage under this warranty. This warranty is extended to the original end user purchaser only. Servicentre at www.panasonic.ca : Link: "ServicentresTM locator" under "Customer support" Panasonic Factory Service: Vancouver Panasonic Canada Inc. 12111 - Panasonic VDRD250 | VDRD250 User Guide - Page 174
AC adaptor 28, 30, 161 Aperture 75 Auto focus 164 Auto Ground-directional Standby (AGS) . . . 49 Automatic white balance 73, 163 ∫B Backlight compensation 58 Battery setting 97 Dubbing 107, 108 DVD-RAM, DVD-RW, DVD-R 23 ∫F Fade 59 Finalize MagicPix function 63 Manual focus 72 Menu 42 - Panasonic VDRD250 | VDRD250 User Guide - Page 175
∫U Un-finalize 101 ∫V Video format 24 Viewfinder 19, 47, 162 Volume adjustment 77 VR format 24 ∫W White balance 73, 163 Wide mode 66 Wind noise reduction function 65 ∫Z Zoom 56 Zoom microphone 57 Index Others 175 LSQT1011 - Panasonic VDRD250 | VDRD250 User Guide - Page 176
ía española para el uso rápido Spanish Quick Use Guide/Guía española para el uso rápido ∫ Carga de la EJECT una vez y la deje. ∫ Cómo quitar la batería Mientras hace deslizar la palanca BATTERY RELEASE, haga deslizar la batería para quitarla. 2 Abra la tapa del compartimiento del disco manualmente - Panasonic VDRD250 | VDRD250 User Guide - Page 177
Spanish Quick Use Guide/Guía española para el uso rápido ∫ Cómo insertar/quitar una tarjeta 2 Pulse de nuevo el botón de inicio/ SD 1 Abra la tapa de la - Panasonic VDRD250 | VDRD250 User Guide - Page 178
Spanish Quick Use Guide/Guía española para el uso rápido ∫ Reproducción de imágenes dinámicas ≥ Gire el selector de modo para seleccionar . ∫ Reproducción de imágenes fijas ≥ - Panasonic VDRD250 | VDRD250 User Guide - Page 179
Others 179 LSQT1011 - Panasonic VDRD250 | VDRD250 User Guide - Page 180
Consumer Electronics Company, Division of Panasonic Corporation of North America One Panasonic Way, Secaucus, NJ 07094 Panasonic Puerto Rico, Inc. Ave. 65 de Infantería, Km. 9.5, San Gabriel Industrial Park, Carolina, Puerto Rico 00985 Panasonic Canada Inc. 5770 Ambler Drive, Mississauga, Ontario
-
 1
1 -
 2
2 -
 3
3 -
 4
4 -
 5
5 -
 6
6 -
 7
7 -
8
-
9
-
10
-
11
-
12
-
13
-
14
-
15
-
16
-
17
-
18
-
19
-
20
-
21
-
22
-
23
-
24
-
25
-
26
-
27
-
28
-
29
-
30
-
31
-
32
-
33
-
34
-
35
-
36
-
37
-
38
-
39
-
40
-
41
-
42
-
43
-
44
-
45
-
46
-
47
-
48
-
49
-
50
-
51
-
52
-
53
-
54
-
55
-
56
-
57
-
58
-
59
-
60
-
61
-
62
-
63
-
64
-
65
-
66
-
67
-
68
-
69
-
70
-
71
-
72
-
73
-
74
-
75
-
76
-
77
-
78
-
79
-
80
-
81
-
82
-
83
-
84
-
85
-
86
-
87
-
88
-
89
-
90
-
91
-
92
-
93
-
94
-
95
-
96
-
97
-
98
-
99
-
100
-
101
-
102
-
103
-
104
-
105
-
106
-
107
-
108
-
109
-
110
-
111
-
112
-
113
-
114
-
115
-
116
-
117
-
118
-
119
-
120
-
121
-
122
-
123
-
124
-
125
-
126
-
127
-
128
-
129
-
130
-
131
-
132
-
133
-
134
-
135
-
136
-
137
-
138
-
139
-
140
-
141
-
142
-
143
-
144
-
145
-
146
-
147
-
148
-
149
-
150
-
151
-
152
-
153
-
154
-
155
-
156
-
157
-
158
-
159
-
160
-
161
-
162
-
163
-
164
-
165
-
166
-
167
-
168
-
169
-
170
-
171
-
172
-
173
-
174
-
175
-
176
-
177
-
178
-
179
-
180
 |
 |

Others
With a computer
With other products
Disc and card management
Editing
Playback
Recording
Setup
Before using
(VDR-D300)
For USA assistance, please call: 1-800-211-PANA(7262) or, contact us via the web at: http://www.panasonic.com/contactinfo
For Canadian assistance, please call: 1-800-561-5505 or visit us at www.panasonic.ca
LSQT1011 B
P
PC
Operating Instructions
DVD Video Camera
Model No.
VDR-D300
VDR-D250
Cover
≥
The illustration shows VDR-D300.
≥
VDR-D250 does not have a built-in flash.
Before connecting, operating or adjusting this
product, please read the instructions completely.
Spanish Quick Use Guide is included.
Guía para rápida consulta en español está incluida.