Panasonic VDRM70PP Dvd Camcorder
Panasonic VDRM70PP - DVD CAMCORDER Manual
 |
View all Panasonic VDRM70PP manuals
Add to My Manuals
Save this manual to your list of manuals |
Panasonic VDRM70PP manual content summary:
- Panasonic VDRM70PP | Dvd Camcorder - Page 1
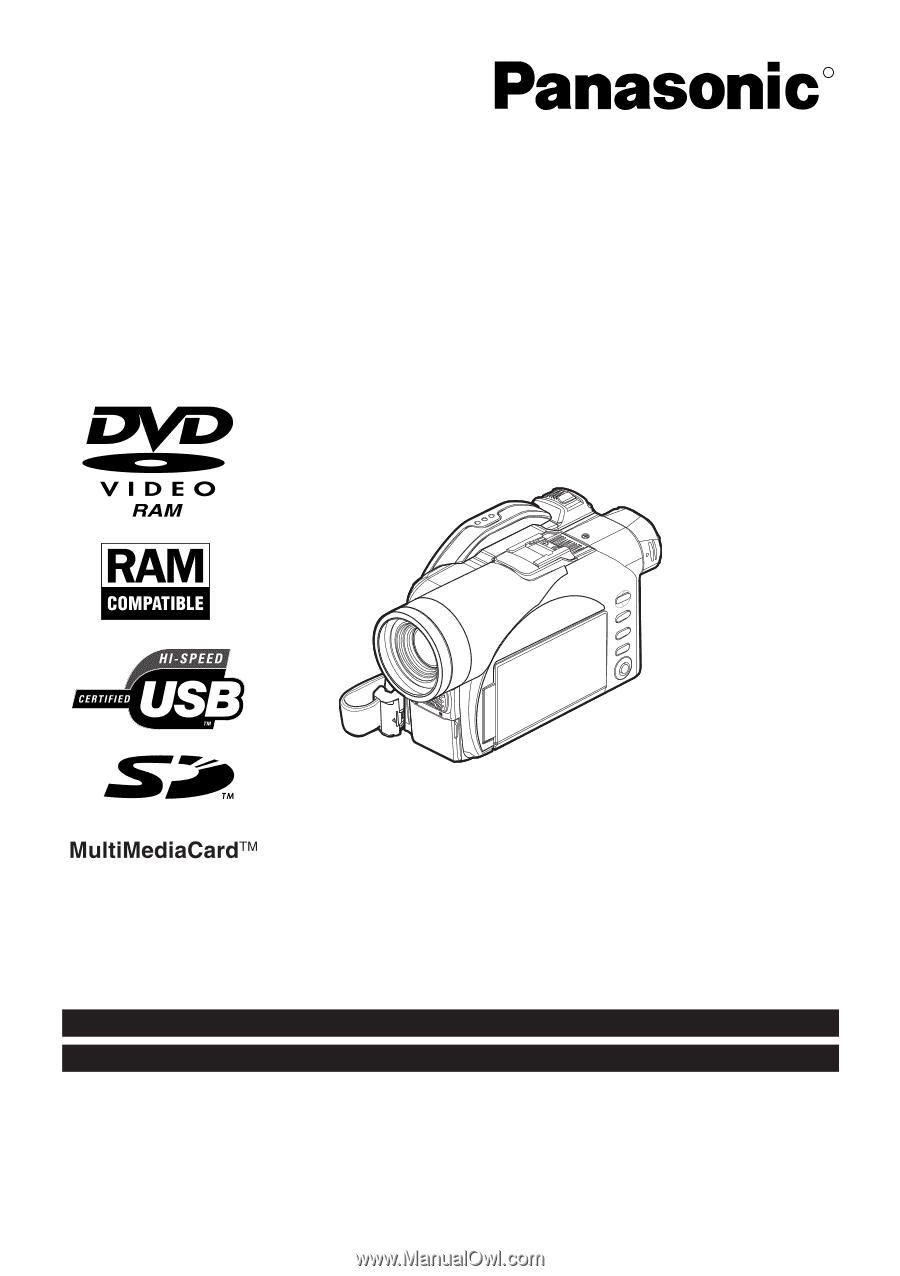
DVD Video Camera Model No. VDR-M50PP VDR-M70PP The illustration shows VDR-M70PP. Thank you for buying a Panasonic product. Please take the time to become familiar with the operating instructions and how it is set up. Keep this manual handy for future reference. Quick Start Guide for Software - Panasonic VDRM70PP | Dvd Camcorder - Page 2
DVD Video Camera and AC adaptor have the following caution marks. CAUTION RISK OF ELECTRIC SHOCK DO NOT OPEN CAUTION: TO REDUCE THE RISK OF ELECTRIC SHOCK, DO NOT OPEN. NO USER-SERVICEABLE PARTS INSIDE. REFER SERVICING TO QUALIFIED SERVICE carefully to avoid any problems. Precautions WARNING: Many - Panasonic VDRM70PP | Dvd Camcorder - Page 3
to operate this equipment. Declaration of Conformity Trade Name: Panasonic Model No.: VDR-M50PP / VDR-M70PP Responsible party: Matsushita Electric Corporation of America One Panasonic Way, Secaucus, NJ 07094 Support Contact: Panasonic Consumer Electronics Company 1-800-211-PANA (7262) This - Panasonic VDRM70PP | Dvd Camcorder - Page 4
The copyrights of This Software, attached manual, etc. are owned by the following corporations, and are protected by copyright laws in Japan and USA, as well as by other intellectual property and international properties: Name of Software USB Driver DVD-RAM Driver DVD-MovieAlbumSE MyDVD Copyright - Panasonic VDRM70PP | Dvd Camcorder - Page 5
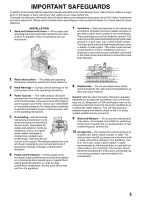
enjoyment and proper use of DVD Video Camera and accessory equipment. Please read it carefully before operating your video product and keep it in a handy place for future reference. INSTALLATION 1 Read and Follow Instructions - All the safety and operating instructions should be read before the - Panasonic VDRM70PP | Dvd Camcorder - Page 6
, unplug it from the wall outlet and disconnect the antenna or cable-system. This will prevent damage to the video product due to lightning and power-line surges. SERVICE 16 Servicing - Do not attempt to service this video product yourself as opening or removing covers may expose you to dangerous - Panasonic VDRM70PP | Dvd Camcorder - Page 7
is at low temperature, as in cold areas, or immediately after power is turned on. Normal brightness will be restored when the temperature inside the DVD Video Camera rises. Hold the DVD Video Camera correctly: • Do not hold the DVD Video Camera by the viewfinder or LCD monitor when lifting it: the - Panasonic VDRM70PP | Dvd Camcorder - Page 8
sulfide, the external or internal terminals could corrode, disabling normal operation, or the battery connecting terminals could corrode, so that power will not turn on. Do not use the DVD Video Camera near ultrasonic humidifier: • Calcium and other chemicals dissolved in water could scatter in - Panasonic VDRM70PP | Dvd Camcorder - Page 9
: − Remove battery pack − Disconnect AC adaptor − Plug or unplug USB cable − Remove disc or card − Subject DVD Video Camera to severe vibrations instructions. Also read the instructions attached with optional accessories: • For optional accessories, observe the cautions and follow instruction manuals - Panasonic VDRM70PP | Dvd Camcorder - Page 10
DVD Video Camera, disc or card. Also, Panasonic cannot be responsible for your recorded video and audio. • If you or a third party make a mistake when handling this DVD Video Camera recorded on the disc or card in this DVD Video Camera using other digital/analog media or devices are protected by the - Panasonic VDRM70PP | Dvd Camcorder - Page 11
your DVD Video Camera by using this manual, and get to know Panasonic. We appreciate your business. Quick Index Available Discs 28 Recording Movie 51 Playing Back 59 Connecting to a TV 69 Functions Available with Disc Navigation ........ 99 Installing Software 130 With this DVD Video Camera - Panasonic VDRM70PP | Dvd Camcorder - Page 12
had to repeatedly press buttons. With DVD, you can simply play back this DVD Video Camera, and press the record button on VCR. lCreate original DVDs on PC (page 141) You can use a DVD-R disc to create an original DVD, using the provided software CD-ROM. The created DVD disc can be played back on - Panasonic VDRM70PP | Dvd Camcorder - Page 13
Software Feature USB Driver DVD-RAM Driver DVD-MovieAlbumSE MyDVD Install this driver when using the provided USB Cable to connect this DVD Video Camera to a PC. Install this driver when using stills and images recorded on a DVD-RAM disc on a PC. By combining DVD-MovieAlbumSE with VDR-M50PP/VDR - Panasonic VDRM70PP | Dvd Camcorder - Page 14
and introduce interactive DVD menus using MyDVD Software. 6 Insert a new DVD-R disc into the DVD Video Camera. • When making an original DVD-R disc using MyDVD software, a message for initialization appears on the LCD of DVD Video Camera. Select "No" and then follow the instructions on the screen - Panasonic VDRM70PP | Dvd Camcorder - Page 15
Read This First 11 About This Manual 11 Introduction 12 Quick Start Guide for Software 13 Table of Contents 15 Checking Provided Accessories 18 Names of Parts 19 Setting Up the Battery Pack 23 Charging Battery Pack 23 Try to Record and Play Back Using Disc (Video and Photo 24 Try to Record - Panasonic VDRM70PP | Dvd Camcorder - Page 16
TV Screen Mode (Wide) (Only for VDR-M70PP 84 Setting Up Record Functions 86 Switching Movie Quality (VIDEO Mode 86 Switching Quality of Still Image 92 Switching Operating Sound On or Off (Beep 92 Turning DVD Video Camera Off Automatically (Power Save 92 Turning Record LED On or Off (Record LED - Panasonic VDRM70PP | Dvd Camcorder - Page 17
Installing Software Compatible PC for use with DVD Video Camera: VDR-M50PP/VDR-M70PP 130 Operations will not be guaranteed under the following conditions 130 Contents on Provided CD-ROM 131 Installing USB Driver 133 Installing DVD-RAM Driver 135 Installing DVD-MovieAlbumSE 138 Installing MyDVD - Panasonic VDRM70PP | Dvd Camcorder - Page 18
this DVD Video Camera. Charge it before use. AC Adaptor/Charger (PV-DAC13): Used to power the DVD Video Camera from AC outlet, or charge battery pack. DC Cord: When powering the DVD Video Camera from household AC outlet, use this cord to connect the DVD Video Camera and AC adaptor. Power Cable - Panasonic VDRM70PP | Dvd Camcorder - Page 19
located on the bottom of this DVD Video Camera: Slide it when removing the battery pack. Although the external appearances of VDR-M50PP and VDR-M70PP are different, the method of operating both models is identical. VDR-M70PP illustrations are used in this manual. 8 Zoom lever (P. 57) Push the lever - Panasonic VDRM70PP | Dvd Camcorder - Page 20
blink or light when the disc in DVD Video Camera is accessed (write or read is executed) or the DVD Video Camera is connected to PC. 23 Shoulder belt attachments portion (P. 35) 24 LOCK switch (P. 25, 51) In mode, set the LOCK switch to (to the left) to lock the power switch so that it does not - Panasonic VDRM70PP | Dvd Camcorder - Page 21
SELECT MENU DISC NAVIGATION 37 SELECT 38 MENU 39 40 34 35 36 28 AUTO button (P. 67) To switch the DVD Video Camera to full automatic. 29 FOCUS button (P. 64) To switch between manual focus and auto-focus. 35 USB port (To PC) 36 Joystick (P. 40, 59, 79) 30 EXPOSURE button (P. 66) Press this - Panasonic VDRM70PP | Dvd Camcorder - Page 22
50 51 45 52 53 46 54 55 41 REC button (P. 51, 52) 47 ZOOM T button (P. 57) 42 DIGITAL ZOOM button (P. 57) 48 ZOOM W button (P. 57) 43 Reverse skip button (P. 61) 49 Forward Search button (P. 111) * The buttons on remote controller will function the same as those on DVD Video Camera. 22 - Panasonic VDRM70PP | Dvd Camcorder - Page 23
not been charged at purchase time: Charge it before using the DVD Video Camera. Note: • Be sure to use the specified battery pack CGA-DU14A (provided) for the DVD Video Camera: using other batteries could cause the DVD Video Camera to malfunction, or result in fire. • Be sure to use the specified - Panasonic VDRM70PP | Dvd Camcorder - Page 24
on DVD-RAM disc; only videos on DVD-R disc. 1 Connect power supply (P. 45). Power cable DC cord Connect them in sequence of the digits. AC adaptor 2 Insert a disc (P. 46). 1. Press down the DISC EJECT lever once and release it. 3. Insert the disc, in Round DVD Holder, into the disc guide until - Panasonic VDRM70PP | Dvd Camcorder - Page 25
REC button Note: When using an unformatted disc, format (initialize) it on this DVD Video Camera. If unformatted disc is inserted into this DVD Video Camera, a message will appear: Format the disc following the instructions on screen (P. 47, 125). Initializing the disc will erase all the recorded - Panasonic VDRM70PP | Dvd Camcorder - Page 26
Using Card (Photo) Only photos can be recorded on card. 1 Connect power supply (P. 45). Power cable DC cord Connect them in sequence of the digits. AC adaptor 2 Insert a card (P. 49). 1. Open the cover of card insertion slot with power turned off. 3. Insert the card all the way until it locks - Panasonic VDRM70PP | Dvd Camcorder - Page 27
3 Start recording (P. 52). 1. Open the LCD monitor (See page 38). 3. While holding the switch at the center of power switch, set the switch to " ". 2. Set the LOCK switch to (to the right). 4. Press the REC button. Pressing REC once will record one photo. REC - Panasonic VDRM70PP | Dvd Camcorder - Page 28
may not be playable on this DVD Video Camera. Note: • It is recommended that you use Panasonic discs, since their compatibility with this DVD Video Camera has been confirmed. Using a disc other than those made by Panasonic may not allow the DVD Video Camera to deliver optimum performance. • It is - Panasonic VDRM70PP | Dvd Camcorder - Page 29
then reinserted. lFinalizing DVD-R disc Before using the 8 cm DVD-R disc on a DVD player or DVD video recorder that is compatible with 8 cm DVDR disc, the disc must be finalized on this DVD Video Camera. For the finalizing procedure of 8 cm DVD-R disc, refer to "Finalizing DVD-R Disc (Finalize Disc - Panasonic VDRM70PP | Dvd Camcorder - Page 30
are very delicate recording media. Carefully read the following cautions and observe them: • When using a disc in this DVD Video Camera, be sure to keep it in Round DVD Holder. • Always use a brand new disc when recording important material. • Be sure not to touch the exposed disc portion - Panasonic VDRM70PP | Dvd Camcorder - Page 31
be slightly slower than advertised. • We recommend that you use a Panasonic brand SD Memory Card. • This DVD Video Camera can play back image data recorded on other digital cameras conforming to the DCF (Design rule for Camera File system) standard which was established by the Japan Electronics and - Panasonic VDRM70PP | Dvd Camcorder - Page 32
Layer 2 format, which is the option standard of DVD video standard. • No movie can be recorded on SD Memory Card or MultiMediaCard. • When using DVD-R disc, you cannot switch the movie quality while recording on the disc: The DVD Video Camera will be automatically set to the movie quality first - Panasonic VDRM70PP | Dvd Camcorder - Page 33
DVD Video Camera is as follows: Model Setting Camera input External input VDR-M50PP 640 × 480 pixels 640 × 480 pixels VDR-M70PP 1,280 × 960 pixels 640 × 480 pixels The following table shows the file size and quality of one JPEG still recorded on card: Quality File size VDRM50PP VDRM70PP - Panasonic VDRM70PP | Dvd Camcorder - Page 34
Setups This section explains preparations for recording - setting up the DVD Video Camera and battery pack. Setting Up the DVD Video Camera Holding DVD Video Camera Using Grip Belt Insert your right hand from the bottom of DVD Video Camera up to the base of your thumb. Put your hand in a position - Panasonic VDRM70PP | Dvd Camcorder - Page 35
inward and attach it over the lens. 2 Attach the string to the attachment hole of DVD Video Camera. Detaching the grip belt makes things easier. Note: • Always keep the lens cap on when not using the DVD Video Camera, to protect the lens. • When recording, attach the lens cap to the grip belt by - Panasonic VDRM70PP | Dvd Camcorder - Page 36
is incorrectly replaced. Replace only with the same or equivalent type recommended by the equipment manufacturer. Discard used batteries according to manufacturer's instructions. Risk of fire, explosion and burns. Do not recharge, disassemble, heat above 212°F (100°C) or inclnerate, Keep the Button - Panasonic VDRM70PP | Dvd Camcorder - Page 37
action. The remote controllable distance is up to 16 feet (5 m). Note: • When using the remote controller, make sure that the infrared receiver on DVD Video Camera is not exposed to direct sunlight or any intense light. If the infrared receiver is subject to light stronger than the infrared light - Panasonic VDRM70PP | Dvd Camcorder - Page 38
approximately 90º before changing its vertical angle. • Do not record for a prolonged time with the LCD monitor turned approximately 180º in close contact with the DVD Video Camera body: Doing this could cause the DVD Video Camera and LCD monitor to become hot. Hook your finger (Bottom) 90 180 38 - Panasonic VDRM70PP | Dvd Camcorder - Page 39
monitor is tilted or faces outward from the camera body, it cannot be closed to the DVD Video Camera. • If the LCD monitor is not securely locked to the DVD Video Camera, no image will appear in the viewfinder. Caution: Do not lift the DVD Video Camera by holding the viewfinder or LCD monitor: If - Panasonic VDRM70PP | Dvd Camcorder - Page 40
e Se t u p The figure for the month will be selected. [The digit that is highlighted first depends on the date Da t e Mode Da t e DVD Video Camera will enter recording pause mode. Choosing "NO" will restore the menu screen. Important Note: This DVD Video Camera incorporates a rechargeable battery - Panasonic VDRM70PP | Dvd Camcorder - Page 41
Changing Display Format of Date and Time You can select one of three date display formats: month/day/year, day/month/year, or year/month/day. The time display format will also change as follows: Display format M/D/Y D/M/Y Y/M/D 1 Press the MENU button. The menu screen will appear. 2 Use the - Panasonic VDRM70PP | Dvd Camcorder - Page 42
, resulting in damage. Terminal must face up. Removing Battery Pack After using the DVD Video Camera, remove the battery pack from it. 1 Slide the BATTERY EJECT switch on the bottom of DVD Video Camera: The battery pack can be removed. 2 Slide the battery pack downward to remove it. Note: • For - Panasonic VDRM70PP | Dvd Camcorder - Page 43
pack (with no zoom operation, etc.) For your reference, the approximate DVD Video Camera recordable time with fully charged battery pack [with model CGA-DU14A]: VDR-M50PP Video quality mode XTRA*1 FINE STD LPCM*2 DVD-RAM disc DVD-R disc When using approx. 140 min viewfinder − When using approx - Panasonic VDRM70PP | Dvd Camcorder - Page 44
even if it is detached from the DVD Video Camera. If the battery pack is left attached to DVD Video Camera, it will consume a slight amount of power. Important Note: Therefore, it is recommended that you charge the battery pack shortly before using the DVD Video Camera, usually on the day before you - Panasonic VDRM70PP | Dvd Camcorder - Page 45
DC cord AC adaptor 1 Connect the power cable to AC adaptor. 2 Plug the power cable into household AC outlet. 3 Plug one end of DC cord into the DC output jack on AC adaptor. 4 Attach the other end of DC cord to the battery attachment platform on DVD Video Camera. Note: The AC adaptor can be - Panasonic VDRM70PP | Dvd Camcorder - Page 46
. Correct orientation Incorrect orientation Note that the recording/playback surface of disc must face the inside of DVD Video Camera. The orientation for inserting the disc into the disc guide is also specific: load the disc correctly, referring to the figure below. PUSH CLOSE portion Disc cover - Panasonic VDRM70PP | Dvd Camcorder - Page 47
Note: • Disc cannot be inserted or removed unless the battery pack or AC adaptor is connected to DVD Video Camera. • See page 74 for how to set disc in Round DVD Holder. • If there is some delay before recording starts, refer to "Check 4" on page 150. • The disc insertion orientation is specific: - Panasonic VDRM70PP | Dvd Camcorder - Page 48
disc will slightly come out from the disc guide, and stop. Note: • Even after the DVD Video Camera is turned on, the disc can be battery pack or AC adaptor to the DVD Video Camera: The disc cover will not open unless the DVD Video Camera is powered. 4 Remove the disc. Hold the top of Round DVD - Panasonic VDRM70PP | Dvd Camcorder - Page 49
Inserting and Removing Card 1 Turn the DVD Video Camera off. 2 Open the cover of card insertion slot. 3 Insert card with its contacts inward until it locks. Note: Do not push the label pasting portion - Panasonic VDRM70PP | Dvd Camcorder - Page 50
techniques of recording movies and still images, and also basic settings on DVD Video Camera. Basic Operation of DVD Video Camera Turning DVD Video Camera On or Off While holding down the button at the center of power switch, set the switch according to each recording function: Set to " ": To - Panasonic VDRM70PP | Dvd Camcorder - Page 51
Functions" on page 80. • Panasonic cannot be responsible for video and audio that cannot be recorded or edited because of any defect. • The power switch can be changed even during recording, but the operation will not be changed. • Each time the DVD Video Camera enters the recording pause mode, the - Panasonic VDRM70PP | Dvd Camcorder - Page 52
the power switch or remove the card while the ACCESS/PC or CARD ACCESS indicator is lit or blinking: Doing so may damage the card or the data on card. • With VDR-M70PP, the range of screen in which recording is possible will be different for movie and still. • The DVD Video Camera automatically - Panasonic VDRM70PP | Dvd Camcorder - Page 53
appear. Note: • Pressing the BACK LIGHT button will alternate backlight setting between on and off. • The backlight setting will automatically return to "off" when the DVD Video Camera is turned off. 53 - Panasonic VDRM70PP | Dvd Camcorder - Page 54
Spanish): Manual focus 3. Backlight compensation No display : Backlight compensation OFF m : Backlight compensation ON 4. Wind Cut (only in movie recording mode) No display : Wind Cut OFF : Wind Cut ON Wide mode*2 No display: Wide mode 4:3 : Wide mode 16:9 External flash*2 [when Video Flash - Panasonic VDRM70PP | Dvd Camcorder - Page 55
[Digital Zoom: 500× (VDR-M50PP), 240× (VDR-M70PP), only in movie recording mode] 9. Exposure correction 10. FULL AUTO indicator 11. Warning message 12. Disc/Card type I : DVD-RAM K : DVD-R J : DVD-RAM (write-protected) M : DVD-R disc already finalized on this DVD Video Camera N : DVD - Panasonic VDRM70PP | Dvd Camcorder - Page 56
the DVD Video Camera has warning information, a warning message will appear. Note: The DVD Video Camera does a copy-guarded image. Operating status/ warning message Battery remaining level Note: • If the LCD screen is • Although you can switch to the manual focus, exposure and on-screen display - Panasonic VDRM70PP | Dvd Camcorder - Page 57
This DVD Video Camera allows you to record using optical 18- (on VDR-M50PP) or 10- (on VDR-M70PP) power zoom and digital zoom. If you continue to hold the zoom lever on the "T" control side with Dig. Zoom 40x or 240x specified, the digital zoom will be activated midway (when optical 18-power is - Panasonic VDRM70PP | Dvd Camcorder - Page 58
) from the lens surface, magnifying the image to fill the screen. 1 Aim the DVD Video Camera at the subject, and press down the zoom lever to "W" control side. Note: -angle effect. Use conversion lenses with the following filter diameter. VDR-M50PP/VDR-M70PP : 37 mm Remove the lens hood on the top - Panasonic VDRM70PP | Dvd Camcorder - Page 59
. • Image data recorded on another camcorder may not be playable on this DVD Video Camera. • Depending on the amount of data to be played back, it may take some time for the playback image to appear. • Do not operate the power switch or remove the card while the ACCESS/PC or CARD ACCESS indicator - Panasonic VDRM70PP | Dvd Camcorder - Page 60
one frame. Hold right : Forward slow playback Hold left : Reverse slow playback After frame advance, frame back or slow playback, the DVD Video Camera will enter playback pause mode. Note: • In forward slow, a rapidly moving subject image may be distorted. • The intervals for playing back - Panasonic VDRM70PP | Dvd Camcorder - Page 61
played back will return to the start of the scene preceding that being played back. Note: • If you perform skip playback during playback pause, the DVD Video Camera will enter playback pause mode at the beginning of the located scene. • Tilting down in the last scene on disc will set the - Panasonic VDRM70PP | Dvd Camcorder - Page 62
ENTER CANCEL Cursor position 2 Use the joystick to select the desired time of chosen point. 3 Press the A button to enter the selection. The DVD Video Camera will go to the specified point and enter playback pause mode. Pressing A again will start playback. To cancel the "Go To" procedure midway - Panasonic VDRM70PP | Dvd Camcorder - Page 63
:Reverse skip playback g :Forward frame advance h :Reverse frame back :Forward slow playback :Reverse slow playback Refer to "Playing Back" beginning on page 59 for instructions on how to operate. The "j" mark will appear on the first image on disc. The "i" mark will appear on the last image on disc - Panasonic VDRM70PP | Dvd Camcorder - Page 64
on a subject automatically (autofocus). You can also manually focus a subject depending on the recording conditions. Focusing during Recording This DVD Video Camera automatically focuses a subject at the center of screen (auto-focus). When the DVD Video Camera is turned on, auto-focus will always be - Panasonic VDRM70PP | Dvd Camcorder - Page 65
Manually focus the following objects, which may not be automatically focused (See page 64): Objects not in the center of screen Objects with little variation in - Panasonic VDRM70PP | Dvd Camcorder - Page 66
Adjusting Exposure Manually 123 The DVD Video Camera usually adjusts the exposure automatically. You can also manually adjust the exposure depending on the recording conditions. 1 Press the EXPOSURE button during recording. The exposure indicator will appear on the screen. Exposure indicator 0: - Panasonic VDRM70PP | Dvd Camcorder - Page 67
functions. 123 1 Press the AUTO button. "FULL AUTO" will be displayed on the screen of DVD Video Camera for several seconds. FULL AUTO FULL AUTO The following settings will reset to defaults: Function Program AE White balance Exposure Focus When setting full auto - Panasonic VDRM70PP | Dvd Camcorder - Page 68
, the power is supplied by this DVD Video Camera. Setting of Video Flash AUTO ON OFF On-screen information A Manner of emitting light Automatically emits light in dark place or in a place lit from rear. Always emits light regardless of brightness. No light emission. * Unusable on VDR-M50PP. 68 - Panasonic VDRM70PP | Dvd Camcorder - Page 69
on TV Screen 123 Connecting to a TV Use the provided AV/S input/output cable to connect the DVD Video Camera to a TV as follows: A/V To AV input/output jack MIC To S-video input jack* To video/ audio input jacks AV/S input/output cable (provided) Yellow White Red * If your TV has an - Panasonic VDRM70PP | Dvd Camcorder - Page 70
set the input selector to the Input connection the DVD Video Camera is connected to. This is often refered to as "line". Refer to the TV instruction manual for how to switch the TV input. 2 Turn the DVD Video Camera on. The image that the DVD Video Camera is viewing will appear on the TV screen. You - Panasonic VDRM70PP | Dvd Camcorder - Page 71
this DVD Video Camera. Note, however, that such DVD-RAM discs are not compatible with all DVD video recorders and all DVD players. 1 Remove the disc from Round DVD Holder (See page 73). 2 Insert the disc into the DVD video recorder/player and play it back. See the instruction manual for DVD video - Panasonic VDRM70PP | Dvd Camcorder - Page 72
/and Replacing in Round DVD Holder" on page 73. See the instruction manual for DVD player. Note: • See "Terminology" on page 148 for linear PCM recording. • DVD-R discs recorded on this DVD Video Camera can be played back on Panasonic DVD players, but playback on all DVD players is not guaranteed - Panasonic VDRM70PP | Dvd Camcorder - Page 73
-RAM or a DVD-R disc used in this DVD Video Camera from Round DVD Holder and use the uncovered disc in DVD player, DVD-RAM recorder, drive for PC, etc., which conforms to 8 cm DVD-RAM or 8 cm DVD-R. Removing disc from Round DVD Holder may vary with the disc maker: See the disc instruction sheet. The - Panasonic VDRM70PP | Dvd Camcorder - Page 74
at positions (3). 3 OPEN marks SIDE A mark side or Label surface 3 SIDE A mark When the Hinge of Round DVD Holder Comes Off 1 Push the hinged portion of the holder piece marked SIDE A with thumb and middle finger, and direction, or use puffer to blow dust off disc, like on camera lens. 74 - Panasonic VDRM70PP | Dvd Camcorder - Page 75
. Note: • If you operate the DVD Video Camera connected to another device, always power the DVD Video Camera from household AC outlet using the AC adaptor. • With VDR-M70PP, using S-VIDEO will enable you to record clearer images. • The VDR-M50PP cannot record S-VIDEO input. • Reduce the volume of - Panasonic VDRM70PP | Dvd Camcorder - Page 76
(generally available) *2 AV/S input/output cable (provided) To S-VIDEO output jack of video camera, etc.*3 8mm video camera, VHS video camera, etc. *1: The AV/S input/output cable provided with this DVD Video Camera can be directly connected to some video cameras. *2: For relay adapters, JVC VZ - Panasonic VDRM70PP | Dvd Camcorder - Page 77
(dub) it. Note: • Using S-VIDEO will deliver clearer images. • Audio is heard from the speaker: If the volume is too high, noise may enter the dubbed image. • Be sure to use the AC adaptor to power the DVD Video Camera from household AC outlet to prevent battery power from shutting off during - Panasonic VDRM70PP | Dvd Camcorder - Page 78
of this DVD Video Camera. Understanding Flow of Menus Press the MENU button during recording pause: The "Camera Functions Setup" : Date Setup V: LCD Setup W : Initial Setup Guide display Functions settable WIDE mode will not appear on VDR-M50PP. When "Wide 16:9" is specified, black bands will - Panasonic VDRM70PP | Dvd Camcorder - Page 79
Digital zoom (P. 57) Wind Cut (P. 83) Wide*1 (P. 84) *1 Not displayed on VDR-M50PP. Displayed on VDRM70PP only for movies using DVD-RAM disc. Recording Functions Setup Movie quality*2 (P. 86) Record Funct i ons Se t up Input selection (P. 88) V I DEO Mode : F I NE I npu t S o u r c e : CAMERA - Panasonic VDRM70PP | Dvd Camcorder - Page 80
Auto mode. • The shooting mode set as above will be stored in memory even if the DVD Video Camera is turned off. Tilt up/down and left/right to select, and then press A to designate image, adjust the focus manually. 3 Press the MENU button to end setting. The menu screen will disappear. 80 - Panasonic VDRM70PP | Dvd Camcorder - Page 81
0 MIN 8 : 00AM FINE SEP 30 2 00 4 lSetting white balance manually 1 Point the DVD Video Camera at a white object so that it fills the screen. Use an object that the digital zoom is engaged or under low light: The "h" indicator will blink at this time. • If the white balance that was manually set - Panasonic VDRM70PP | Dvd Camcorder - Page 82
recording conditions. If this happens, set the mode to match the recording conditions, or manually set the white balance. • Be sure to remove the lens cap before turning the DVD Video Camera on: If the DVD Video Camera is turned on with the lens capped, the white balance will not work normally. 82 - Panasonic VDRM70PP | Dvd Camcorder - Page 83
the EIS to "OFF" (only for VDRM50PP). • The EIS function cannot be used when still images are recorded on the card (only for VDR-M70PP). Reducing Wind Noise during Recording (Wind Cut) When recording sound from the microphone built into this DVD Video Camera, you can reduce wind noise in recording - Panasonic VDRM70PP | Dvd Camcorder - Page 84
Setting to Wide TV Screen Mode (Wide) (Only for VDR-M70PP) 1 If you view the images recorded with 4:3) "Wide 16:9" specified (aspect ratio 16:9) 1 Press the MENU button, choose "Wide" on the "Camera Functions Setup" menu screen, and then press the A button. 2 Choose "16:9", and then press the A - Panasonic VDRM70PP | Dvd Camcorder - Page 85
be kept even after the DVD Video Camera is turned off. • The VDR-M50PP does not have the Wide setting. • Even if you use the provided application software (MyDVD) and dub wide movies on DVD-RAM disc to DVD-R disc, the screen image will not be wider. DVD-R disc does not support the Wide setting and - Panasonic VDRM70PP | Dvd Camcorder - Page 86
. Block-like noise may appear in recorded image, or the outline of subject image is distorted under the recording conditions listed below: Pan the DVD Video Camera as slowly as possible. (Block noise is likely to appear in "STD" mode): • If there is a complicated pattern in the background (as in - Panasonic VDRM70PP | Dvd Camcorder - Page 87
2 00 4 Still recording quality Note: • The still quality setting will be stored in memory even when the DVD Video Camera is turned off. • "PHOTO Input" is displayed only when "Input Source" is set to "LINE" or "S LINE" (VDR-M70PP only). • "OSD Output" is displayed only when "Input Source" is set to - Panasonic VDRM70PP | Dvd Camcorder - Page 88
8 : 00AM SEP 30 2 00 4 the DVD Video Camera is turned off. External input icon • If you pull or push the card on " " mode, "Input Source" setting will return to "CAMERA". • "PHOTO Input" is displayed only when "Input Source" is set to "LINE" or "S LINE" (VDR-M70PP only). • "OSD Output" is - Panasonic VDRM70PP | Dvd Camcorder - Page 89
be stored in memory even when the DVD Video Camera is turned off. • Refer to "Recording (Dubbing) Images" on page 75 to see how to connect the DVD Video Camera to another device. • "PHOTO Input" is displayed only when "Input Source" is set to "LINE" or "S LINE" (VDR-M70PP only). • "OSD Output" is - Panasonic VDRM70PP | Dvd Camcorder - Page 90
Note: • The "OSD Output" setting will return to "On" whenever the DVD Video Camera is turned off. • Even if "Off" is chosen, the on-screen to "CAMERA": It cannot be set during "LINE" or "S LINE" (VDR-M70PP only). • "OSD Output" is displayed only when "Input Source" is set to "CAMERA". LCD - Panasonic VDRM70PP | Dvd Camcorder - Page 91
screen, and then press the Note: A button. Br i ghtness Co l o r L e v e l • The color level setting will be stored in memory even when the DVD Video Camera is turned off. The color density adjustment bar will appear on the screen. ENTER RETURN RAM • Even if the brightness or density of LCD - Panasonic VDRM70PP | Dvd Camcorder - Page 92
when the DVD Video Camera is turned off. Turning DVD Video Camera Off Automatically (Power Save) Setting On Off Contents To engage power save. If the DVD Video Camera is left in recording pause mode without being operated for 5 minutes, it will automatically turn off to prevent the battery from - Panasonic VDRM70PP | Dvd Camcorder - Page 93
red to show that the DVD Video Camera is recording. The recording indicator will not light even during recording. Recording indicator 1 Press the MENU button, choose "Record LED" on the "Initial Setup" menu screen, and then press the A button. Ini t ial Setup Be e p Power Save Record LED Language - Panasonic VDRM70PP | Dvd Camcorder - Page 94
at the factory (P. 164)]. 1 Press the MENU button, choose "Reset" on the "Initial Setup" menu screen, and then press the A button. Ini t ial Setup Be e p Power Save Record LED Language Reset ENTER RETURN 3 Press the MENU button to end setting. Note: To cancel resetting midway, choose "NO" on the - Panasonic VDRM70PP | Dvd Camcorder - Page 95
The screens in this operating manual are basically those that will appear when DVD-RAM disc is used: Some items will not appear when DVD-R disc or card is used, but the operations are the same. • Turn the DVD Video Camera on (P.50). Before You Begin • When using disc: Set the power switch to " " or - Panasonic VDRM70PP | Dvd Camcorder - Page 96
display screen. *2 No still icon will appear for card. *3 The operation guide will vary depending on the operation status of DVD Video Camera. *4 Appears when 13 scenes or more have been recorded. *5 " R" appears for DVD-R disc. " " will appear for card. Note: • The background color of screen - Panasonic VDRM70PP | Dvd Camcorder - Page 97
l Pr og r ams 001 / 014 A l l Pr og r ams 007 / 014 Up or Down A PLAY RAM Left or Right PLAY RAM lWhen playback ends The DVD Video Camera will enter playback pause mode at the last image of last scene. Pressing the g or DISC NAVIGATION button will restore the Disc Navigation screen - Panasonic VDRM70PP | Dvd Camcorder - Page 98
Selecting Multiple Scenes 1 Press the DISC NAVIGATION button. 2 Use the joystick to select the desired scene. 3 Press the SELECT button once: Repeat steps 2 and 3 to randomly select multiple scenes. To cancel a selected scene, select the scene to be canceled, and then press the SELECT button. To - Panasonic VDRM70PP | Dvd Camcorder - Page 99
to this DVD Video Camera. When a disc edited on this DVD Video Camera is directly played back on a DVD-RAM recorder or read into PC, the editing results will not be reflected in the playback or reading. To reflect the editing results, connect both devices using the AV/S input/output cable and then - Panasonic VDRM70PP | Dvd Camcorder - Page 100
disc and card will appear. See pages 78-79 and 95 for how to interpret the screen. Refer to pages indicated for details. lWhen using DVD-RAM disc Scene Delete (P.101) Edit Copy (P.108) Select (P.111) Detail (P.112) Thumbnail Skip Fade Combine Divide Move* (P.103) (P.104) (P.105) (P.106) (P.107 - Panasonic VDRM70PP | Dvd Camcorder - Page 101
be deleted, and then press the DELETE button on remote controller, the screen in step 5 will appear. • To delete an unwanted part of a scene on DVD-RAM disc, divide the scene first, and then delete the unnecessary part (See page 107). • If you delete all data on disc or card, initializing - Panasonic VDRM70PP | Dvd Camcorder - Page 102
lEditing using submenu Press the MENU button before pressing the A button in step 5 (see page 101): The submenu will appear. Ed i t Exi t De l ete ENTER RETURN RAM Se l ec t S t a r t - Cu r r en t Cu r r en t - End All ENTER RETURN RAM Go To To p End ENTER RETURN RAM Edit Select Go To - Panasonic VDRM70PP | Dvd Camcorder - Page 103
Changing Images for Thumbnails (Edit - Thumbnail) 1 Normally, the first image of the recorded scene is displayed as a thumbnail: You can choose another image of the scene for thumbnail. If you set a vivid image to thumbnail, you can know what you recorded from a glance at the Disc Navigation - Panasonic VDRM70PP | Dvd Camcorder - Page 104
Playing Back by Skipping Scenes (Edit - Skip) 1 You can specify "Skip" for scenes you do not want to play back: The selected scenes will be skipped. 1 Press the DISC NAVIGATION button. 6 Press the C button to quit. 2 Select the scene to be skipped. 3 Press the MENU button. 4 Choose "Scene", " - Panasonic VDRM70PP | Dvd Camcorder - Page 105
Directing Scenes Effectively (Edit - Fade) You can add fading to the beginning and/or end of scene. There are three types of special effects: Fade Out Fade Out Fade Out 1 Fade In Black: Fades in from black screen Fades out to black screen Fade In Wipe: Fades in from black screen vertically. - Panasonic VDRM70PP | Dvd Camcorder - Page 106
Combining Multiple Scenes (Edit - Combine) 1 If you have recorded numerous short scenes, combining them will be facilitated by the use of Disc Navigation. Be sure to select consecutive multiple scenes. Combining scenes is possible only when "Category: All" is specified (page 128). Stills cannot be - Panasonic VDRM70PP | Dvd Camcorder - Page 107
Dividing Movies (Edit - Divide) 1 You can divide a scene into two parts. To delete unnecessary portion of scene, first divide the scene, and then delete the unnecessary portion. 1 Press the DISC NAVIGATION button. 2 Select the scene to be divided. 3 Press the MENU button. 4 Choose, "Scene", " - Panasonic VDRM70PP | Dvd Camcorder - Page 108
Copying Stills on DVD-RAM Disc to Card (Copy) 1 1 Set the power switch to " " or " ". 2 Press the DISC NAVIGATION on card cannot be copied to disc. • Stills recorded on a device other than this DVD Video Camera may not be copied normally. 7 The screen for verifying copy will appear: Choose "YES - Panasonic VDRM70PP | Dvd Camcorder - Page 109
Scenes on Card (Lock) 3 You can lock each photo recorded on card so that it will not be deleted or edited by mistake. 1 Set the power switch to " ". 2 Press the DISC NAVIGATION button. 3 Select the scene to be locked. 4 Press the MENU button. 5 Choose "Lock" on the "Scene" menu screen, and - Panasonic VDRM70PP | Dvd Camcorder - Page 110
. Note: DPOF stands for digital print order format. DPOF is used to ask a print lab to print recorded stills. 1 Set the power switch to " ". 2 Press 999. • This DVD Video Camera may not recognize DPOF that has been set on another device: Always set the DPOF on this DVD Video Camera. If you want - Panasonic VDRM70PP | Dvd Camcorder - Page 111
Selecting Scenes Using Menu Screen (Select) 123 You can use this "Select" function to select consecutive scenes at one time. This function is useful when there are numerous scenes. 1 Press the DISC NAVIGATION button. 2 Press the MENU button. 3 Choose "Select" on the "Scene" menu screen. 4 Choose - Panasonic VDRM70PP | Dvd Camcorder - Page 112
with DCF. *3 Number of pixels on still in horizontal direction: This may not appear with a JPEG file that does not conform to this DVD Video Camera. Note: Tilting the joystick to the right will display information on the following scene; tilting the joystick to left will display information on the - Panasonic VDRM70PP | Dvd Camcorder - Page 113
. 1 Recorded on September 10 5:20PM Still 8:00PM Switching to Thumbnail Display of Specific Date (Switch) 12 Since the scenes recorded on this DVD Video Camera are collected as "programs" for each recording date, selecting a program will allow you to display only the scenes on a specific date - Panasonic VDRM70PP | Dvd Camcorder - Page 114
Playing Back Program (Play) You can play back only the selected program. 1 Press the DISC NAVIGATION button. 2 Press the MENU button. 3 Choose "Play" on the "Program" menu screen, P r og r am and then press the A Sw i t c h button. Play Ti tle ETC ENTER RETURN RAM 12 4 Select the - Panasonic VDRM70PP | Dvd Camcorder - Page 115
for verifying change in title, the title setting screen will be restored. • Double byte characters set on other devices may be displayed blank on this DVD Video Camera. T I T L E SEP 3 0 2004 1 2 3 4 5 6 7 8 9 0 SPACE 3 Enter Cancel CHANGE DELETE SEL SELECT 115 - Panasonic VDRM70PP | Dvd Camcorder - Page 116
Play List 1 What is "Play List"? You can create a play list on this DVD Video Camera by gathering your favorites from the recorded scenes. Since the play list is not created by copying data, you will consume little of the disc - Panasonic VDRM70PP | Dvd Camcorder - Page 117
Switching to Display of Each Play List (Switch) Select the desired play list: The Disc Navigation screen of the selected play list will appear. 1 Press the DISC NAVIGATION button. 2 Press the MENU button. 3 Choose "Switch" on the "PlayList" menu screen, and then press the A button. PlayList Sw - Panasonic VDRM70PP | Dvd Camcorder - Page 118
Adding Scenes to Play List (Editing Play List) 1 Press the DISC NAVIGATION button. 2 Press the MENU button. 5 Tilt the joystick down to move the cursor to the lower row, and tilt it left or right to select the point where the scene is to be inserted. 3 Choose "Edit" on the "PlayList" menu screen - Panasonic VDRM70PP | Dvd Camcorder - Page 119
Deleting Scenes from Play List (Editing Play List) 1 Press the DISC NAVIGATION button. 2 Display the editing screen of the play list to be edited. Ed i t P layL i s t A l l Progr ams 004/014 Perform steps 2−4 on PlayList No.02 008/008 page 118. DELETE EX I T 3 Move the cursor to the play - Panasonic VDRM70PP | Dvd Camcorder - Page 120
Deleting Scenes Using Submenu for Editing (Editing Play List) You can delete scenes from play list on the editing screen. 1 Press the DISC NAVIGATION button. 2 Display the editing screen of the play list to be edited. Ed i t P layL i s t A l l Pro g r ams 001/014 Perform steps 2−4 on page 118 - Panasonic VDRM70PP | Dvd Camcorder - Page 121
Arranging Order of Scenes (Move) You can move scenes only when "Category: All" is specified. 1 Press the DISC NAVIGATION button. 2 Press the MENU button. 3 Choose "Switch" on the "PlayList" menu screen, and then press the A button. 4 Select the scene to be moved, and then press the A button. 5 - Panasonic VDRM70PP | Dvd Camcorder - Page 122
Changing Title of Play List (Title) The play lists have serial numbers based on the order in which you have created them, along with the created dates/ times: You can change these titles at any time. 1 Press the DISC NAVIGATION button. 2 Press the MENU button. 3 Choose "Title" on the "PlayList" - Panasonic VDRM70PP | Dvd Camcorder - Page 123
Go To 123 From the Disc Navigation screen, you can jump to the first scene or last scene. Top (End) 1 Press the DISC NAVIGATION button. 2 Press the MENU button. 3 Choose "Top" or "End" on the "Go To" menu screen, Go To and then press the A button. To p End ETC ENTER RETURN RAM A l l Pr - Panasonic VDRM70PP | Dvd Camcorder - Page 124
-R disc: The quality mode first used for recording with disc will appear. *2 With DVD-R disc: This will not be displayed. Protecting Disc from Writing (Protect Disc) 1 You can protect a DVD-RAM disc in order to prevent recorded images from being erased or edited by mistake. Further recording will - Panasonic VDRM70PP | Dvd Camcorder - Page 125
PC or a device other than this DVD Video Camera. • If you attempt to initialize a disc or card in this DVD Video Camera when it is connected to PC via USB cable, the disc or card may not be initialized and may be unusable on this DVD Video Camera. (When using DVD-RAM disc) (When using card) When - Panasonic VDRM70PP | Dvd Camcorder - Page 126
to update the data. Before You Begin • Use the AC adaptor to power the DVD Video Camera for updating control information, and make sure that power is not turned off during updating: If the DVD Video Camera is turned off during updating and the updating is interrupted, the control information - Panasonic VDRM70PP | Dvd Camcorder - Page 127
Disc) 2 Before You Begin • Be sure to use the AC adaptor to power the DVD Video Camera when finalizing a DVD-R disc. Finalization cannot be executed using a battery pack. If the DVD Video Camera is turned off during finalization and the finalization is interrupted, incorrect finalization will - Panasonic VDRM70PP | Dvd Camcorder - Page 128
in that range will repeat. lTo release Repeat Play Use one of the following 3 methods to release: • Choose "Off" in step 4 above. • Turn the DVD Video Camera off once. • Press the DISC EJECT lever to remove the disc. Note: • Press the g button to terminate playback. However, the Repeat Play setting - Panasonic VDRM70PP | Dvd Camcorder - Page 129
ENTER RETURN in slide show. DPOF: To play only stills to which DPOF has been set in slide show. When playback is finished, the DVD Video Camera will enter the playback pause mode at the final still. Pressing the g button will restore the Disc Navigation screen. Note: • One still is played - Panasonic VDRM70PP | Dvd Camcorder - Page 130
RAM driver. • We will not guarantee proper operation of this DVD Video Camera if you use software other than that supplied with this product to read/write data to the DVD Video Camera even though reading/writing of a file has finished without errors. Compatible PC for use with DVD Video Camera: VDR - Panasonic VDRM70PP | Dvd Camcorder - Page 131
" screen will appear. You can install the included software. If the "Setup Menu" screen does not appear, double-click the CD-ROM drive icon. lUSB Driver (see page 133 for installation) Install this driver when using the provided USB cable to connect this DVD Video Camera to PC. • Be sure you do not - Panasonic VDRM70PP | Dvd Camcorder - Page 132
" or "All Programs" from the Windows "Start" menu, choose "Panasonic DVD-RAM" and "DVD-RAM Driver", and then open "Using DVDRAM disc". No electronic instruction manual is provided with the USB Driver. Note: Although the above software programs can be used on Windows®98 Second Edition or later is - Panasonic VDRM70PP | Dvd Camcorder - Page 133
will appear: Click the "USB Driver Installation" button. Click 6 Set the power switch of DVD Video Camera to " ", and then use the provided USB cable to connect the DVD Video Camera to the USB port of PC. The "Found New Hardware" icon will appear. Click 3 When using Windows® XP Home Edition/XP - Panasonic VDRM70PP | Dvd Camcorder - Page 134
of the USB driver is finished, click "Finish". lOperation with DVD Video Camera connected • The following operations are not possible when connected to PC: - Camera recording and playback using operation buttons on DVD Video Camera - Power off using the power switch on DVD Video Camera • No image - Panasonic VDRM70PP | Dvd Camcorder - Page 135
-RAM Driver lBefore Installing DVD-RAM Driver If another DVD-RAM driver has already installed in your PC, confirm the original DVD-RAM driver. If the packet writing software which supports the DVD-RAM disc is installed, it is necessary to uninstall it, and then install the provided DVD-RAM driver - Panasonic VDRM70PP | Dvd Camcorder - Page 136
/ XP Professional, a message that prompts you to restart will appear: Follow the on-screen instructions and then click "Finish". Installing the DVD-RAM driver is now complete. If your PC uses Windows® 2000 Professional, proceed with step 10. Confirm 7 Click "Next". Click Click 10If your PC - Panasonic VDRM70PP | Dvd Camcorder - Page 137
screen. When using disc: • "MATSHITA DVD-CAMERA M5070 USB Device" under "DVD/CD-ROM drives" *1 *1:When using Windows® 98 Second Edition or Me, "MATSHITA DVD-CAMERA M5070" is listed under "CDROM" and "Disk drives" respectively. • "Panasonic DVD CAMERA DVD Mode USB Interface" under "Universal Serial - Panasonic VDRM70PP | Dvd Camcorder - Page 138
Installing DVD-MovieAlbumSE "DVD-MovieAlbumSE" software is used to edit movies that conform to DVD Video Recording format. 1 Insert the provided CD-ROM into the PC, and Click "DVD-MovieAlbumSE 3" on the "Setup Menu" screen. 4 Choose "NTSC" for the TV broadcast system, click "Next". If the "Setup - Panasonic VDRM70PP | Dvd Camcorder - Page 139
Windows® 2000 Professional a message announcing "READ ONLY FILE DETECTION MESSAGE" will appear: Click "No". Proceed with installation, following the instructions the software (if you do not have authorization, consult your system manager.). • When using DVD-MovieAlbumSE software on Windows® 2000 - Panasonic VDRM70PP | Dvd Camcorder - Page 140
". 2 The screen for installing "MyDVD" will appear: Click "Next". Click 5 Check the contents, and then click "Next". Click Installation will start. 3 Carefully read the Software License Agreement: If you accept it, click "Yes". Click 6 Click "Finish", and then restart the PC. Click Click 140 - Panasonic VDRM70PP | Dvd Camcorder - Page 141
. sonic. com Telephone Customer Support (For registered customers only) 1-877-383-1124 9am-6pm Pacific Standard Time. USA (Weekdays only) Creating DVD Video on PC from DVD-RAM Disc Recorded on DVD Video Camera Using DVD-MovieAlbumSE and MyDVD, you can create a DVD Video disc (DVD-R disc) from the - Panasonic VDRM70PP | Dvd Camcorder - Page 142
will be created. Then the disc cover of DVD Video Camera will open automatically. Note: • Even if you use the provided application software (MyDVD) and record wide movies on DVD-RAM disc to DVD-R disc, screen image will not be wider. DVD-R disc does not support the Wide setting and it is displayed - Panasonic VDRM70PP | Dvd Camcorder - Page 143
Use the following procedure to uninstall (delete) any provided software that has been installed: Uninstalling USB Driver With Windows® 98 Second Edition/Me: 1 Set the power switch on DVD Video Camera to " ", and use the USB cable to connect it to the PC. 2 Open "System" on "Control Panel", and - Panasonic VDRM70PP | Dvd Camcorder - Page 144
software Notepad provided with Windows by the following method (Right click on the oem0.inf and select "open with" Notepad.) Search for the files with the following entry on the second and fourth lines, and delete them: ; Panasonic DVD DIGICAM USB Driver Installation File ; Support Model : VDR- M50 - Panasonic VDRM70PP | Dvd Camcorder - Page 145
32 MB SD Memory Card USB Reader/Writer for SD Memory Card (compatible with MultimediaCard) SD PCMCIA Adaptor (compatible with MultimediaCard) Video Flash (only for VDR-M70PP) * Please refer to page 43 concerning the battery charging time and available recording time. NOTE: Accessories and/or model - Panasonic VDRM70PP | Dvd Camcorder - Page 146
Information on Round DVD Holder This DVD Video Camera cannot use a square adapter, such as for 8 cm DVD-RAM disc, 8 cm DVD-R disc: Remove the disc from square adapter and set it in Round DVD Holder, referring to the instruction sheet of disc. lRemoving disc from square adaptor (Example 1) Snap - Panasonic VDRM70PP | Dvd Camcorder - Page 147
scratch the lens. lDo not use benzene or thinner to clean DVD Video Camera case The coating of case could peel off or the case could deteriorate. Wipe off dirt on the case with a moist cloth which has been completely wrung out. When using a chemical cleaning cloth, follow instructions for use. 147 - Panasonic VDRM70PP | Dvd Camcorder - Page 148
, that conforms to the DVD Video Recording format. Some DVD Video recorders can record on a DVD-R disc conforming to DVD Video format. A DVD Video recorder that is compatible with 8 cm DVD-RAM can play back DVD-RAM discs recorded on the DVD Video Camera. DVD Video Recording format: Format recorded - Panasonic VDRM70PP | Dvd Camcorder - Page 149
. Howling can be prevented by changing the positional relationship between the DVD Video Camera and TV, or by turning down the volume on TV. Suspending compress an audio signal, but instead samples it and converts it to a digital signal to be recorded. Therefore, the amount of data used is larger - Panasonic VDRM70PP | Dvd Camcorder - Page 150
Before Requesting Service Check 1 No movie can be recorded Movie can be recorded only on DVD-RAM or DVD-R disc. Check the following: • Is DVD-RAM or DVD-R disc inserted? • Is power switch set to " "? • Is the DVD-RAM disc in DVD Video Camera write- protected? Release the write-protect. • Does disc - Panasonic VDRM70PP | Dvd Camcorder - Page 151
Check 5 No DVD Video Camera operation Is a fully charged battery pack attached? Is the DVD Video Camera powered from AC outlet? Check 6 No image in viewfinder Is LCD monitor open? No image will appear in viewfinder unless the LCD monitor is closed and securely locked to DVD Video Camera. Check 7 - Panasonic VDRM70PP | Dvd Camcorder - Page 152
. (Do not remove the disc while the DVD Video Camera is recognizing it: Ignoring this will deactivate the file repair function.) Follow the instructions on screen, taking note of the following cautions: • Data may not be repaired, depending on the timing when power was turned off. • Data may not be - Panasonic VDRM70PP | Dvd Camcorder - Page 153
Message Cause & Troubleshooting Cannot combine. Deselect PHOTO scenes. Select only movies and occurred during editing of scenes. Turn off the DVD Video Camera with the card being used inside, connect the AC adaptor, and then power the DVD Video Camera again. Repair of scenes will be attempted. - Panasonic VDRM70PP | Dvd Camcorder - Page 154
Message Cause & Troubleshooting Control Information Error. Mismatch may occur between the recorded image and scene information. Update the control information. • Use another disc. • See *3 on page 157. COPY PROTECTED The video signal input to this DVD Video Camera may be copyguarded. Some - Panasonic VDRM70PP | Dvd Camcorder - Page 155
with no play list stored. Disc includes protected The disc may be software protected from a device other than this scenes. Delete scenes? DVD Video Camera. To release in this case, use the device that has executed software-protect. Disc is full. Cannot add control info. The number of entered - Panasonic VDRM70PP | Dvd Camcorder - Page 156
Cause & Troubleshooting NO CARD Insert a card. No card. Please insert card. No card is inserted. Insert a card. NO DISC This message may appear when the DVD Video Camera or disc is moved from a cold place to a warm place. Condensation has occurred on the DVD Video Camera lens or DVD-RAM drive - Panasonic VDRM70PP | Dvd Camcorder - Page 157
adapter/ charger. Finalization is not possible when the DVD Video Camera is powered by a battery pack: Use the AC adaptor for finalization. Use AC adapter/ charger. Turn off power. Scene cannot be repaired when the DVD Video Camera is powered by a battery pack. If the AC adaptor is unavailable in - Panasonic VDRM70PP | Dvd Camcorder - Page 158
Troubleshooting Check to see the following before asking for a repair. If the suggested solution still cannot restore the DVD Video Camera to normal, do not attempt to repair it yourself, but consult your dealer. Power supplies Symptom Cause and Correction Battery pack cannot be Is the ambient - Panasonic VDRM70PP | Dvd Camcorder - Page 159
Does "MF" appear? The DVD Video Camera is set to manual focus. Focus the subject manually, or release manual focus. Is the diopter control correctly adjusted if you are using the viewfinder as a monitor? Adjust the diopter control. In cases other than the above, set the power switch to "OFF", and - Panasonic VDRM70PP | Dvd Camcorder - Page 160
can play back image data recorded on SD Memory Card in other digital cameras conforming to the DCF (Design rule for Camera File system) standard. The range of image data normally playable on this DVD Video Camera is that with pixels from 80 horizontal x 60 vertical to 4000 horizontal x 3000 vertical - Panasonic VDRM70PP | Dvd Camcorder - Page 161
if the software related to DVD-RAM/R/ RW of your PC is upgraded, or if the DVD-RAM driver is uninstalled. However, with Windows® 98 Second Edition / Me / 2000 Professional, uninstalling the DVD-RAM driver will make it impossible for the JPEG stills recorded on DVD-RAM on this DVD Video Camera to be - Panasonic VDRM70PP | Dvd Camcorder - Page 162
DVD Video Camera is operated on Greenwich file in DVD-RAM is viewed on PC, it is Mean Time (GMT), and time lag information has not been set. With Windows® with the DVD-RAM driver on the CD-ROM protect. provided with this DVD Video Camera cannot be released on this DVD Video Camera as is. - Panasonic VDRM70PP | Dvd Camcorder - Page 163
strikes the infrared receiver. Adjust the place or angle of the DVD Video Camera. Is there a battery in the remote controller? Also check the polarities of battery. The battery could be dead: Try replacing it. Is the DVD Video Camera powered? Turn it on. Disc cover cannot be closed. Is disc - Panasonic VDRM70PP | Dvd Camcorder - Page 164
defaults. The date and time will also be reset: Set the date and time again before using the DVD Video Camera. 1 Set the power switch to "OFF" to turn the DVD Video Camera off. Detach the battery pack or AC adaptor. 2 Use a fine tipped pen to hold down the reset button for several seconds. All - Panasonic VDRM70PP | Dvd Camcorder - Page 165
Major Specifications DVD Video Camera Power Source: Power Consumption: Information for your safety DC 7.9/7.2 V When recording with LCD monitor off VDR-M50PP approx. 4.9 W (in FINE mode) VDR-M70PP approx. 5.2 W (in FINE mode) CCD VDR-M50PP: 1/6-inch interlaced VDR-M70PP: 1/4-inch interlaced - Panasonic VDRM70PP | Dvd Camcorder - Page 166
, remote controller, button type battery for remote controller, lens cap, lens cap string, shoulder belt, power cable, DC cord, software CD-ROM, USB cable, 8 cm DVD-RAM disc (in Round DVD Holder) * The MPEG 1 Audio Layer 2 format is a type of DVD Video standard. If your DVD player does not conform - Panasonic VDRM70PP | Dvd Camcorder - Page 167
AC adaptor/Charger Power Source: Power Consumption: DC Output: Information for your safety AC 110-240 V, 50/60 Hz 19 W 0.5 W (When not in use) DC 7.9 V, 1.4 A (DVD Video Camera operation) DC 8.4 V, 0.65 A (Battery Charging) Dimensions (W × H × D) Weight: approx. 2.40 (W) × 1.26 (H) × 3.58 (D) - Panasonic VDRM70PP | Dvd Camcorder - Page 168
what wrong with the unit and any symptom it is exhibiting. Mail this completed form and your Proof of Purchase along with your unit to: Panasonic Services Company 1705 N. Randall Road Elgin, IL. 60123-7847 Attn: Camcorder Repair Please write the displayed above Self Diagnostic number here. 168 - Panasonic VDRM70PP | Dvd Camcorder - Page 169
Carolina, Puerto Rico 00985 Panasonic/Quasar Video Products Limited Warranty Coverage in-home service, as applicable, during the warranty period. If non-rechargeable batteries are included controls, improper maintenance, power line surge, lightning a problem with this product develops during or after the - Panasonic VDRM70PP | Dvd Camcorder - Page 170
your nearest Dealer or Servicenter; purchase Parts and Accessories; or make Customer Service and Literature requests by visiting our Web Site at: http://www.panasonic.com/support or, contact us via the web at: http://www.panasonic.com/contactinfo You may also contact us directly at: 1-800-211-PANA - Panasonic VDRM70PP | Dvd Camcorder - Page 171
any product which is used commercially. Dry cell batteries are also excluded from coverage under this warranty original purchase is required before warranty service is performed. THIS EXPRESS, LIMITED -5505 Fax #: (905) 238-2360 Web: www.panasonic.ca For product repairs, please contact one of the - Panasonic VDRM70PP | Dvd Camcorder - Page 172
MEMO 172 - Panasonic VDRM70PP | Dvd Camcorder - Page 173
173 - Panasonic VDRM70PP | Dvd Camcorder - Page 174
Electric Corporation of America Executive Office: One Panasonic Way, Secaucus, NJ 07094 (201) 348-7000 Panasonic Company East: 6749 Baymeadow Drive, Glen Burnie, MD 21060 Panasonic Company Central: 1707 North Randall Road, Elgin, IL 60123 Panasonic Company West: 6550 Katella Avenue, Cypress, CA
-
 1
1 -
 2
2 -
 3
3 -
 4
4 -
 5
5 -
 6
6 -
 7
7 -
8
-
9
-
10
-
11
-
12
-
13
-
14
-
15
-
16
-
17
-
18
-
19
-
20
-
21
-
22
-
23
-
24
-
25
-
26
-
27
-
28
-
29
-
30
-
31
-
32
-
33
-
34
-
35
-
36
-
37
-
38
-
39
-
40
-
41
-
42
-
43
-
44
-
45
-
46
-
47
-
48
-
49
-
50
-
51
-
52
-
53
-
54
-
55
-
56
-
57
-
58
-
59
-
60
-
61
-
62
-
63
-
64
-
65
-
66
-
67
-
68
-
69
-
70
-
71
-
72
-
73
-
74
-
75
-
76
-
77
-
78
-
79
-
80
-
81
-
82
-
83
-
84
-
85
-
86
-
87
-
88
-
89
-
90
-
91
-
92
-
93
-
94
-
95
-
96
-
97
-
98
-
99
-
100
-
101
-
102
-
103
-
104
-
105
-
106
-
107
-
108
-
109
-
110
-
111
-
112
-
113
-
114
-
115
-
116
-
117
-
118
-
119
-
120
-
121
-
122
-
123
-
124
-
125
-
126
-
127
-
128
-
129
-
130
-
131
-
132
-
133
-
134
-
135
-
136
-
137
-
138
-
139
-
140
-
141
-
142
-
143
-
144
-
145
-
146
-
147
-
148
-
149
-
150
-
151
-
152
-
153
-
154
-
155
-
156
-
157
-
158
-
159
-
160
-
161
-
162
-
163
-
164
-
165
-
166
-
167
-
168
-
169
-
170
-
171
-
172
-
173
-
174
 |
 |
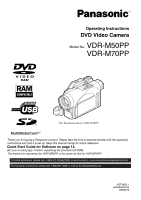
Operating Instructions
DVD Video Camera
Model No.
VDR-M50PP
VDR-M70PP
Thank you for buying a Panasonic product. Please take the time to become familiar with the operating
instructions and how it is set up. Keep this manual handy for future reference.
Quick Start Guide for Software on page 13.
Be sure to read page 4 before unpacking the provided CD-ROM.
The method for operating the VDR-M50PP is the same as that for VDR-M70PP.
VQT0K92-1
H0204HM1034
QR35225
R
The illustration shows VDR-M70PP.
For USA assistance, please call: 1-800-211-PANA(7262) or send e-mail to : [email protected]
For Canadian assistance, please call: 1-800-561-5505 or visit us at www.panasonic.ca