Panasonic WJ-GXD400 Installation Guide
Panasonic WJ-GXD400 Manual
 |
View all Panasonic WJ-GXD400 manuals
Add to My Manuals
Save this manual to your list of manuals |
Panasonic WJ-GXD400 manual content summary:
- Panasonic WJ-GXD400 | Installation Guide - Page 1
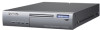
Installation Guide Network Video Decoder Model No. WJ-GXD400 OPERATE ERROR1 ERROR2 ALARM Before attempting to connect or operate this product, please read these instructions carefully and save this manual for future use. No model number suffix is shown in this manual. - Panasonic WJ-GXD400 | Installation Guide - Page 2
SHOCK, DO NOT REMOVE COVER (OR BACK). NO USER-SERVICEABLE PARTS INSIDE. REFER SERVICING TO QUALIFIED SERVICE PERSONNEL. The lightning flash with arrowhead symbol, within an equilateral important operating and maintenance (servicing) instructions in the literature accompanying the appliance. 2 - Panasonic WJ-GXD400 | Installation Guide - Page 3
. This equipment generates, uses, and can radiate radio frequency energy and, if not installed and used in accordance with the instruction manual, may cause harmful interference to radio communications. Operation of this equipment in a residential area is likely to cause harmful interference - Panasonic WJ-GXD400 | Installation Guide - Page 4
block any ventilation openings. Install in accordance with the manufacturer's instructions. 8) Do not install near any heat sources such as unused for long periods of time. 14) Refer all servicing to qualified service personnel. Servicing is required when the apparatus has been damaged in any - Panasonic WJ-GXD400 | Installation Guide - Page 5
CAUSED BY INAPPROPRIATE USE OR NEGLIGENT OPERATION OF THE USER; (3) UNAUTHORIZED DISASSEMBLE, REPAIR OR MODIFICATION OF THE PRODUCT BY THE USER; (4) ANY PROBLEM, CONSEQUENTIAL INCONVENIENCE, OR LOSS OR DAMAGE, ARISING OUT OF THE SYSTEM COMBINED BY THE DEVICES OF THIRD PARTY; (5) ANY CLAIM OR ACTION - Panasonic WJ-GXD400 | Installation Guide - Page 6
Preface The network video decoder WJ-GXD400 is designed to convert digital image data (JPEG/MPEG-4) to analog video signals. By connecting to a network (LAN), images and audio from cameras and encoders - Panasonic WJ-GXD400 | Installation Guide - Page 7
There are 2 sets of operating instructions for the WJ-GXD400 as follows. • Installation Guide (this book) • Setup Instructions (PDF) The "Installation Guide" contains descriptions of how to install and connect this unit. Refer to the "Setup Instructions (PDF)" on the provided CD-ROM for descriptions - Panasonic WJ-GXD400 | Installation Guide - Page 8
trademarks or registered trademarks of HDMI Licensing LLC. • Other names of companies and products contained in these operating instructions may be trademarks or registered trademarks of their respective owners. Copyright Distributing, copying, disassembling, reverse compiling, reverse engineering - Panasonic WJ-GXD400 | Installation Guide - Page 9
These Operating Instructions ...7 Software Setup procedure ...18 Install the decoder in a rack ...19 Connections ...20 When connecting to a network using a hub 20 Turn on/off the power of the decoder ...21 Turn on the power of the decoder ...21 Turn off the power of the decoder ...21 Troubleshooting - Panasonic WJ-GXD400 | Installation Guide - Page 10
Turn the power off and refer servicing to qualified service personnel. Moisture can damage the apparatus the product. Failure to observe this may cause trouble. About the monitor When displaying the same image cause malfunction. Contact your dealer for instructions. Cleaning Turn the power off when - Panasonic WJ-GXD400 | Installation Guide - Page 11
license of GPL and/or LGPL. • Read the "Readme.txt" file on the provided CD-ROM for further information about the software. • Please note that Panasonic shall not respond to any inquiries regarding the source code. 11 - Panasonic WJ-GXD400 | Installation Guide - Page 12
Major operating controls and their functions Front view OPERATE ERROR1 ERROR2 ALARM WJ-GXD400 q wer tyui o !0 q Operation indicator (OPERATE) Lights when the power is on. Important: • This indicator will blink for around a minutes until the unit becomes ready to - Panasonic WJ-GXD400 | Installation Guide - Page 13
Rear view XX-XX-XX-XX-XX-XX AUDIO OUT VIDEO OUT OUT IN G q w e rt y 12V IN ui q Network port Connect a LAN cable. (100BASE-TX/1 000BASE-T) NTSC model: category 5e, straight PAL model: category 7, straight (Cable is not provided.) wAudio output connector (AUDIO OUT) Connect an audio device - Panasonic WJ-GXD400 | Installation Guide - Page 14
It is possible to apply a color on the frame border that divides a screen. Select a color from the following. Off/White/Gray/Black ( Setup instructions (PDF)) (1) (2) (2) (3) Alarm display • When an alarm occurrence is detected, the frame border will turn red to indicate which images are from the - Panasonic WJ-GXD400 | Installation Guide - Page 15
", it will not be displayed. Note: • Information display position and display or hide infor- mation display can be determined by configuring the settings on the setup menu. • When the "Image capture size" setting is other than "QVGA", "VGA" or "4VGA", a black screen will be displayed. 15 - Panasonic WJ-GXD400 | Installation Guide - Page 16
Display mode There are 2 display modes, "Full screen" mode (full-resolution display) and the "Trimmed screen" mode (trimming mode). Normally, select "Full screen". When the displayed images do not fit in the screen even by adjusting the display settings of the monitor in use, select "Trimmed screen - Panasonic WJ-GXD400 | Installation Guide - Page 17
on a screen can be heard. Audio output is available via the HDMI output connector or the audio output connector (RCA, pin jack). Refer to the setup instructions (PDF) for how to output images (video) and audio. 17 - Panasonic WJ-GXD400 | Installation Guide - Page 18
decoder. (page 21) Change the TCP/IP setting of the PC to conform to the settings of the decoder. Refer to the setup instructions (PDF). Perform the required settings on the setup menu to start operation. Refer to the setup instructions (PDF). Images from the registered camera will be displayed. 18 - Panasonic WJ-GXD400 | Installation Guide - Page 19
Install the decoder in a rack z Remove the rubber feet (4 pcs.) on the bottom of the unit. x Install the rack mounting brackets (Option: Refer to the following.) on both sides of the unit. Using the mounting screws (4 pcs.) for the rack mounting brackets, fix them firmly. 1. When installing one - Panasonic WJ-GXD400 | Installation Guide - Page 20
camera Hub PC LAN cable (category 5e, straight (NTSC model)/ category 7, straight (PAL model) OPERATE ERROR1 ERROR2 ALARM Network Video Decoder WJ-GXD400 Monitor AC adapter (standard accessory) To an outlet Important: • Use a switching hub or a router which is compliant with 100BASE-TX - Panasonic WJ-GXD400 | Installation Guide - Page 21
Turn on/off the power of the decoder Turn on the power of the decoder Insert the power plug of the AC adapter to an outlet. Connect the power plug of the AC adapter to a 120 V AC, 60 Hz for NTSC model, 220 - 240 V AC, 50 Hz for PAL model. The OPERATE indicator will start blinking for around a - Panasonic WJ-GXD400 | Installation Guide - Page 22
your dealer. 10, 12 Check the status on the "Camera" page of the setup menu. Refer to the setup instructions (PDF). Check the settings on the "Basic" page of the setup menu. Refer to the setup instructions (PDF). Check the IP address, subnet mask, and default gateway of each of the decoder - Panasonic WJ-GXD400 | Installation Guide - Page 23
Problem The power cord insulation is damaged. The power cord, plug and connectors shock or a fire. Unplug the power plug from the AC outlet immediately, and refer to qualified service personnel. Page - • An error notification (message) is displayed. Check the displayed message and contact - Panasonic WJ-GXD400 | Installation Guide - Page 24
Specifications Network Video Decoder Power source: Power consumption: Ambient temperature: Ambient humidity: Video output connectors: Audio output connector: Parallel port: Resolution: Image compression method: Audio compression method: Protocol: Network: Security: OS: Browser: Dimensions: Weight: - Panasonic WJ-GXD400 | Installation Guide - Page 25
Standard Accessories CD-ROM 1 pc. Operating Instructions (this book 1 pc. Warranty card (NTSC model only 1 pc. * The CD-ROM contains the operating instructions (PDFs and the software). The following are for installation. AC adapter 1 pc. Code label 1 pc. Power cord 1 pc. * Use the power cord - Panasonic WJ-GXD400 | Installation Guide - Page 26
26 - Panasonic WJ-GXD400 | Installation Guide - Page 27
Information on Disposal for Users of Waste Electrical & Electronic Equipment (private households) This symbol on the products and/or accompanying documents means that used electrical and electronic products should not be mixed with general household waste. For proper treatment, recovery and - Panasonic WJ-GXD400 | Installation Guide - Page 28
. For European and other fields: Matsushita Electric Industrial Co., Ltd. Osaka, Japan http://panasonic.net Importer's name and address to follow EU rules: Panasonic Testing Centre Panasonic Services Europe GmbH Winsbergring 15, 22525 Hamburg F.R.Germany NM0608-1068 3TR005589BAA Printed in Japan
-
 1
1 -
 2
2 -
 3
3 -
 4
4 -
 5
5 -
 6
6 -
 7
7 -
8
-
9
-
10
-
11
-
12
-
13
-
14
-
15
-
16
-
17
-
18
-
19
-
20
-
21
-
22
-
23
-
24
-
25
-
26
-
27
-
28
 |
 |

Before attempting to connect or operate this product,
please read these instructions carefully and save this manual for future use.
No model number suffix is shown in this manual.
Installation Guide
Network Video Decoder
Model No.
WJ-GXD400
OPERATE
ERROR1
ERROR2
ALARM