Panasonic fv-05vs1 Installation Instructions
Panasonic fv-05vs1 Manual
 |
View all Panasonic fv-05vs1 manuals
Add to My Manuals
Save this manual to your list of manuals |
Panasonic fv-05vs1 manual content summary:
- Panasonic fv-05vs1 | Installation Instructions - Page 1
Motor/Grille Assembly FV-05VSB1, FV-08VSB1 Applicable to Models: FV-05VS1, FV-08VS1 READ AND SAVE THESE INSTRUCTIOINS. Please read these instructions carefully before attempting to install, operate or service the Panasonic Ventilating Fan. Failure to comply with instructions could result in - Panasonic fv-05vs1 | Installation Instructions - Page 2
device, such as a tag, to the service panel. J. NEVER place a switch where it can be reached from a tub or shower. K. Not to be installed in a ceiling thermally insulated to a value greater than R40. (This is required for installation in Canada only.) L. Install the fan at least 1.5m (5 feet) above - Panasonic fv-05vs1 | Installation Instructions - Page 3
4 (B) For Housing Can of model: FV-05-08VSA1 Part name Long screw (ST4.2X20) Thumb screw Screw I (ST4.2X8) Screw II (ST4.2X10) Suspension bracket I Appearance Quantity 24 4 8 8 4 Suspension bracket II 4 Suspension bracket III 4 Spacer 4 WIRING DIAGRAM Fan body Red White Junction box - Panasonic fv-05vs1 | Installation Instructions - Page 4
to adaptor by using thumb screw. (Fig.1) IMPORTANT : Remove the tape from damper and adaptor before installation. As shown below: Adaptor Damper Thumb screw Remove tape A=12 inches 2. Insert the supension bracket into the fan body and adaptor. (Select the suspension bracket as shown below - Panasonic fv-05vs1 | Installation Instructions - Page 5
Fig. 3. Joist Fan body 4. Install the suspension bracket to joists by using long screws (ST4.2X20) and secure it to the fan body by using screw wiring diagram (page 3). Using wire nuts, connect house power wires to ventilating fan wires: black to black; white to white; green to green; Replace - Panasonic fv-05vs1 | Installation Instructions - Page 6
the original installation instruction to complete the motor/grille assembly installation. Ceiling inches (mm) Fig. 6 INSTALLATION II (JOIST MOUNTING- II ) 1. Disconnect plug connector from receptacle and remove adaptor from fan body before starting installation. 2. Insert the suspension bracket - Panasonic fv-05vs1 | Installation Instructions - Page 7
INSTALLATION II ( JOIST MOUNTING-II ) CONTINUED 5. Insert the fan body into joists. (Fig. 8) IMPORTANT: Make sure that adaptor claws are properly inserted into body slots. 6. Secure the fan body to adaptor by using thumb screw. Joist Conduit Circular duct Junction box cover 7. Secure the - Panasonic fv-05vs1 | Installation Instructions - Page 8
Follow step 5 to 9 of installation I (page 5~page 6) to complete the installation work. INSTALLATION IV ( BETWEEN JOIST MOUNTING ) 4 Long screws (ST4.2X20) Fig. 11 1. Before installation, Secure the fan body to adaptor by using thumb screw. (Fig.1 of page 4) 2. Insert the suspension bracket into - Panasonic fv-05vs1 | Installation Instructions - Page 9
INSTALLATION IV ( BETWEEN JOIST MOUNTING ) CONTINUED 3. Insert the fan body between joists. Make sure the fan body is level and square (perpendicular) with the joists. (Fig. 13) CAUTION: Ensure that distance B is no more than 1/2 inch (13 mm). Joists Adaptor Fan body Junction box Suspension - Panasonic fv-05vs1 | Installation Instructions - Page 10
6. (6) Install ventilating fan. 2. Installation from accessible area above fan location. (1) Inspect duct work and wiring before proceeding with installation. (2) Remove ceiling section according to Fig. 6 of page 6. (3) Install ventilating fan. INSTALLATION VII ( WALL INSTALLATION-I ) IMPORTANT - Panasonic fv-05vs1 | Installation Instructions - Page 11
original installation instruction to complete the motor/grille assembly installation. 2 Long screws (ST4.2X20) 2 Long screws (ST4.2X20) Fig. 21 INSTALLATION VIII ( WALL INSTALLATION-II ) 1. Before installation, Secure the fan body to adaptor by using thumb screw. (Fig.1 of page 4) 2. Insert the - Panasonic fv-05vs1 | Installation Instructions - Page 12
INDEPENDENT SERVICE CENTERS is maintained to support your product's warranty. (In the U.S.A.,call 1-866-292-7292 to Customer call center.) PANASONIC CONSUMER ELECTRONICS COMPANY Division de Panasonic Corporation of North America, One Panasonic Way, Secaucus, NJ 07094 PANASONIC CANADA INC
-
 1
1 -
 2
2 -
 3
3 -
 4
4 -
 5
5 -
 6
6 -
 7
7 -
8
-
9
-
10
-
11
-
12
 |
 |

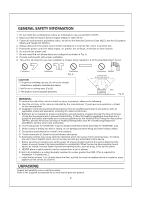
READ AND SAVE THESE INSTRUCTIOINS.
Please read these instructions carefully
before
attempting to install,
operate or service the Panasonic Ventilating Fan. Failure to comply
with instructions could result in personal injury and/or property
damage. Please retain this booklet for future reference.
Applicable to Models: FV-05VS1, FV-08VS1
SUPPLEMENTARY
INSTALLATION INSTRUCTIONS
(For Contractor Pack)
Housing Can
FV-05-08VSA1
Motor/Grille Assembly
FV-05VSB1, FV-08VSB1
Table of Contents
2
Unpacking
2
General Safety Information
I
Installation
( Joist Mounting- )
I
6-7
4-6
II
Installation
3
Supplied Accessories
3
Wiring diagram
( Joist Mounting-
)
II
III
Installation
( -Joist Mounting )
I
8
IV
Installation
( Between Joist Mounting )
8-9
V
Installation
( Wooden Header )
9
VI
Installation
( In Existing Construction )
10
Product Service
12
VII
VIII
IX
Installation
Installation
Installation
( Wall Installation- )
I
( Wall Installation-
)
II
( Wall Installation-
)
III
10-11
11
12