Pfaff 1199 Owner's Manual
Pfaff 1199 Manual
 |
View all Pfaff 1199 manuals
Add to My Manuals
Save this manual to your list of manuals |
Pfaff 1199 manual content summary:
- Pfaff 1199 | Owner's Manual - Page 1
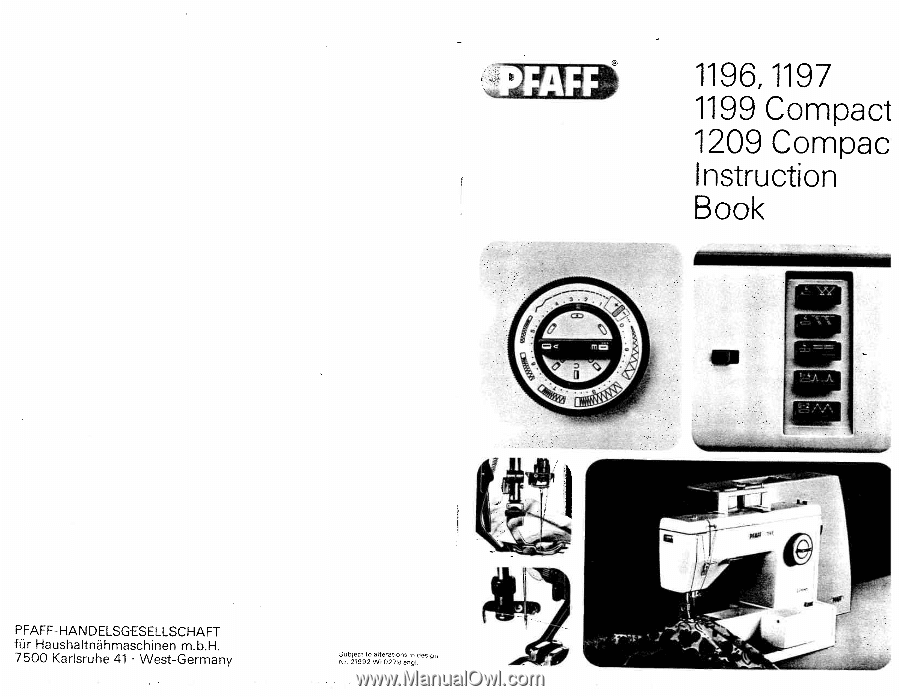
1196, 1197 1199 Compaci 1209 Compac Instruction Book PFAFF-HAN DELSGESELLSCHAFT für Haushaltnähmaschinen m.b.H. 7500 Karsruhe 41 West-Germany Subject to ajterations in design Nr 21992 Wi 0279 engI - Pfaff 1199 | Owner's Manual - Page 2
reverse sewing and dropping the feed dog 1 8 Presser bar lifter (on back of machine arm> 1 9 Needle holder with needle set screw 20 Needle plate with guide grooves 21 Handle on Models 11 99/1209 22 Accessories drawer on Models 1199/1209 23 Free arm 24 Free arm cover (enclosing sewing hook - Pfaff 1199 | Owner's Manual - Page 3
needle 1196-1199 Drawing up the bobbin thread Attaching the work support Thread cutter Ultra-Matic stitch selector (9) Straight stitch Zigzag stitch the light bulb Cleaning and oiling Threading the needle 1209 Trouble shooting Model 1196/1197 Press down catches A (marked by arrows> and swing - Pfaff 1199 | Owner's Manual - Page 4
Removing the carrying case cover, Model 1199/1209 On the Compact models the carrying case cover is not locked in position by catches and can thus be easily lifted off. Foot control receptacle Models 11 99/1209 Remove the receptacle from the machine. Before you put the machine away after sewing, - Pfaff 1199 | Owner's Manual - Page 5
Electrical connection Push plug A into the machine socket and plug B into the wall socket. Press master switch 11 . Your machine is now switched on and ready for sewing. Foot control Place the foot control under the table. Press down its pedal. The machine starts sewing. The more the pedal is - Pfaff 1199 | Owner's Manual - Page 6
against the bobbin case to make sure it has snapped into place. Upper threading Pull the thread from the spool and draw it into slot A, guide B and take-up lever 1. Then pull it into - Pfaff 1199 | Owner's Manual - Page 7
, Model 1196/1197 11 96: Turn over the foot control receptacle and attach it (A). 11 97: Incline the workplate and push it over the free arm (B) until its guide pins enter the two holes, then lower it, Attaching the work support, Model 1199/1209 Turn over the foot control receptacle and push it - Pfaff 1199 | Owner's Manual - Page 8
Thread cutter, Models 1196/1199 There is a sharp-edged slot on the back of the presser bar which serves as a thread cutter. Raise the sewing foot. Pull the work back out of the machine. Place the threads in the thread cutter slot and pull them downwards to cut them. Thread cutter, Model 1209 The - Pfaff 1199 | Owner's Manual - Page 9
Needle position The needle can be set to different positions in the needle hole. Turn knob 1 0 until the symbol of the needle position desired is positioned below mark A. = central needle position (normal) = right needle position = left needle position Reverse sewing and dropping the feed dog - Pfaff 1199 | Owner's Manual - Page 10
Upper tension (16) A = Setting mark. The normal tension setting is in the green range between 3 and 5. The higher the number, the tighter the tension. Lower tension B = Regulating screw. Turn it left for a looser tension, or right for a tighter tension. C = Both tensions are correct. = Upper tension - Pfaff 1199 | Owner's Manual - Page 11
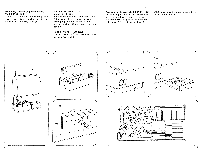
____ Utility stitches A Elastic stitch B Blindstitch C Elastic triple straight stitch D Overlock stitch E Cross stitch 3 Eraser button for releasing the pushed buttons. Utility-stitch setting The setting of Ultra-Matic stitch selector 9/10 which is required for a specific utility stitch is - Pfaff 1199 | Owner's Manual - Page 12
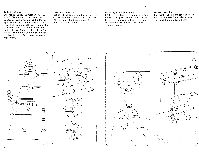
0E D - Pfaff 1199 | Owner's Manual - Page 13
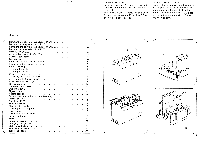
are intended for special sewing jobs. They can be obtained from your Pfaff dealer. ccessory Cordvig set Coroing fool, 3 grooves (twin needle with for free-arm models Needle plate with round needle hole for flatbed models Eoge guide (fastening screw 93-040 959- 25 Ordering No. 93-107 560-91 93 - Pfaff 1199 | Owner's Manual - Page 14
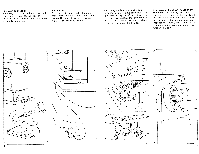
B. Cleaning and oiling 11 96: Remove cover 1 5. Pull needle plate forward and take it out. 1197-1209: Take out the screws and remove the needle plate. Open cover 24. Remove the bobbin case. Clean the parts in the vicinity of the sewing hook and the feed dog with a soft brush. Do not - Pfaff 1199 | Owner's Manual - Page 15
and push it up as far as it will go. Insert new needle. Note Needle and Thread Chart. Let machine feed the work alone. Only guide the material lightly. When inserting the bobbin case, press against it until t snaps into place. 24 / Cause: 4. Seam is not uniform Tension out of adjustment
-
 1
1 -
 2
2 -
 3
3 -
 4
4 -
 5
5 -
 6
6 -
 7
7 -
8
-
9
-
10
-
11
-
12
-
13
-
14
-
15
 |
 |
1196,
1197
1199
Compaci
1209
Compac
Instruction
Book
PFAFF-HAN
DELSGESELLSCHAFT
für
Haushaltnähmaschinen
m.b.H.
7500
Karsruhe
41
West-Germany
Subject
to
ajterations
in
design
Nr
21992
Wi
0279
engI