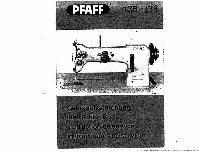
Pfaff 138 Owner's Manual
Pfaff 138 Manual
 |
View all Pfaff 138 manuals
Add to My Manuals
Save this manual to your list of manuals |
Pfaff 138 manual content summary:
- Pfaff 138 | Owner's Manual - Page 1
- Pfaff 138 | Owner's Manual - Page 2
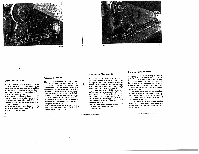
switched on and operalad by persons who have been instructed accordingly. • When eschanging gauge parts (e.g. needle, presser toot, needle plate, feed dog, bobbin). threading the machine or leaving it, arid when making maintenance work, the machine must be disconnected either by actuating the master - Pfaff 138 | Owner's Manual - Page 3
parts with a clean rag. Apply a few drops of kerosene to all oiling points marked red on the machine (end by arrows in Figs. 1103> and run the machine briefly with needle thread and bobbin case removed and the presser foot raised. Then apply a few drops ot Ptaff sewing machine tél. Pfaff 280-1-120 - Pfaff 138 | Owner's Manual - Page 4
Pfaff 138 in Ausfuhnurrg A kSnnen teine, in AusfUhnung B mittlere Malerialieri verarboilet werden. Nadel- und Gamdicke richion sich dabei nach dem zu vemithenden Material. Die nachslehenden Angaben sollen als Anhalls punkte dienen. Needle and thread sizes In model A the Pfafl 138 is used for sewing - Pfaff 138 | Owner's Manual - Page 5
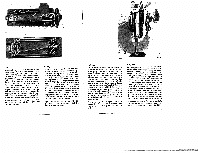
screw 4 and adjust the position of the tension bracket sideways. The thread tension is regulated by turning nut 8. The arrangement of the bobbin winder on powerdriven machines is illustrated In Fig. 5, that of foot-driven machines in Fig. 6. Bobinage du fil de canette Placer Ia canette sur laxe - Pfaff 138 | Owner's Manual - Page 6
. Lift the bobbin case latch and insert the bobbin case with the bobbin into the sewing hook. Close the latch and press against the bobbin case lightly until you hear it snap into place. :9 :, .1' /2 I Threading the needle Switch off the machine. Lead the thread through thread guide 1, then, as - Pfaff 138 | Owner's Manual - Page 7
Drawing up the bobbin thread Switch off the machine. Hold the end of the needle thread and turn the balance wheel in its normal direction of rotation until the bobbin thread comes up through the needle hole ins loop. Draw the bobbin thread out of the needle hole and lay both threads back under the - Pfaff 138 | Owner's Manual - Page 8
starker, nach links (fl-") achwticher. Regulating the bobbin thread tension Turn the regulating screw clockwise for a tighter stitches. The numbers on the scale indicate the approximate stitch length in millimeters. Reverse sewing Push feed regutator lever S up as far as it wilt go and hold in - Pfaff 138 | Owner's Manual - Page 9
turning knob G. When knob 0 is turned so that pointer Z points at 0, the machine sews straight stitches. Locking the stitch width slide in position lighten screw B. Turn knob 0 so que,incluso al cambiar de ancho Tie zig zag,se consigue exactamente el mismo ancho si girar hacia atrits at baton 0. 17 - Pfaff 138 | Owner's Manual - Page 10
pres sure. Raising the presser foot The presser foot can be raised by means of the hand lever at the back of the machine head or by operating the ôn del pie prensatelas El pie prensatelas puade elavarse madiante a palanca manual colocada defrtis dais cabeza de a maquina, o bieri accionando Ia - Pfaff 138 | Owner's Manual - Page 11
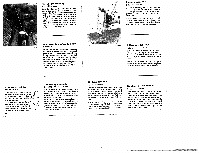
Cleaning Clesn the sewing hook and the parts in its vicinity each day. To do this, off the needle plate switch off the machine, take and remove the dust In the hook area with a soft brush. Never use metal objects for removing tightly packed lint. jFaomrmainthgoirnotuhgehhocolekanraincegwoaryf, - Pfaff 138 | Owner's Manual - Page 12
properly covered. o Turn both knob G and thumb nutS to "0' and make 3 to 4 tying stitches. 0 Raise needle and sewing foot, remove the work by pulling it toward the rear, and trim the threads. Cut the buttonhole open between the seams (pre ferably using a seam ripper for that purpose), If you preter - Pfaff 138 | Owner's Manual - Page 13
the presser toot by the buttonhole foot with gimp guide and screw on the edge guide (Fig. 22). Before your raise the presser bar, make sure you swing the edge guide out of action by turning it to the right. Increase the needle thread tenalon and reduce the bobbin thread tension. Set the stitch width - Pfaff 138 | Owner's Manual - Page 14
-91 foot 91-051 277-93 Ba 6.0, cover plate 91-041 844-25 Replace the presser tool by the cording fool (Fig. 23). Slip prong a of the cording slide into can be varied from 2 to 3, 4.5 or 6 mm, depending on the machine version. Subct. -915/05 Turn screw T counter-clockwise to increase the needle gauge, - Pfaff 138 | Owner's Manual - Page 15
part No. of zigzag foot 91-041 296-93) Sew the first seam with great care. Then set the quilting gauge to the desired distance between seems and guide the material while sewing egujero. Pars esegurar a coslura, ponga el ancho de zig zag en o0.y haga unas puntadas de rernate. Wattierung absteppen - Pfaff 138 | Owner's Manual - Page 16
foot (Pad-No. 91 744 700-91) Fitted with this foot machine unless the presser bar has been lowered. For sewing thin fabrics adjust bight limiting screws and g with the aid of a screwdriver so that the needle will be slightty deflected. Operation: During sewing guide a Pfaff 138 por Ia parte derecha en - Pfaff 138 | Owner's Manual - Page 17
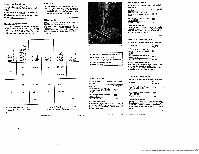
Nadelbewegung angeeignet hat. Zweckmittlig Slickrahrnen verwenden (FIg. 32). 32 Cover plate (Part No. 91 -041 251-25) For darning and enrbroidenng. 1, Remove the presser foot. 2. Slip the prong of the cover plate into the hole of the needle plate (Fig. 30), turn it over and secure it iii position - Pfaff 138 | Owner's Manual - Page 18
Bandkante verläuft. Schraube A wieder testziehen. Bias binder (Part No. ot attachment: 91-041 894-23, part No. of foot: 91-041 895-04) Secure the bias binder to the nb DunalnegsserttheNbeevlet rguruanrdahpasowbeere-ndrpivroepnermlyafcihttiende. Attention: machines No jamais mettro it commando par - Pfaff 138 | Owner's Manual - Page 19
posictón spriete fuertemente Ia tuerca de mariposa 1. Ursachen von Störungen Trouble shooting Stichauslassen Ursache: 1 Falsche Einftidelung 2. Falsches Nadelsyslem 3. 4. Nadel gednlltes Sam Skipping of stitches 1. Cause: Machine threaded improperly. 2. 3. 4. 5. Wrong needle system - Pfaff 138 | Owner's Manual - Page 20
transportador inapropiada pars el trabajo 4. Price presion del prensatefas 5. Diontosdoltransportsdorllenosde polvo 6. Puntas do los dientes muy schatadas VerscheiI3teile / Wearing parts -6/21 x 4,5 91-11355-91 91-54] 522-131:0 61-013168-91 L 51-826961-5414] Pièces d'usure / l-'iezas uo - Pfaff 138 | Owner's Manual - Page 21
. Use correct needle size for Be sure pressure on foot is thread. sufficient when sewing heavy fabrics. Stitches Make Loop sure tensions are properly balanced and that machine is threaded correctly. Machine Binds Clean thread, dust and If condition continues, kerosene to oil holes
-
 1
1 -
 2
2 -
 3
3 -
 4
4 -
 5
5 -
 6
6 -
 7
7 -
8
-
9
-
10
-
11
-
12
-
13
-
14
-
15
-
16
-
17
-
18
-
19
-
20
-
21
 |
 |
