Pfaff creative 2124 Owner's Manual
Pfaff creative 2124 Manual
 |
View all Pfaff creative 2124 manuals
Add to My Manuals
Save this manual to your list of manuals |
Pfaff creative 2124 manual content summary:
- Pfaff creative 2124 | Owner's Manual - Page 1
creative 2124 Owner´s manual - Pfaff creative 2124 | Owner's Manual - Page 2
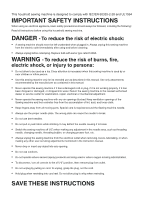
needle, changing needle, threading bobbin, or changing presser foot, etc. • Always unplug the sewing machine from the electrical outlet when removing covers, lubricating, or when making any other user servicing adjustments mentioned in the instruction manual. • Never drop or insert any object into - Pfaff creative 2124 | Owner's Manual - Page 3
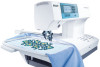
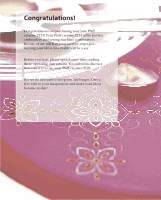
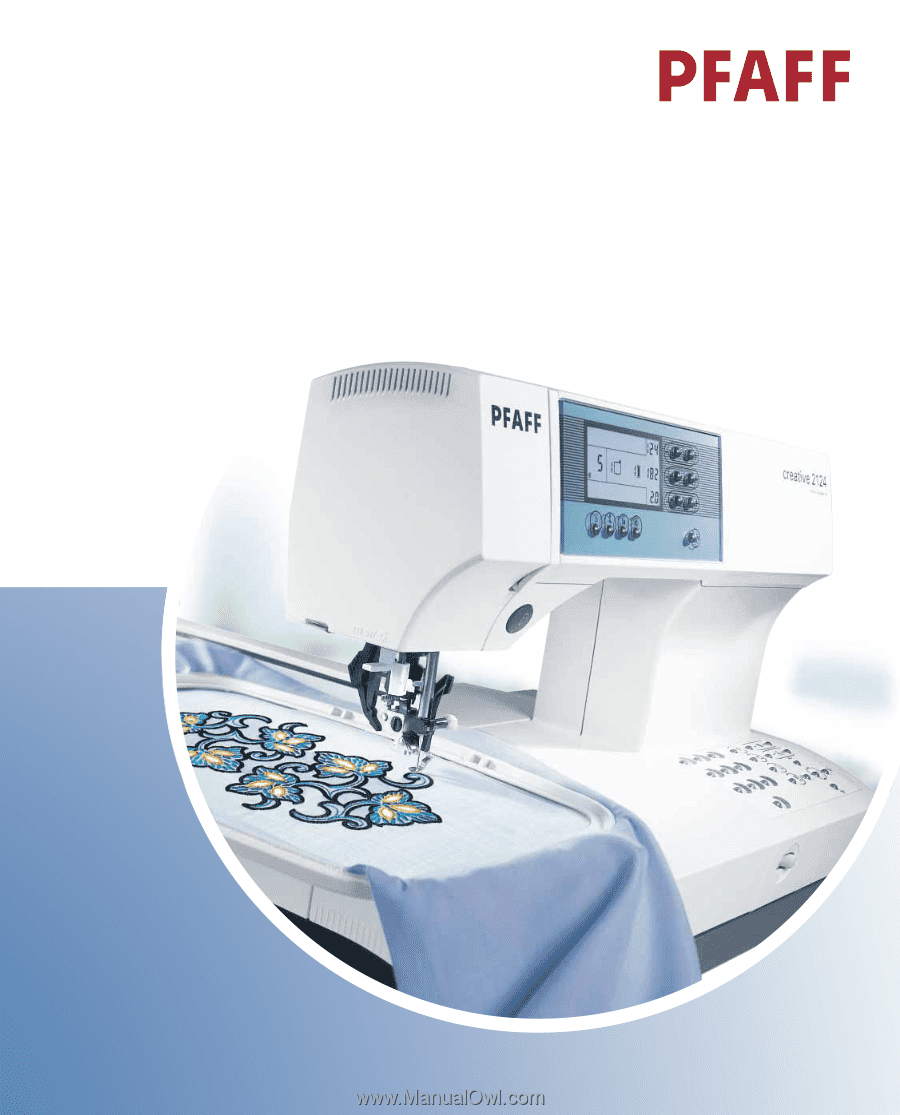
your new Pfaff creative 2124! Your Pfaff creative 2124 is the perfect embroidery and sewing machine combination. Its ease of use will free your creative engergies turning your ideas into reality will be a joy. Before you start, please spend some time reading these operating instructions. You - Pfaff creative 2124 | Owner's Manual - Page 4
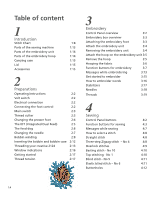
Chart 1:8 Parts of the sewing machine 1:13 Parts of the embroidery unit 1:14 Parts of the embroidery hoop 1:14 Carrying case 1:15 Lid 1:15 Accessories 1:15 2 Preparations Operating Instructions 2:2 Volt switch 2:2 Electrical connection 2:2 Connecting the foot control 2:2 Main - Pfaff creative 2124 | Owner's Manual - Page 5
13 Cross-hem Knit stitch 5:13 Rolled hem with foot No. 7 5:14 Rolled hem with Stitch No. 3 5:14 Shell edging 5:15 6 Maintenance Changing the needle plate 6:2 Cleaning 6:2 Changing the light bulb 6:3 Sewing problems and their solutions 6:4 Index 6:6 Technical data/package contents - Pfaff creative 2124 | Owner's Manual - Page 6
- Pfaff creative 2124 | Owner's Manual - Page 7
Introduction - Pfaff creative 2124 | Owner's Manual - Page 8
mm For seaming and topstitching. Many needlepositions 6 available for topstitching or sewing in zippers. For reinforced seams such as stitch trousers, under 6 position eyelets. 13 Lightning stretch stitch For joining light weight stretch fabrics and 6 decorative embellishment. 1:8 - Pfaff creative 2124 | Owner's Manual - Page 9
Quilting, appliqué or pinstitching For hand-look quilt appliqué or pinstitching. 6 20 Antique Quilt stitch Special hand-look quilt stitch. Use for topstitching 6 and decorating quilting and sewing projects. 21 Quilt Stitch For topstitching quilt projects with a hand-look 6 stitch. 1:9 - Pfaff creative 2124 | Owner's Manual - Page 10
and home decorating. 30 Geometric decorative stitch For embellishing sewing projects. Decorative joining 6 31 Geometric decorative stitch of stitches to create new cross stitch 6 borders and patterns. 38 Open Scallop with decorative edge Decorative stitch. Use with decorative threads - Pfaff creative 2124 | Owner's Manual - Page 11
stitch Application Width up to mm Satin decorative stitch. Use with decorative threads 6 for beautiful motifs. Satin decorative stitch. Use with decorative threads 6 for beautiful motifs. Satin decorative stitch. Use with decorative threads 6 for beautiful motifs. Satin decorative stitch - Pfaff creative 2124 | Owner's Manual - Page 12
1 2 34 23 5 67 8 22 21 20 19 18 16 17 29 30 28 27 31 32 26 25 24 36 39 37 38 1:12 9 10 11 12 13 14 15 33 34 35 - Pfaff creative 2124 | Owner's Manual - Page 13
door 25. Free arm 26. Sewing light bulb (Max. 5 W.) 27. Thread cutter 28. Thread take-up 29. Take up lever 30. Thread guide 31. Spool holder with spool cap 32. Hole for second spool holder 33. Lid with stitch chart 34. Bobbin winder 35. Creative smart card slot 36. Needle holder with retaining - Pfaff creative 2124 | Owner's Manual - Page 14
Parts of the embroidery unit 40. Release button for removing the embroidery unit 41. Under arm guide 42. Fastening latch for fitting to the machine 43. Connection plug to the machine 44. Rotating table for the embroidery arm 45. Metal guide for fitting the embroidery hoop 46. Recessed grip for raising - Pfaff creative 2124 | Owner's Manual - Page 15
of the stitch, is the recommended presser foot for that stitch, e.g. Stitch No. 2, use presser foot No. 0. Accessories Embroidery unit With the embroidery unit comes four clips, the embroidery foot, the hoop (225x140), the embroidery booklet and the embroidery smart card 300 s foot. 1:15 - Pfaff creative 2124 | Owner's Manual - Page 16
fabric but also on your sewing machine. This discoloring may be sewing/embroidering to avoid the discoloring. Arranging the accessories The standard accessories are marked with numbers. Arrange the parts in the respective compartments of the accessory tray. Accessories Accessories for creative 2124 - Pfaff creative 2124 | Owner's Manual - Page 17
accessories) Standard Presser Foot with IDT 820250-096 Fancy Stitch Foot with IDT 820253-096 Fancy Stitch Foot 820278-096 Blindhem/Overlock Foot 820256-096 PInretrpoadruacttioionns Zipper Foot with IDT 820248-096 Buttonhole Foot 820295-096 Darning Foot 820243-096 Rolled Hem Foot 3 mm 820249-096 - Pfaff creative 2124 | Owner's Manual - Page 18
Edge Guide/Quilting Guide 820251-096 Bulb Remover/Needle Plate Changer 820292-096 Buttonhole Guide 820294-096 Second spool holder Seam ripper Brush 93-033 063-44/000 99-053 016-91/000 93-847 979-91/000 1 Needle box - Pfaff creative 2124 | Owner's Manual - Page 19
Preparations - Pfaff creative 2124 | Owner's Manual - Page 20
the proper outlet. DO NOT modify the plug in any way! Connecting the foot control Connect the plug of the foot control to the connection socket (14) of the sewing machine. The sewing speed is controlled by pressing the foot control. The foot control AT 0070 must be used for this sewing machine. 2:2 - Pfaff creative 2124 | Owner's Manual - Page 21
Preparations Main switch When the main switch (15) is switched on (switch function I) the sewing lamp lights up and stitch No. 1 is indicated in the creative 2124 window. The sewing machine is now ready to function. "0" = OFF "I" = ON Thread cutter Pull the thread from the back to the front up over - Pfaff creative 2124 | Owner's Manual - Page 22
Snap off the presser foot Switch off the main switch. Press the front part of the presser foot upwards and at the same time the rear part downwards until it disengages from the presser foot holder (19). Snap on the presser foot Place the presser foot under the presser foot holder (19), so that when - Pfaff creative 2124 | Owner's Manual - Page 23
Dual Feed) For sewing any fabric precisely Pfaff provides the ideal solution: the Integrated Dual Feed, IDT system. As on industrial machines, the IDT feeds the fabric from the top and bottom at the same time at the same stitch length. The fabric is fed precisely. On light fabrics such as silk - Pfaff creative 2124 | Owner's Manual - Page 24
sewing work such as free-motion quilting or darning or when embroidering, the feed dog must be lowered. On your Pfaff creative 2124 there are two different methods for lowering the feed dog, one on the outside of the machine and one inside the bobbin door. For either method: Raise the presser foot - Pfaff creative 2124 | Owner's Manual - Page 25
Preparations Bobbin winding Preparing the machine for bobbin winding Place an empty blue bobbin on the bobbin winder aligning the small rectangular hole on the bottom side of the bobbin with the small black pin on the bobbin winder. The Pfaff logo is facing up. Push the bobbin to the right. Note: - Pfaff creative 2124 | Owner's Manual - Page 26
sewing thread on the spool pin. Slide a spool cap, slightly larger than the spool, firmly against the spool. Three different spools caps to accomodate any type of thread spool are included with your machine Turn on the machine. Hold the end of the thread firmly and press the foot control. As soon - Pfaff creative 2124 | Owner's Manual - Page 27
pin on the bobbin winder, making sure that the C Pfaff logo is facing up. Wrap the thread tail clockwise around the bobbin. Push the bobbin-winding lever to the right. Hold the end of the thread tail firmly and press the foot control. As soon the bobbin is full, the winding action will - Pfaff creative 2124 | Owner's Manual - Page 28
spool pin Insert the second spool pin in the hole provided. Threading Thread as shown on page 9. Turn on the machine. B Hold the end of the thread firmly and press the A foot control. As soon as the bobbin is full, the winding action will stop automatically. Cut the thread, push the bobbin to - Pfaff creative 2124 | Owner's Manual - Page 29
the latch of the bobbin case and pull the bobbin case out of the machine. Release the latch and take the empty bobbin out of the bobbin case. bobbin case Lift latch E and push the bobbin case fully onto pin C of the sewing hook. Opening D of the bobbin case must face upwards. Check: Pull the bobbin - Pfaff creative 2124 | Owner's Manual - Page 30
creative 2124 Switch off the main switch. Raise the presser foot lifter. Place the thread on the spool pin and fit a spool cap either the same size or slightly larger. Using both hands, pull the thread into thread guide A from the front. Place the thread from right to left into the pretension guide - Pfaff creative 2124 | Owner's Manual - Page 31
E F Preparations Integrated Needle Threader In order to make threading the needle easier and quicker, use the Pfaff Integrated Needle Threader. Lower the presser foot. Press the threader down with the handle. Threader hook F swivels through the needle eye. Bring the thread under the thread hook E - Pfaff creative 2124 | Owner's Manual - Page 32
the needle thread, press the foot control so the needle moves down and up one time. Pull the needle thread to draw up the bobbin thread. Close the bobbin door and pull the top and bobbin threads under the presser foot to the left. Presser foot lifter The presser foot is raised or lowered with - Pfaff creative 2124 | Owner's Manual - Page 33
Thread break 59. Embroidery card indication 60. Presser foot warning 61 62 embroidery card containing both designs and fonts 62. Stitch or design number 63. Hoop number 64. Design rotation 65. Hoop indicator 66. Lower the feed dog 67. Stitch selected can be mirrored 68. Color block number 69. Manual - Pfaff creative 2124 | Owner's Manual - Page 34
To begin sewing on your new Pfaff creative 2124, do a straight stitch first. When you turn on your machine, the straight stitch is automatically selected. Take a piece of fabric, fold it and place it under the presser foot. Lower the presser foot and begin to sew by stepping on your foot control. If - Pfaff creative 2124 | Owner's Manual - Page 35
Preparations Correct top tension - How to get it This machine will automatically preset the tension for different types of stitches. Depending on what type of fabric and threads you are using, manual adjustments might be needed. If you find that the bobbin thread is visible on the top side of the - Pfaff creative 2124 | Owner's Manual - Page 36
- Pfaff creative 2124 | Owner's Manual - Page 37
Embroidery - Pfaff creative 2124 | Owner's Manual - Page 38
length, + and - buttons 88. Thread tension, + and - button 89. Single pattern/monochrome Control panel buttons on the base of the machine 90-99 Stitch/design selection buttons 100. Embroidery design/font select 101. Hoop size select 102. Parking 103. Orbiting 104. Rotate 105. Color stepping, + and - Pfaff creative 2124 | Owner's Manual - Page 39
Embroidery Embroidery box overview The embroidery unit will be delivered together with four clips, the embroidery foot, the hoop (225x140), the 300 s- creative smart card and the booklet. S T 1. 2. Attaching the embroidery foot 1. Remove the standard presser foot. Carefully loosen the screw - Pfaff creative 2124 | Owner's Manual - Page 40
the main switch. The connecting socket (A) for the embroidery unit is found on the back side of the sewing machine. Push the embroidery unit parallel from the back to the front into the socket. A Make sure that the under arm guide (A) on the embroidery unit is placed between the base plate and the - Pfaff creative 2124 | Owner's Manual - Page 41
to the right. Slide the hoop along the machine's metal guide (45) behind the release lever (48), until the hoop locks in place. Remove the hoop To remove the hoop, push down the release lever (48) of the embroidery unit and pull the hoop forwards and away. The presser foot must be in the highest - Pfaff creative 2124 | Owner's Manual - Page 42
, or areas left unembroidered. The fabric is hooped as follows: 1. Loosen the retaining screw (A); the inner hoop can now be removed. 2. Lay the outer hoop in front of you with the guide pins (B) pointing to the right, for fitting to the embroidery unit. The retaining screw is now pointing towards - Pfaff creative 2124 | Owner's Manual - Page 43
Pfaff creative 2124, you need to choose a hoop for your embroidery. There are 3 different hoops available: 225x140 mm (no 1 in the window), 120x115 mm (no 2) and 80x80 mm (no 3). To select a hoop, press the hoop select button (101) to jump between the hoops. For best embroidery results, the machine - Pfaff creative 2124 | Owner's Manual - Page 44
design/font select The embroidery design/font select button (100) is used for switching between designs and fonts. If a card contains only fonts, a number for each font will be shown on the window (A). If a card contains both designs and fonts, the small hoop icon will be shown in the window - Pfaff creative 2124 | Owner's Manual - Page 45
tie-off/basting icon (A) will be shown on the window. The machine will then baste a square, outlining the design area. The basting function can be useful when working with fabrics that can not be hooped tightly. You can then use the basting function to baste the fabric and stabilizer together. 3:9 - Pfaff creative 2124 | Owner's Manual - Page 46
button (83) in embroidery mode, the hoop will move forward to make it easier for you to cut jump stitches. At this point a flashing C will replace the hoop number (A). Press the button one more time and the hoop will move back to where it was. Sew slow When pressing the sew slow button (84) the - Pfaff creative 2124 | Owner's Manual - Page 47
shown on the window. To deactivate the function press the monochrome button again. Stitch/design selection button In embroidery mode the stitch/design selection buttons (90-99) are used for selecting a design. If the card contains both designs and fonts the icon (A) will appear on the window. If the - Pfaff creative 2124 | Owner's Manual - Page 48
reverse button In the embroidery mode the reverse sewing button (108)is a start/stop button. Use the button when you want to start your embroidery and when you want to stop. Keep the button depressed in order to start the embroidery. Note: You can also use the foot control when embroidering. Design - Pfaff creative 2124 | Owner's Manual - Page 49
Insert the embroidery smart card When the embroidery card flashes (A), you should insert an embroidery card. Lower your feed dog When this message (A) appears you should lower your feed dog. Thread broken When the top thread is broken the icon (A) is shown in your window. Rethread your machine, top - Pfaff creative 2124 | Owner's Manual - Page 50
stitches your Pfaff creative 2124 stops and flashes with the cut symbol (A), telling you to cut the thread tail. When you have cut the thread, press the reverse button again, and the machine will continue to embroider. Appliqué and cutwork stop When embroidering an appliqué embroidery or a cutwork - Pfaff creative 2124 | Owner's Manual - Page 51
the embroidery foot and thread the machine. 2. Attach the embroidery unit and put the presser foot in the up position. Turn on your machine. 3. The machine prompts you to press the hoop selection button so that the machine can calibrate. 4. Insert your embroidery creative smart card and choose - Pfaff creative 2124 | Owner's Manual - Page 52
How to embroider words With your Pfaff creative 2124, the 300 s-card is included. On the 300 s-card there are 17 designs and 2 different fonts, Block and Monogram. 1. Attach the embroidery foot and thread the machine. 2. Attach the embroidery unit and put the presser foot in the up position. Turn on - Pfaff creative 2124 | Owner's Manual - Page 53
-away stabilizers are torn away after the design is stitched and are used for stable, woven fabrics such as denim, woven cotton or blends, linen etc. When pulling the stabilizer from the embroidery you should always support the stitching. Iron-On stabilizer Iron-On stabilizers are temporarily fused - Pfaff creative 2124 | Owner's Manual - Page 54
hoop the stabilizer with the paper side facing the top. Then lightly scratch the surface and remove the paper. You now have a sticky side where you can place the fabric that you will embroider on. You can use the basting function to make sure that the fabric stays in place. When the embroidery is - Pfaff creative 2124 | Owner's Manual - Page 55
lower the speed and use the vertical spool pin. Place the thread on a spool holder using a felt pad and use a metallic needle. Bobbin thread When embroidering you should use a special bobbin thread. The bobbin thread is thinner than normal sewing thread and prevents embroidery build-ups on the - Pfaff creative 2124 | Owner's Manual - Page 56
outside the straight stitch line. Slide the hoop back onto the embroidery unit and continue embroidering to finish the appliqué edges and the entire embroidery. Cutwork embroidery All cutwork embroideries are marked with an A in Pfaff creative cards/cds design booklets. To embroider cutwork designs - Pfaff creative 2124 | Owner's Manual - Page 57
Sewing - Pfaff creative 2124 | Owner's Manual - Page 58
tension, + and - button 89. Single pattern/monochrome Control panel buttons on the base of the machine 90-99 Stitch/design selection buttons 100. Font select (not active in sewing mode) 101. Hoop select (not active in sewing mode) 102. Parking (not active in sewing mode) 103. Orbiting (not active in - Pfaff creative 2124 | Owner's Manual - Page 59
set the needle to automatically stop in the down position when you stop sewing. When the function is active, the icon (A) will be shown in the window of your Pfaff creative 2124. Note: If you tap on your foot control while sewing, the needle can be raised or lowered. This does not A change the - Pfaff creative 2124 | Owner's Manual - Page 60
this button while sewing, the machine sews in reverse for as long as you keep the button pressed. If you press the reverse button while the machine is stopped, the machine sews in reverse until you press the button again. When sewing a buttonhole, the reverse button is used for stepping between - Pfaff creative 2124 | Owner's Manual - Page 61
Sewing Stitch width Change the stitch width by pressing the + and - buttons (86). The stitch width can be changed in 0.5 mm steps, from 0 mm to 6.0 mm. When you have reached the limit you will hear a beep. Stitches 1, 2 and 11 are side position stitches. This means that you can use the + and - - Pfaff creative 2124 | Owner's Manual - Page 62
Balancing buttonholes You can also use the stitch length buttons for balancing a buttonhole. By keeping the is active until another stitch is selected. The control panel of the machine: stitch/ design selection buttons On your Pfaff creative 2124 you can choose between 52 different stitches. To - Pfaff creative 2124 | Owner's Manual - Page 63
should lower the presser foot (37). The warning will disappear when you have started to sew. Raise the feed dogs For normal sewing the feed dogs should needle warning appears, you should not sew with a twin needle. Otherwise the needle can break and the presser foot can be damaged. Top thread broken - Pfaff creative 2124 | Owner's Manual - Page 64
stitch to sew in a zipper or topstitch along the edge of a collar. Your Pfaff creative 2124 has 13 needle positions that can be adjusted with the stitch width -/+ buttons. Tip: Use the "needle up / down" button to easily pivot at collar points. You can also just tap on the foot control to set - Pfaff creative 2124 | Owner's Manual - Page 65
stretch fabrics, your creative 2124 provides a selection of overlock stitches. These stitches join multiple layers of fabric and overcast them in one operation. These stitches can stretch and are more durable than standard stitches. Tip: Use blind stitch foot No. 3 when sewing overcast seams. This - Pfaff creative 2124 | Owner's Manual - Page 66
10 For basting fabrics together, use stitch no 10. Each time you press the foot control, the machine will sew one stitch at a time. • Lower the feed dog and disengage the IDT. • Place the fabric under the presser foot and put the presser foot in the darning position. • Sew one stitch, then move the - Pfaff creative 2124 | Owner's Manual - Page 67
Sewing Blindhem stitch- No 5 The blindhem stitch is used to make invisible hems on skirts, trousers and catch a small amount of fabric. If the stitches are visible on the right side, adjust edge guide A by turning adjusting screw B, until the stitch that catches the hem just barely shows. Stitch - Pfaff creative 2124 | Owner's Manual - Page 68
Buttonholes Your Pfaff creative 2124 has the perfect buttonhole for every fabric and garment. Whether you wish to sew buttonholes on jackets, pants (trousers), blouses or stretch fabrics, 2 different buttonholes give your garments the professional touch. Insert the buttonhole guide to support the - Pfaff creative 2124 | Owner's Manual - Page 69
with a fabric pen, where you want the buttonhole and place the fabric under the buttonhole foot. Lower the presser foot. The machine will start to sew the right column and sewing forward pressing the foot control. 3. Sew the column as far as you want the buttonhole to be. Stop and press the reverse - Pfaff creative 2124 | Owner's Manual - Page 70
press your foot control the machine will automatically sew the next buttonhole Use pearl cotton or regular gimp thread. Insert the buttonhole guide. Place the center of a length of gimp cord over the metal hook extending from the center back of the buttonhole foot. Pass the cord ends under the foot - Pfaff creative 2124 | Owner's Manual - Page 71
make sure the needle also enters the right hole of the button. YOu may need to adjust the needle swing with the width +/buttons. • Continue sewing on the button. The machine will complete the program for you. Tip! Use the optional Sew on Button Foot for easy optimal results. 4:15 - Pfaff creative 2124 | Owner's Manual - Page 72
fabric. In this case, use presser foot 1 with the Integrated Dual Feed engaged. Fabrics that shift or stretch easily should be reinforced with watersoluble or lightweight stabilizer. Buttonholes are particularly stable and durable if a gimp cord is inserted while sewing (see " Buttonholes, with gimp - Pfaff creative 2124 | Owner's Manual - Page 73
Decorative sewing - Pfaff creative 2124 | Owner's Manual - Page 74
General notes on decorative sewing To enhance your own home textiles or garments your creative 2124 offers you a wide variety of fancy and decorative stitches. Create a greater variety of embellishments by combining different patterns, colors and sizes. Use specialty decorative threads to enhance - Pfaff creative 2124 | Owner's Manual - Page 75
of stitching directly across from the first. Sew stitch no. 3; stitch length 0.2 mm and stitch no. 50 along each side of your center embroidery. Your completed border should now have six rows of decorative stitching. Tip: Use the edge of your foot as aguide. Twin needle Additional decorative effects - Pfaff creative 2124 | Owner's Manual - Page 76
using templates. A seam allowance of ¼" (6 mm) should already be included in the templates. Snap on the optional ¼" quilting foot. Sew the pieces together following the design instructions and more practical with your Pfaff creative 2124, e.g. with stitch no. 11 using monofilament thread on top - Pfaff creative 2124 | Owner's Manual - Page 77
Pfaff creative 2124 with a straight stitch (no. 1), stitch length 2.5, center needle position and the IDT engaged. Use the optional narrow edge foot for optimal guiding when sewing through thick quilts. Test sew to make sure your stitching is proper before you start quilting your piece. Tip: Use the - Pfaff creative 2124 | Owner's Manual - Page 78
Pfaff creative 2124 for stippling with a Straight Stitch (1) and lower the feed dogs. Attach the free motion quilting foot (extra accessory).Lower the pressser foot Tip: Use the Free Motion Guide grip to help move the quilt in a more consistent way. The Quilting table and Free Motion Guide foot are - Pfaff creative 2124 | Owner's Manual - Page 79
block before the quilt is put together. Set your Pfaff creative 2124 with stitch no. 3, stitch length 0.5, stitch width 4-6 mm, presser foot no. 2. Adhere the appliqué piece to the quilt block. Place stabilizer behind the block and appliqué. Sew around the appliqué with the satin stitch. Make sure - Pfaff creative 2124 | Owner's Manual - Page 80
several times (23 or 24). Use the recommended presser foot for that stitch. Thread the top and bottom with sewing. Use the sew slow button (84) to reduce your speed while using the wing needle. Hemstitching This is a technique everyone recognizes as embroidered by hand. With your Pfaff creative 2124 - Pfaff creative 2124 | Owner's Manual - Page 81
of the optional Pfaff Pintuck feet to easily guide your rows where needed. Tip: Use the optional pintuck blade and pintuck foot to accentuate the tucks. See page 6:8 for directions using the pintuck foot. Replace the standard sewing needle with a 2.0 mm twin needle. Set your creative 2124 for normal - Pfaff creative 2124 | Owner's Manual - Page 82
would draw with a pencil, using the various types of threads that are on the market today and your Pfaff creative 2124. You can also vary the shade of your Free Motion Sewing by sewing in different directions or patterns. Top tension 2-3 Presser foot Darning foot Feed dog Lowered Needle size - Pfaff creative 2124 | Owner's Manual - Page 83
it is important to sew close to the teeth of the zipper. The zipper foot can be snapped to the presser foot ankle on the left or used for sewing seams where strength is needed, such as under arm and crotch seams. The heavier the fabric, the longer the stitch length required. Your Pfaff creative 2124 - Pfaff creative 2124 | Owner's Manual - Page 84
embroidery hoop. Select the straight or zigzag stitch. Put the presser foot in the darning position. To put the presser foot in the darning position you should lower the presser bar lifter slowly and push it to the rear until it engages in the darning position. Draw up the bobbin thread and sew - Pfaff creative 2124 | Owner's Manual - Page 85
this line. Leave about 4 - 5 inches (10-13 cm) of thread at the beginning and end of the seam. • Sew 1 or 2 more rows of stitching, using the edge of the presser foot as a guide. • Gather the fabric by pulling the bobbin (bottom) threads to the desired fullness. • Distribute the gathers evenly and - Pfaff creative 2124 | Owner's Manual - Page 86
Rolled hem with foot No. 7 Use the rolled hemmer to finish the edges of blouses, scarves at its lowest point. Raise the presser foot and slide the fabric into the scroll of the foot. • Lower the presser foot and while sewing, guide the fabric edge evenly into the foot. When roll-hemming, make sure the - Pfaff creative 2124 | Owner's Manual - Page 87
tension to create a deeper shell tuck. • Finish the raw edge and press the seam allowance to the left. • While sewing, make sure the fabric runs under the presser foot at half of the foot width, and the blind hem swings over the folded edge. Tip: Add a colored pearl cotton thread on the folded - Pfaff creative 2124 | Owner's Manual - Page 88
Maintenance - Pfaff creative 2124 | Owner's Manual - Page 89
. Removal • Raise the presser foot. Position the needle plate changer front until you hear it snap in place. Before you start sewing, check that the needle plate is lying flat. Tip: dogs and hook area with the brush. • Clean the sewing machine after every 10 - 15 hours of opera- tion. Cleaning the window Wipe - Pfaff creative 2124 | Owner's Manual - Page 90
Switch off the main switch. • Disconnect the lead cord and the foot control plug from the machine. • Remove the accessory tray. The light bulb is located inside the sewing machine near the needle threader. Bulb removal Push the bulb remover, as shown in the picture, up as far as it will go. Now turn - Pfaff creative 2124 | Owner's Manual - Page 91
needle. Check how the machine is threaded. Use a larger needle. See above. Adjust upper thread tension. Only use good quality threads. Use needle with large eye (system 130 N). Insert new needle and push fully in. Insert different type of needle. Only guide the fabric lightly. When you insert the - Pfaff creative 2124 | Owner's Manual - Page 92
embroider. You need to bring your sewing machine to your dealer for service. The design does not fit in the largest hoop. If problems remain contact an authorized Pfaff dealer. Have your Pfaff creative 2124 serviced regularly by your Pfaff dealer. When leaving the machine, even for only a short time - Pfaff creative 2124 | Owner's Manual - Page 93
Attach the hoop Attach the embroidery foot Attach the embroidery unit 1:15-1:18 needle Buttonhole automatic manual with gimp thread Keyhole buttonhole with gimp thread linen buttonhole Buttonhole guide Buttonholes 4:6 4:11 foot control Control panel buttons embroidery sewing Creative smart card - Pfaff creative 2124 | Owner's Manual - Page 94
fabric Hoop select button I 3:10, 4:3 3:18 5:8 1:14 3:6 3:7 IDT (Integrated Dual Feed) 2:5 Inserting the creative smart card 3:15 Inserting the sensormatic buttonhole guide 4:12 Integrated Needle Threader 2:13 Iron-On stabilizer 3:17 K Keyhole buttonhole Keypad lock L Lid Light bulb Linen - Pfaff creative 2124 | Owner's Manual - Page 95
foot lifter 2:14 Presser foot, attach Q Quilt appliqués Quilting Quilt stitches R Raise the feed dog Raise the presserfoot Remove the embroidery unit Remove the hoop Reverse sewing button Rolled hem Rotating button S Select a design Select a stitch Sewing machine Sewing sew Top stitching Trouble- - Pfaff creative 2124 | Owner's Manual - Page 96
speed Stitching width Stitching length Presser foot lift Max. presser foot height Needle system Package contents Sewing machine Carrying case Foot control Lead cord Accessories Instruction manual Embroidery unit Embroidery hoop Embroidery clips Quick start embroidery kit 408 x 290 x 187 8,3 kg 120V - Pfaff creative 2124 | Owner's Manual - Page 97
VSM Group AB • SE-561 84 Huskvarna • SWEDEN www.pfaff.com 412 79 05-26E • English • Inhouse • © 2003-2006 VSM Group AB • Printed in Sweden on environmental-friendly paper
-
 1
1 -
 2
2 -
 3
3 -
 4
4 -
 5
5 -
 6
6 -
 7
7 -
8
-
9
-
10
-
11
-
12
-
13
-
14
-
15
-
16
-
17
-
18
-
19
-
20
-
21
-
22
-
23
-
24
-
25
-
26
-
27
-
28
-
29
-
30
-
31
-
32
-
33
-
34
-
35
-
36
-
37
-
38
-
39
-
40
-
41
-
42
-
43
-
44
-
45
-
46
-
47
-
48
-
49
-
50
-
51
-
52
-
53
-
54
-
55
-
56
-
57
-
58
-
59
-
60
-
61
-
62
-
63
-
64
-
65
-
66
-
67
-
68
-
69
-
70
-
71
-
72
-
73
-
74
-
75
-
76
-
77
-
78
-
79
-
80
-
81
-
82
-
83
-
84
-
85
-
86
-
87
-
88
-
89
-
90
-
91
-
92
-
93
-
94
-
95
-
96
-
97
 |
 |
Owner´s manual
creative
2124