Pfaff creative 2140 Owner's Manual - Page 117
Buttonho'es
 |
View all Pfaff creative 2140 manuals
Add to My Manuals
Save this manual to your list of manuals |
Page 117 highlights
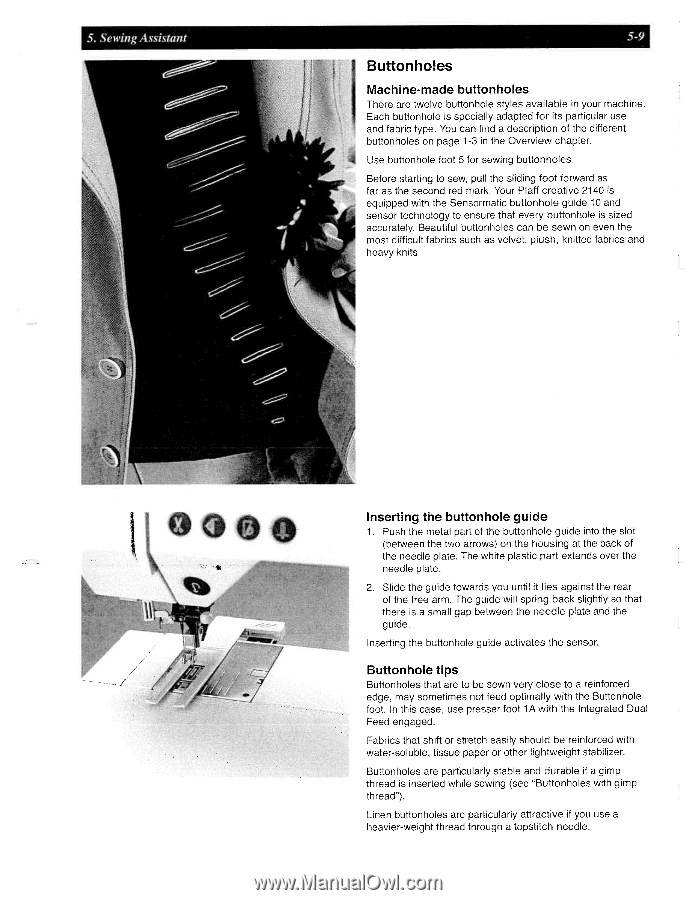
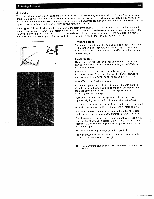
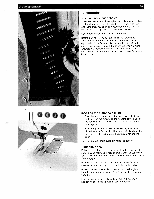
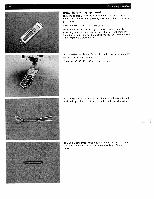
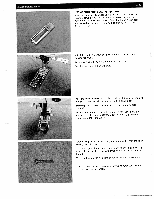
5 Sewing Assistant 5-9 Buttonho'es Machine-made buttonholes There are twelve buttonhole styles available in your machine. Each buttonhole is specially adapted for its particular use and fabric type. You can find a description of the different buttonholes on page 1-3 in the Overview chapter. Use buttonhole foot 5 for sewing buttonholes. Before starting to sew, pull the sliding foot forward as far as the second red mark. Your Pfaff creative 2140 is equipped with the Sensormatic buttonhole guide 10 and sensor technology to ensure that every buttonhole is sized accurately. Beautiful buttonholes can be sewn on even the most difficult fabrics such as velvet, plush. knitted fabrics and heavy knits. I Inserting the buttonhole guide 1. Push the metal part of the buttonhole guide into the slot (between the two arrows) on the housing at the back of the needle plate. The white plastic part extends over the needle plate. 2. Slide the guide towards you until it lies against the rear of the free arm. The guide will spring back slightly so that there is a small gap between the needle plate and the guide. Inserting the buttonhole guide activates the sensor. Buttonhole tips Buttonholes that are to be sewn very close to a reinforced edge, may sometimes not feed optimally with the Buttonhole foot. In this case, use presser foot 1 A with the Integrated Dual Feed engaged. Fabrics that shift or stretch easily should be reinforced with water-soluble, tissue paper or other lightweight stabilizer. Buttonholes are particularly stable and durable if a gimp thread is inserted while sewing (see "Buttonholes with gimp thread"). Linen buttonholes are particularly attractive if you use a heavier-weight thread through a topstitch needle.
-
 1
1 -
2
-
3
-
4
-
5
-
6
-
7
-
8
-
9
-
10
-
11
-
12
-
13
-
14
-
15
-
16
-
17
-
18
-
19
-
20
-
21
-
22
-
23
-
24
-
25
-
26
-
27
-
28
-
29
-
30
-
31
-
32
-
33
-
34
-
35
-
36
-
37
-
38
-
39
-
40
-
41
-
42
-
43
-
44
-
45
-
46
-
47
-
48
-
49
-
50
-
51
-
52
-
53
-
54
-
55
-
56
-
57
-
58
-
59
-
60
-
61
-
62
-
63
-
64
-
65
-
66
-
67
-
68
-
69
-
70
-
71
-
72
-
73
-
74
-
75
-
76
-
77
-
78
-
79
-
80
-
81
-
82
-
83
-
84
-
85
-
86
-
87
-
88
-
89
-
90
-
91
-
92
-
93
-
94
-
95
-
96
-
97
-
98
-
99
-
100
-
101
-
102
-
103
-
104
-
105
-
106
-
107
-
108
-
109
-
110
-
111
-
 112
112 -
 113
113 -
 114
114 -
 115
115 -
 116
116 -
 117
117 -
 118
118 -
 119
119 -
 120
120 -
 121
121 -
 122
122 -
123
-
124
-
125
-
126
-
127
-
128
-
129
-
130
-
131
-
132
-
133
-
134
-
135
-
136
-
137
-
138
-
139
-
140
-
141
-
142
-
143
-
144
-
145
-
146
-
147
-
148
-
149
-
150
-
151
-
152
-
153
-
154
-
155
-
156
-
157
-
158
-
159
-
160
-
161
-
162
-
163
-
164
-
165
-
166
-
167
-
168
-
169
-
170
-
171
-
172
-
173
-
174
-
175
-
176
-
177
-
178
-
179
-
180
-
181
-
182
-
183
-
184
-
185
-
186
-
187
-
188
-
189
-
190
-
191
 |
 |