Pfaff creative 2140 Owner's Manual - Page 151
Embroidery, Assistant, Combine, designs, large, pattern, using, embroidery, template
 |
View all Pfaff creative 2140 manuals
Add to My Manuals
Save this manual to your list of manuals |
Page 151 highlights
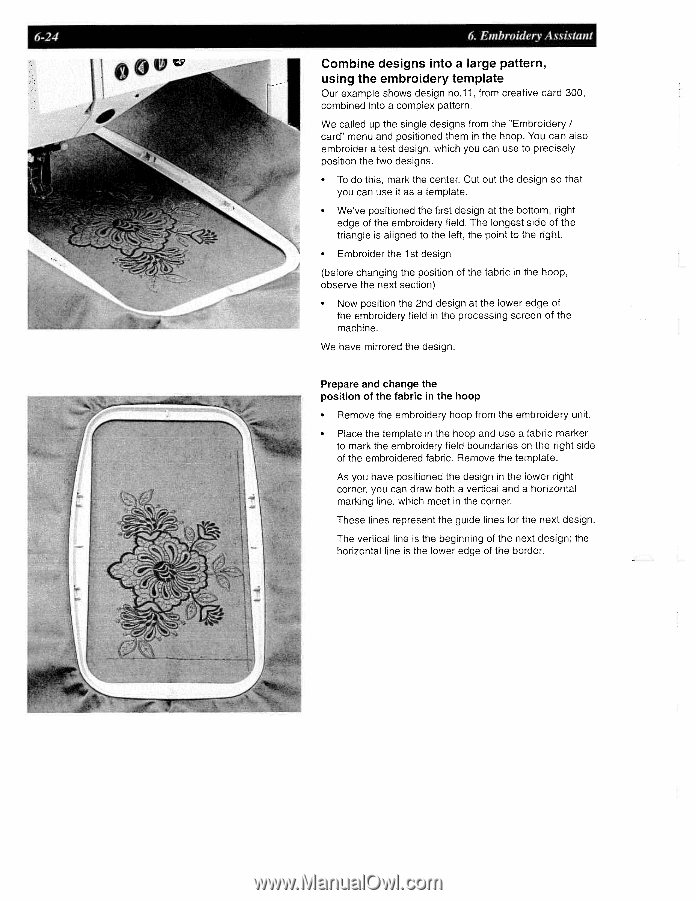
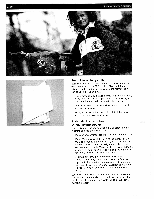
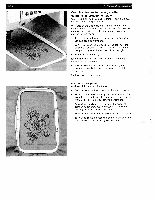
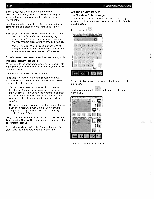
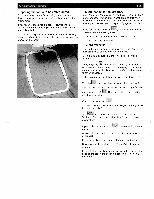
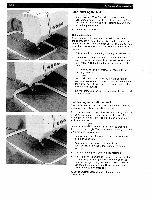
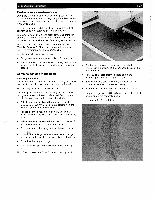
6-24 6. Embroidery Assistant Combine designs into a large pattern, using the embroidery template Our example shows design no.11 from creative card 300, combined into a complex pattern. We called up the single designs from the "Embroidery I card" menu and positioned them in the hoop. You can also embroider a test design, which you can use to precisely position the two designs. • To do this, mark the center. Cut out the design so that you can use it as a template. • We've positioned the first design at the bottom, right edge of the embroidery field. The longest side of the triangle is aligned to the left, the point to the right. • Embroider the 1st design (before changing the position of the fabric in the hoop. observe the next section) • Now position the 2nd design at the lower edge of the embroidery field in the processing screen of the machine. We have mirrored the design. Prepare and change the position of the fabric in the hoop • Remove the embroidery hoop from the embroidery unit. • Place the template in the hoop and use a fabric marker to mark the embroidery field boundaries on the right side of the embroidered fabric. Remove the template. As you have positioned the design in the lower right corner, you can draw both a vertical and a horizontal marking line, which meet in the corner. These lines represent the guide lines for the next design. The vertical line is the beginning of the next design; the horizontal line is the lower edge of the border.
-
 1
1 -
2
-
3
-
4
-
5
-
6
-
7
-
8
-
9
-
10
-
11
-
12
-
13
-
14
-
15
-
16
-
17
-
18
-
19
-
20
-
21
-
22
-
23
-
24
-
25
-
26
-
27
-
28
-
29
-
30
-
31
-
32
-
33
-
34
-
35
-
36
-
37
-
38
-
39
-
40
-
41
-
42
-
43
-
44
-
45
-
46
-
47
-
48
-
49
-
50
-
51
-
52
-
53
-
54
-
55
-
56
-
57
-
58
-
59
-
60
-
61
-
62
-
63
-
64
-
65
-
66
-
67
-
68
-
69
-
70
-
71
-
72
-
73
-
74
-
75
-
76
-
77
-
78
-
79
-
80
-
81
-
82
-
83
-
84
-
85
-
86
-
87
-
88
-
89
-
90
-
91
-
92
-
93
-
94
-
95
-
96
-
97
-
98
-
99
-
100
-
101
-
102
-
103
-
104
-
105
-
106
-
107
-
108
-
109
-
110
-
111
-
112
-
113
-
114
-
115
-
116
-
117
-
118
-
119
-
120
-
121
-
122
-
123
-
124
-
125
-
126
-
127
-
128
-
129
-
130
-
131
-
132
-
133
-
134
-
135
-
136
-
137
-
138
-
139
-
140
-
141
-
142
-
143
-
144
-
145
-
 146
146 -
 147
147 -
 148
148 -
 149
149 -
 150
150 -
 151
151 -
 152
152 -
 153
153 -
 154
154 -
 155
155 -
 156
156 -
157
-
158
-
159
-
160
-
161
-
162
-
163
-
164
-
165
-
166
-
167
-
168
-
169
-
170
-
171
-
172
-
173
-
174
-
175
-
176
-
177
-
178
-
179
-
180
-
181
-
182
-
183
-
184
-
185
-
186
-
187
-
188
-
189
-
190
-
191
 |
 |