Pfaff creative 2140 Owner's Manual - Page 152
IooeO
 |
View all Pfaff creative 2140 manuals
Add to My Manuals
Save this manual to your list of manuals |
Page 152 highlights
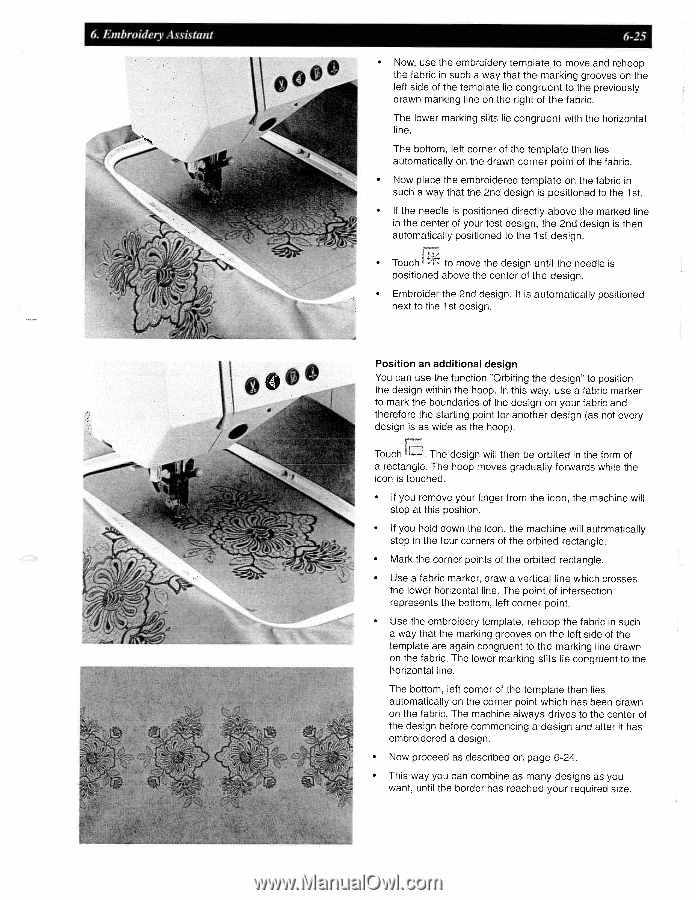
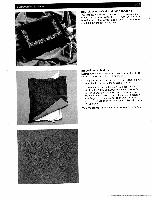
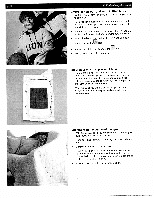
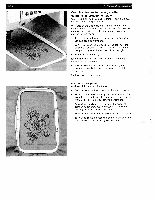
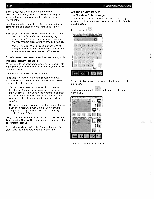
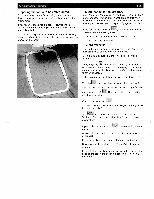
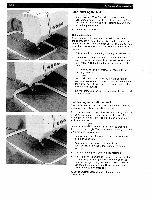
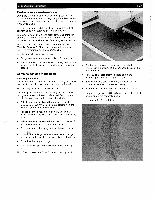
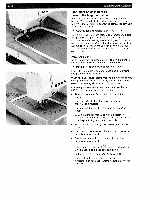
6. Embroidery Assistant ooeO I hi 6-25 • Now, use the embroidery template to move and rehoop the fabric in such a way that the marking grooves on the left side of the template lie congruent to the previously drawn marking line on the right of the fabric. The lower marking slits lie congruent with the horizontal line. The bottom, left corner of the template then lies automatically on the drawn corner point of the fabric. • Now place the embroidered template on the fabric in such a way that the 2nd design is positioned to the 1 st. • If the needle is positioned directly above the marked line in the center of your test design, the 2nd design is then automatically positioned to the 1st design. • Touch r:. to move the design until the needle is positioned above the center of the design. • Embroider the 2nd design. It is automatically positioned next to the 1st design. Position an additional design You can use the function "Orbiting the design" to position the design within the hoop. In this way, use a fabric marker to mark the boundaries of the design on your fabric and therefore the starting point for another design (as not every design is as wide as the hoop). Touch L. The design will then be orbited in the form of a rectangle. The hoop moves gradually forwards while the icon is touched. • If you remove your finger from the icon, the machine will stop at this position. • If you hold down the icon, the machine will automatically stop in the four corners of the orbited rectangle. • Mark the corner points of the orbited rectangle. • Use a fabric marker, draw a vertical line which crosses the lower horizontal line. The point of intersection represents the bottom, left corner point. • Use the embroidery template, rehoop the fabric in such a way that the marking grooves on the left side of the template are again congruent to the marking line drawn on the fabric. The lower marking slits lie congruent to the horizontal line. The bottom, left corner of the template then lies automatically on the corner point which has been drawn on the fabric. The machine always drives to the center of the design before commencing a design and after it has embroidered a design. • Now proceed as described on page 6-24. • This way you can combine as many designs as you want, until the border has reached your required size.
-
 1
1 -
2
-
3
-
4
-
5
-
6
-
7
-
8
-
9
-
10
-
11
-
12
-
13
-
14
-
15
-
16
-
17
-
18
-
19
-
20
-
21
-
22
-
23
-
24
-
25
-
26
-
27
-
28
-
29
-
30
-
31
-
32
-
33
-
34
-
35
-
36
-
37
-
38
-
39
-
40
-
41
-
42
-
43
-
44
-
45
-
46
-
47
-
48
-
49
-
50
-
51
-
52
-
53
-
54
-
55
-
56
-
57
-
58
-
59
-
60
-
61
-
62
-
63
-
64
-
65
-
66
-
67
-
68
-
69
-
70
-
71
-
72
-
73
-
74
-
75
-
76
-
77
-
78
-
79
-
80
-
81
-
82
-
83
-
84
-
85
-
86
-
87
-
88
-
89
-
90
-
91
-
92
-
93
-
94
-
95
-
96
-
97
-
98
-
99
-
100
-
101
-
102
-
103
-
104
-
105
-
106
-
107
-
108
-
109
-
110
-
111
-
112
-
113
-
114
-
115
-
116
-
117
-
118
-
119
-
120
-
121
-
122
-
123
-
124
-
125
-
126
-
127
-
128
-
129
-
130
-
131
-
132
-
133
-
134
-
135
-
136
-
137
-
138
-
139
-
140
-
141
-
142
-
143
-
144
-
145
-
146
-
 147
147 -
 148
148 -
 149
149 -
 150
150 -
 151
151 -
 152
152 -
 153
153 -
 154
154 -
 155
155 -
 156
156 -
 157
157 -
158
-
159
-
160
-
161
-
162
-
163
-
164
-
165
-
166
-
167
-
168
-
169
-
170
-
171
-
172
-
173
-
174
-
175
-
176
-
177
-
178
-
179
-
180
-
181
-
182
-
183
-
184
-
185
-
186
-
187
-
188
-
189
-
190
-
191
 |
 |