Pfaff creative 2140 Owner's Manual - Page 155
Embroidering, Positioning, additional,
 |
View all Pfaff creative 2140 manuals
Add to My Manuals
Save this manual to your list of manuals |
Page 155 highlights
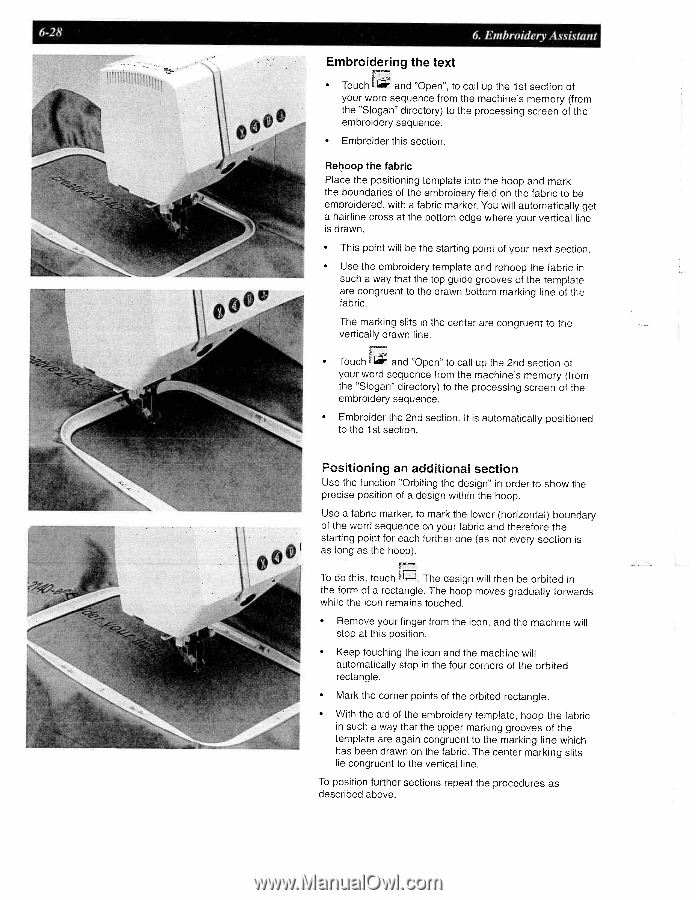
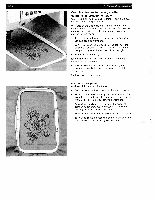
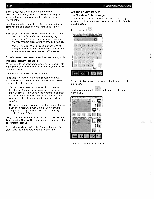
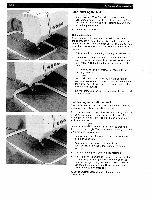
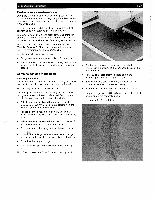
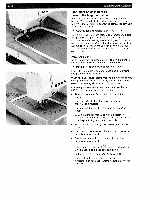
6-28 6. Embroidery Assistant Embroidering the text Touch and "Open". to call up the 1st section of your word sequence from the machine's memory (from the "Slogan" directory) to the processing screen of the embroidery sequence. Embroider this section. Rehoop the fabric Place the positioning template into the hoop and mark the boundaries of the embroidery field on the fabric to be embroidered, with a fabric marker. You will automatically get a hairline cross at the bottom edge where your vertical line is drawn. • This point will be the starting point of your next section • Use the embroidery template and rehoop the fabric in such a way that the top guide grooves of the template are congruent to the drawn bottom marking line of the fabric. The marking slits in the center are congruent to the vertically drawn line. • Touch and "Open" to call up the 2nd section of your word sequence from the machine's memory (from the "Slogan" directory) to the processing screen of the embroidery sequence. Embroider the 2nd section. It is automatically positioned to the 1st section. Positioning an additional section Use the function "Orbiting the design" in order to show the precise position of a design within the hoop. Use a fabric marker, to mark the lower (horizontal) boundary of the word sequence on your fabric and therefore the starting point for each further one (as not every section is as long as the hoop). To do this, touch . The design will then be orbited in the form of a rectangle. The hoop moves gradually forwards while the icon remains touched. • Remove your finger from the icon, and the machine will stop at this position. Keep touching the icon and the machine will automatically stop in the four corners of the orbited rectangle. Mark the corner points of the orbited rectangle. With the aid of the embroidery template, hoop the fabric in such a way that the upper marking grooves of the template are again congruent to the marking line which has been drawn on the fabric. The center marking slits lie congruent to the vertical line. To position further sections repeat the procedures as described above.
-
 1
1 -
2
-
3
-
4
-
5
-
6
-
7
-
8
-
9
-
10
-
11
-
12
-
13
-
14
-
15
-
16
-
17
-
18
-
19
-
20
-
21
-
22
-
23
-
24
-
25
-
26
-
27
-
28
-
29
-
30
-
31
-
32
-
33
-
34
-
35
-
36
-
37
-
38
-
39
-
40
-
41
-
42
-
43
-
44
-
45
-
46
-
47
-
48
-
49
-
50
-
51
-
52
-
53
-
54
-
55
-
56
-
57
-
58
-
59
-
60
-
61
-
62
-
63
-
64
-
65
-
66
-
67
-
68
-
69
-
70
-
71
-
72
-
73
-
74
-
75
-
76
-
77
-
78
-
79
-
80
-
81
-
82
-
83
-
84
-
85
-
86
-
87
-
88
-
89
-
90
-
91
-
92
-
93
-
94
-
95
-
96
-
97
-
98
-
99
-
100
-
101
-
102
-
103
-
104
-
105
-
106
-
107
-
108
-
109
-
110
-
111
-
112
-
113
-
114
-
115
-
116
-
117
-
118
-
119
-
120
-
121
-
122
-
123
-
124
-
125
-
126
-
127
-
128
-
129
-
130
-
131
-
132
-
133
-
134
-
135
-
136
-
137
-
138
-
139
-
140
-
141
-
142
-
143
-
144
-
145
-
146
-
147
-
148
-
149
-
 150
150 -
 151
151 -
 152
152 -
 153
153 -
 154
154 -
 155
155 -
 156
156 -
 157
157 -
 158
158 -
 159
159 -
 160
160 -
161
-
162
-
163
-
164
-
165
-
166
-
167
-
168
-
169
-
170
-
171
-
172
-
173
-
174
-
175
-
176
-
177
-
178
-
179
-
180
-
181
-
182
-
183
-
184
-
185
-
186
-
187
-
188
-
189
-
190
-
191
 |
 |