Pfaff creative 2140 Owner's Manual - Page 166
Faggoting, guide, Pintuck
 |
View all Pfaff creative 2140 manuals
Add to My Manuals
Save this manual to your list of manuals |
Page 166 highlights
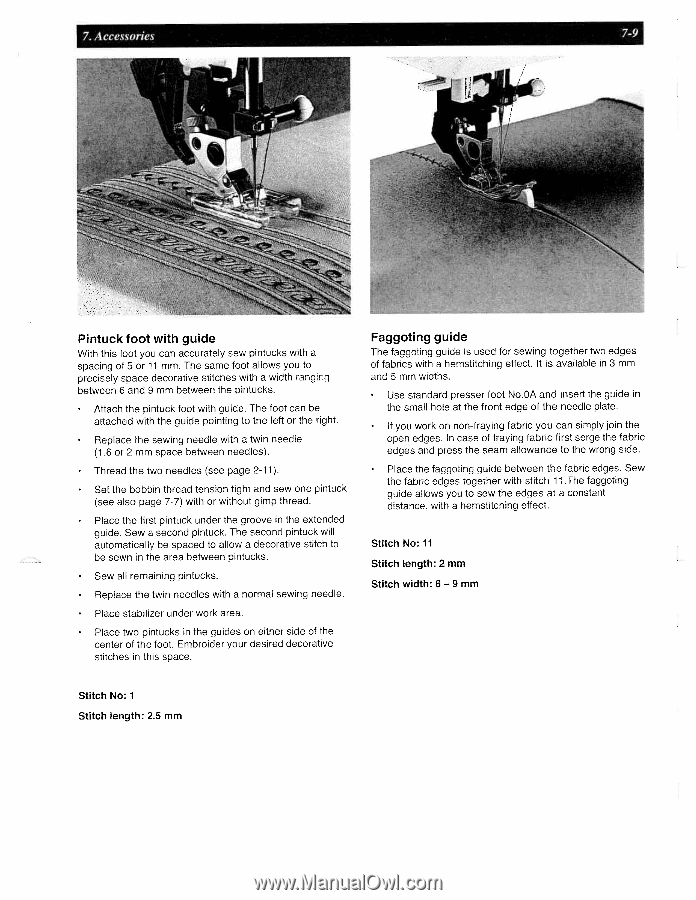
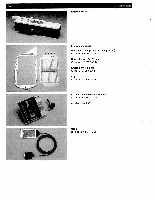
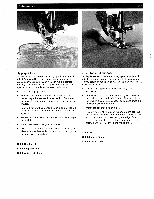
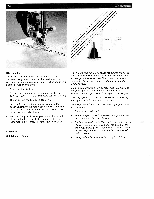
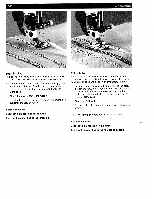
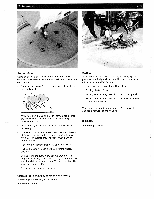
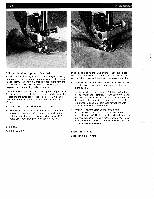
7. Accessories 74 Pintuck foot with guide With this foot you can accurately sew pintucks with a spacing of 5 or 11 mm. The same foot allows you to precisely space decorative stitches with a width ranging between 6 and 9 mm between the pintucks. • Attach the pintuck foot with guide. The foot can be attached with the guide pointing to the left or the right. • Replace the sewing needle with a twin needle (1 .6 or 2 mm space between needles). • Thread the two needles (see page 2-11). • Set the bobbin thread tension tight and sew one pintuck (see also page 7-7) with or without gimp thread. • Place the first pintuck under the groove in the extended guide. Sew a second pintuck. The second pintuck will automatically be spaced to allow a decorative stitch to be sewn in the area between pintucks. • Sew all remaining pintucks. • Replace the twin needles with a normal sewing needle. Place stabilizer under work area. Place two pintucks in the guides on either side of the center of the foot. Embroider your desired decorative stitches in this space. Faggoting guide The faggoting guide is used for sewing together two edges of fabrics with a hemstitching effect. It is available in 3 mm and 5 mm widths. Use standard presser toot No.OA and insert the guide in the small hole at the front edge of the needle plate. • If you work on non-fraying fabric you can simply join the open edges. In case of fraying fabric first serge the fabric edges and press the seam allowance to the wrong side. • Place the faggoting guide between the fabric edges. Sew the fabric edges together with stitch 11 .The faggoting guide allows you to sew the edges at a constant distance, with a hemstitching effect. Stitch No: 11 Stitch length: 2 mm Stitch width: 6 -9 mm Stitch No: 1 Stitch length: 2•5 mm
-
 1
1 -
2
-
3
-
4
-
5
-
6
-
7
-
8
-
9
-
10
-
11
-
12
-
13
-
14
-
15
-
16
-
17
-
18
-
19
-
20
-
21
-
22
-
23
-
24
-
25
-
26
-
27
-
28
-
29
-
30
-
31
-
32
-
33
-
34
-
35
-
36
-
37
-
38
-
39
-
40
-
41
-
42
-
43
-
44
-
45
-
46
-
47
-
48
-
49
-
50
-
51
-
52
-
53
-
54
-
55
-
56
-
57
-
58
-
59
-
60
-
61
-
62
-
63
-
64
-
65
-
66
-
67
-
68
-
69
-
70
-
71
-
72
-
73
-
74
-
75
-
76
-
77
-
78
-
79
-
80
-
81
-
82
-
83
-
84
-
85
-
86
-
87
-
88
-
89
-
90
-
91
-
92
-
93
-
94
-
95
-
96
-
97
-
98
-
99
-
100
-
101
-
102
-
103
-
104
-
105
-
106
-
107
-
108
-
109
-
110
-
111
-
112
-
113
-
114
-
115
-
116
-
117
-
118
-
119
-
120
-
121
-
122
-
123
-
124
-
125
-
126
-
127
-
128
-
129
-
130
-
131
-
132
-
133
-
134
-
135
-
136
-
137
-
138
-
139
-
140
-
141
-
142
-
143
-
144
-
145
-
146
-
147
-
148
-
149
-
150
-
151
-
152
-
153
-
154
-
155
-
156
-
157
-
158
-
159
-
160
-
 161
161 -
 162
162 -
 163
163 -
 164
164 -
 165
165 -
 166
166 -
 167
167 -
 168
168 -
 169
169 -
 170
170 -
 171
171 -
172
-
173
-
174
-
175
-
176
-
177
-
178
-
179
-
180
-
181
-
182
-
183
-
184
-
185
-
186
-
187
-
188
-
189
-
190
-
191
 |
 |