Pfaff creative 2140 Owner's Manual - Page 169
Braiding
 |
View all Pfaff creative 2140 manuals
Add to My Manuals
Save this manual to your list of manuals |
Page 169 highlights
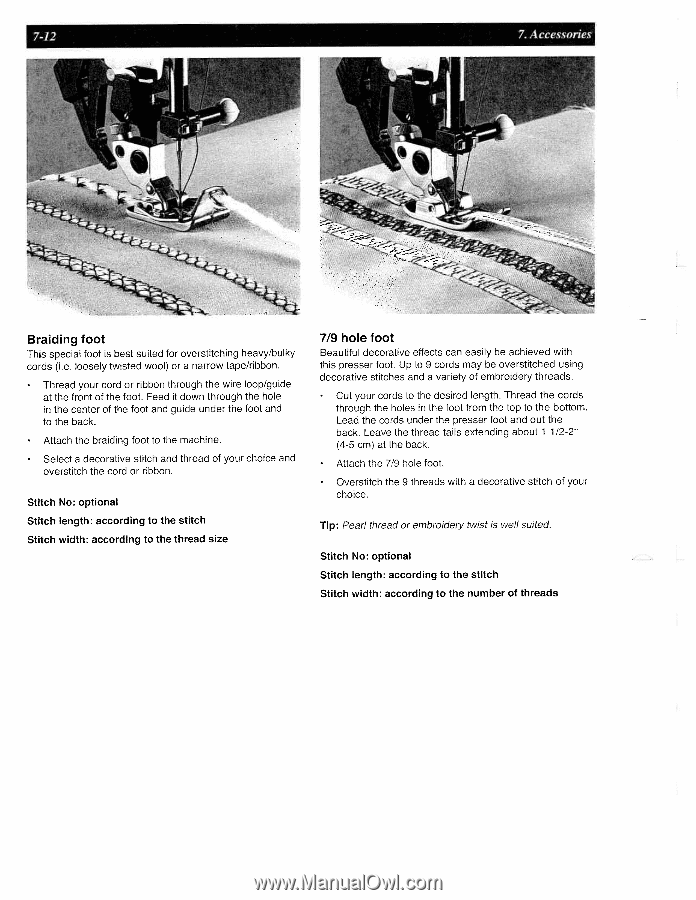
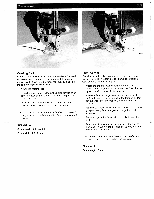
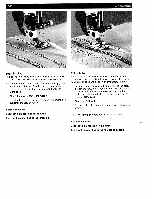
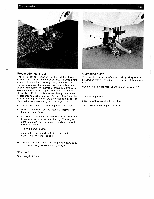
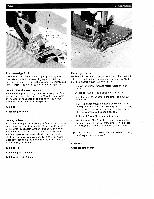
7-12 7 Accessories Braiding foot This special foot is best suited for overstitching heavy/bulky cords (i.e. loosely twisted wool) or a narrow tape/ribbon. • Thread your cord or ribbon through the wire loop/guide at the front of the foot. Feed it down through the hole in the center of the foot and guide under the foot and to the back. • Attach the braiding foot to the machine. Select a decorative stitch and thread of your choice and overstitch the cord or ribbon. Stitch No: optional Stitch length: according to the stitch Stitch width: according to the thread size 7/9 hole foot Beautiful decorative effects can easily be achieved with this presser foot. Up to 9 cords may be overstitched using decorative stitches and a variety of embroidery threads. • Cut your cords to the desired length. Thread the cords through the holes in the foot from the top to the bottom. Lead the cords under the presser foot and out the back. Leave the thread tails extending about 1 1/2-2" (4-5 cm) at the back. • Attach the 7/9 hole foot. • Overstitch the 9 threads with a decorative stitch of your choice. Tip: Pearl thread or embroidery twist is well suited. Stitch No: optional Stitch length: according to the stitch Stitch width: according to the number of threads
-
 1
1 -
2
-
3
-
4
-
5
-
6
-
7
-
8
-
9
-
10
-
11
-
12
-
13
-
14
-
15
-
16
-
17
-
18
-
19
-
20
-
21
-
22
-
23
-
24
-
25
-
26
-
27
-
28
-
29
-
30
-
31
-
32
-
33
-
34
-
35
-
36
-
37
-
38
-
39
-
40
-
41
-
42
-
43
-
44
-
45
-
46
-
47
-
48
-
49
-
50
-
51
-
52
-
53
-
54
-
55
-
56
-
57
-
58
-
59
-
60
-
61
-
62
-
63
-
64
-
65
-
66
-
67
-
68
-
69
-
70
-
71
-
72
-
73
-
74
-
75
-
76
-
77
-
78
-
79
-
80
-
81
-
82
-
83
-
84
-
85
-
86
-
87
-
88
-
89
-
90
-
91
-
92
-
93
-
94
-
95
-
96
-
97
-
98
-
99
-
100
-
101
-
102
-
103
-
104
-
105
-
106
-
107
-
108
-
109
-
110
-
111
-
112
-
113
-
114
-
115
-
116
-
117
-
118
-
119
-
120
-
121
-
122
-
123
-
124
-
125
-
126
-
127
-
128
-
129
-
130
-
131
-
132
-
133
-
134
-
135
-
136
-
137
-
138
-
139
-
140
-
141
-
142
-
143
-
144
-
145
-
146
-
147
-
148
-
149
-
150
-
151
-
152
-
153
-
154
-
155
-
156
-
157
-
158
-
159
-
160
-
161
-
162
-
163
-
 164
164 -
 165
165 -
 166
166 -
 167
167 -
 168
168 -
 169
169 -
 170
170 -
 171
171 -
 172
172 -
 173
173 -
 174
174 -
175
-
176
-
177
-
178
-
179
-
180
-
181
-
182
-
183
-
184
-
185
-
186
-
187
-
188
-
189
-
190
-
191
 |
 |