Pfaff creative 2140 Owner's Manual - Page 173
Narrow-edge, binder
 |
View all Pfaff creative 2140 manuals
Add to My Manuals
Save this manual to your list of manuals |
Page 173 highlights
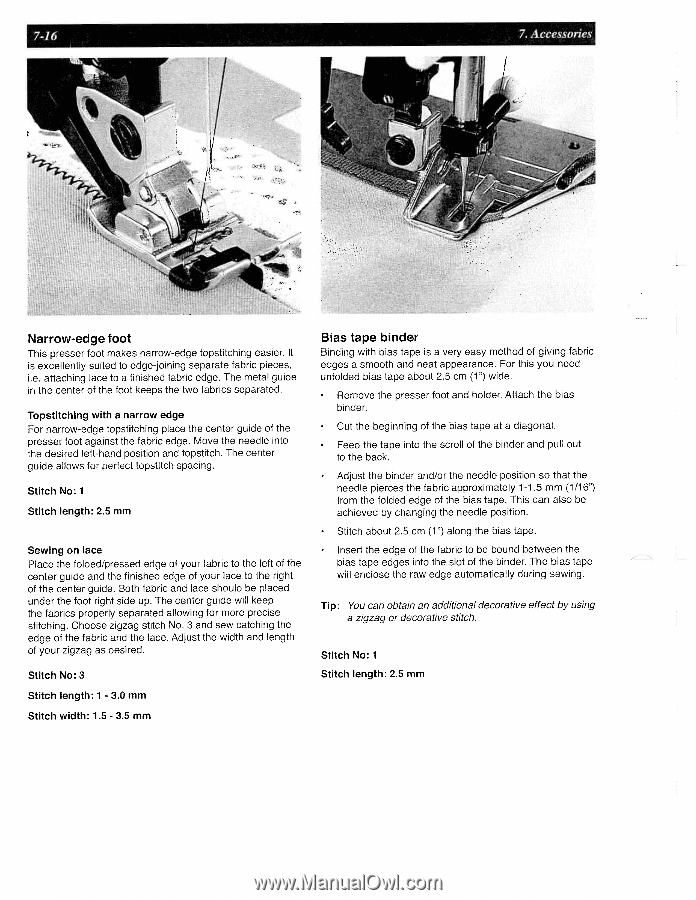
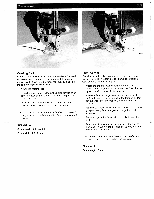
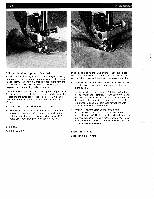
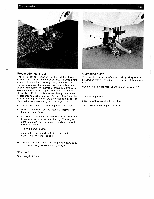
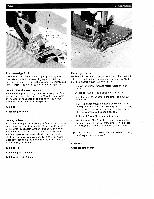
Narrow-edge foot This presser foot makes narrow-edge topstitching easier. It is excellently suited to edge-joining separate fabric pieces, i.e. attaching lace to a finished fabric edge. The metal guide in the center of the foot keeps the two fabrics separated. Topstitching with a narrow edge For narrow-edge topstitching place the center guide of the presser foot against the fabric edge. Move the needle into the desired left-hand position and topstitch. The center guide allows for perfect topstitch spacing. Stitch No: 1 Stitch length: 2.5 mm Sewing on lace Place the folded/pressed edge of your fabric to the left of the center guide and the finished edge of your lace to the right of the center guide. Both fabric and lace should be placed under the foot right side up. The center guide will keep the fabrics properly separated allowing for more precise stitching. Choose zigzag stitch No. 3 and sew catching the edge of the fabric and the lace. Adjust the width and length of your zigzag as desired. Stitch No: 3 Stitch length: I - 3.0 mm Stitch width: 1.5- 3.5 mm Bias tape binder Binding with bias tape is a very easy method of giving fabric edges a smooth and neat appearance. For this you need unfolded bias tape about 2.5cm (1') wide. Remove the presser foot and holder. Attach the bias binder. Cut the beginning of the bias tape at a diagonal. Feed the tape into the scroll of the binder and pull out to the back. • Adjust the binder and/or the needle position so that the needle pierces the fabric approximately 1-1.5 mm (1/16") from the folded edge of the bias tape. This can also be achieved by changing the needle position. • Stitch about 2.5 cm (1 ') along the bias tape. Insert the edge of the fabric to be bound between the bias tape edges into the slot of the binder. The bias tape will enclose the raw edge automatically during sewing. Tip: You can obtain an additional decorative effect by using a zigzag or decorative stitch. Stitch No: 1 Stitch length: 2.5 mm
-
 1
1 -
2
-
3
-
4
-
5
-
6
-
7
-
8
-
9
-
10
-
11
-
12
-
13
-
14
-
15
-
16
-
17
-
18
-
19
-
20
-
21
-
22
-
23
-
24
-
25
-
26
-
27
-
28
-
29
-
30
-
31
-
32
-
33
-
34
-
35
-
36
-
37
-
38
-
39
-
40
-
41
-
42
-
43
-
44
-
45
-
46
-
47
-
48
-
49
-
50
-
51
-
52
-
53
-
54
-
55
-
56
-
57
-
58
-
59
-
60
-
61
-
62
-
63
-
64
-
65
-
66
-
67
-
68
-
69
-
70
-
71
-
72
-
73
-
74
-
75
-
76
-
77
-
78
-
79
-
80
-
81
-
82
-
83
-
84
-
85
-
86
-
87
-
88
-
89
-
90
-
91
-
92
-
93
-
94
-
95
-
96
-
97
-
98
-
99
-
100
-
101
-
102
-
103
-
104
-
105
-
106
-
107
-
108
-
109
-
110
-
111
-
112
-
113
-
114
-
115
-
116
-
117
-
118
-
119
-
120
-
121
-
122
-
123
-
124
-
125
-
126
-
127
-
128
-
129
-
130
-
131
-
132
-
133
-
134
-
135
-
136
-
137
-
138
-
139
-
140
-
141
-
142
-
143
-
144
-
145
-
146
-
147
-
148
-
149
-
150
-
151
-
152
-
153
-
154
-
155
-
156
-
157
-
158
-
159
-
160
-
161
-
162
-
163
-
164
-
165
-
166
-
167
-
 168
168 -
 169
169 -
 170
170 -
 171
171 -
 172
172 -
 173
173 -
 174
174 -
 175
175 -
 176
176 -
 177
177 -
 178
178 -
179
-
180
-
181
-
182
-
183
-
184
-
185
-
186
-
187
-
188
-
189
-
190
-
191
 |
 |