Pfaff creative 2140 Owner's Manual - Page 18
Function, Stitch, settings - machine
 |
View all Pfaff creative 2140 manuals
Add to My Manuals
Save this manual to your list of manuals |
Page 18 highlights
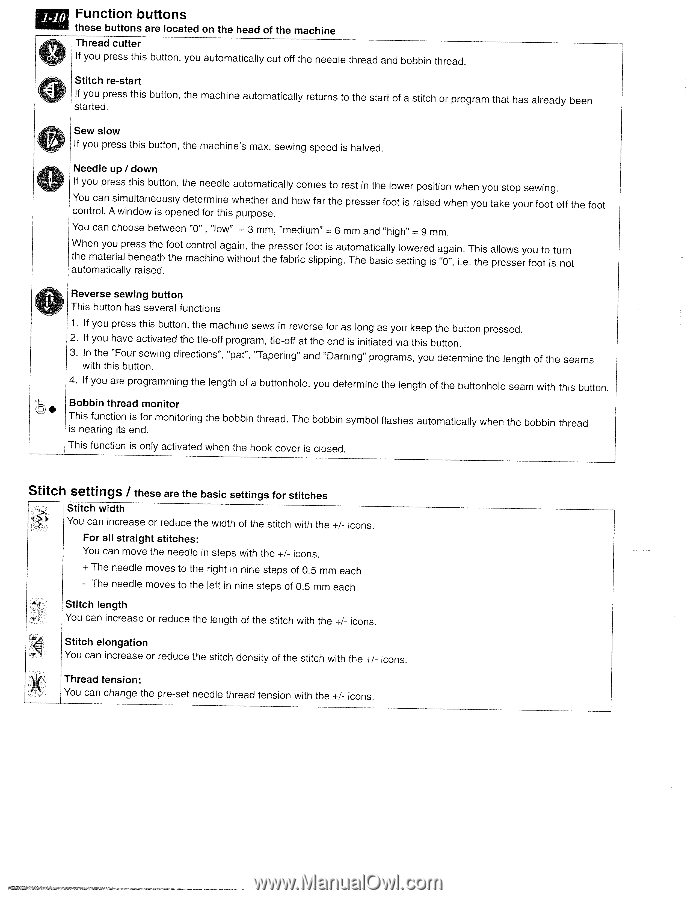
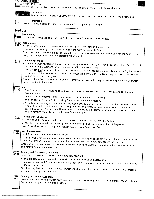
Function buttons these buttons are located on the head of the machine Thread cutter If you press this button, you automatically cut off the needle thread and bobbin thread. Stitch re-start LJi If you press started. this button, the machine automatically returns to the start of a stitch or program that has already been Sew slow If you press this button, the machine's max. sewing speed is halved. Needle up! down If you press this button, the needle automatically comes to rest in the lower position when you stop sewing. You can simultaneously determine whether and control. A window is opened for this purpose. how far the presser foot is raised when you take your foot off the foot You can choose between "0", "low" = 3 mm, "medium" = 6mm and "high" = 9 mm. When you press the the material beneath automatically raised. foot the control again, the presser foot is automatically lowered machine without the fabric slipping. The basic setting is again. This "0", i.e. the allows you to turn presser foot is not Reverse sewing button This button has several functions 1. If you press this button, the machine sews in reverse for as long as you keep the button pressed. 2. If you have activated the tie-off program, tie-off at the end is initiated via this button. 3. In the "Four sewing with this button. directions", "pat". "Tapering" and "Darning" programs, you determine the length of the seams 4. If you are programming the length of a buttonhole, you determine the length of the buttonhole seam with this button. Bobbin thread monitor This function is nearing its is for end. monitoring the bobbin thread. The bobbin symbol flashes automatically when the bobbin thread This function is only activated when the hook cover is closed. Stitch settings I these are the basic settings for stitches Stitch width You can increase or reduce the width of the stitch with the +1' icons. For all straight stitches: You can move the needle in steps with the +I icons. ± The needle moves to the right in nine steps of 0.5 mm each - The needle moves to the left in nine steps of 0.5 mm each " Stitch length You can increase or reduce the length of the stitch with the ÷1 icons Stitch elongation ' You can increase or reduce the stitch density of the stitch with the ±/- icons. Thread tension You can change the pre-set needle thread tension with the +I icons.
-
 1
1 -
2
-
3
-
4
-
5
-
6
-
7
-
8
-
9
-
10
-
11
-
12
-
 13
13 -
 14
14 -
 15
15 -
 16
16 -
 17
17 -
 18
18 -
 19
19 -
 20
20 -
 21
21 -
 22
22 -
 23
23 -
24
-
25
-
26
-
27
-
28
-
29
-
30
-
31
-
32
-
33
-
34
-
35
-
36
-
37
-
38
-
39
-
40
-
41
-
42
-
43
-
44
-
45
-
46
-
47
-
48
-
49
-
50
-
51
-
52
-
53
-
54
-
55
-
56
-
57
-
58
-
59
-
60
-
61
-
62
-
63
-
64
-
65
-
66
-
67
-
68
-
69
-
70
-
71
-
72
-
73
-
74
-
75
-
76
-
77
-
78
-
79
-
80
-
81
-
82
-
83
-
84
-
85
-
86
-
87
-
88
-
89
-
90
-
91
-
92
-
93
-
94
-
95
-
96
-
97
-
98
-
99
-
100
-
101
-
102
-
103
-
104
-
105
-
106
-
107
-
108
-
109
-
110
-
111
-
112
-
113
-
114
-
115
-
116
-
117
-
118
-
119
-
120
-
121
-
122
-
123
-
124
-
125
-
126
-
127
-
128
-
129
-
130
-
131
-
132
-
133
-
134
-
135
-
136
-
137
-
138
-
139
-
140
-
141
-
142
-
143
-
144
-
145
-
146
-
147
-
148
-
149
-
150
-
151
-
152
-
153
-
154
-
155
-
156
-
157
-
158
-
159
-
160
-
161
-
162
-
163
-
164
-
165
-
166
-
167
-
168
-
169
-
170
-
171
-
172
-
173
-
174
-
175
-
176
-
177
-
178
-
179
-
180
-
181
-
182
-
183
-
184
-
185
-
186
-
187
-
188
-
189
-
190
-
191
 |
 |