Pfaff creative 2140 Owner's Manual - Page 189
Up UIT
 |
View all Pfaff creative 2140 manuals
Add to My Manuals
Save this manual to your list of manuals |
Page 189 highlights
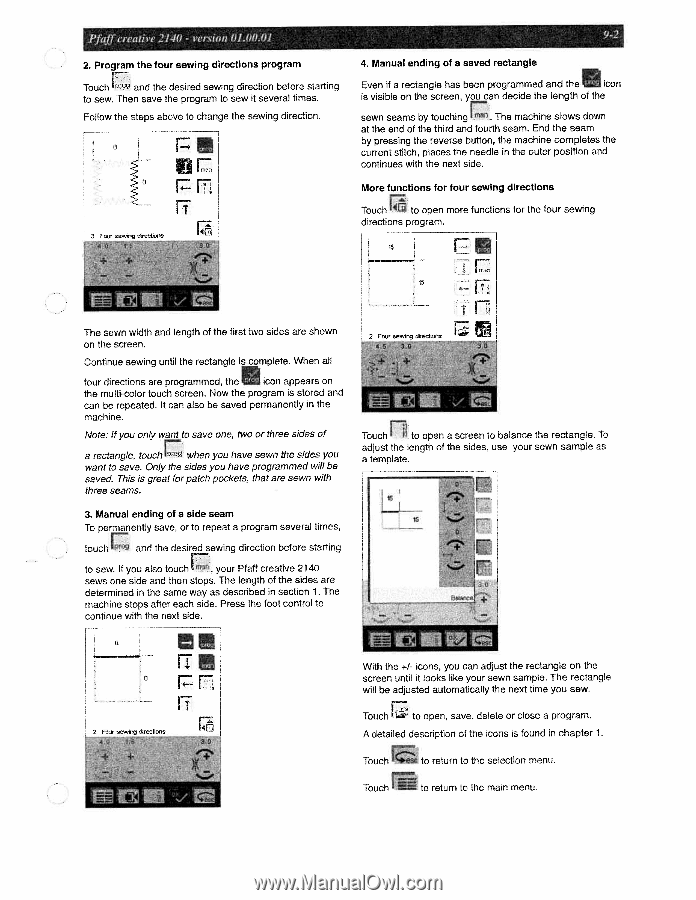
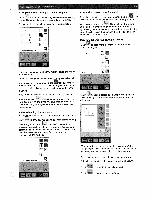
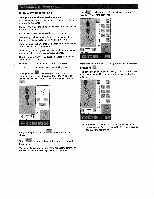
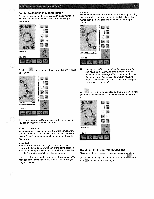
2. Program the four sewing directions program Touch and the desired sewing direction before starting to sew. Then save the program to sew it several times. Follow the steps above to change the sewing direction. U rm IT 4. Manual ending of a saved rectangle Even if a rectangle has been programmed and the icon is visible on the screen, you can decide the length of the sewn seams by touching The machine slows down at the end of the third and fourth seam. End the seam by pressing the reverse button, the machine completes the current stitch, places the needle in the outer position and continues with the next side. More functions for four sewing directions Touch to open more functions for the four sewing directions program. F- 4 The sewn width and length of the first two sides are shown on the screen. Continue sewing until the rectangle is complete. When all four directions are programmed, the icon appears on the multi-color touch screen. Now the program is stored and can be repeated. It can also be saved permanently in the machine. Note: if you only want to save one, two or three sides of a rectangle, touch when you have sewn the sides you want to save. Only the sides you have programmed will be saved. This is great for patch pockets, that are sewn with three seams. 3. Manual ending of a side seam To permanently save, or to repeat a program several times, touch and the desired sewing direction before starting to sew. If you also touch your Pfaff creative 2140 sews one side and then stops. The length of the sides are determined in the same way as described in section 1. The machine stops after each side. Press the foot control to continue with the next side. p Touch Ii to open a screen to balance the rectangle. To adjust the length of the sides, use your sewn sample as a template. U With the +1- icons, you can adjust the rectangle on the screen until it looks like your sewn sample. The rectangle will be adjusted automatically the next time you sew. Touch to open, save, delete or close a program. A detailed description of the icons is found in chapter 1. Touch to return to the selection menu Touch to return to the main menu.
-
 1
1 -
2
-
3
-
4
-
5
-
6
-
7
-
8
-
9
-
10
-
11
-
12
-
13
-
14
-
15
-
16
-
17
-
18
-
19
-
20
-
21
-
22
-
23
-
24
-
25
-
26
-
27
-
28
-
29
-
30
-
31
-
32
-
33
-
34
-
35
-
36
-
37
-
38
-
39
-
40
-
41
-
42
-
43
-
44
-
45
-
46
-
47
-
48
-
49
-
50
-
51
-
52
-
53
-
54
-
55
-
56
-
57
-
58
-
59
-
60
-
61
-
62
-
63
-
64
-
65
-
66
-
67
-
68
-
69
-
70
-
71
-
72
-
73
-
74
-
75
-
76
-
77
-
78
-
79
-
80
-
81
-
82
-
83
-
84
-
85
-
86
-
87
-
88
-
89
-
90
-
91
-
92
-
93
-
94
-
95
-
96
-
97
-
98
-
99
-
100
-
101
-
102
-
103
-
104
-
105
-
106
-
107
-
108
-
109
-
110
-
111
-
112
-
113
-
114
-
115
-
116
-
117
-
118
-
119
-
120
-
121
-
122
-
123
-
124
-
125
-
126
-
127
-
128
-
129
-
130
-
131
-
132
-
133
-
134
-
135
-
136
-
137
-
138
-
139
-
140
-
141
-
142
-
143
-
144
-
145
-
146
-
147
-
148
-
149
-
150
-
151
-
152
-
153
-
154
-
155
-
156
-
157
-
158
-
159
-
160
-
161
-
162
-
163
-
164
-
165
-
166
-
167
-
168
-
169
-
170
-
171
-
172
-
173
-
174
-
175
-
176
-
177
-
178
-
179
-
180
-
181
-
182
-
183
-
 184
184 -
 185
185 -
 186
186 -
 187
187 -
 188
188 -
 189
189 -
 190
190 -
 191
191
 |
 |