Pfaff creative 2140 Owner's Manual - Page 29
tmroiaery, combinations
 |
View all Pfaff creative 2140 manuals
Add to My Manuals
Save this manual to your list of manuals |
Page 29 highlights
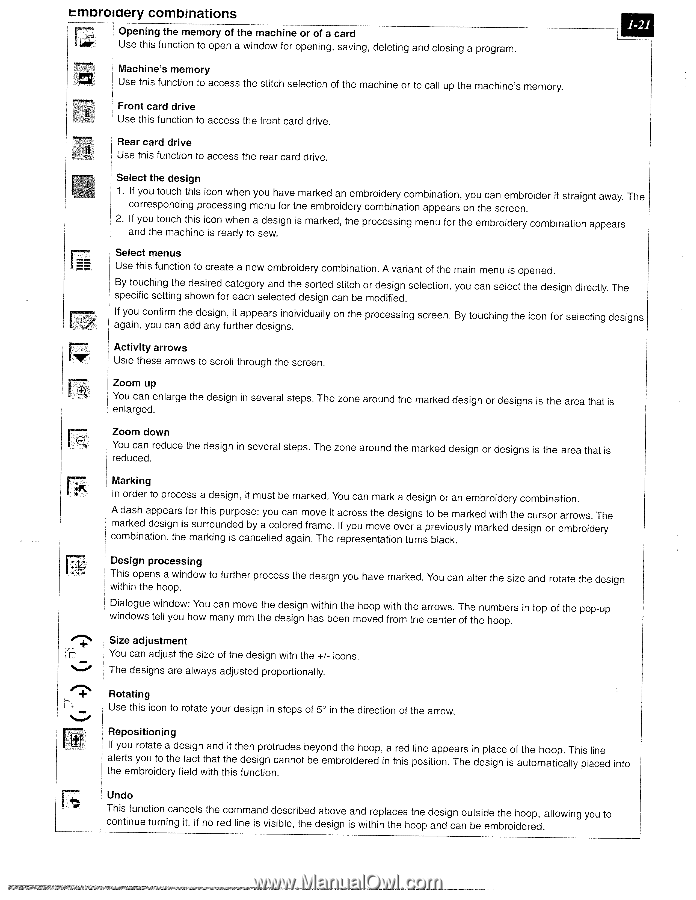
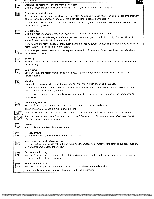
tmroiaery combinations Opening the memory of the machine or of a card Use this function to open a window for opening, saving, deleting and closing a program. - Machines memory Use this function to access the stitch selection of the machine or to call up the machine's memory. Front card drive Use this function to access the front card drive. Rear card drive Use this function to access the rear card drive. Select the design 1. If you touch this icon when you have marked an embroidery combination, you can embroider it straight away. The corresponding processing menu for the embroidery combination appears on the screen. 2. If you touch this icon when a design is marked, the processing menu for the embroidery combination appears and the machine is ready to sew. S&ect menus Use this function to create a new embroidery combination. A variant of the main menu is opened. By touching the desired category and the sorted stitch or design selection, you can select the design directly. The specific setting shown for each selected design can be modified. If you confirm the design, it appears individually on the processing screen. By touching the icon for selecting designs again, you can add any further designs. Activity arrows Usie these arrows to scroll through the screen. Zoom up You can enlarge the design in several steps. The zone around the marked design or designs is the area that is enlarged. Zoom down You can reduce the design in several steps. The zone around the marked design or designs is the area that is reduced. [ '-' Marking In order to process a design, it must be marked. You can mark a design or an embroidery combination. A dash appears for this purpose; you can move it across the designs to be marked with the cursor arrows. The marked design is surrounded by a colored frame. If you move over a previously marked design or embroidery combination, the marking is cancelled again. The representation turns black. Design processing This opens a window to further process the design you have marked. You can alter the size and rotate the design within the hoop. Dialogue window: You can move the design within the hoop with the arrows. The numbers in top of the pop-up windows tell you how many mm the design has been moved from the center of the hoop. Size adjustment You can adjust the size of the design with the +1- icons. The designs are always adjusted proportionally. Rotating Use this icon to rotate your design in steps of 5° in the direction of the arrow. Flff Repositioning If you rotate a design and it then protrudes beyond the hoop, a red line appears in place of the hoop. This line alerts you to the fact that the the embroidery field with this design cannot function. be embroidered in this position. The design is automatically placed into Undo This function cancels the command described above continue turning it. If no red line is visible, the design and replaces the is within the hoop design outside the hoop, allowing and can be embroidered. you to
-
 1
1 -
2
-
3
-
4
-
5
-
6
-
7
-
8
-
9
-
10
-
11
-
12
-
13
-
14
-
15
-
16
-
17
-
18
-
19
-
20
-
21
-
22
-
23
-
 24
24 -
 25
25 -
 26
26 -
 27
27 -
 28
28 -
 29
29 -
 30
30 -
 31
31 -
 32
32 -
 33
33 -
 34
34 -
35
-
36
-
37
-
38
-
39
-
40
-
41
-
42
-
43
-
44
-
45
-
46
-
47
-
48
-
49
-
50
-
51
-
52
-
53
-
54
-
55
-
56
-
57
-
58
-
59
-
60
-
61
-
62
-
63
-
64
-
65
-
66
-
67
-
68
-
69
-
70
-
71
-
72
-
73
-
74
-
75
-
76
-
77
-
78
-
79
-
80
-
81
-
82
-
83
-
84
-
85
-
86
-
87
-
88
-
89
-
90
-
91
-
92
-
93
-
94
-
95
-
96
-
97
-
98
-
99
-
100
-
101
-
102
-
103
-
104
-
105
-
106
-
107
-
108
-
109
-
110
-
111
-
112
-
113
-
114
-
115
-
116
-
117
-
118
-
119
-
120
-
121
-
122
-
123
-
124
-
125
-
126
-
127
-
128
-
129
-
130
-
131
-
132
-
133
-
134
-
135
-
136
-
137
-
138
-
139
-
140
-
141
-
142
-
143
-
144
-
145
-
146
-
147
-
148
-
149
-
150
-
151
-
152
-
153
-
154
-
155
-
156
-
157
-
158
-
159
-
160
-
161
-
162
-
163
-
164
-
165
-
166
-
167
-
168
-
169
-
170
-
171
-
172
-
173
-
174
-
175
-
176
-
177
-
178
-
179
-
180
-
181
-
182
-
183
-
184
-
185
-
186
-
187
-
188
-
189
-
190
-
191
 |
 |