Pfaff creative 2140 Owner's Manual - Page 30
Pfaff creative 2140 Manual
 |
View all Pfaff creative 2140 manuals
Add to My Manuals
Save this manual to your list of manuals |
Page 30 highlights
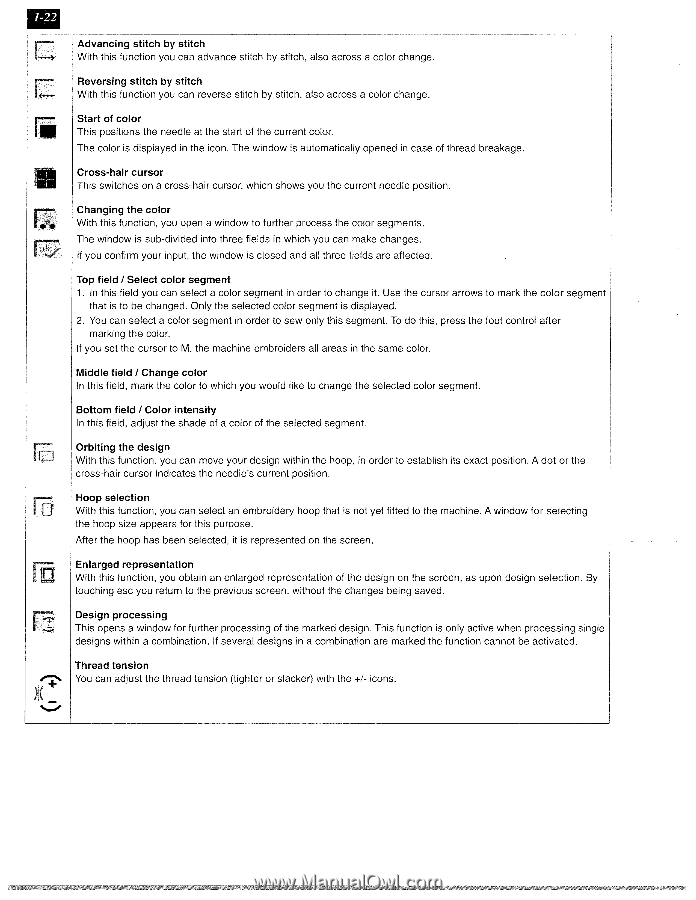
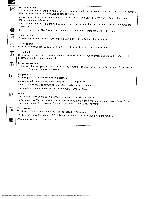
[-..., I....• r ,, ci k r I I11 - Advancing stitch by stitch With this function you can advance stitch by stitch, also across a color change. Reversing stitch by stitch With this function you can reverse stitch by stitch, also across a color change. Start of color This positions the needle at the start of the current color. The color is displayed in the icon. The window is automatically opened in case of thread breakage. Cross-hair cursor This switches on a cross-hair cursor, which shows you the current needle position. Changing the color With this function, you open a window to further process the color segments. The window is sub-divided into three fields in which you can make changes. If you confirm your input, the window is closed and all three fields are affected. Top field I Select color segment 1. In this field you can select a color segment in order to change it. Use the cursor arrows to mark the color segment that is to be changed. Only the selected color segment is displayed. 2. You can select a color segment in order to sew only this segment. To do this, press the foot control after marking the color. If you set the cursor to M, the machine embroiders all areas in the same color. Middle field I Change color In this field, mark the color to which you would like to change the selected color segment. Bottom field / Color intensity In this field, adjust the shade of a color of the selected segment. Orbiting the design With this function, you can move your design within the hoop, in order to establish its exact position. A dot or the cross-hair cursor indicates the needle's current position. Hoop selection With this function, you can select an embroidery hoop that is not yet fitted to the machine. A window for selecting the hoop size appears for this purpose. After the hoop has been selected, it is represented on the screen. Enlarged representation With this function, you obtain an enlarged representation of the design on the screen, as upon design selection, By touching esc you return to the previous screen, without the changes being saved. Design processing This opens a window for further processing of the marked design. This function is only active when processing single designs within a combination. If several designs in a combination are marked the function cannot be activated. Thread tension You can adjust the thread tension (tighter or slacker) with the +1- icons.
-
 1
1 -
2
-
3
-
4
-
5
-
6
-
7
-
8
-
9
-
10
-
11
-
12
-
13
-
14
-
15
-
16
-
17
-
18
-
19
-
20
-
21
-
22
-
23
-
24
-
 25
25 -
 26
26 -
 27
27 -
 28
28 -
 29
29 -
 30
30 -
 31
31 -
 32
32 -
 33
33 -
 34
34 -
 35
35 -
36
-
37
-
38
-
39
-
40
-
41
-
42
-
43
-
44
-
45
-
46
-
47
-
48
-
49
-
50
-
51
-
52
-
53
-
54
-
55
-
56
-
57
-
58
-
59
-
60
-
61
-
62
-
63
-
64
-
65
-
66
-
67
-
68
-
69
-
70
-
71
-
72
-
73
-
74
-
75
-
76
-
77
-
78
-
79
-
80
-
81
-
82
-
83
-
84
-
85
-
86
-
87
-
88
-
89
-
90
-
91
-
92
-
93
-
94
-
95
-
96
-
97
-
98
-
99
-
100
-
101
-
102
-
103
-
104
-
105
-
106
-
107
-
108
-
109
-
110
-
111
-
112
-
113
-
114
-
115
-
116
-
117
-
118
-
119
-
120
-
121
-
122
-
123
-
124
-
125
-
126
-
127
-
128
-
129
-
130
-
131
-
132
-
133
-
134
-
135
-
136
-
137
-
138
-
139
-
140
-
141
-
142
-
143
-
144
-
145
-
146
-
147
-
148
-
149
-
150
-
151
-
152
-
153
-
154
-
155
-
156
-
157
-
158
-
159
-
160
-
161
-
162
-
163
-
164
-
165
-
166
-
167
-
168
-
169
-
170
-
171
-
172
-
173
-
174
-
175
-
176
-
177
-
178
-
179
-
180
-
181
-
182
-
183
-
184
-
185
-
186
-
187
-
188
-
189
-
190
-
191
 |
 |