Pfaff creative 2140 Owner's Manual - Page 52
make further
 |
View all Pfaff creative 2140 manuals
Add to My Manuals
Save this manual to your list of manuals |
Page 52 highlights
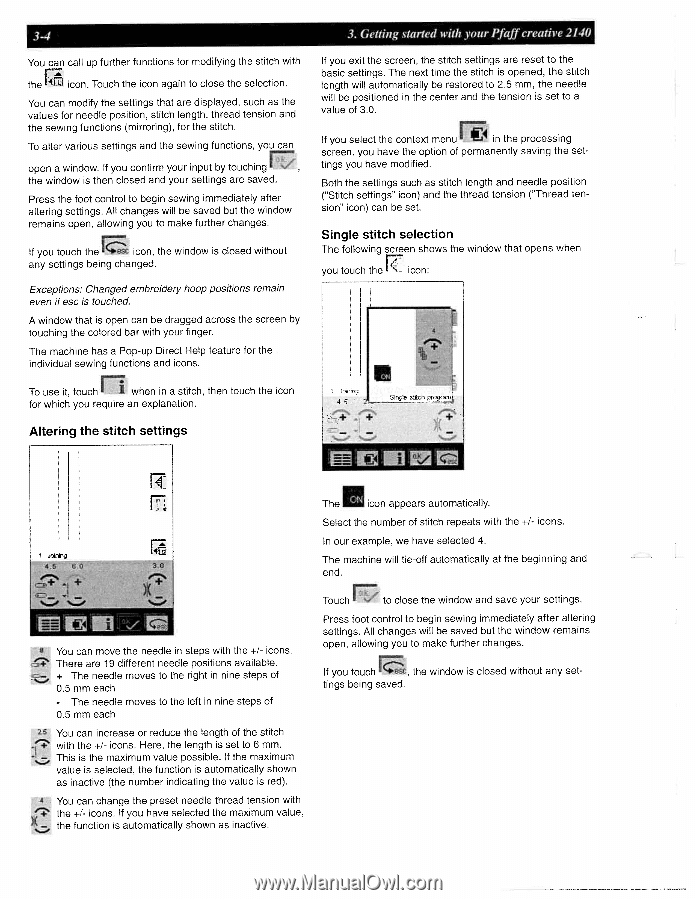
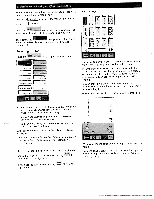
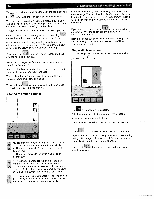
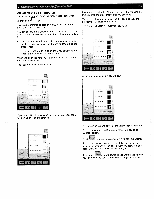
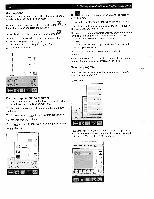
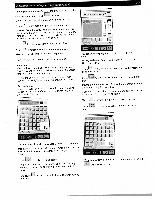
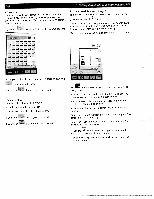
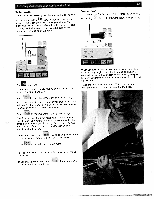
3-4 You can call up further functions for modifying the stitch with the icon. Touch the icon again to close the selection. You can modify the settings that are displayed, such as the values for needle position, stitch length, thread tension and the sewing functions (mirroring), for the stitch. To alter various settings and the sewing functions, you can open a window. If you confirm your input by touching the window is then closed and your settings are saved. Press the foot control to begin sewing immediately after altering settings. All changes will be saved but the window remains open, allowing you to make further changes. If you touch the icon, the window is closed without any settings being changed. Exceptions: Changed embroidery hoop positions remain even if esc is touched. A window that is open can be dragged across the screen by touching the colored bar with your finger. The machine has a Pop-up Direct Help feature for the individual sewing functions and icons. r To use it, touch I when in a stitch, then touch the icon for which you require an explanation. Altering the stitch settings 3. Getting started with your Pfaff creative 2140 If you exit the screen, the stitch settings are reset to the basic settings. The next time the stitch is opened, the stitch length will automatically be restored to 2.5 mm, the needle will be positioned in the center and the tension is set to a value of 3.0. If you select the context menu in the processing screen, you have the option of permanently saving the set tings you have modified. Both the settings such as stitch length and needle position ("Stitch settings" icon) and the thread tension ("Thread ten sion" icon) can be set. Single stitch selection The following screen shows the window that opens when you touch the icon: I I Yz.,nir, P Snge sijich procrnL The icon appears automatically. Select the number of stitch repeats with the ÷1- icons. In our example, we have selected 4. ktil The machine will tie-off automatically at the beginning and end. You can move the needle in steps with the +I icons. There are 19 different needle positions available. + The needle moves to the right in nine steps of 0.5 mm each - The needle moves to the left in nine steps of 0.5 mm each 25 You can increase or reduce the length of the stitch with the +1- cons. Here, the length is set to 6 mm. This is the maximum value possible If the maximum value is selected, the function is automatically shown as inactive (the number indicating the value is red). 4 You can change the preset needle thread tension with the +1- icons. If you have selected the maximum value, the function is automatically shown as inactive. Touch to close the window and save your settings. Press foot control to begin sewing immediately after altering settings. All changes will be saved but the window remains open, allowing you to make further changes. If you touch the window is closed without any set tings being saved.
-
 1
1 -
2
-
3
-
4
-
5
-
6
-
7
-
8
-
9
-
10
-
11
-
12
-
13
-
14
-
15
-
16
-
17
-
18
-
19
-
20
-
21
-
22
-
23
-
24
-
25
-
26
-
27
-
28
-
29
-
30
-
31
-
32
-
33
-
34
-
35
-
36
-
37
-
38
-
39
-
40
-
41
-
42
-
43
-
44
-
45
-
46
-
 47
47 -
 48
48 -
 49
49 -
 50
50 -
 51
51 -
 52
52 -
 53
53 -
 54
54 -
 55
55 -
 56
56 -
 57
57 -
58
-
59
-
60
-
61
-
62
-
63
-
64
-
65
-
66
-
67
-
68
-
69
-
70
-
71
-
72
-
73
-
74
-
75
-
76
-
77
-
78
-
79
-
80
-
81
-
82
-
83
-
84
-
85
-
86
-
87
-
88
-
89
-
90
-
91
-
92
-
93
-
94
-
95
-
96
-
97
-
98
-
99
-
100
-
101
-
102
-
103
-
104
-
105
-
106
-
107
-
108
-
109
-
110
-
111
-
112
-
113
-
114
-
115
-
116
-
117
-
118
-
119
-
120
-
121
-
122
-
123
-
124
-
125
-
126
-
127
-
128
-
129
-
130
-
131
-
132
-
133
-
134
-
135
-
136
-
137
-
138
-
139
-
140
-
141
-
142
-
143
-
144
-
145
-
146
-
147
-
148
-
149
-
150
-
151
-
152
-
153
-
154
-
155
-
156
-
157
-
158
-
159
-
160
-
161
-
162
-
163
-
164
-
165
-
166
-
167
-
168
-
169
-
170
-
171
-
172
-
173
-
174
-
175
-
176
-
177
-
178
-
179
-
180
-
181
-
182
-
183
-
184
-
185
-
186
-
187
-
188
-
189
-
190
-
191
 |
 |