Pfaff creative 2140 Owner's Manual - Page 78
Sewing-on, buttons - instruction manual
 |
View all Pfaff creative 2140 manuals
Add to My Manuals
Save this manual to your list of manuals |
Page 78 highlights
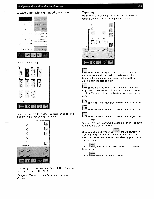
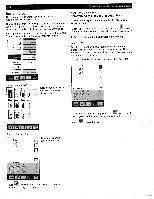
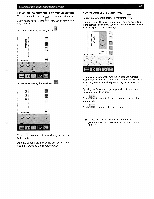
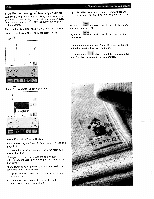
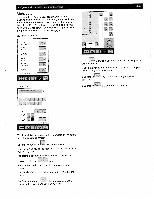
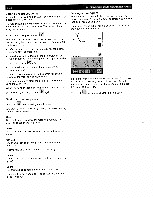
4-8 Sewing-on buttons With stitch 59, you can easily sew on two and four hole buttons. The number of stitches used to fasten the button are pre-set to three. A tie-off is automatically made at the start and at the end of the program. You can also select the program for cutting off the threads and lifting the presser foot. Touch to open a window to specify the number of stitches according to your own wishes. Use the +1- icons to specify a number of stitches between 3-9. The selected number of stitches are visible on the screen. 4 Operate the multi-color touch screen + + Touch to close the window and save your settings. Press the foot control to begin sewing immediately after altering settings. All changes will be saved but the window remains open, allowing you to make further changes. Touch 1 c to close the window without saving your settings. The button is sewn with the pre-set number of stitches (3). (For sewing instructions see page 5-12) The first chapter of this manual is an overview chapter. Here you can find information about the parts of your Pfaff creative 2140 and all stitches stored in it. There is also an explanation about the different icons appearing in the different menus/screens. Please keep these pages available for reference when using the machine. The machine has a Pop-up Direct Help feature for the individua' sewing functions and icons. To use it, touch I when in a stitch, then touch the icon for which you require an explanation.
-
 1
1 -
2
-
3
-
4
-
5
-
6
-
7
-
8
-
9
-
10
-
11
-
12
-
13
-
14
-
15
-
16
-
17
-
18
-
19
-
20
-
21
-
22
-
23
-
24
-
25
-
26
-
27
-
28
-
29
-
30
-
31
-
32
-
33
-
34
-
35
-
36
-
37
-
38
-
39
-
40
-
41
-
42
-
43
-
44
-
45
-
46
-
47
-
48
-
49
-
50
-
51
-
52
-
53
-
54
-
55
-
56
-
57
-
58
-
59
-
60
-
61
-
62
-
63
-
64
-
65
-
66
-
67
-
68
-
69
-
70
-
71
-
72
-
 73
73 -
 74
74 -
 75
75 -
 76
76 -
 77
77 -
 78
78 -
 79
79 -
 80
80 -
 81
81 -
 82
82 -
 83
83 -
84
-
85
-
86
-
87
-
88
-
89
-
90
-
91
-
92
-
93
-
94
-
95
-
96
-
97
-
98
-
99
-
100
-
101
-
102
-
103
-
104
-
105
-
106
-
107
-
108
-
109
-
110
-
111
-
112
-
113
-
114
-
115
-
116
-
117
-
118
-
119
-
120
-
121
-
122
-
123
-
124
-
125
-
126
-
127
-
128
-
129
-
130
-
131
-
132
-
133
-
134
-
135
-
136
-
137
-
138
-
139
-
140
-
141
-
142
-
143
-
144
-
145
-
146
-
147
-
148
-
149
-
150
-
151
-
152
-
153
-
154
-
155
-
156
-
157
-
158
-
159
-
160
-
161
-
162
-
163
-
164
-
165
-
166
-
167
-
168
-
169
-
170
-
171
-
172
-
173
-
174
-
175
-
176
-
177
-
178
-
179
-
180
-
181
-
182
-
183
-
184
-
185
-
186
-
187
-
188
-
189
-
190
-
191
 |
 |