Pfaff hobby 303 Owner's Manual - Page 38
Pfaff hobby 303 Manual
 |
View all Pfaff hobby 303 manuals
Add to My Manuals
Save this manual to your list of manuals |
Page 38 highlights
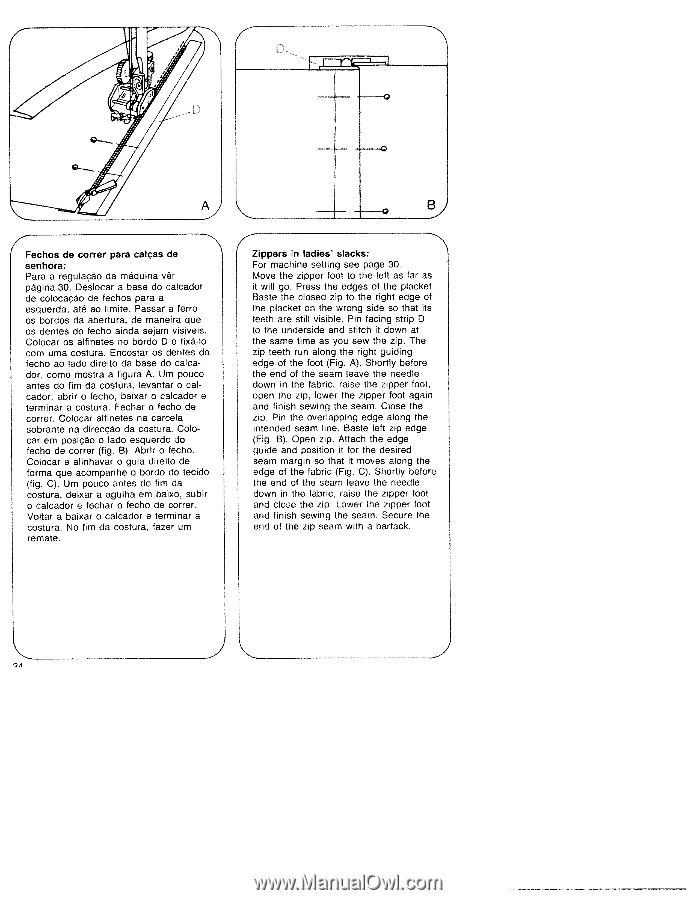
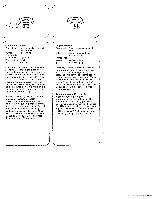
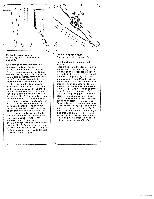
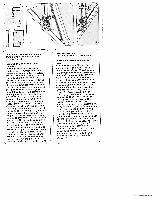
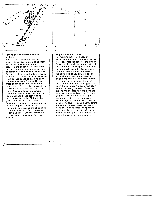
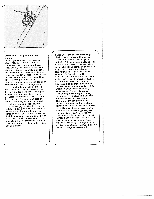
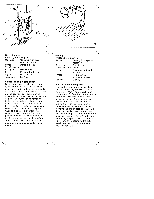
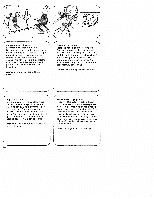
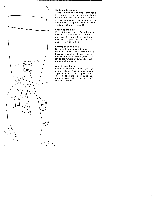
,6 . 4 ______ -0 Fechos de correr para calcas de senhora: Para a regulaçao da maquina vér pagina 30. Deslocar a base do calcador de colocacão de techos para a esquerda, ate ao Hmite. Passar a ferro Os bordos da abertura, de maneira que Os dentes do fecho ainda sejam visiveis. Colocar os alfinetes no bordo D e tixá1o corn uma costura. Encostar os dentes do fecho ao ado direito da base do calca dor, corno rnostra a figura A. Urn pouco antes do tim da costura, levantar o cal cador. abrir o fecho, baixar o calcador e term mar a costura. Fechar o techo de correr. Colocar alfinetes na carcela sobrante na direcçao da costura. Cobcar em posicao a ado esquerdo do fecho de correr (fig. B). Abrir o techo. Colocar e alinhavar o guia direito de forma que acompanhe o bordo do tecido (fig. C). Urn pouco antes do tim da costura. deixar a agulha em baixo. subir o calcador e fechar o fecho de correr. Voltar a baixar a calcador e terminar a costura. No tim da costura, fazer um remate. 4 N Zippers in ladies' slacks: For machine setting see page 30. Move the zipper foot to the left as far as it will go. Press the edges of the placket. Baste the closed zip to the right edge of the placket on the wrong side so that its teeth are still visible, Pin facing strip D to the underside and stitch it down at the same time as you sew the zip. The zip teeth run along the right guiding edge of the foot (Fig. A). Shortly before the end of the seam leave the needle down in the fabric, raise the zipper foot, open the zip, lower the zipper foot again and finish sewing the seam. Close the zip. Pin the overlapping edge along the intended seam line. Baste left zip edge (Fig. B). Open zip. Attach the edge guide and position it for the desired seam margin so that it moves along the edge of the tabric (Fig. C). Shortly before the end of the seam leave the needle down in the fabric, raise the zipper toot and close the zip. Lower the zipper foot and tinish sewing the seam. Secure the end of the zip seam with a bartack.
-
 1
1 -
2
-
3
-
4
-
5
-
6
-
7
-
8
-
9
-
10
-
11
-
12
-
13
-
14
-
15
-
16
-
17
-
18
-
19
-
20
-
21
-
22
-
23
-
24
-
25
-
26
-
27
-
28
-
29
-
30
-
31
-
32
-
 33
33 -
 34
34 -
 35
35 -
 36
36 -
 37
37 -
 38
38 -
 39
39 -
 40
40 -
 41
41 -
 42
42 -
 43
43 -
44
-
45
-
46
-
47
-
48
-
49
-
50
-
51
-
52
-
53
-
54
-
55
-
56
-
57
-
58
-
59
-
60
-
61
-
62
-
63
-
64
-
65
-
66
-
67
 |
 |