Pfaff hobby 721 Owner's Manual
Pfaff hobby 721 Manual
 |
View all Pfaff hobby 721 manuals
Add to My Manuals
Save this manual to your list of manuals |
Pfaff hobby 721 manual content summary:
- Pfaff hobby 721 | Owner's Manual - Page 1
I YQ ö1 tiöiDflJESU )iH9N3 oo - Pfaff hobby 721 | Owner's Manual - Page 2
cxuencla esta hoja FBluetstiaôyflaeyst sdairsiarsiyIôaudoru katlayiniz 4 baS))opcmcmMfTahoiranaaeratcdkgnskhe.esegiwraenscsfheeaumbertryoyneeerecttvryhhwouoeeaaluranenvnisytcuoeoaniteudolpdllahcuiennlagejdvudaetrunhyaretcionitcto,gpelooseysiwsaoleovuewiretrryiontrhge. c) Be sure to bulb in the - Pfaff hobby 721 | Owner's Manual - Page 3
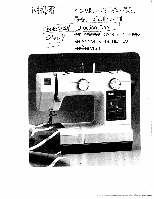
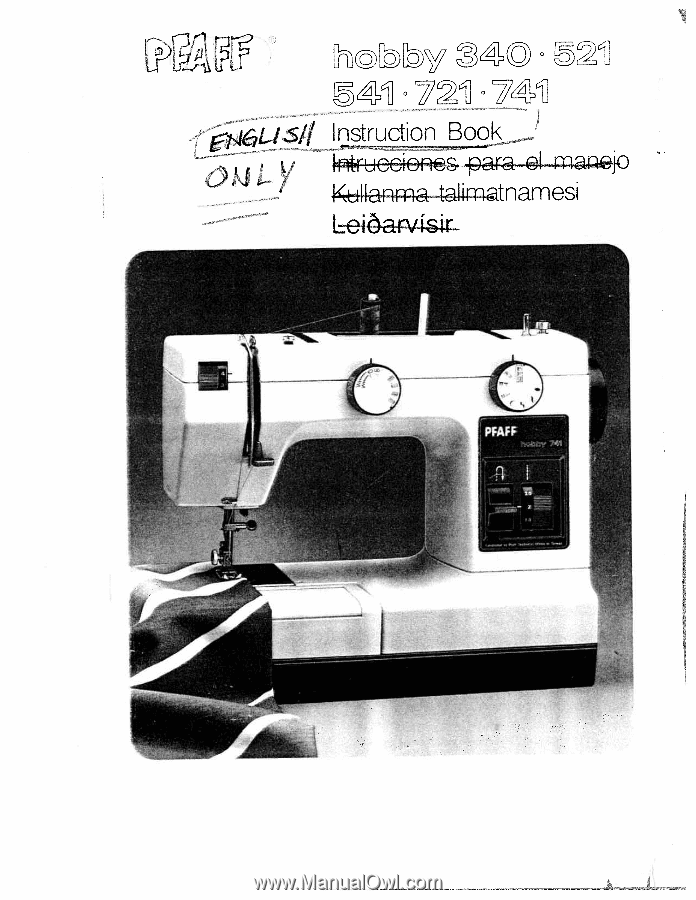
knob 21 Utility-stitch, stretch-and fancy-stitch knob, Model 741 22 Reverse control 23 Bedplate 24 Base 25 Bedplate cover, enclosing sewing hook 26 Accessories compartment Mandos y elementos principales th máquina de coser 1 Palanca tirahilos 2 Tensor del devanador 3 Asa 4 Espigas portacarretes (Se - Pfaff hobby 721 | Owner's Manual - Page 4
fitted. I Inserting the spool pins Two spool pins are included in the accessories, Insert these in the holes provided in the machine. Colocación de los portacarretes: I I En los accesorios se encuentran dos portacarretes. Colóquelos en los orificios previstos en Ia máquina y déjelos intro ducidos - Pfaff hobby 721 | Owner's Manual - Page 5
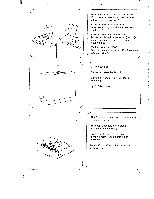
____I ______ Removing the carry case, Model 340 Push both catches fully down (A), then allow them to move up (B). Cómo quitar Ia maleta-funda 0 1 los dos cerres (A) y suelteios(B) cantayi çikarmak, Model 340 Her ki menteseyi tamamen asiya doru ye yukariya doru kdtniz(B). Taskan opnuô a vél - Pfaff hobby 721 | Owner's Manual - Page 6
connection: Set the foot control on the floor. Insert plug A in the machine and plug B in the wall socket. Conexión eléctrica Coloque el pedal lntroduzca Ia clavija A en Ia máquina, y Ia clavija B en el enchute de Ia red. Elektrik balantisi: Marsi yere koyunuz. A fisini, makina içerisine ye B - Pfaff hobby 721 | Owner's Manual - Page 7
____- t Bobbin winding preparations: Reach under work support 9 and pull it out towards the left. Preparaci bed plate cover 25 or fold freearm cover 10 downwards. Quite a tapa 25 de Ia placa base o abra el casquete de cierre 10 hacia abajo. Alt levha kapaini (25) kaldiriniz, veya kapama kapaini ( - Pfaff hobby 721 | Owner's Manual - Page 8
kadar bastiriniz. YtiO nü spOlunni til hgri aO takka A. ,/bisengaging the sewing mechanism: Hold hand wheel 6 firmly and turn knob 7 towards you. : Sujete con una mano el volante 6 y gire con Ia otra el disco de desem brague 7 hacia el frente. Diki mekanizmasini kapatmak: El car kini (6> tutunuz - Pfaff hobby 721 | Owner's Manual - Page 9
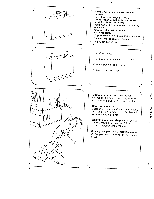
): Tome el hilo desde el carrete, páselo por el tensor 2, Ilévelo hacia Ia canilla, introdüzcalo en uno de sus agujeros y sujételo. Pise el pedal y comience a devanar. Después de unas vueltas de devanado, suelte el hilo. Una vez Ilena Ia canilla, empüjela hacia Ia izquierda, sáquela y corte el hilo - Pfaff hobby 721 | Owner's Manual - Page 10
4 Ethnegbagalianngcethwe hseeewl ifnirgmlmy eacnhdantuirsnmk: nHobold7 away from you. CSuojneetxeiOelnvdoelalnmteeycagniriesmelo de costura: disco 7 hacia atrás. / ( Dcairkkiisnimseikkacnaiztumtuansiunztnyeçadliissktir7i'lymi aasrik:aEyla doru çeviriniz. Tengiô gangverlc handhjOliO og festiO - Pfaff hobby 721 | Owner's Manual - Page 11
slip downwards. (Turn screw A to the left for a weaker tension and to the right for a tighter tension.) Comprobación de Ia tensiOn del hilo inferior: Suspendiendo Ia cápsula con Ia canilla de su propio hilo, Ia cápsula no deberá deslizarse más que al dar tiron citos del hilo (girando el tornillo - Pfaff hobby 721 | Owner's Manual - Page 12
eftir rauf 0, i ráO st'ringar E og F og ann a nálahóldunni. siOan i hgri ráOIeiãar 0 / Thread the needle from front to back. Enhebre superior eI ojo de Ia aguja desde el Ia aguja. pasando el hilo frente hacia atrás par List ipIii on taraftan arka tarafa ine delii içerisinden geçiriniz - Pfaff hobby 721 | Owner's Manual - Page 13
üiô hand a hjOlinu fram viô ar til nálin hefur farià niôur oger komin upp aftur. ToglO nü undirtvinnann ace both threads towards the right under the sewing foot. - o I Coloque ambos hilos hacia Ia derecha debajo del prensatelas. /1 Insert bedplate cover 25 or close free- arm cover 10 - Pfaff hobby 721 | Owner's Manual - Page 14
521-741 van provistos de brazo al aire para coser articulos tubulares. 521-741 modelleri, boru seklindeki dikile cek seyler için bir serbest kola sahip bulunmaktadir. Vélarnar eru meO 521-741 meô friarm sem er gilegt fyrir skálmar og ermar. Push the detachable work support onto the machine (guide - Pfaff hobby 721 | Owner's Manual - Page 15
stitch. Sew a short seam. The threads should interlock in the middle of the material. Operating the foot control: The farther you press the pedal down the faster the machine runs. Accionamiento del pedal: Cuanto más profundo pise el pedal tanto mayor será Ia velocidad de costura de Ia Hobby. Marsa - Pfaff hobby 721 | Owner's Manual - Page 16
véllnni. CL Thread cutter A: Draw the threads. into the slot and pull them downwards. Cortahilos A. Coloque los hilos en a ranura y tire de ellos hacia abajo Iplik kesici A. plikleri yerletiriniz ye geriye doru cekiniz. Tvinnahnifur A. LeggiO tvinnaendana skáraufina og tog là beggja megin. 14 - Pfaff hobby 721 | Owner's Manual - Page 17
sewing buttonholes. Regulación del largo de puntada (8): Gire el botOn hasta que el argo de puntada deseado entre 0 y 4 coincida con Ia marca A. La zona roja entre 0 y 1 se usa para coser sport. d. fyrir hnappagot. Reverse sewing: Press down control 22. The machine sews backwards as long as the - Pfaff hobby 721 | Owner's Manual - Page 18
4 16 4 N For sewing stretch stitches (green), set the stitch length control at "S. S' Stretch stitches can be lengthened by turning the control towards "+" or shortened by turning it towards Para coser puntadas elásticas (stretch) (sector verde) hay que colocar el regula dor de puntada sobre el - Pfaff hobby 721 | Owner's Manual - Page 19
see pages 18/19. 4 Modelo 741 Botön selector de zigzag y ojales (20). Gire el botón de forma que Ia puntada deseada coincida con Ia marca A. BotOn selector de puntadas (21). Gire el botón de forma que el tipo de puntada deseado coincida con Ia marca B. Para coser puntadas utilitarias y decora tivas - Pfaff hobby 721 | Owner's Manual - Page 20
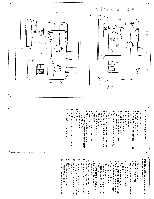
pattern table Stitch Straight stitch, middle needle position stitch, left needle Straight position Modeller 340 521 541 721 741 • ç e • Zigzag stitch range . Ill 2 1I Buttonhole symbols j - -->. I'' IN III Shell-edging stitch Elastic blind stitch -- i .' Elastic seam . Straight - Pfaff hobby 721 | Owner's Manual - Page 21
feed disengaged, and to B again for sewing. Ocultación del transportador: Retire Ia tapa 25 de Ia piaca base 0 abra Ia tapa 10 del brazo al aire. Corriendo Ia palanca hacia C, queda oculto el transportador; corriéndoia hacia B, pasa a Ia posiciOn normal para coser - Pfaff hobby 721 | Owner's Manual - Page 22
sewing foot so that stud B fits in slots C. Colocación del pie prensatelas: Baje a palanca alzaprensatelas y posicione a! mismo tiempo el prensatelas de F I Hole E and screw D are used for attaching an edge guide, while screw F is the sewing foot holder srew. D y E sirven para fijar gulas. F sirve - Pfaff hobby 721 | Owner's Manual - Page 23
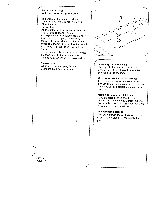
feet (standard accessories) 1 Ordinary sewing 3 Blindstitch foot toot 4 Zipper 2 Clear-view foot Pies prensatelas (accesorios compartment: (Models 521-741) To open accessory compartment raise cover of work support 9. Compartimento para accesorios (módelos 521-741): Abriendo Ia tapa del - Pfaff hobby 721 | Owner's Manual - Page 24
ô fyrir fylgihlutina er hgra megin I sökkl mum (23) I Detachable work support (Model 340) Attach the work support so that its two hooks engage in the openings on the base. Suplemento de costura (modelo 340): lntroduzca el suplemento de forma que los dos ganchos encajen en los orificios del zôcalo - Pfaff hobby 721 | Owner's Manual - Page 25
desired stit ajustar, segün Ia labor, a a distancia deseada. C ching margin for various applications. Con Ia ayuda de a guIa se pueden With the edge guide attached, it is easy coser con toda facilidad costuras parale P to sew parallel lines of stitches or to stitch parallel to the edge. The - Pfaff hobby 721 | Owner's Manual - Page 26
penetration Aguja: N 0 70 u 80 Place the prepared hem under the blind- stitch sewing foot. The crease line of the Regulación de Ia penetración de Ia outer fabric runs along edge guide 8 of aguja: the blindstitch sewing foot. Coloque debajo del prensatelas para Turn screw A to adjust edge - Pfaff hobby 721 | Owner's Manual - Page 27
machine embroidery thread Stitch length: buttonhole range (red) Needle: sizes 70/80 1. Set zigzag stitch knob 20 to sew a buttonhole seam width of 2 mm, i. e. roughly at 'B'. Sew 80 1. Con el botón selector del zigzag 20 elija una anchura de unos 2 mm, aprox. en B. Cosa el primer labio del - Pfaff hobby 721 | Owner's Manual - Page 28
: needle thread tension a little slack Thread: fine machine embroidery thread Stitch length: buttonhole range (red) Utility-stitch knob 21 at Model 741: red buttonhole symbol Needle: sizes 70 to 80 jJ 1 Set utility-stitch knob 20 at sew the first buttonhole seam. and Raise the needle - Pfaff hobby 721 | Owner's Manual - Page 29
foot (B). Sew a num ber of zigzag stitches and leave a thread end of about 6 inches. Pull the needleand bobbin threads through (C). Wrap the stem (D) and tie off the threads. 4 Costura de botones: Prensatelas: Sin prensatelas a con el transparente Puntada: Punto recto PosiciOn de Ia puntada - Pfaff hobby 721 | Owner's Manual - Page 30
the foot so that its teeth run along the right guiding edge on the sole of the foot (Fig. B). Sew about half the length of the zip at the required . Coloque Ia cremallera abierta debajo del prensatelas de forma que los dientes de Ia cremallera discurran a lo largo de Ia guIa derecha (fig. B), Cosa Ia - Pfaff hobby 721 | Owner's Manual - Page 31
in the foot (Fig. F). Finish sewing the zip. Now sew down the zip tape letting the zip teeth run along the guiding edge of the foot (Fig. G). 36 4 Cremallera cosida en una costura (Para Ia preparaciOn de Ia máquina, véase Ia Pág. 34) Preparación y colocación de Ia cremallera: Doble y planche los - Pfaff hobby 721 | Owner's Manual - Page 32
in ladies' slacks For machine setting see page 34. down at the same time as you sew the zip. The zip teeth run along the right guiding edge of the foot (Fig. sewing the seam. Secure the end of the zip seam with a bartack. B I Cremalleras para pantalones de señora (Para Ia preparaciOn de a maquina - Pfaff hobby 721 | Owner's Manual - Page 33
machine Needle: embroidery thread Size 70 How to fit the darning foot Remove the sewing inferior. Sujete ambos hilos punta al cornenzar a coser. Haga unas puntadas en Ia tela. Extien da . unos a otros D). Zurza en y redondo al final de cada costura (fig. E). Tan pronto como esté recubierto - Pfaff hobby 721 | Owner's Manual - Page 34
'i-i-b)- I- I- I-I- H-l- F- 4- - i- H4 - -I-hl-' - -- -- -. -J ------' - -, __1 --I -' 3 I E brerek tamir etmek Makinanin hazirlanmasi: Dikis aya: Orerek tamir etme ayai Batis: Düz dikis Ust iplik gerginIii: Biraz daha gevek iplik: Ince makina naki iplii lne: Kalinlik 70 Transportor - Pfaff hobby 721 | Owner's Manual - Page 35
. Apply a drop of oil to the hook raceway occasionally. Caution: do not drop the sewing hook. 4 Engrase y limpieza Eleve Ia aguja y el prensatelas. Afloje los dos tornillos de fijaciOn y retire a placa de aguja. Limpie el transportador con un pincel. Gire hacia afuera el pestillo A del garfio - Pfaff hobby 721 | Owner's Manual - Page 36
the pins enter slots C, push the bulb upwards and turn it in direction B. Cambio de Ia bombilla Desenchufe a máquina de Ia red. Empuje Ia bombilla hacia arriba, girela hacia A y saquela. Coloque Ia nueva bombilla de forma que as gulas encajen en las ranuras C, empüjela hacia arriba y gIrela hacia - Pfaff hobby 721 | Owner's Manual - Page 37
SKF 70, 110 130/705 H-J 90-110 -- Medium ball point Heavy ball point Acute round point Stretch-fabric needle developed especially for Pfaff. Particularly suitable for delicate stretch and knitted fabrics. Wide-meshed corsetry, Lycra, Simplex and Lastex. Twill, workwear, heavy linen, blue jeans - Pfaff hobby 721 | Owner's Manual - Page 38
Needle chart System & No. Stitch length Stitch width n [ Needle spacing Suitable for 130/705 80 H-ZWJ 2.5 mm 2.5 mm - - 130/705H-ZWI 80 90 100 2.5 mm 2.5 mm - 3.0 mm - - 1.6mm 2.0 mm 2.5 mm 3.0 mm 4.0mm Medium-wide cording Wide cording Extra wide Extra-wide cording cording - Pfaff hobby 721 | Owner's Manual - Page 39
inserted correctly. Wrong needle used. Needle bent or blunt. Machine threaded improperly. Needle too thin for thread used. Push far as it will go. Insert new needle. See Needle Chart. Let machine feed the work alone. Only guide the material lightly. When inserting the bobbin case, push it in as far - Pfaff hobby 721 | Owner's Manual - Page 40
. Remove thread ends and put a drop of oil into hook raceway. 7. Important notes: Never run a threaded machine unless there is a piece of fabric under the sewing foot. If you have to leave the machine, even for a short while, be sure to switch off the master switch. This is particularly important - Pfaff hobby 721 | Owner's Manual - Page 41
holder) Cording foot, 5 grooves (twin needle with 1.8-2.5 mm needle gauge) Cording foot, 7 grooves (twin needle with 1.4-1.8 mm needle gauge) Fringe sewing foot Edge guide Straight-stitch foot Needle plate with round needle hole Felling foot, 4.5 mm Felling foot, 6.5 mm Part No. 93-035920=91 98 - Pfaff hobby 721 | Owner's Manual - Page 42
Changing the needle Dropping the feed Changing the sewing foot Sewing feet Accessory compartment Detachable work support Top-stitching Elastic blind stitch Sewing buttonholes, Models 340 and 521 Sewing buttonholes, Models 541 -741 Sewing on buttons Inserting zippers Seam-like zipper closures Zippers
-
 1
1 -
 2
2 -
 3
3 -
 4
4 -
 5
5 -
 6
6 -
 7
7 -
8
-
9
-
10
-
11
-
12
-
13
-
14
-
15
-
16
-
17
-
18
-
19
-
20
-
21
-
22
-
23
-
24
-
25
-
26
-
27
-
28
-
29
-
30
-
31
-
32
-
33
-
34
-
35
-
36
-
37
-
38
-
39
-
40
-
41
-
42
 |
 |
I
Y
Q
o
o
ötiöiDflJESU
1
)iH9N3