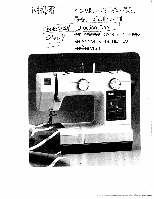
Pfaff hobby 741 Owner's Manual
Pfaff hobby 741 Manual
 |
View all Pfaff hobby 741 manuals
Add to My Manuals
Save this manual to your list of manuals |
Pfaff hobby 741 manual content summary:
- Pfaff hobby 741 | Owner's Manual - Page 1
I YQ ö1 tiöiDflJESU )iH9N3 oo - Pfaff hobby 741 | Owner's Manual - Page 2
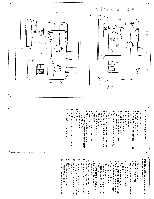
cxuencla esta hoja FBluetstiaôyflaeyst sdairsiarsiyIôaudoru katlayiniz 4 baS))opcmcmMfTahoiranaaeratcdkgnskhe.esegiwraenscsfheeaumbertryoyneeerecttvryhhwouoeeaaluranenvnisytcuoeoaniteudolpdllahcuiennlagejdvudaetrunhyaretcionitcto,gpelooseysiwsaoleovuewiretrryiontrhge. c) Be sure to bulb in the - Pfaff hobby 741 | Owner's Manual - Page 3
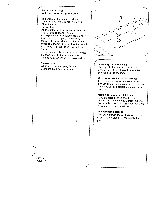
knob 8 Stitch length control 9 Detachable work support with accessories box 10 Free-arm cover, enclosing sewing hook 11 Needle plate 12 Sewing foot holder with sewing foot 13 Needle holder with retaining screw 14 Thread guides 15 Threading slots 16 Needle thread tension 17 Free arm 18 Presser bar - Pfaff hobby 741 | Owner's Manual - Page 4
to be fitted. I Inserting the spool pins Two spool pins are included in the accessories, Insert these in the holes provided in the machine. Colocación de los portacarretes: I I En los accesorios se encuentran dos portacarretes. Colóquelos en los orificios previstos en Ia máquina y déjelos intro - Pfaff hobby 741 | Owner's Manual - Page 5
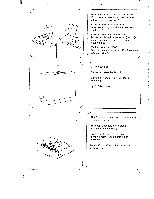
____I ______ Removing the carry case, Model 340 Push both catches fully down (A), then allow them to move up (B). Cómo quitar Ia maleta-funda 0 1 los dos cerres (A) y suelteios(B) cantayi çikarmak, Model 340 Her ki menteseyi tamamen asiya doru ye yukariya doru kdtniz(B). Taskan opnuô a vél - Pfaff hobby 741 | Owner's Manual - Page 6
hacia arriba. canta kapainin kaldirilmasi. LyftiO tOskunni slOan upp. jiiIllI Electrical connection: Set the foot control on the floor. Insert plug A in the machine and plug B in the wall socket. Conexión eléctrica Coloque el pedal en el suelo. lntroduzca Ia clavija A en Ia máquina, y Ia clavija - Pfaff hobby 741 | Owner's Manual - Page 7
____- t Bobbin winding preparations: Reach under work support 9 and pull it out towards the left. Preparación para el devanado: Meta a mano izquierda por debajo del brazo 9 y desvIelo hacia Ia izquierda. ipHi masuraya sarma - Pfaff hobby 741 | Owner's Manual - Page 8
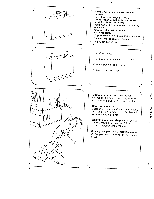
Ia canilia hacia Ia derecha contra el tope A. Masurayi saga doru, A dayanaina kadar bastiriniz. YtiO nü spOlunni til hgri aO takka A. ,/bisengaging the sewing mechanism: Hold hand wheel 6 firmly and turn knob 7 towards you. I Desconexión del mecanismo del costura: Sujete con una mano el volante - Pfaff hobby 741 | Owner's Manual - Page 9
hold it there. Press the foot control to wind the bobbin. After a few turns, let go of the thread again. Push the filled bob bin to the left, remove it and cut the thread. N Devanado del hilo (bobinado): Tome el hilo desde el carrete, páselo por el tensor 2, Ilévelo hacia Ia - Pfaff hobby 741 | Owner's Manual - Page 10
4 Ethnegbagalianngcethwe hseeewl ifnirgmlmy eacnhdantuirsnmk: nHobold7 away from you. CSuojneetxeiOelnvdoelalnmteeycagniriesmelo de costura: disco 7 hacia atrás. / ( Dcairkkiisnimseikkacnaiztumtuansiunztnyeçadliissktir7i'lymi aasrik:aEyla doru çeviriniz. Tengiô gangverlc handhjOliO og festiO - Pfaff hobby 741 | Owner's Manual - Page 11
Checking the bobbin thread tension: With a brief sharp upward movement of your hand, the bobbin must gradually slip downwards. (Turn screw A to the left for a weaker tension and to - Pfaff hobby 741 | Owner's Manual - Page 12
stringu C neOan frá i rauf D. rauf B, siOan i ráâgjafenn 1, aftur niOur eftir rauf 0, i ráO st'ringar E og F og ann a nálahóldunni. siOan i hgri ráOIeiãar 0 / Thread the needle from front to back. Enhebre superior eI ojo de Ia aguja desde el Ia aguja. pasando el hilo frente hacia atr - Pfaff hobby 741 | Owner's Manual - Page 13
og snüiô hand a hjOlinu fram viô ar til nálin hefur farià niôur oger komin upp aftur. ToglO nü undirtvinnann ace both threads towards the right under the sewing foot. - o I Coloque ambos hilos hacia Ia derecha debajo del prensatelas. /1 Insert bedplate cover 25 or close free- arm cover 10 - Pfaff hobby 741 | Owner's Manual - Page 14
f4 , Models 521-741 have a free arm for sewing tubular shaped articles. Los modelos 521-741 van provistos de -741 meô friarm sem er gilegt fyrir skálmar og ermar. Push the detachable work support onto the machine (guide pin in hole). Acople el suptemento a Ia máquina de forma que el perno guIa - Pfaff hobby 741 | Owner's Manual - Page 15
stitch. Sew a short seam. The threads should interlock in the middle of the material. Operating the foot control: The farther you press the pedal down the faster the machine runs. Accionamiento del pedal: Cuanto más profundo pise el pedal tanto mayor será Ia velocidad de costura de Ia Hobby. Marsa - Pfaff hobby 741 | Owner's Manual - Page 16
/ Kuma bastirma kolunu (19) yukariya /, getlilniz. Kumasi arka tarafa doru LyftiO fOtlyftir 19, og takiO efniO aftur ür véllnni. CL Thread cutter A: Draw the threads. into the slot and pull them downwards. Cortahilos A. Coloque los hilos en a ranura y tire de ellos hacia abajo Iplik kesici - Pfaff hobby 741 | Owner's Manual - Page 17
margir mm. sporlO se. Hgt er aO a stilla frá 04 mm. RauOa svOiO milli 0 og 1 er fyrir étt sport. d. fyrir hnappagot. Reverse sewing: Press down control 22. The machine sews backwards as long as the control key is held down. Costura en retroceso: j Pulse el botón 22 hacia abajo. La máquina cose - Pfaff hobby 741 | Owner's Manual - Page 18
4 4 16 4 N For sewing stretch stitches (green), set the stitch length control at "S. S' Stretch stitches can be lengthened by turning the control towards "+" or shortened by turning it towards - Pfaff hobby 741 | Owner's Manual - Page 19
Zigzag- and utility-stitch knob 20 Turn the required stitch to mark A. Stitch pattern setting knob 21 Turn the required stitch pattern to mark B. For sewing the utility- and fancy stitches, zigzag setting knob 20 must be set at the widest zigzag stitch. For a table of stitch patterns, see pages 18 - Pfaff hobby 741 | Owner's Manual - Page 20
Isaret/Tákn Stitch pattern table Stitch Straight stitch, middle needle position stitch, left needle Straight position Modeller 340 521 541 721 741 • ç e • Zigzag stitch range . Ill 2 1I Buttonhole symbols j - -->. I'' IN III Shell-edging stitch Elastic blind stitch -- i .' Elastic - Pfaff hobby 741 | Owner's Manual - Page 21
aftur. Dropping the feed: Remove bedplate cover 25 or free-arm ocover 10. Push the drop-feed control to = feed disengaged, and to B again for sewing. Ocultación del transportador: Retire Ia tapa 25 de Ia piaca base 0 abra Ia tapa 10 del brazo al aire. Corriendo Ia palanca hacia C, queda oculto - Pfaff hobby 741 | Owner's Manual - Page 22
fOtlyftirinn og friô fOtinn til annig aO tittur B falli i rauf C. 0 D E F I Hole E and screw D are used for attaching an edge guide, while screw F is the sewing foot holder srew. D y E sirven para fijar gulas. F sirve para fijar el soporte del prensatelas. D ye E, cetvelin tespit edilmesi çindir - Pfaff hobby 741 | Owner's Manual - Page 23
feet (standard accessories) 1 Ordinary sewing 3 Blindstitch foot toot 4 Zipper 2 Clear-view foot Pies prensatelas (accesorios : (Models 521-741) To open accessory compartment raise cover of work support 9. Compartimento para accesorios (módelos 521-741): Abriendo Ia tapa del suplemento - Pfaff hobby 741 | Owner's Manual - Page 24
asilacai ekilde olmak üzere sürünüz. Auka vinnuborô (Vél 340) RenniO borOinu annig upp aO vélinni aO hökin krkist gotin a sokklinum. ( After attaching the support, push it downwards a little. Una vez encajado el suplemento, presiO nelo un poco hacia abajo. Astiktan sonra, diki yüzeyini biraz aaiya - Pfaff hobby 741 | Owner's Manual - Page 25
for various applications. Con Ia ayuda de a guIa se pueden With the edge guide attached, it is easy coser con toda facilidad costuras parale P to sew parallel lines of stitches or to stitch parallel to the edge. The guide either follows an edge (Fig. D) or when making parallel lines of stitches - Pfaff hobby 741 | Owner's Manual - Page 26
8 of aguja: the blindstitch sewing foot. Coloque debajo del prensatelas para Turn screw A to adjust edge guide B so puntada invisible el dobladillo previamen far to the left that the needle picks up te preparado. El borde del doblez supe only one thread of the outer fabric when rior deber - Pfaff hobby 741 | Owner's Manual - Page 27
: clear-view foot Tension: needle thread tension a little slack Thread: fine machine embroidery thread Stitch length: buttonhole range (red) Needle: sizes 70/80 1. Set zigzag stitch knob 20 to sew a buttonhole seam width of 2 mm, i. e. roughly at 'B'. Sew the first buttonhole seam. At - Pfaff hobby 741 | Owner's Manual - Page 28
4 Sewing Sewing buttonholes (Models 541, 741) foot: clear-view sewing foot Tension: needle thread tension a little slack Thread: fine machine embroidery thread Stitch length: buttonhole range (red) Utility-stitch knob 21 at Model 741: red buttonhole symbol Needle: sizes 70 to 80 jJ 1 - Pfaff hobby 741 | Owner's Manual - Page 29
with clear-view foot Stitch: straight stitch, left needle position Feed: dropped Thread: fine sewing thread Place the button in the location marked beforehand and push it under the sewing foot holder. Lower the sewing foot holder into the button. Lower the needle into the left hole of - Pfaff hobby 741 | Owner's Manual - Page 30
2 to 3 Stitch: Straight stitch, middle needle position Thread: sewing thread This is how the zipper foot is engaged Insert the zip under the foot so that its teeth run along the right guiding edge on the sole of the foot (Fig. B). Sew about half the length of the zip at the required width. - Pfaff hobby 741 | Owner's Manual - Page 31
lLII4ITII11IIL1II1IIII Ji- III J 1 ' a A C 4 Seam-like zipper closure For machine setting see page 34 How the zipper is prepared and inserted: Press the edges of the seam lift up the teeth a lfttle to feed them into the guiding groove. Sew the seam to the end and secure it. Close zip. Pin other - Pfaff hobby 741 | Owner's Manual - Page 32
__-,Iu ,, II tIi -0 -0 Zippers in ladies' slacks For machine setting see page 34. Move the zipper foot to the left as D to the underside and stitch t down at the same time as you sew the zip. The zip teeth run along the right guiding edge of the foot (Fig. A). Shortly before the end of the seam - Pfaff hobby 741 | Owner's Manual - Page 33
(special accessory) Stitch type: Straight stitch Needle position: Centre Tension: Ease needle thread tension Thread: Fine machine Needle: embroidery thread Size 70 How to fit the darning foot Remove the sewing foot holder, then secure the darning foot with screw A. making sure that wire - Pfaff hobby 741 | Owner's Manual - Page 34
'i-i-b)- I- I- I-I- H-l- F- 4- - i- H4 - -I-hl-' - -- -- -. -J ------' - -, __1 --I -' 3 I E brerek tamir etmek Makinanin hazirlanmasi: Dikis aya: Orerek tamir etme ayai Batis: Düz dikis Ust iplik gerginIii: Biraz daha gevek iplik: Ince makina naki iplii lne: Kalinlik 70 Transportor - Pfaff hobby 741 | Owner's Manual - Page 35
hook C. Clean the hook raceway. Apply a drop of oil to the hook raceway occasionally. Caution: do not drop the sewing hook. 4 Engrase y limpieza Eleve Ia aguja y el prensatelas. Afloje los dos tornillos de fijaciOn y retire a placa de aguja. Limpie el transportador con un pincel. Gire - Pfaff hobby 741 | Owner's Manual - Page 36
_____ Changing the bulb Pull out the mains plug. Push the bulb upwards, then in direction A and pull it out. Insert the new bulb so that the pins enter slots C, push the bulb upwards and turn it in direction B. Cambio de Ia bombilla Desenchufe a máquina de Ia red. Empuje Ia bombilla hacia arriba, - Pfaff hobby 741 | Owner's Manual - Page 37
Heavy ball point Acute round point Stretch-fabric needle developed especially for Pfaff. Particularly suitable for delicate stretch and knitted fabrics. Wide-meshed corsetry, Seams topstitched with buttonhole silk or No. 30/3 synthetic thread. 130/705 H-WING 100 44 -( ----- Hemstitching point - Pfaff hobby 741 | Owner's Manual - Page 38
Needle chart System & No. Stitch length Stitch width n [ Needle spacing Suitable for 130/705 80 H-ZWJ 2.5 mm 2.5 mm - - 130/705H-ZWI 80 90 100 2.5 mm 2.5 mm - 3.0 mm - - 1.6mm 2.0 mm 2.5 mm 3.0 mm 4.0mm Medium-wide cording Wide cording Extra wide Extra-wide cording cording - Pfaff hobby 741 | Owner's Manual - Page 39
Machine skips stitches Needle not inserted correctly. Wrong needle used. Needle bent or blunt. Machine threaded improperly. Needle too thin for thread used go. Insert new needle. See Needle Chart. Let machine feed the work alone. Only guide the material lightly. When inserting the bobbin case, push - Pfaff hobby 741 | Owner's Manual - Page 40
ends and put a drop of oil into hook raceway. 7. Important notes: Never run a threaded machine unless there is a piece of fabric under the sewing foot. If you have to leave the machine, even for a short while, be sure to switch off the master switch. This is particularly important when children - Pfaff hobby 741 | Owner's Manual - Page 41
holder) Cording foot, 5 grooves (twin needle with 1.8-2.5 mm needle gauge) Cording foot, 7 grooves (twin needle with 1.4-1.8 mm needle gauge) Fringe sewing foot Edge guide Straight-stitch foot Needle plate with round needle hole Felling foot, 4.5 mm Felling foot, 6.5 mm Part No. 93-035920=91 98 - Pfaff hobby 741 | Owner's Manual - Page 42
741 Changing the needle Dropping the feed Changing the sewing foot Sewing feet Accessory compartment Detachable work support Top-stitching Elastic blind stitch Sewing buttonholes, Models 340 and 521 Sewing buttonholes, Models 541 -741 Sewing on buttons Inserting zippers Seam-like zipper closures
-
 1
1 -
 2
2 -
 3
3 -
 4
4 -
 5
5 -
 6
6 -
 7
7 -
8
-
9
-
10
-
11
-
12
-
13
-
14
-
15
-
16
-
17
-
18
-
19
-
20
-
21
-
22
-
23
-
24
-
25
-
26
-
27
-
28
-
29
-
30
-
31
-
32
-
33
-
34
-
35
-
36
-
37
-
38
-
39
-
40
-
41
-
42
 |
 |
I
Y
Q
o
o
ötiöiDflJESU
1
)iH9N3