Pfaff hobbylock 756 Owner's Manual - Page 11
Remove, Replace, Cloth, Plate, Howto, Removeand, Cylinder, Cover - sewing machine
 |
View all Pfaff hobbylock 756 manuals
Add to My Manuals
Save this manual to your list of manuals |
Page 11 highlights
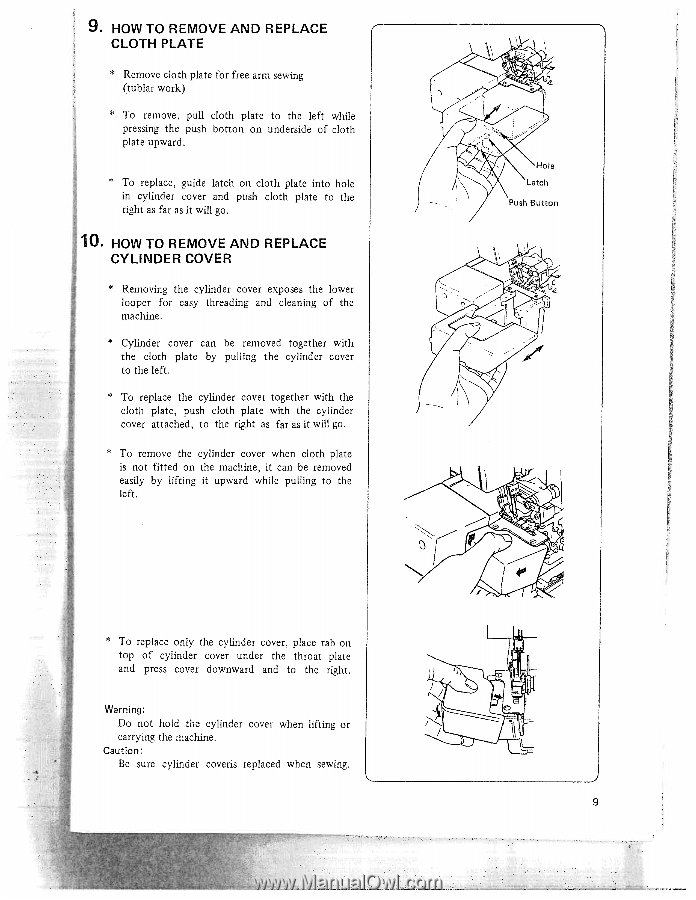
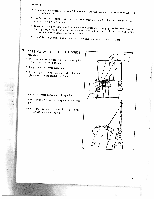
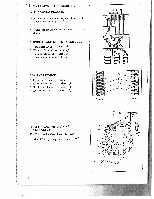
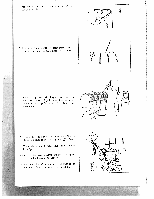
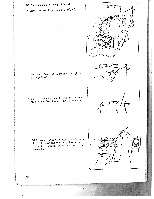
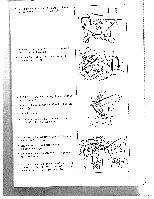
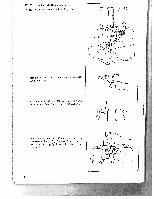
9 HOW TO REMOVE AND REPLACE CLOTH PLATE * Remove cloth plate for free arm sewing (tublar work) * To remove, pull cloth plate to the left while pressing the push botton on underside of cloth plate upward. * To replace, guide latch on cloth plate into hole in cylinder cover and push cloth plate to the right as far as it will go. :10. HOWTO REMOVEAND REPLACE CYLINDER COVER * Removing the cylinder cover exposes the lower looper for easy threading and cleaning of the machine. * Cylinder cover can be removed together with the cloth plate by pulling the cylinder cover to the left. * To replace the cylinder cover together with the cloth plate, push cloth plate with the cylinder cover attached, to the right as far as it will go. * To remove the cylinder cover when cloth plate is not fitted on the machine, it can be removed easily by lifting it upward while pulling to the left. * To replace only the cylinder cover, place tab on top of cylinder cover under the throat plate and press cover downward and to the right. Warning: Do not hold the cylinder cover when lifting or •1 carrying the machine. Caution: Be sure cylinder coveris replaced when sewing. 9 4
-
 1
1 -
2
-
3
-
4
-
5
-
 6
6 -
 7
7 -
 8
8 -
 9
9 -
 10
10 -
 11
11 -
 12
12 -
 13
13 -
 14
14 -
 15
15 -
 16
16 -
17
-
18
-
19
-
20
-
21
-
22
-
23
-
24
-
25
-
26
-
27
-
28
-
29
-
30
-
31
-
32
-
33
-
34
-
35
-
36
-
37
-
38
-
39
-
40
-
41
-
42
-
43
-
44
-
45
-
46
-
47
-
48
 |
 |