Pfaff hobbylock 756 Owner's Manual - Page 5
Preparation prior - accessories
 |
View all Pfaff hobbylock 756 manuals
Add to My Manuals
Save this manual to your list of manuals |
Page 5 highlights
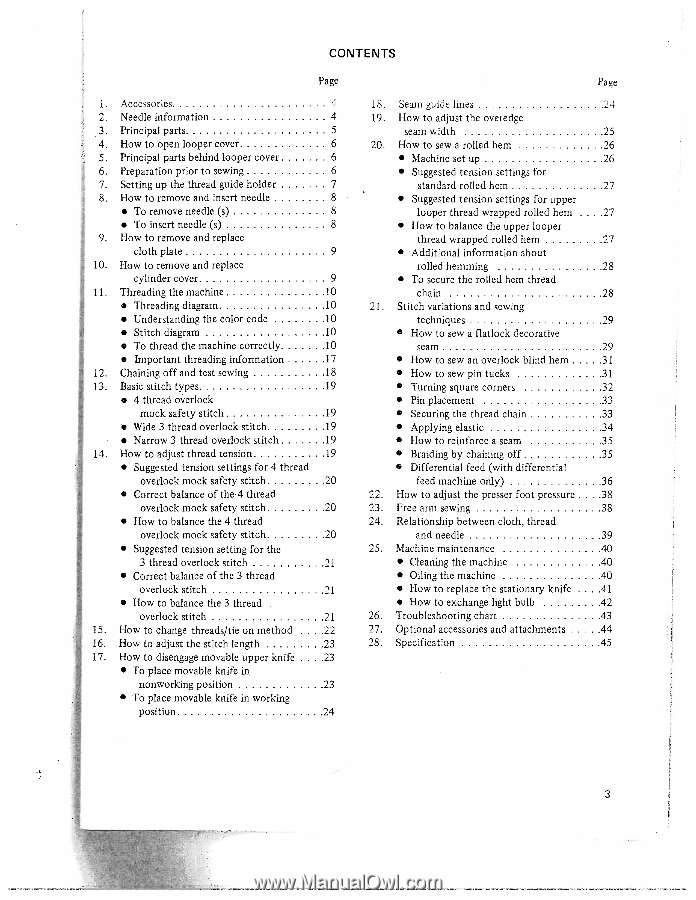
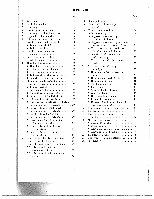
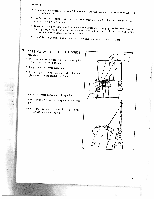
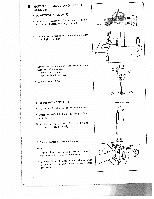
CONTENTS Page 1 Accessories 4 2. Needle information 4 3. Principal parts 5 4. How to open looper cover 6 5. Principal parts behind looper cover 6 6. Preparation prior to sewing 6 7. Setting up the thread guide holder 7 8. How to remove and insert needle 8 • To remove needle (s) 8 • To insert needle (s) 8 9. How to remove and replace cloth plate 9 10. How to remove and replace cylinder cover 9 11. Threading the machine 10 • Threading diagram 10 • Understanding the color code 10 • Stitch diagram 10 a To thread the machine correctly 10 • Important threading information 17 12. Chaining off and test sewing 18 13. Basic stitch types 19 • 4 thread overlock mock safety stitch 19 • Wide 3 thread overlock stitch 19 a Narrow 3 thread overlock stitch 19 14. How to adjust thread tension 19 • Suggested tension settings for 4 thread overlock mock safety stitch 20 a Correct balance of the 4 thread overlock mock safety stitch 20 a How to balance the 4 thread overlock mock safety stitch 20 • Suggested tension setting for the 3 thread overlock stitch 21 4 J 15. • Correct balance of the 3 thread • overlock stitch How to balance the 3 thread 21 overlock stitch 21 How to change threads/tie on method .22 . . . 16. How to adjust the stitch length 23 17. How to disengage movable upper knife . . . .23 • To place movable knife in nonworking position 23 • To place movable knife in working position 24 Page 18. Seam guide lines 24 19. How to adjust the overedge seam width 25 20. How to sew a rolled hem 26 • Machine set up 26 • Suggested tension settings for standard rolled hem 27 • Suggested tension settings for upper looper thread wrapped rolled hem .27 . . . • How to balance the upper looper thread wrapped rolled hem 27 • Additional information about rolled hemming 28 • To secure the rolled hem thread chain 28 21. Stitch variations and sewing techniques 29 • How to sew a flatlock decorative seam 29 • How to sew an overlock blind hem 31 • How to sew pin tucks 31 • Turning square corners 32 • Pin placement 33 • Securing the thread chain 33 • Applying elastic 34 • How to reinforce a seam 35 • Braiding by chaining off 35 • Differential feed (with differential feed machine only) 36 22. How to adjust the presser foot pressure. . . .38 23. Free arm sewing 38 24. Relationship between cloth, thread and needle 39 25. Machine maintenance 40 • Cleaning the machine 40 • Oiling the machine 40 • How to replace the stationary knife .41 . . . • How to exchange light bulb 42 26. Troubleshooting chart 43 27. Optional accessories and attachments 44 28. Specification 45 3
-
 1
1 -
 2
2 -
 3
3 -
 4
4 -
 5
5 -
 6
6 -
 7
7 -
 8
8 -
 9
9 -
 10
10 -
 11
11 -
12
-
13
-
14
-
15
-
16
-
17
-
18
-
19
-
20
-
21
-
22
-
23
-
24
-
25
-
26
-
27
-
28
-
29
-
30
-
31
-
32
-
33
-
34
-
35
-
36
-
37
-
38
-
39
-
40
-
41
-
42
-
43
-
44
-
45
-
46
-
47
-
48
 |
 |