Pfaff hobbylock 795 Owner's Manual
Pfaff hobbylock 795 Manual
 |
View all Pfaff hobbylock 795 manuals
Add to My Manuals
Save this manual to your list of manuals |
Pfaff hobbylock 795 manual content summary:
- Pfaff hobbylock 795 | Owner's Manual - Page 1
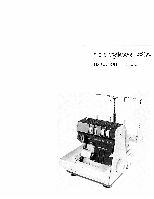
7- nstruCt0fl maflUa - / - Pfaff hobbylock 795 | Owner's Manual - Page 2
, the user must take sufficient care to avoid injury and observe the sewing area continuously while sewing. B) When leaving the machine, chan ging parts or accessories, the ma chine must be disconnected from the power source. C) The maximum approved wattage of the light bulb is 15 watts. D) The - Pfaff hobbylock 795 | Owner's Manual - Page 3
width Machine care Changing the needles Changing the lower knife Changing the upper knife Changing the light bulb Oiling the machine Accessories Specifications Sewing problems and solutions Changing the sewing feet 2, 3 4 4, 5 5 6, 7 7-11 8 9 10 11 12 13 14 15, 16 17 17 17 18, 19 20 21 21 22 21 - Pfaff hobbylock 795 | Owner's Manual - Page 4
(11 - Pfaff hobbylock 795 | Owner's Manual - Page 5
of the sewing machine 1 Foot pressure regulating dial 2 Thread guide 3 Carrying handle 4 Left needle thread tension dial 5 Right foot lifter lever 12 Hand wheel 13 Looper cover 14 Looper cover lever 15 Work support 16 Stitch length setting dial 17 Needle plate 18 Presser foot 19 Needle bar 20 - Pfaff hobbylock 795 | Owner's Manual - Page 6
Accessory box Swing the work support to the left and pull out the accessory box. To replace the accessory box, slide it into the grooves and push it until it locks. - Pfaff hobbylock 795 | Owner's Manual - Page 7
Machine and sewing light are switched on. Switching off: Press switch again. Machine and sewing light are switched off. Foot control The speed of the Hobbylock is regulated as follows: When pressing the foot control gently, the machine will run at low speed; when pressing harder, it will run faster - Pfaff hobbylock 795 | Owner's Manual - Page 8
reel stand, slide it to the left and tighten it. y Adjustment of thread guides: Pull up the thread guide bar and align it so that the thread guides are directly above the reel stand. Carrying handle and thread guide bar behind it: Insert fingers into the groove of the carrying handle and pull - Pfaff hobbylock 795 | Owner's Manual - Page 9
push the cover until it locks. To open the work support, push it to the left. To close the work support; push it to the right until it locks. A green) 4. Left needle (blue) Diagram B shows threading of the thread guides behind the carrying handle. Diagram C shows threading of the thread tension dials - Pfaff hobbylock 795 | Owner's Manual - Page 10
4-thread safety stitch seam For sewing and finishing two layers of fabric. Threading the left looper: Turn the handwheel towards you until the left looper is in its farthest right position (see illustration below). Thread the left looper in sequence 1, 2, 3, 4, 5, 6, 7, 8 and pull approximately 10 - Pfaff hobbylock 795 | Owner's Manual - Page 11
Threading the right looper: Turn the handwheel towards you until the right looper is in its farthest right position (see illustration below). Thread the right looper in sequence 1, 2, 3, 4, 5, 6, 7, 8 and pull approxima tely 10 cm (4") of thread through the looper eye (the thread path is marked red - Pfaff hobbylock 795 | Owner's Manual - Page 12
lJ- 1 1j fl L li r3 6 ( 2 -- Threading the right needle: Thread the right needle in sequence 1, 2, 3, 4, 5 and pull approximately 10 cm (4") thread through the needle eye (the thread path is marked green). Thread the left needle in sequence 1, 2, 3, 4, 5, 6, 7, 8 and pull approximately 10 cm - Pfaff hobbylock 795 | Owner's Manual - Page 13
Now close the work support (1), push the handle down (2) and close the looper cover (3). 2 Inserting the lint box: Insert the tabs of the lint box into the slots (4) of the - Pfaff hobbylock 795 | Owner's Manual - Page 14
Sewing a test sample After threading, a test sample should b sewn. Raise presser foot lever, as shown in illustration. Place a piece of fabric under the needle and lower presser foot. Hold thread ends with your left hand while turning hand wheel counter-clock wise with your right hand. Make sure - Pfaff hobbylock 795 | Owner's Manual - Page 15
been re-threaded). Sew the first stitches slowly. Since the fabric is fed automatically, do not pull or push the fabric. Use your hand for guiding the fabric only. Finishing seam Sew approximately 10 cm (4") beyond the end of the seam and use the thread cutter (1) behind the presser foot to - Pfaff hobbylock 795 | Owner's Manual - Page 16
Securing the seam: Knot the thread chain. In case of knitted fabrics, a crochet needle can be used in order to pull the thread chain into the seam. Or: Sew approximately 3 cm (1") beyond the seam. Raise presser foot. Flip fabri over. Lower presser foot and sew over the seam approximately 2 cm - Pfaff hobbylock 795 | Owner's Manual - Page 17
Setting thread tension: The thread tension should be adjusted according to fabric type and thread size. Examine the seam and make the necessary tension adjustments. Adjusting thread tension: Set all thread tension dials to "N", standard setting. (See illustration below). Sew a test sample to be sure - Pfaff hobbylock 795 | Owner's Manual - Page 18
- -- - / t\ When the thread tension is turned in (+) direction, the tension is increased. When turned in (-) direction, it is decreased. Incorrect thread tension: The left needle thread is too loose (blue thread tension). The right needle thread is too tight (green thread tension), or the right - Pfaff hobbylock 795 | Owner's Manual - Page 19
The following seams can be sewn with this machine: 1. Four-thread safety stitch seam This seam is sewn with all four threads. It should be used to sew light to medium weight fabrics. Application: Closing seams, sewing sleeves into shirts and blouses, sewing curtains and drapes, etc. 2. Two-thread - Pfaff hobbylock 795 | Owner's Manual - Page 20
Setting the machine for double chainstitch Remove the lint box, see page 11. Open looper cover. Remove knife guard (1) from the looper cover. Remove right needle. Raising the upper knife: Turn the hand wheel counter-clockwise to set the knife in the highest position. Push the knife holder to the far - Pfaff hobbylock 795 | Owner's Manual - Page 21
. After sewing the two-thread chainstitch seam, set the machine for overedge seaming as follows: Open the looper cover. Open the work support and remove the fabric guide plate. Turn the hand wheel counter-clockwise until the needle is in the lowest position. Press the looper disengaging lever up - Pfaff hobbylock 795 | Owner's Manual - Page 22
Thread chart :1 Material type Stitch type Light fabrics Organdy, light knit fabrics, taffeta, lining, silk, etc. Chainstitch Overedge stitch Medium fabrics Cotton, medium knits, linen, satin, dress fabrics, etc. Chainstitch Overedge stitch Heavy fabrics Tweed, coat fabrics, cotton twill, - Pfaff hobbylock 795 | Owner's Manual - Page 23
Adjusting the stitch length: The stitch length is regulated by turning the stitch length dial. The numbers indicate the stitch length in mm. The normal stitch length is "N". A = The red mark on the dial is the setting mark. Sewing foot pressure: Position "N" of the foot pressure dial is the standard - Pfaff hobbylock 795 | Owner's Manual - Page 24
Adjusting seam width: Standard setting is 3.5 mm. The seam width can be changed from 2.5 to 7.0 mm, according to fabric type and seam requirements. Note: Before adjusting the stitch width, always disengage the upper knife. To disengage upper knife, open looper cover. Push upper knife holder (1) to - Pfaff hobbylock 795 | Owner's Manual - Page 25
and skipped stitches. Important: Left needle = JL needle; Right needle = DB needle (JL needle is black). Changing knives Knives are available as spare parts and should be replaced when they are blunt. Removing lower knife: Unplug the machine. Raise the needle bar. Push the upper knife holder to the - Pfaff hobbylock 795 | Owner's Manual - Page 26
Loosen knife clamp screw (1) and pull the lower knife down. Inserting lower knife: Insert a new knife into the groove of the lower knife holder with the cutting edge facing right. Set the knife so that the cutting edge aligns with the surface of the needle plate. Tighten the lower knife clamp screw - Pfaff hobbylock 795 | Owner's Manual - Page 27
Changing upper knife: The upper knife is carbide tipped and will not need to be replaced with normal use. It has to be replaced only when the cutting edge has been damaged. Unplug the machine. Push the upper knife holder to the far right and turn the knob clockwise until it clicks. Unscrew the knife - Pfaff hobbylock 795 | Owner's Manual - Page 28
• Changing the light bulb: Unplug the machine. Remove the retaining screw from light cover and swing cover to the Turn the bulb in direction (1) and remove it. Insert the new bulb with into slots (3). Push bulb up and turr in direction (2). Replace cover. Caution: Use a 15 watt bulb only. Cleaning - Pfaff hobbylock 795 | Owner's Manual - Page 29
tiling the machine: a Always clean the machine of lint and dust prior to oiling. Use only one to two drops of good quality sewing machine oil at the places indicated (Fig. 1). Since the bushings are oil impregnated, they need to be oiled only once or twice a month. (Fig. 2). 4 •1 27 - Pfaff hobbylock 795 | Owner's Manual - Page 30
2 Wrench 3 Lint brush 4 Tweezers 5 Lower knife 6 Fabric guide plate 7 Edge guide 8 Retaining screw for 7 9 Thread unreeling disc 10 Needles 11 mm 1-5 mm Snap-on manual JL x 1 and DR x 1 (or 1738) (sizes 9-14) 24 x 22 x 18.5 cm approx. 8,5 kg (19 lbs.) Sewing problems and solutions (see next page - Pfaff hobbylock 795 | Owner's Manual - Page 31
roblem useS0 4achine does not 9ed material properly Sewing foot pressure on material too light eedle breaks requently 1. Needle is bent 2. Needle not correctly inserted 3. Fabric is pulled during sewing Turn sewing foot pressure screw clockwise to increase pressure. Check result on each adjust - Pfaff hobbylock 795 | Owner's Manual - Page 32
Changing the sewing feet Push lever A up slightly (Fig. 1), and the presser foot will snap out. Place the rolled hem foot under the presser foot holder so that crosspiece B of the rolled hem foot engages in groove C of the holder (Fig. 2). Push the presser foot lever down and with the other hand
-
 1
1 -
 2
2 -
 3
3 -
 4
4 -
 5
5 -
 6
6 -
 7
7 -
8
-
9
-
10
-
11
-
12
-
13
-
14
-
15
-
16
-
17
-
18
-
19
-
20
-
21
-
22
-
23
-
24
-
25
-
26
-
27
-
28
-
29
-
30
-
31
-
32
 |
 |

7—
nstruCt0fl
maflUa
-
/