Philips 150B User manual
Philips 150B Manual
 |
View all Philips 150B manuals
Add to My Manuals
Save this manual to your list of manuals |
Philips 150B manual content summary:
- Philips 150B | User manual - Page 1
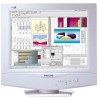
Philips 150B Electronic User's Manual file:///E|/Potomac/english/150b/index.htm [4/19/2000 4:36:53 PM] - Philips 150B | User manual - Page 2
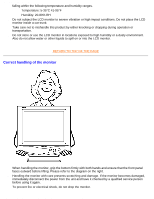
sure the power plug and outlet are easily accessible. Consult a service technician if the monitor does not operate normally when operating instructions of this manual are followed. RETURN TO TOP OF THE PAGE Installation Locations q Avoid Heat and Extreme Cold q Do not store or use the LCD monitor in - Philips 150B | User manual - Page 3
scratching and damage. If the monitor becomes damaged, immediately disconnect the power from the unit and have it checked by a qualified service person before using it again. 3. To prevent fire or electrical shock, do not drop the monitor. file:///E|/Potomac/english/150b/safety/safety.htm (2 of - Philips 150B | User manual - Page 4
Safety & Troubleshooting 4. When moving the monitor, be sure to unplug all power cords in order to avoid injury or damage to the equipment. RETURN TO TOP OF THE PAGE file:///E|/Potomac/english/150b/safety/safety.htm (3 of 3) [4/19/2000 4:41:05 PM] - Philips 150B | User manual - Page 5
Philips 150B LCD Monitor. It describes the LCD monitor's features, setup, operation and other pertinent information. Its contents are identical to the information in our printed version. Sections are as follows: q Safety and Troubleshooting Information provides tips and solutions for common problems - Philips 150B | User manual - Page 6
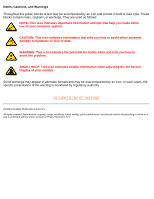
Manual Notes, Cautions, and Warnings Throughout this guide, avoid the problem. SMART HELP: This icon indicates helpful information when adjusting the On Screen Display of your monitor. Some without written consent of Philips Electronics N.V. file:///E|/Potomac/english/150b/about/about.htm (2 of 2) - Philips 150B | User manual - Page 7
Product Information Product Features • Technical Specifications • Resolution & Preset Modes • Philips Pixel Defect Policy • Automatic Power Saving • Physical Specification • Pin Assignment • Product Views Product Features 150B q 15" color LCD monitor with excellent display performance and viewing - Philips 150B | User manual - Page 8
150B Product Information • Input signal levels • Sync input signal • Sync polarities • 50ms (typ.) * These information are subject to change without notice. RETURN TO TOP OF THE PAGE Resolution & Preset Modes • Maximum 1024 x 768 at 75Hz • Recommended 1024x768 at 60Hz 14 USER DEFINABLE MODES - Philips 150B | User manual - Page 9
150B Product Information dot rate (MHz) 25.175 28.322 25.175 30.200 31.500 31.500 36 VESA VESA MACINTOSH VESA VESA VESA Resolution 640*350 720*400 640*480 Power Saving If you have VESA's DPMS compliance display card or software installed in your PC, the monitor can automatically reduce its power - Philips 150B | User manual - Page 10
150B Product Information This monitor is ENERGY STAR® compliant. As an ENERGY STAR® Partner, PHILIPS has determined that this product meets the ENERGY STAR® guidelines for energy efficiency. RETURN TO TOP OF THE PAGE Physical Specifications • Dimension (WxHxD) • Weight • Power supply • Power - Philips 150B | User manual - Page 11
to pin 10 12 Serial data line (SDA) 13 H. Sync / H+V 14 V. Sync (VCLK for DDC) 15 Data clock line (SCL) RETURN TO TOP OF THE PAGE Views Follow the links to see various views of the monitor and its components. Front View Product Description RETURN TO TOP OF THE PAGE file:///E|/Potomac - Philips 150B | User manual - Page 12
Installing your LCD Monitor Installing your LCD Monitor Your LCD Monitor : Front View Product Description • adjusting the OSD of your monitor LEFT and RIGHT buttons, like the UP and DOWN buttons, are also used in adjusting the OSD of your monitor. file:///E|/Potomac/english/150b/install/install - Philips 150B | User manual - Page 13
display mode is shown on the item called RESOLUTION. q You can also install the Flat Panel Adjust (FP Adjust) program, a program for getting the best performance out of your monitor, included in this CD. A step-by-step instructions is provided to guide you through the installtion process. Click on - Philips 150B | User manual - Page 14
On-Screen Display • The OSD Tree • The OSD Controls Description of the On Screen Display What is the On-Screen Display? This is a feature in all Philips LCD monitors which allows an end-user to adjust screen performance of monitors directly through an on-screen instruction window. The user interface - Philips 150B | User manual - Page 15
RETURN TO TOP OF THE PAGE The OSD Tree Below is an overall view of the structure of the On-Screen Display. You can use this as reference when you want to later on work your way around the different adjustments. file:///E|/Potomac/english/150b/osd/osddesc.htm (2 of 4) [4/19/2000 4:41:07 - Philips 150B | User manual - Page 16
On-Screen Display RETURN TO TOP OF THE PAGE file:///E|/Potomac/english/150b/osd/osddesc.htm (3 of 4) [4/19/2000 4:41:07 PM] - Philips 150B | User manual - Page 17
On-Screen Display file:///E|/Potomac/english/150b/osd/osddesc.htm (4 of 4) [4/19/2000 4:41:07 PM] - Philips 150B | User manual - Page 18
Customer Care and Warranty Customer Care & Warranty PLEASE SELECT YOUR COUNTRY/AREA TO REVIEW DETAILS OF YOUR WARRANTY COVERAGE WESTERN EUROPE: Austria • Belgium • Cyprus • Denmark • France • Germany • Greece • Finland • Ireland • Italy • Luxembourg • the Netherlands • Norway • Portugal • Sweden • - Philips 150B | User manual - Page 19
black body radiating with the same dominant frequency as the source. Most Philips monitors of going into a low -power state (< 30 W) either TO TOP OF THE PAGE L LCD Liquid Crystal Display An alphanumeric display LCD cells that generate text and colorful graphics on a screen. They consume little power - Philips 150B | User manual - Page 20
Glossary V Vertical refresh rate Expressed in Hz, it is the number of frames (complete pictures) written to the screen every second. RETURN TO TOP OF THE PAGE file:///E|/Potomac/english/150b/glossary/glossary.htm (2 of 2) [4/19/2000 4:41:07 PM] - Philips 150B | User manual - Page 21
Printing Instructions • Installing FPadjust Program • Installing your LCD monitor driver This page provides an option to read the manual in icon below. (Win95/98 users right-click) Download 140S.pdf Download 150B.pdf Download 150P.pdf 2. From the menu that appears, choose 'Save Link As...', - Philips 150B | User manual - Page 22
Window 95, Window 98 or later To install the .inf/.icm driver: q Click on the link or icon to install the driver for this LCD monitor. or q Click-and-hold your mouse over the icon. (Win95/98 users right-click) Download Driver (PHILIPS.EXE) q From the menu that appears, choose 'Save Link As - Philips 150B | User manual - Page 23
browser and install the .inf/.icm file. NOTE: q Read the " ReadMe.txt" file before installing . q You may be required to restart your PC once the driver installed. RETURN TO TOP OF THE PAGE file:///E|/Potomac/english/download/download.htm (3 of 3) [4/19/2000 4:41:07 PM] - Philips 150B | User manual - Page 24
Troubleshooting • Regulatory Information • Other Related Information General FAQs Q: When I install my monitor how do I do if the screen shows "Cannot display this video mode"? A: Recommended video mode for Philips 150P/150B/140S: 1024x768 @60Hz for Philips 181AS 1280x1024@60Hz. q Unplug all cables - Philips 150B | User manual - Page 25
Your video card/graphic driver and monitor together determine the available resolutions. You can select desired resolution under Window 95/98 with the "Display properties/Settings" control panel Q: What if I get lost when making monitor adjustments? A: Simply press the OSD button, then select "Reset - Philips 150B | User manual - Page 26
for the 140S. There are: q VESA Wall Mount Kit Q: How many signal inputs do Philips 150P LCD monitor provide? A: Standard 15-pin D-Sub and DVI-D connectors and a Macintosh adapter (optional outside of North America) open the 150P up to most PC and workstation users. Handy hot keys on the chin of the - Philips 150B | User manual - Page 27
® is proprietary Philips software that allows users to adjust monitor via software instead of control keys under Windows base. With the Philips Brilliance 150P, CustoMax® operates via a USB connection to PC. All Philips 150P models are CustoMax® compatible, but your computer must support USB in - Philips 150B | User manual - Page 28
Philips LCD monitors Plug-and-Play? A: Yes, the monitors are Plug-and-Play compatible with Windows® 95, 98 and the PC98/99 platforms. Q: What is USB (Universal Serial Bus)? A: Think of USB as a smart plug for PC peripherals. USB automatically determines resources (like driver software / 150P) A: - Philips 150B | User manual - Page 29
LCD allows displays to be much thinner than cathode ray tube (CRT) technology. LCD consumes much less power LCD cell is assembled into a "module" by adding the backlight, driver differentiates passive matrix LCDs from active matrix LCDs? A: An LCD is made LCD has a grid of conductors - Philips 150B | User manual - Page 30
LCD monitor, why? A: Unlike a CDT monitor, the TFT LCD panel has a fixed resolution. For example, an XGA monitor has 1024x3 (R, G, B) x 768 pixels and higher resolution may not be available without additional software file:///E|/Potomac/english/150b/safety/saf_faq.htm (7 of 9) [4/19/2000 4:41:48 PM] - Philips 150B | User manual - Page 31
LCD monitor does not have key parts that generate Electro Magnetic Interference, especially magnetic fields. Also, since LCD display utilizes relatively low power, its power Philips LCD Monitor Y2k compliant? A: Yes, all Philips LCD Monitors are compliant with the Y2K. file:///E|/Potomac/english/150b - Philips 150B | User manual - Page 32
FAQs (Frequently Asked Questions) RETURN TO TOP OF THE PAGE file:///E|/Potomac/english/150b/safety/saf_faq.htm (9 of 9) [4/19/2000 4:41:48 PM] - Philips 150B | User manual - Page 33
, contact your nearest Philips dealer. Common Problems Having this problem? Check these items No Picture (Power LED not lit) No Picture (Power LED is amber or yellow) Screen says q Make sure the Power cable is plugged to the wall and back of the monitor. q Make sure the DC power cord has been - Philips 150B | User manual - Page 34
Troubleshooting AUTO button not working properly Imaging Problems & Vertical Position in the second Window q Check that the signal cable is properly connected to the graphics board or PC. q Push using the First Window. (The backlight of the LCD monitor has a fixed life span. When the screen becomes - Philips 150B | User manual - Page 35
Troubleshooting An after-image appears q If an image remains in the screen for an extended period of time, it may be imprinted in the screen and leave an after-image. This usually disappears after a few hours An after-image remains after the power has been turned off. q This is characteristic of - Philips 150B | User manual - Page 36
Philips End-of-Life Disposal • Information for UK only Safety and Troubleshooting • Troubleshooting • Other Related Information • Frequently Asked Questions (FAQs) TCO '99 Information • TCO '99 : Available on Brilliance 150P, 150B services to the environment. The main problem its power consumption to - Philips 150B | User manual - Page 37
THE PAGE Energy Star Declaration PHILIPS 150P1* 140S1* 150B1* This monitor is equipped with a function for saving energy which supports the VESA Display Power Management Signaling (DPMS) standard. This means that the monitor must be connected to a computer which supports VESA DPMS to fulfill the - Philips 150B | User manual - Page 38
by the party responsible for compliance could void the user's authority to operate the equipment. Use only RF shielded cable that was supplied with the monitor when connecting this monitor to a computer device. To prevent damage which may result in fire or shock hazard, do not expose this appliance - Philips 150B | User manual - Page 39
use the equipment according to the instruction manual. Class B ITE MOC Notice ( monitor, printer, and so on) should have the same power power supply cable must be removed from the power supply socket, which should be located near the equipment and easily accessible. file:///E|/Potomac/english/150b - Philips 150B | User manual - Page 40
. Plassering/Ventilasjon ADVARSEL: NÅR DETTE UTSTYRET PLASSERES, MÅ DU PASSE PÅ AT KONTAKTENE FOR STØMTILFØRSEL ER LETTE Å NÅ. RETURN TO TOP OF THE PAGE file:///E|/Potomac/english/150b/safety/regs/regulat.htm (5 of 7) [4/19/2000 4:41:49 PM] - Philips 150B | User manual - Page 41
of. Please find out about the local regulations on how to dispose of your old monitor from your local Philips dealer. RETURN TO TOP OF THE PAGE Information for UK only WARNING - THIS off and an appropriate file:///E|/Potomac/english/150b/safety/regs/regulat.htm (6 of 7) [4/19/2000 4:41:49 PM] - Philips 150B | User manual - Page 42
2. The BLUE wire must be connected to the terminal which is marked with the letter "N" or coloured BLACK. 3. The BROWN wire must be connected to the terminal which marked with the letter "L" or coloured RED. Before replacing the plug cover, make certain that the cord grip is clamped over the sheath - Philips 150B | User manual - Page 43
Troubleshooting • Regulatory Information • Information for Users in the U. S. • Information for Users Outside the U.S Information for Users in the U. S. For units set at 115 V : Use a UL Listed Cord Set consisting of a minimum 18 AWG, Type SVT or SJT three conductor cord a maximum of 15 rated 15 A, - Philips 150B | User manual - Page 44
or subpixel defects on the TFT LCD panels used in flat panel monitors are sometimes unavoidable. No manufacturer can guarantee that all panels will be free from pixel defects, but Philips guarantees that any monitor with an unacceptable number of defects will be repaired or replaced under warranty - Philips 150B | User manual - Page 45
that are always dark or "off". These are the types of black dot defects: One dark subpixel Two or three adjacent dark subpixels Proximity order to qualify for repair or replacement due to pixel defects during the warranty period, a TFT LCD panel in a Philips flat panel monitor must have pixel or - Philips 150B | User manual - Page 46
Philips Pixel Defect Policy RETURN TO TOP OF THE PAGE file:///E|/Potomac/english/150b/product/pixel.htm (3 of 3) [4/19/2000 4:42:00 PM] - Philips 150B | User manual - Page 47
Accessory Pack Unpack all the parts. 1) Power Cable (socket may differ for different countries) 2) Macintosh Adapter (optional) 3) VGA Signal Cable 4) E-DFU package with Quick Setup Guide, Using Your Monitor Manual, and CD-ROM. file:///E|/Potomac/english/150b/install/connect.htm (1 of 6) [4/19/2000 - Philips 150B | User manual - Page 48
a coin to disengage the clips on each side, then pull from the bottom at lift. 2) Remove the plastic ring from the hinge file:///E|/Potomac/english/150b/install/connect.htm (2 of 6) [4/19/2000 4:42:08 PM] - Philips 150B | User manual - Page 49
Connecting to Your PC 3) Plug in the video cable into VGA connector, and connect DC power cord into DC inlet 4) Cover the cables with the plastic ring and put the ring back on the hinge file:///E|/Potomac/english/150b/install/connect.htm (3 of 6) [4/19/2000 4:42:08 PM] - Philips 150B | User manual - Page 50
Connecting to Your PC NOTE: If you use an Apple Macintosh™, you need to connect the special Mac adapter to one end of the monitor signal cable 5) Replace the back cover on the monitor file:///E|/Potomac/english/150b/install/connect.htm (4 of 6) [4/19/2000 4:42:08 PM] - Philips 150B | User manual - Page 51
Connecting to Your PC file:///E|/Potomac/english/150b/install/connect.htm (5 of 6) [4/19/2000 4:42:08 PM] - Philips 150B | User manual - Page 52
cable to the video connector on the back of your computer. 6.3 Plug the power cord of your computer and your monitor into a nearby outlet. 6.4 Turn on your computer and monitor. If the monitor displays an image, installation is complete. RETURN TO TOP OF THE PAGE file:///E|/Potomac/english/150b - Philips 150B | User manual - Page 53
/ 150B) or 1280x1024, 60Hz (for 181AS). q Shut down your computer, disconnect your old monitor and reconnect your Philips LCD monitor. q Turn on your monitor and then turn on your PC. 1.4 Your computer may ask you for monitor drivers (.inf and .icm files) or a driver disk. Follow the instructions to - Philips 150B | User manual - Page 54
the Protective Cover Installing the Protective Cover Your LCD Monitor : Front View Product Description • Connecting to Your PC • Getting Started • Optimizing Performance Accessories (optional) : Installing the Protective Cover • Cleaning Instructions • Installing the Wall Mount Kit Installing the - Philips 150B | User manual - Page 55
Installing the Protective Cover 2) Pull up and forward to remove the front bezel from the monitor. 3) Peel off the film on both sides of the protective cover. file:///E|/Potomac/english/150b/install/p_cover/pcov_inst.htm (2 of 4) [4/19/2000 4:42:13 PM] - Philips 150B | User manual - Page 56
cover onto the monitor, engaging only the top two clips. Now press the bottom corners of the protective cover to engage the two side clips. RETURN TO TOP OF THE PAGE Cleaning Instructions The anti-scratch, anti-reflective cover protects the LCD screen. file:///E|/Potomac/english/150b/install/p_cover - Philips 150B | User manual - Page 57
Installing the Protective Cover Cleaning Instructions: q Wipe with a soft dry cloth q Do not use alcohol solvents or other strong chemical RETURN TO TOP OF THE PAGE file:///E|/Potomac/english/150b/install/p_cover/pcov_inst.htm (4 of 4) [4/19/2000 4:42:13 PM] - Philips 150B | User manual - Page 58
Wall Mount Kit Installing Your Wall Mount Kit Your LCD Monitor : Front View Product Description • Connecting to Your Please turn off the monitor and unplug all cables, then remove the screw in the monitor base and pull it away completely. file:///E|/Potomac/english/150b/install/m_kit/mkit_inst.htm - Philips 150B | User manual - Page 59
Installing Your Wall Mount Kit 2) Detach the monitor base by pulling away the two parts. 3) Fix the mount bracket to the desired location. file:///E|/Potomac/english/150b/install/m_kit/mkit_inst.htm (2 of 3) [4/19/2000 4:42:14 PM] - Philips 150B | User manual - Page 60
Installing Your Wall Mount Kit 4) Thread all cables through the hole at the bottom of the bracket and use the clip provided to hold them in place. 5) Slide the support pin at the bottom of the monitor into the matching hole on the bracket, making sure that the pin is aligned. Then use the - Philips 150B | User manual - Page 61
Contrast • Video Noise • Adjust Color • OSD Settings • Product Information • Reset to Factory is recommended. 1) Press the or button on the monitor. The BRIGHTNESS window appears. 2) Press the button pressing the CONTROLS window will appear key, an OSD MAIN ... to continue to the MAIN CONTROLS, - Philips 150B | User manual - Page 62
window appears. LANGUAGE is highlighted. (If not, press the or button on the monitor until LANGUAGE is highlighted) 2) Press the button again. The LANGUAGE window appears. . CLOSE MAIN CONTROLS is highlighted. file:///E|/Potomac/english/150b/osd/osd_cont.htm (2 of 16) [4/19/2000 4:42:28 PM] - Philips 150B | User manual - Page 63
centered in relation to the top and bottom of your screen. 1) Press the highlighted. button on the monitor. The MAIN CONTROLS window appears. LANGUAGE is 2) Press the button until ADJUST POSITION is highlighted. file:///E|/Potomac/english/150b/osd/osd_cont.htm (3 of 16) [4/19/2000 4:42:28 PM] - Philips 150B | User manual - Page 64
The OSD Controls 3) Press the button. The ADJUST POSITION window appears. ADJUST HORIZONTAL is highlighted. 4) . Next, follow steps 3 - 6 under BRIGHTNESS & CONTRAST. ... to exit completely, press the button. file:///E|/Potomac/english/150b/osd/osd_cont.htm (4 of 16) [4/19/2000 4:42:28 PM] - Philips 150B | User manual - Page 65
window. See the steps at the beginning of these instructions to learn how. 1) Press the highlighted. button on the monitor. The MAIN CONTROLS window appears. LANGUAGE is 2) . An 80% brightness is recommended. file:///E|/Potomac/english/150b/osd/osd_cont.htm (5 of 16) [4/19/2000 4:42:28 PM] - Philips 150B | User manual - Page 66
, press the AUTO button on the front panel. If there is no improvement, then return to adjust PHASE and CLOCK. 1) Press the button on the monitor. The MAIN CONTROLS window appears. LANGUAGE is file:///E|/Potomac/english/150b/osd/osd_cont.htm (6 of 16) [4/19/2000 4:42:28 PM] - Philips 150B | User manual - Page 67
The OSD Controls highlighted. 2) Press the button until VIDEO NOISE is highlighted. 3) Press the button. The VIDEO NOISE window button until CLOCK is highlighted. Next, press the or button to adjust the clock. file:///E|/Potomac/english/150b/osd/osd_cont.htm (7 of 16) [4/19/2000 4:42:28 PM] - Philips 150B | User manual - Page 68
to adjust the colors on your screen to a setting you desire. 1) Press the highlighted. button on the monitor. The MAIN CONTROLS window appears. LANGUAGE is 2) Press the button until ADJUST COLOR is highlighted. file:///E|/Potomac/english/150b/osd/osd_cont.htm (8 of 16) [4/19/2000 4:42:28 PM] - Philips 150B | User manual - Page 69
The OSD Controls 3) Press the button. The ADJUST COLOR window appears. 4) Press the or button to select ORIGINAL PANEL COLOR, 9300K FOR CAD/CAM, 6500K FOR IMAGE MANAGEMENT, or USER PRESET. file:///E|/Potomac/english/150b/osd/osd_cont.htm (9 of 16) [4/19/2000 4:42:28 PM] - Philips 150B | User manual - Page 70
The OSD Controls 5) Once you have highlighted ORIGINAL PANEL COLOR, 9300K FOR CAD/CAM, or 6500K FOR IMAGE MANAGEMENT, press , press the button to highlight RED. Next, press the or button to adjust the color red. file:///E|/Potomac/english/150b/osd/osd_cont.htm (10 of 16) [4/19/2000 4:42:28 PM] - Philips 150B | User manual - Page 71
CONTROLS window almost any place on the screen that is convenient for you. OSD SETTINGS allows you to do this. It is composed of HORIZONTAL and VERTICAL adjustments you can make by simply following the step below. file:///E|/Potomac/english/150b/osd/osd_cont.htm (11 of 16) [4/19/2000 4:42:28 PM] - Philips 150B | User manual - Page 72
. button on the monitor. The MAIN CONTROLS window appears. LANGUAGE is 2) Press the button until OSD SETTINGS is highlighted. 3) Press the button. The OSD SETTINGS window appears. down to the desired position. file:///E|/Potomac/english/150b/osd/osd_cont.htm (12 of 16) [4/19/2000 4:42:28 PM] - Philips 150B | User manual - Page 73
INFORMATION The PRODUCT INFORMATION window displays the monitor's serial number and the resolution of the monitor, all in one easy place. This monitor. The MAIN CONTROLS window appears. LANGUAGE is 2) Press the button until PRODUCT INFORMATION is highlighted. file:///E|/Potomac/english/150b/osd - Philips 150B | User manual - Page 74
The OSD Controls 3) Press the button. The PRODUCT INFORMATION window appears. This window shows the monitor's SERIAL NUMBER and RESOLUTION of the monitor. 4) Press the highlighted. PAGE RESET TO FACTORY SETTINGS file:///E|/Potomac/english/150b/osd/osd_cont.htm (14 of 16) [4/19/2000 4:42:28 PM] - Philips 150B | User manual - Page 75
OSD Controls RESET TO FACTORY SETTINGS returns everything in all the windows to factory presets. This means all adjustments that you may have made will be returned to the original settings. 1) Press the OK button on the monitor Potomac/english/150b/osd/osd_cont.htm (15 of 16) [4/19/2000 4:42:28 PM] - Philips 150B | User manual - Page 76
The OSD Controls Close Main Controls RETURN TO TOP OF THE PAGE RETURN TO TOP OF THE PAGE file:///E|/Potomac/english/150b/osd/osd_cont.htm (16 of 16) [4/19/2000 4:42:28 PM] - Philips 150B | User manual - Page 77
ease of installation. Should you encounter any difficulties while installing or using this product, please contact Philips directly to benefit from your Philips F1rst Choice Warranty. This three-year service warranty entitles you to a swap model on-site within 48 hours of your call being received - Philips 150B | User manual - Page 78
The Philips guarantee may not apply if: q the documents have been altered in any way or made illegible; q the model or production number on the product has been altered, deleted, removed or made illegible; q repairs or product modifications and alterations have been executed by unauthorized service - Philips 150B | User manual - Page 79
warranty service. A sales receipt or other document showing that you purchased the product is considered proof of purchase. Attach it to this owner's manual and repair or other cause not within the control of Philips Consumer Electronics. q reception problems caused by signal conditions or cable - Philips 150B | User manual - Page 80
GET MORE INFORMATION? For more information, contact the Philips Customer Care Center by calling (877) 835-1838 (U.S.A. customers only) or (903) 242-4804. Before Requesting Service... Please check your owner's manual before requesting service. Adjustments of the controls discussed there may save you - Philips 150B | User manual - Page 81
from your Philips F1rst Choice Warranty. This three-year service warranty entitles you to a swap model on-site within 48 hours of your call being received within the first year of purchase. If you have any problems with your monitor within the second or third year of purchase, we will repair it
-
 1
1 -
 2
2 -
 3
3 -
 4
4 -
 5
5 -
 6
6 -
 7
7 -
8
-
9
-
10
-
11
-
12
-
13
-
14
-
15
-
16
-
17
-
18
-
19
-
20
-
21
-
22
-
23
-
24
-
25
-
26
-
27
-
28
-
29
-
30
-
31
-
32
-
33
-
34
-
35
-
36
-
37
-
38
-
39
-
40
-
41
-
42
-
43
-
44
-
45
-
46
-
47
-
48
-
49
-
50
-
51
-
52
-
53
-
54
-
55
-
56
-
57
-
58
-
59
-
60
-
61
-
62
-
63
-
64
-
65
-
66
-
67
-
68
-
69
-
70
-
71
-
72
-
73
-
74
-
75
-
76
-
77
-
78
-
79
-
80
-
81
 |
 |
Philips 150B Electronic User's Manual
file:///E|/Potomac/english/150b/index.htm [4/19/2000 4:36:53 PM]