Philips DVDR3506 User manual - Page 37
Basic Recording & One-touch Timer Recording - 37 dvd recorder
 |
UPC - 609585155190
View all Philips DVDR3506 manuals
Add to My Manuals
Save this manual to your list of manuals |
Page 37 highlights
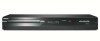
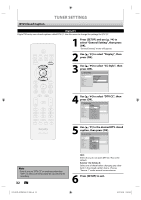
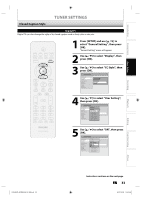
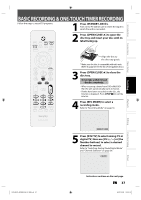
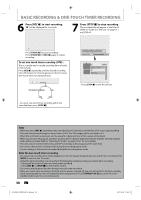
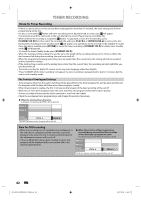
Introduction Connections Basic Setup BASIC RECORDING & ONE-TOUCH TIMER RECORDING Follow the steps to record TV programs. 1 Press [STANDBY-ON y]. Turn on the TV and be sure to select the input to which the unit is connected. 2 Press [OPEN/CLOSE A] to open the disc tray and insert your disc with its label facing up. Align the disc to the disc tray guide. * Make sure the disc is compatible with this unit. (Refer to page 35 for the list of compatible discs.) 3 Press [OPEN/CLOSE A] to close the disc tray. It may take a while to load the disc completely. • When inserting a brand-new DVD+RW/DVDRW, the unit automatically starts to format. • If titles have been recorded on the disc, the title list is displayed. Press [STOP C] to exit the title list. 4 Press [REC MODE] to select a recording mode. Refer to "Recording Mode" on page 35. Recording Playback Editing E7H42UD_DVDR3506-37_EN.indd 37 Function Setup SP(2Hr) 0:58 5 Press [DTV/TV] to select analog TV or digital TV, then use [CH / ] or [the Number buttons] to select a desired channel to record. Refer to "Switching Analog Mode/Digital Mode" and "Channel Selection" on page 29. CH 12 Others Instructions continue on the next page. EN 37 2007/12/28 10:53:10
-
 1
1 -
2
-
3
-
4
-
5
-
6
-
7
-
8
-
9
-
10
-
11
-
12
-
13
-
14
-
15
-
16
-
17
-
18
-
19
-
20
-
21
-
22
-
23
-
24
-
25
-
26
-
27
-
28
-
29
-
30
-
31
-
 32
32 -
 33
33 -
 34
34 -
 35
35 -
 36
36 -
 37
37 -
 38
38 -
 39
39 -
 40
40 -
 41
41 -
 42
42 -
43
-
44
-
45
-
46
-
47
-
48
-
49
-
50
-
51
-
52
-
53
-
54
-
55
-
56
-
57
-
58
-
59
-
60
-
61
-
62
-
63
-
64
-
65
-
66
-
67
-
68
-
69
-
70
-
71
-
72
-
73
-
74
-
75
-
76
-
77
-
78
-
79
-
80
-
81
-
82
-
83
-
84
-
85
-
86
-
87
-
88
-
89
-
90
-
91
-
92
-
93
-
94
-
95
-
96
-
97
-
98
-
99
-
100
-
101
-
102
-
103
-
104
-
105
-
106
-
107
-
108
 |
 |