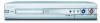
Philips HDRW720 User manual
Philips HDRW720 Manual
 |
View all Philips HDRW720 manuals
Add to My Manuals
Save this manual to your list of manuals |
Philips HDRW720 manual content summary:
- Philips HDRW720 | User manual - Page 1
- Philips HDRW720 | User manual - Page 2
from you to obtain warranty service. *Product Safety Notification By Dear PHILIPS product owner: Thank you for your confidence in PHILIPS. You prevent operating and maintenance problems. WARNING: To reduce Model No.: HDRW 720/17 Serial No Visit our World Wide Web Site at http://www.philips.com - Philips HDRW720 | User manual - Page 3
'HDRW 720/17' is based in part on the Entropy Gathering Daemon, which is copyright (C) 1999-2000 Brian Warner. All Rights Reserved. Regarding this Entropy Gathering Daemon, the following conditions apply: Permission is hereby granted, free of charge, to any person obtaining a copy of this software - Philips HDRW720 | User manual - Page 4
user's authority to operate it. Laser Safety This unit employs a laser. Only a qualified service person should remove the cover or attempt to service this device, due to possible eye injury. CAUTION: Use of controls Model Number: HDRW 720/17 Trade Name: Philips Responsible Party: Philips - Philips HDRW720 | User manual - Page 5
block any of the ventilation openings. Install in accordance with the manufacturer's instructions consult an electrician for replacement of the obsolete outlet. Refer all servicing to qualified service personnel. Servicing is required exposed to dripping or splashing. 17. Do not place any sources - Philips HDRW720 | User manual - Page 6
...8 Important instructions for the HDD 9 Symbols used in these operating instructions 9 Cleaning the discs 9 Special functions of your DVD recorder 10 Connecting the DVD recorder ......... 12 Preparing the remote control for operation 12 Using your DVD-Recorder remote control with your TV set - Philips HDRW720 | User manual - Page 7
71 Messages in the DVD recorder display 71 User preferences for the HDD ......... 61 General ...61 Toolbar ...61 Options ...61 'Audio' ...61 'Zoom' ...61 'Time search 62 'Subpictures' ...62 Preferences ...62 Before you call an engineer 73 Glossar 78 Code numbers of the remote control 79 - Philips HDRW720 | User manual - Page 8
the device Your Philips DVD/HDD recorder mainly consists of the following components: HDD recorder For recording in a temporary storage on the HDD (Time shift Buffer) As soon as you turn on the DVD/HDD recorder, it automatically records the current TV channel selected on the DVD/HDD recorder in this - Philips HDRW720 | User manual - Page 9
The remote control Overview of functions ENGLISH REC/OTR n Record the current TV show on the HDD, mark recordings in the time shift buffer to be stored on HDD. Hold button down to start the recording from now. (Mark the recording from the beginning of the actual position in the Time Shift Buffer - Philips HDRW720 | User manual - Page 10
in the 'Camera mode', the DVD recorder switches to pause and inserts a chapter marker. PLAY G Play back a recorded disc. CHANNEL q Next channel CHANNEL r Previous channel JUMP BACK To jump back a certain time period that can be changed in the settings of the HDD. N Briefly press the button during - Philips HDRW720 | User manual - Page 11
a summary of all available remote control commands on the last page of this manual. How to enter this code number you will read in the chapter ' Using your DVD-Recorder remote control with your TV set'. TV VOLUME q Increase TV volume TV VOLUME r Reduce TV volume TV/MUTE y Switch TV sound on/off For - Philips HDRW720 | User manual - Page 12
TV show on the HDD, mark recordings in the time shift buffer to be stored on HDD. Red light around the n button indicates: •) a recording on a DVD+RW/+R (archiving of titles) •) storing of a recording(s) on the HDD. G : Play button Play back a recorded disc or a title on the HDD In the TV Guide - Philips HDRW720 | User manual - Page 13
set with audio input jacks or an additional device. ANTENNA IN Connection of the antenna TV OUT Connection of the antenna cable to the TV set Input jacks (IN EXT2) S-VIDEO (Y/C)-EXT2 S Video input: Connection of an additional device (channel number 'EXT2'). Switching between the S-VIDEO (Y/C)-EXT2 - Philips HDRW720 | User manual - Page 14
hope you will enjoy your new DVD Recorder / Hard Disk, your Philips team! If you have any problems operating the device, please read the section entitled 'Before you call an engineer'. If this doesn't help you to resolve the problem, please call the customer support service for your country. You can - Philips HDRW720 | User manual - Page 15
. AThe device does not contain any user-serviceable parts. Please leave all maintenance work to qualified personnel. AThere are some components in the DVD recorder that keep running as long as the recorder is connected to AC-outlet. To switch off the DVD recorder completely, you must unplug it from - Philips HDRW720 | User manual - Page 16
disconnect it from the power supply and call after-sales service for advice. BKeep the DVD recorder away from radiators and other heat sources and protect it from direct sunlight. Symbols used in these operating instructions The following symbols will facilitate the use of these operating - Philips HDRW720 | User manual - Page 17
main functions on your television using your DVD-Recorder recorder remote control, even if your television is not a Philips. You can upgrade the software of your DVD-Recorder with a CD-ROM. On the web site http://www.p4c.philips.com under the model number 'HDRW 720/17' you will find the data and the - Philips HDRW720 | User manual - Page 18
. Click with your remote on the show you'd like to see or schedule. No more hassles programming your DVD recorder! The TV Guide On Screen ™information is sent together with your TV signal so there's nothing to load or buy. The service is free! In the United States, TV GUIDE and other related marks - Philips HDRW720 | User manual - Page 19
is approximately 5 to 10 meters. 'Aim' correctly Aim the remote control at the DVD recorder and not at the TV set. Using your DVD Recorder remote control with your TV set With the enclosed multicode remote control you can control the main functions of your TV set. To do this, you must first enter - Philips HDRW720 | User manual - Page 20
) cable and plug one end into the S-VIDEO (Y/C)-OUT2 jack at the back of the DVD Recorder and the other end into the S-Video (SVHS) In jack of the TV (usually called 'S-Video in' or 'SVHS in'. See your TV's instruction manual). 2 Use an audio (cinch) cable and plug one end into the red/white cinch - Philips HDRW720 | User manual - Page 21
Audio in', 'AV in'. See your TV's instruction manual). Connecting to the AC outlet Always check if the local mains voltage matches the voltage range printed on the type plate at the back or bottom of the DVD-recorder. If not consult your dealer or the customer support from your country. 1 Switch on - Philips HDRW720 | User manual - Page 22
box only via antenna cable You can also connect a video recorder or a DVD player to the input jacks. O Connect the DVD-Recorder directly with your TV-set (Cable from the output jacks directly to the TV set). If there is a video recorder or another device in between, there can be distortions in the - Philips HDRW720 | User manual - Page 23
Recordings from the front jacks were stored on the HDD to make editing easy. Then you can transfer (archive) them on a DVD+ supports at least one of the audio formats of the DVD recorder (MPEG2 and Dolby Digital). Consult the owner's manual of your receiver to find out which audio formats it supports - Philips HDRW720 | User manual - Page 24
the DVD Recorder normally. 1 Press STANDBY-ON m on the front of the DVD-recorder P 'PHILIPS' and then 'IS TV ON?' TV set manually (see your TV's operating instructions). b If your TV set is connected with the antenna cable only, you have to select on the TV the right TV channel for the DVD-Recorder - Philips HDRW720 | User manual - Page 25
). Read therefor the section 'Delete titles/recordings from the HDD' in the chapter 'Playback from the HDD'. Switch off the Dealer Demo If you have switched on the Demo Movie, repeat play back of the movie starts automatically after the installation of the TV Guide On Screen ™System. To switch it - Philips HDRW720 | User manual - Page 26
mode Your DVD-Recorder is equipped with a so called Tuner Mode. With the button TUNER you can switch between playback from the HDD/disc or the Picture from the internal Tuner (TV in the TV Guide On Screen™system remains unchanged (cable box: Yes) you are not able to select the TV channels with - Philips HDRW720 | User manual - Page 27
Chapter 'Set up the TV Guide On Screen™system'. Preparation: •) Switch on the TV set, and if necessary, select the channel for the DVD recorder (channel 3 or 4). •) Switch on the DVD recorder. 1 Press the BROWSER HDD button and then the SYSTEM MENU button on the remote control. P The 'SYSTEM MENU - Philips HDRW720 | User manual - Page 28
is switched on again. Preparation: •) Switch on the TV set, and if necessary, select the channel for the DVD recorder (channel 3 or 4). •) Switch on the DVD recorder. 1 Press the BROWSER HDD button and then the SYSTEM MENU button on the remote control. P The 'SYSTEM MENU' appears. 2 Select 'Set up - Philips HDRW720 | User manual - Page 29
change the clock/date because this information was taken from the TV Guide On Screen™system. Therefore you can not select this function. 1 Press the BROWSER HDD button and then the SYSTEM MENU button on the remote control. P The 'SYSTEM MENÜ' appears. 2 Select 'Set up' using B . 3 Press C to select - Philips HDRW720 | User manual - Page 30
date If the time is still incorrect, this may be due to a weak or faulty TV signal. In this case, switch off the automatic setting. 1 Press the BROWSER HDD button and then the SYSTEM MENU button on the remote control. P The 'SYSTEM MENU' appears. A In the line 'Daylight Saving', select one of the - Philips HDRW720 | User manual - Page 31
recorder (channel 3 or 4). 2 Press the TV GUIDE button on the remote control. P The 'LISTINGS' screen will appear. a A Set-up screen will appear b The TV Guide On Screen™System is not completely installed, or the installation was aborted. Chose from the following options and follow the instructions - Philips HDRW720 | User manual - Page 32
Blaster The cable box is controlled via the DVD recorder with the IR-Blaster (supplied). This means you can record TV shows that are received only through the cable box. Connection of the G-LINK™ cable enables the TV Guide On Screen™system to show the correct guide listing. 1 Connect the IR Blaster - Philips HDRW720 | User manual - Page 33
': Information on the TV Guide On Screen™system, instructions and advertisements. O 'SETUP': For changing the basic settings. For further information, see chapter 'Set up the TV Guide On Screen™system'. O 'MESSAGES': Messages to the user O 'SCHEDULE': Scheduled (pre-programd) recordings 26 - Philips HDRW720 | User manual - Page 34
in the 'LISTINGS' screen You can use the color buttons on the remote control to select the following: 'RECORD' (green button): The highlighted show will be programmed for recording. 'FAVORITE' (blue button): The highlighted TV show will be stored together with its start time. When the start time - Philips HDRW720 | User manual - Page 35
TV Guide On Screen ™ System The 'SCHEDULE' screen This menu displays the shows that are set to record or play back automatically. The following information is also displayed for each scheduled recording in the 'FAVORITE/RECORD' line. The 'MESSAGES' screen Messages to the user are stored here. - Philips HDRW720 | User manual - Page 36
How do I cancel? You can cancel by pressing the blue action button. 'Review options' Here you can choose with B or A between 'Auto display' 'On' or 'Off'. O On The TV Guide On Screen™system screen appears every time the DVD Recorder is switched on with the STANDBY m button. O 'Off' You will have to - Philips HDRW720 | User manual - Page 37
of the recording •) recording mode (quality) •) date of the recording •) index picture of the recording To facilitate the search of a specific position, a chapter marker is recorded every 5 minutes. How you switch off this function you will read in chapter 'User preferences for the HDD' in the - Philips HDRW720 | User manual - Page 38
Recording on the HDD Symbols in the 'Time Shift Buffer' Following symbols can appear in the info bar at the top of the screen in the 'Time Shift Buffer'. With the INFO button on the remote control you can also call up this infobar. Left area Information about the input signal were displayed here: - Philips HDRW720 | User manual - Page 39
the HDD. overview of the recordings. 2 Select for recording with TV-show recording will be stoped automatically at the end of the program. If the start (titlemarker) of the TV-Show was not taken from the TV Guide On Screen™System, or no TV Guide marked recording changes recordings on the HDD, recordings - Philips HDRW720 | User manual - Page 40
from the TV Guide On Screen™System The recording will stop at the end of the TV-Show. O Stop the recording manually: Hold the red button on the remote control pressed, until the red light around the n button on the front is switched off. - You can mark a recording for storage on the HDD using REC - Philips HDRW720 | User manual - Page 41
recordings on the HDD ( REC/OTR n ). For more information on the time shift buffer, read the chapter 'The Time Shift Buffer'. 1 Connect the camera as described in the chapter ' Connecting additonal devices/Connect camcorder to the front jacks' 2 Press CAM on the remote control. P The DVD recorder - Philips HDRW720 | User manual - Page 42
'TIMER' will light up on the display. Preparation: •) Switch on the TV set, and if necessary, select the channel for the DVD recorder (channel 3 or 4). •) Switch on the DVD recorder. 1 Press TV GUIDE on the remote control. 2 Use A or B to select the TV station, and D or C to select the show to - Philips HDRW720 | User manual - Page 43
' screen) is not possible. 1 Switch on the TV set. Select the channel on the DVD recorder (3 or 4). 2 Press TIMER s on the remote control. P The current data will appear. a I will see some informations about the TV Guide On Screen™system b The TV Guide On Screen™system was not installed yet. Please - Philips HDRW720 | User manual - Page 44
on the remote control. P The current information will appear on the screen. How to change or delete a programmed recording (TIMER) Preparation: •) Switch on the TV set, and if necessary, select the channel for the DVD recorder (channel 3 or 4). •) Switch on the DVD recorder. 1 Press TV GUIDE on the - Philips HDRW720 | User manual - Page 45
time of the schedule or end time out of the TV Guide On Screen™System) If you switch off the DVD-Recorder with STANDBY m the DVD-Recorder will be switched off after the recording is completed. If you want to cancel the programmed recording proceed as follows: 1 Press the red function button 2 Select - Philips HDRW720 | User manual - Page 46
Press BROWSER HDD on the remote control or HDD on the DVD recorder. P TV show is not over yet). P The time of the current playback position is displayed. 4 Use the number buttons 0..9 of the remote control /Jump forward, Jump back' in chapter 'User preferences for the HDD' on how to set up this time - Philips HDRW720 | User manual - Page 47
red function button. P Play back starts automatically The media browser Each recording stored on the HDD is displayed in the media browser with an index picture. A current recording ( REC/OTR n ) that is not over yet (no TV Guide On Screen™data available) is also displayed here. Please observe that - Philips HDRW720 | User manual - Page 48
with the color buttons of your remote control: O Delete title: red function button The tiltle (recordings) will be erased from the HDD. O Archive title: green function button The title will be transferred to DVD+RW/+R. If it is not possible to record on a DVD+RW/+R, an error message appears (disc - Philips HDRW720 | User manual - Page 49
Use this function to adapt the title (recording) to your personal preferences. 1 Press BROWSER HDD on the remote control. P The Media Browser appears. 2 Select color buttons on the remote control. The function of the button may vary. Therefore, read the function in the help line before pressing the - Philips HDRW720 | User manual - Page 50
index picture. You can also use this function to separate and delete an undesired end of the recording (commercial). Warning! You cannot undo this division! 1 Press BROWSER HDD on the remote control. P The Media Browser appears. 2 Select the title you want to divide using A or B 3 Press EDIT on the - Philips HDRW720 | User manual - Page 51
ENGLISH Playback from the HDD Delete titles/recordings from the HDD Insert/remove chapter markers You can remove titles/recordings from the HDD to use the capacity from the HDD for new recordings. 1 Press BROWSER HDD on the remote control. P The Media Browser appears. To find you special scenes - Philips HDRW720 | User manual - Page 52
HDD Hide chapters (sections) By default, all chapters are visible. You can hide or unhide certain chapters during playback (e.g. unwanted scenes). In the editing mode HDD on the remote control. P DVD+RW/+R. O Archiving of the 'original' title The 'hidden' szenes were copied as 'hidden' on the DVD - Philips HDRW720 | User manual - Page 53
on a disc is not possible. What happens with DVD+R discs? As long as these discs are not finalized, you can protect them against accidental recording. 1 Insert the disc to be protected. 2 Press STOP h on the remote control while the index screen is displayed. P The first title is highlighted - Philips HDRW720 | User manual - Page 54
on playback With this DVD recorder you can play back the following systems: •) DVD Video •) (Super)Video CD Disc •) DVD+RW Disc •) DVD+R Disc •) DVD-RW (video mode, finalized) •) DVD-R •) CD-R •) CD-RW •) Audio CD •) MP3-CD You can operate the video recorder using the remote control or the buttons - Philips HDRW720 | User manual - Page 55
. 4 To stop playback, press STOP h on the remote control or h on the DVD recorder. 5 To remove the disc, press OPEN/CLOSE J on the front of the DVD recorder. Playing an audio CD You can also use the DVD recorder to play audio CDs If the TV is on, the audio CD screen appears automatically. During - Philips HDRW720 | User manual - Page 56
recorder display. During stopped playback ( STOP h button) the numbers of the albums will be shown on the TV screen and on the display. Further information on the album, track and artist will also be displayed if included in the ID tag. (Super) Video CDs may be equipped with PBC (Play Back Control - Philips HDRW720 | User manual - Page 57
General DVD's are A or B . Searching a disc You can search the disc for a recording at 4x, 8x or 32x playback K speed. Other speeds can only be in search mode. This is not a fault in your machine. Search feature via menu bar - During playback press SYSTEM MENU on the remote control. The menu - Philips HDRW720 | User manual - Page 58
When the end point is reached press OK . 1 P ' ' appears on the TV screen. Playback now takes place within these points. 5 To end the repeat, press the through the enlarged image. 1 During playback, press PAUSE 9 . P The DVD recorder switches to 'PAUSE'. You will see a still picture. G 2 Press - Philips HDRW720 | User manual - Page 59
discs have more than one subtitle language. The language initially selected for playback will be the one you selected when you first set up the DVD recorder. However you can change the subtitle language of the inserted disc at any time. You can change the subtitle language either using the menu of - Philips HDRW720 | User manual - Page 60
or split up the title. Press EDIT on the remote control during recording to open this menu. When a recording is made to disc, the following additional information is also stored at the beginning of the recording: •) Name of the recording If the TV station does not transmit a name, only the channel - Philips HDRW720 | User manual - Page 61
for playback (e.g. unwanted scenes) or make them visible again. In editing mode, hidden chapters are shown darker. A chapter always consists of a start title Press OK visible Press EDIT to exit 2 Press EDIT on the remote control to call the 'Favorite Scene Selection' editing menu. 3 Set the start - Philips HDRW720 | User manual - Page 62
the recording as the index picture. 1 During playback, search for location of the new index picture. Press the PAUSE 9 button. 2 Press the EDIT button. P The 'Favorite Scene Selection' menu appears on the TV screen. 1 While the relevant chapter is playing, press EDIT on the remote control. P The - Philips HDRW720 | User manual - Page 63
I divide titles on DVD+R discs? As recordings on DVD+R discs cannot be overwritten, it is not possible to divide titles on DVD+R discs. 1 While the relevant title is playing, press EDIT on the remote control. P The 'Favorite Scene Selection' menu appears on the TV screen. Favorite Scene Selection - Philips HDRW720 | User manual - Page 64
DVD-Recorder. Each recording from the HDD to a DVD+RW/+R (archiving) will be added at the end of existing recordings NTSC DVD playback Philips1 00:35:59 used Fr15/02/2004 This appears on the TV screen. 5 At this point 'Empty title' appears in the 'index picture display'. A new recording can now be - Philips HDRW720 | User manual - Page 65
new title with OK . P 'Storing name' appears on the TV screen for confirmation. 7 To end, press D . Finalizing DVD+R discs This feature is required to play back a DVD+R disc in a DVD player. Once the disc has been finalized no further recordings or changes can be made. 1 In the 'Disc info display - Philips HDRW720 | User manual - Page 66
DVD recorder. a When I insert a disc I see a number on the screen in the index picture screen in the top left-hand corner b You have inserted a disc that has already been registered by the Disc Manager. 2 Press the DISC MANAGER button on the remote control Disc number001 Next free disc number= 001 - Philips HDRW720 | User manual - Page 67
the Disc Manager (DM) will appear on the TV screen. Searching discs You can easily search for the title of a recording stored in the Disc Manager. To do this, the appropriate disc does not have to be in the DVD recorder. 1 Press DISC MANAGER on the remote control. 2 Select 'Browse discs' using B or - Philips HDRW720 | User manual - Page 68
options. Preparation: •) Switch on the TV set, and if necessary, select the channel for the DVD recorder (channel 3 or 4). •) Switch on the DVD recorder. 1 Press TUNER on the remote control to switch to HDD mode. You can also switch to HDD mode by pressing BROWSER HDD but you will not see the - Philips HDRW720 | User manual - Page 69
recording mode used for the recording on the HDD will be taken. Observe the maximum possible recording time on a DVD+RW/+R. The maximum possible recording time on the HDD depends from the recording mode and the average length of the recordings (titles). O 'M1' High Quality (high recording quality - Philips HDRW720 | User manual - Page 70
User preferences for the HDD 'Filter' Here you can choose between: I can not select this function Check the actual record mode selected. This function is available in the record modes 'M4' to 'M8' only. O 'Sport': Picture quality is optimized for rapid movements in the recording modes (picture - Philips HDRW720 | User manual - Page 71
ENGLISH Additional user preferences General This section describes how you can make additional TV set, and if necessary, select the channel for the DVD recorder (channel 3 or 4). •) Switch on the DVD recorder. 1 Press the DISC MENU button and then the SYSTEM MENU button on the remote control. - Philips HDRW720 | User manual - Page 72
Digital output' menu. Digital output Analog output Night mode All Stereo Off Sound 'Analog output' You can Use this setting if the DVD recorder is only connected to a stereo TV set. O 'Surround' Dolby signals are converted to PCM (Pulse Code Modulation). For receivers/amplifiers with digital - Philips HDRW720 | User manual - Page 73
the DVD recorder was switched off using STANDBY m , the clock display remains visible. O 'Demo mode': When the DVD recorder is control Auto resume Disc features Enter code On 'Access control' Please read the next chapter 'Access control (child lock)'. Auto resume If playback of a pre-recorded DVD - Philips HDRW720 | User manual - Page 74
. Activating/deactivating child lock Preparation: •) Switch on the TV set, and if necessary, select the channel for the DVD recorder (channel 3 or 4). •) Switch on the DVD recorder. 1 Press DISC MENU and then SYSTEM MENU on the remote control. If playback from a disc starts automatically, remove the - Philips HDRW720 | User manual - Page 75
will be blocked from viewing. Activating/deactivating parental level control Preparation: •) Switch on the TV set, and if necessary, select the channel for the DVD recorder (channel 3 or 4). •) Switch on the DVD recorder. 1 Press DISC MENU and then SYSTEM MENU on the remote control. P The menubar - Philips HDRW720 | User manual - Page 76
(Child Lock) Changing the PIN code Preparation: •) Switch on the TV set, and if necessary, select the channel for the DVD recorder (channel 3 or 4). •) Switch on the DVD recorder. 1 Press the TUNER and then the SYSTEM MENU button on the remote control. P The menubar appears. A 2 Select the ' ' icon - Philips HDRW720 | User manual - Page 77
TV You can check or change many of the functions and settings of your DVD recorder the disc inserted. Menu bar 1 A User preferences B Title/track C Chapter/index mode (status) of the DVD recorder and the type of disc inserted. This display can be switched off. Disc type symbols M DVD+RW W DVD+R N DVD - Philips HDRW720 | User manual - Page 78
output is switched to 'interlaced'. o((( A remote control signal has been received SAP Second audio program of the tuner selected. The following messages may appear in your DVD recorder display IS TV ON? The DVD recorder is in initial installation mode. Switch the TV on, then read the paragraph on - Philips HDRW720 | User manual - Page 79
the creation of the menu structure the DVD+RW/+R is prepared. As long as 'POST-FORMAT' is visible on the display you can not operate the DVD-Recorder. PHILIPS The DVD-Recorder has been switched on STANDBY The DVD-Recorder has been switched off GUIDE The TV Guide On Screen™system is switched on 72 - Philips HDRW720 | User manual - Page 80
pressed and the display shows 'PHILIPS', 'IS TV ON?': The device does not react when you press a button, although the remote control works: Your DVD recorder does not respond to any button being pressed: Resetting the machine to the default factory settings Remote control does not work: I can not - Philips HDRW720 | User manual - Page 81
code: The region code of the DVD and the DVD recorder must match. bParental control is on: Read chapter 'Access control (child lock)' bParental control is on fro titles from the HDD: Read chapter 'Access control (child lock)' bYou have selected the wrong channel number on the TV for the DVD recorder - Philips HDRW720 | User manual - Page 82
have to switch the DVD-Recorder on. Then you can select the TV Channels with the remote control from the DVD-Recorder or from the cable box. bBefore recording, select the recording mode as described in chapter 'Manual Recording', section 'Selecting the recording mode (quality)'. bChange the channel - Philips HDRW720 | User manual - Page 83
minutes, 'M8': 30minutes, bSome DVD players cannot play back DVD+RW recordings. You can solve this problem by using a special function: 1 Open the disc tray with OPEN/CLOSE J . Insert the disc but do not close the tray. 2 Hold down the number button 2 on the remote control until the tray closes. The - Philips HDRW720 | User manual - Page 84
. BEFORE REQUESTING SERVICE... Please check your owner's manual before requesting service. Adjustments of the controls discussed there may save you a service call. TO GET WARRANTY SERVICE IN THE U.S.A., PUERTO RICO, OR U.S. VIRGIN ISLANDS... Take the product to a Philips factory service center (see - Philips HDRW720 | User manual - Page 85
all parts of the world at the same time, all DVD players have a specific regional code. Discs can be given a regional code. If the regional codes differ between the player and the disc, playback is not possible. The regional code of the DVD recorder is shown on the type plate at the back or bottom - Philips HDRW720 | User manual - Page 86
of the remote control A Mark 146 Action 116 Admiral .... 093, 134, 209, 262, 306, 332 Aiko .. 013, 246, 248, 250, 255, 266 Akai .. 002, 113, 114, 140, 216, 246, - Philips HDRW720 | User manual - Page 87
, 009, 015, 037, 041, 042, 046, 071, 113, 114, 120, 128, 131, 134, 136, 137, 144, 154, 158, 209, 250, 256, 262, 272, 306, 338 Philips 000, 003, 004, 006, 008, 009, 015, 037, 041, 042, 048, 049, 050, 121, 134, 203, 205, 209, 233, 242, 243, 247, 250, 251, 301 - Philips HDRW720 | User manual - Page 88
, 005, 006, 015, 120, 137, 151, 154 Yoko .......... 222, 246, 250, 266, 332 Yorx 266, 332 Zenith ..... 004, 082, 083, 084, 105, 117, 138, 154 HDRW 720/17 (Ww nN N w nwWNnwNwnNwnNnWNn wN) 3103 605 21401 4375/000 81 - Philips HDRW720 | User manual - Page 89
Weight: 4.0kg Remote Control • Multi brand remote control Package Contents • DVD Video Recorder/Harddisc • Remote Control + batteries • User Manual • AC power cable • Coax RF antenna cable • IR-extender cable (IR Blaster) • Component Video cable • Stereo audio cable Philips Consumer Electronics Data - Philips HDRW720 | User manual - Page 90
(Wwn N Nw n wWNnwNwnNwnNnWNnw N) 3103 605 21401 4375/000 HDRW 720/17
-
 1
1 -
 2
2 -
 3
3 -
 4
4 -
 5
5 -
 6
6 -
 7
7 -
8
-
9
-
10
-
11
-
12
-
13
-
14
-
15
-
16
-
17
-
18
-
19
-
20
-
21
-
22
-
23
-
24
-
25
-
26
-
27
-
28
-
29
-
30
-
31
-
32
-
33
-
34
-
35
-
36
-
37
-
38
-
39
-
40
-
41
-
42
-
43
-
44
-
45
-
46
-
47
-
48
-
49
-
50
-
51
-
52
-
53
-
54
-
55
-
56
-
57
-
58
-
59
-
60
-
61
-
62
-
63
-
64
-
65
-
66
-
67
-
68
-
69
-
70
-
71
-
72
-
73
-
74
-
75
-
76
-
77
-
78
-
79
-
80
-
81
-
82
-
83
-
84
-
85
-
86
-
87
-
88
-
89
-
90
 |
 |