Philips HDRW720 Quick start guide
Philips HDRW720 Manual
 |
View all Philips HDRW720 manuals
Add to My Manuals
Save this manual to your list of manuals |
Philips HDRW720 manual content summary:
- Philips HDRW720 | Quick start guide - Page 1
Box With the TV Guide on ScreenTM System, your new Philips Hard Disk & DVD Recorder can control your set-top box (satellite receiver or cable TV box) via the IR-Blaster (GLINK cable). You can now only record TV shows that are received through the cable box. Connecting Follow the instructions under - Philips HDRW720 | Quick start guide - Page 2
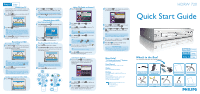
.com HDRW 720 Quick Start Guide What's in the Box? You should find these items upon opening the box. HDD Philips Hard Disk DVD Recorder Remote Control and Batteries Quick Start Guide Antenna Cable Audio L/R Cable Video CVBS Cable Mains Cable G-Link Cable & Transmitter User Manual philips
-
 1
1 -
 2
2
 |
 |
If you don’t have a set-top box follow the instructions for ‘Connection without Set-Top Box’. If you have a set-top box,
follow the instructions for ‘Connection without Set-Top Box’ then the instructions for ‘Connection with Set-Top Box’.
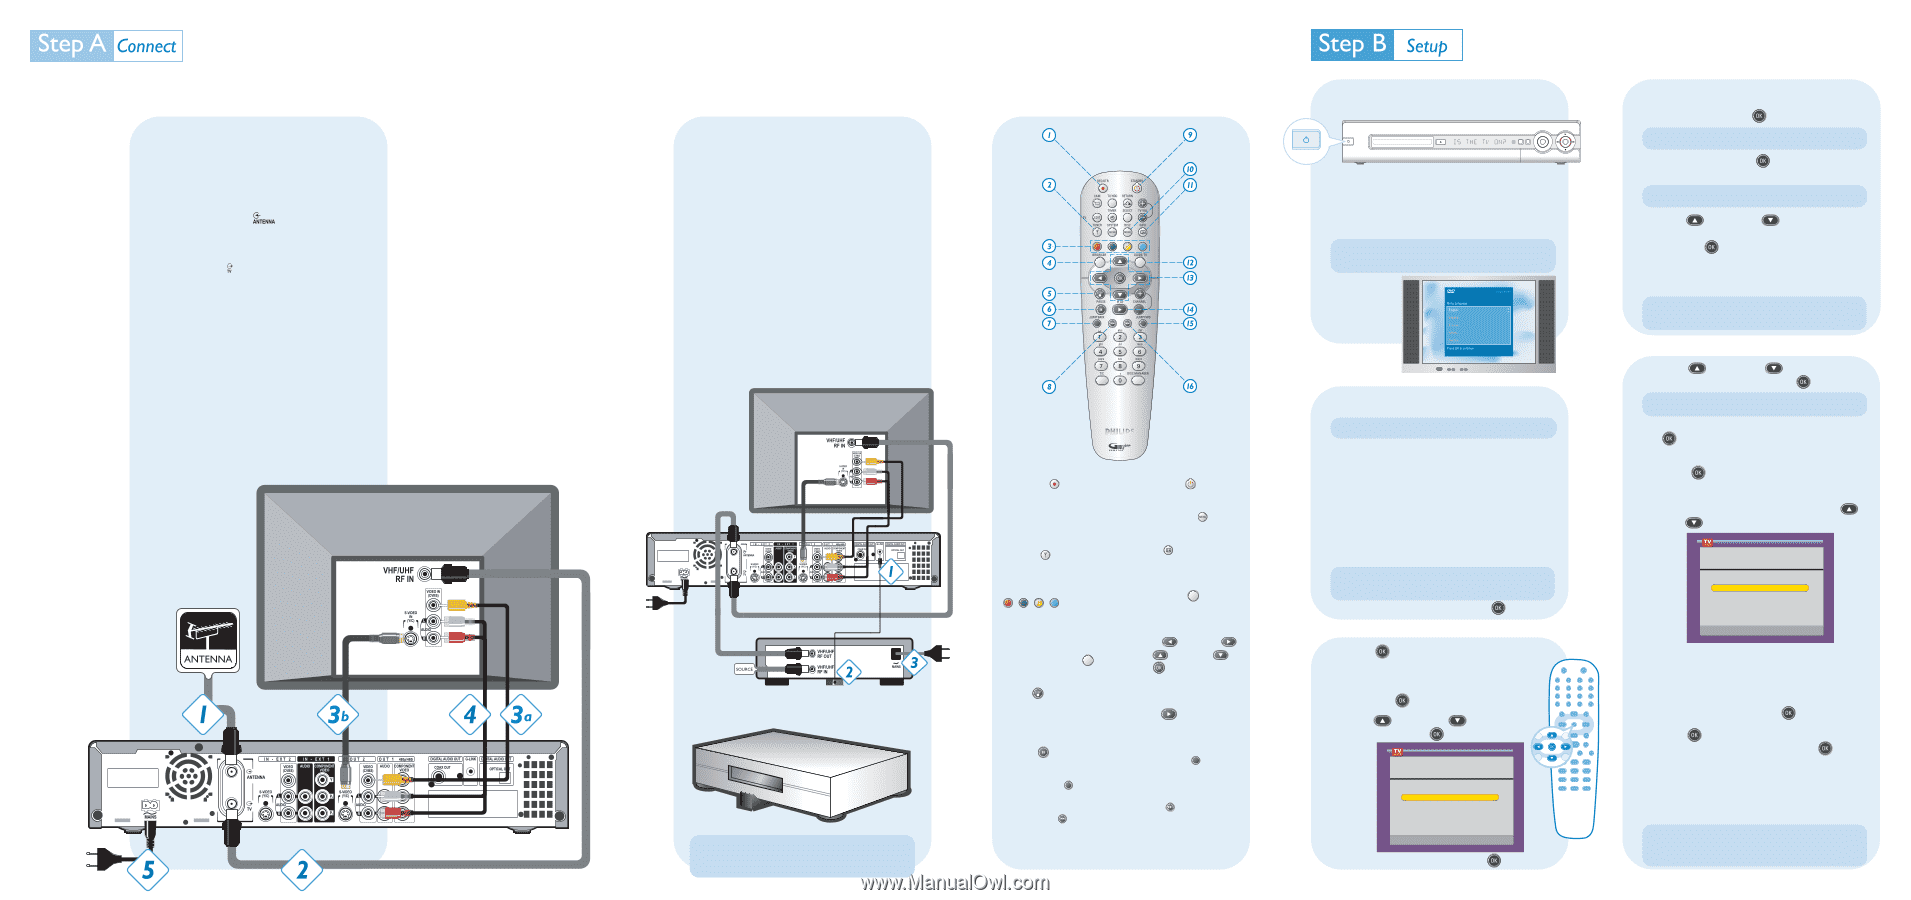
Connection without Set-Top Box
Before Connecting
Your TV should be plugged into the wall jack via the antenna
cable. Unplug the antenna cable from the TV.
Connecting
Connect the antenna cable (plugged out from the
TV) to ANTENNA IN
socket at the rear of
the recorder.
Connect the provided antenna cable into the TV
OUTPUT socket
at rear of the recorder and into
the Antenna In socket of the TV.
Connect the Video (CVBS) cable (yellow) to the
VIDEO (CBVS) socket of the TV and to the OUT 2
VIDEO (CBVS) socket at rear the recorder.
or
Connect the S-Video cable to the S-VIDEO
socket
of the TV and to the OUT 2 S-VIDEO
socket at rear
the recorder.
Connect the red Audio cable to the red socket of
the TV and recorder and the white Audio cable to
the white socket of the TV and recorder.
Connect the power cable from the recorder to an
AC power outlet.
1
2
3
a
4
5
Connection with Set-Top Box
With the TV Guide on Screen
TM
System, your new Philips
Hard Disk & DVD Recorder can control your set-top box
(satellite receiver or cable TV box) via the IR-Blaster (G-
LINK cable). You can now only record TV shows that are
received through the cable box.
Connecting
Follow the instructions under ‘Connection without Set-Top
Box’ to connect the recorder then proceed to step 1 below.
Connect the G-LINK cable (supplied) to the G-LINK
socket at the rear of the recorder.
Place the IR-Blaster transmitter in front of your set-
top box in such a way that it can acquire the signal
broadcasted by the transmitter.
If not already connected, plug in the power cable of
your set-top box to an AC power outlet.
1
2
3
Television
DVD Recorder/Hard Disk
Cable Box
IR-Blaster
Press the
STANDBY-ON
button on the recorder.
The recorder will display ‘IS THE TV ON?’
Switch on the TV set.
Press the ‘0’ button on the TV remote control, scroll
down until you see the Menu Language menu. This is
your correct viewing channel for the recorder.
Finding the Viewing Channel
HARD DISK & DVD RECORDER
STANDBY-ON
OPEN/CLOSE
TV GUIDE
OK
UP
DOWN
RIGHT
LEFT
OPEN
STANDBY-ON
Front Panel of Recorder
Installation
Press
OK
when you see ‘Welcome to Your TV
Guide on Screen System’.
Find your IR-Blaster if you haven’t connected it
and press
OK
.
Press
UP
or
DOWN
to select your
country and press
OK
.
Key in your zip code and press
OK
.
TV Guide on Screen
TM
Installation
If you do not have a set-top box, go to step C.
Select ‘Yes’ and press
OK
if you have cable service.
Select ‘Yes’ and press
OK
if you have a external
set-top box. Select ‘No’ for all other.
Press
UP
or
DOWN
to select the channel
on the recorder which the cable service is tuned to
and press
OK
.
You are now prompted to connect the IR-Blaster, do
so if you haven’t.
Installing Set-Top Box
Press
UP
or
DOWN
to select the brand
of your set-top box and press
OK
.
Read the information on screen carefully and press
OK
to confirm.
Change the channel on your set-top box to 02 and
press
OK
.
The recorder will now attempt to change the channel
number to 09 on your set-top box. Press
UP
or
DOWN
to select ‘Yes’ if it has.
If it has not, refer to the user manual for more details
on installing your set-top box.
Check the settings on screen, if they are incorrect select
‘No, repeat setup process’. If they are correct, select ‘Yes,
end setup process’ and press
OK
to confirm.
Press
OK
after you finish reading about TV Guide
on Screen
TM
System information and
OK
again to
complete the setup.
Switch the set-top box to the channel that transmits
the TV Guide data, leave it on overnight to load the
program data. It will be available in the next 24 hours.
Finalize Installation
1
2
3
4
5
6
7
8
1
2
1
2
3
1
2
3
4
5
1
2
3
4
6
7
8
Follow the on-screen instructions:
Select your Menu Language.
Select your Audio Language.
Select your Subtitle Language.
Select your TV Shape.
Select your Country.
The recorder will now ask if you have connected
your antenna. Do so if you haven’t.
The recorder will now start automatic Channel Search.
Check Date and Time and press
OK
to finish.
Tip
If unable to find the correct viewing channel, check your
connections again or check your TV’s user manual.
Tip
Use the recorder’s remote control to make the selections.
Tip
If no channels were found, check your antenna connection
and check your user manual to search for channels.
Important Note
You must leave the recorder in Standby mode at night in
order for it to load new program listings.
Tip
If you do not see your brand, select ‘not listed’.
Tip
If you have selected ‘No’, proceed to Step C.
Tip
Selected ‘No’ if you don’t and proceed to Step C.
Positioning of G-LINK transmitter
Set-Top Box
IR-Blaster
Note
The IR-Blaster must be placed about one inch in front of
the set-top box.
Remote Control
REC/OTR
Record the current TV
show and mark record-
ings in the TSB to be
stored on HDD.
TUNER
Switch to live TV.
COLOUR BUTTONS
Have different functions
(shown at bottom of
screen) in different menus.
BROWSER HDD
Call up the HDD menu.
STOP
Stop playback/recording.
Hold down to open and
close the disc tray.
PAUSE
Pause playback.
JUMP BACK
Jump back a certain time.
PREVIOUS
Previous chapter or title.
Hold down to search
backwards.
STANDBY
Switch on or off.
DISC MENU
Display the DVD menu.
INFO
Display additional
information.
GUIDE/TV
Call up the GUIDE
Plus+® system.
LEFT
, RIGHT
,
UP
, DOWN
,
OK
Used to navigate through
the menus.
PLAY
Play/resume from
disc/HDD.
JUMP FWD
To jump forward a
certain time.
NEXT
Next Chapter or Title.
Hold down to search
forwards.
Description
1
2
3
4
5
6
7
8
9
14
13
12
11
10
15
16
3
b
Television
DVD Recorder/Hard Disk
3
4
Tip
For more information on installing additional receivers, see
the user manual.
philips
You have indicated that you have. Now the TV on Screen
System need some additional information.
Is a cable box connected to this DVD Recorder?
Using your
your DVD Recorder remote, move up or down to highlight your answer. Press
OK to choose.
Step 2: Configuring for Cable
Yes
No
Testing complete.
If your cable box automatically changed to and remained on
channel 09, the test was successful.
Is your cable box now tuned to channel 09?
Using your
your DVD Recorder remote, move up or down to highlight your answer. Press
OK to choose.
Step 2: Configuring for Cable
Yes
No
Test this code again