Philips HTS3565D User manual - Page 23
Setting up Progressive Scan, feature
 |
UPC - 609585146938
View all Philips HTS3565D manuals
Add to My Manuals
Save this manual to your list of manuals |
Page 23 highlights
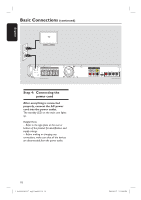
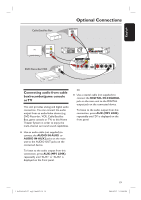
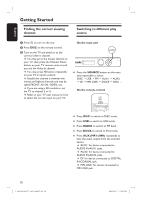
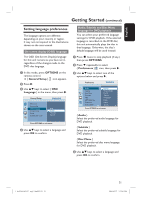
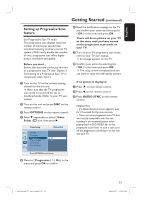
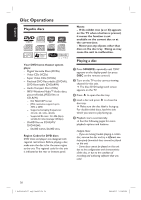
English Getting Started (continued) Setting up Progressive Scan feature (for Progressive Scan TV only) The progressive scan displays twice the number of frames per second than interlaced scanning (ordinary normal TV system.) With nearly double the number of lines, progressive scan offers higher picture resolution and quality. Before you start... Ensure that you have connected this unit to a progressive scan TV (see 'Option 3: Connecting to a Progressive Scan TV or component video input'.) A Turn on the TV to the correct viewing channel for the this unit. Make sure that the TV progressive scan mode is turned off (or set to interlaced mode.) Refer to your TV user manual. B Turn on this unit and press DISC on the remote control. C Press OPTIONS on the remote control. D Press repeatedly to select { Video Setup } icon, then press . Video Setup TV Type TV Display Progressive Off Picture Setting On HDMI Setup Closed Caption F Read the notification message on the TV and confirm your action by selecting the { OK } in the menu and press OK. There will be no picture on your TV at this state until you have turned on the progressive scan mode on your TV. G Turn on your TV progressive scan mode, refer to your TV user manual. A message appears on the TV. H Confirm your action by selecting the { OK } in the menu and press OK. The setup is now completed and you can start to enjoy the high quality picture. If no picture is displayed A Press ç on the remote control. B Press on the remote control. C Press AUDIO SYNC on the remote control. Helpful Hints: - If a blank/distorted screen appears, wait for 15 seconds for the auto recovery. - There are some progressive scan TV that are not fully compatible with this unit, resulting in an unnatural picture when playing back a DVD VIDEO disc in the progressive scan mode. In such a case, turn off the progressive scan feature on this unit and your TV. Press OPTIONS to exit menu E Move to { Progressive } > { On } in the menu and press OK to confirm. 1_hts3565-66D_37_eng2_final813.i23 23 23 2008-03-27 3:12:01 PM
-
 1
1 -
2
-
3
-
4
-
5
-
6
-
7
-
8
-
9
-
10
-
11
-
12
-
13
-
14
-
15
-
16
-
17
-
 18
18 -
 19
19 -
 20
20 -
 21
21 -
 22
22 -
 23
23 -
 24
24 -
 25
25 -
 26
26 -
 27
27 -
 28
28 -
29
-
30
-
31
-
32
-
33
-
34
-
35
-
36
-
37
-
38
-
39
-
40
-
41
-
42
-
43
-
44
-
45
-
46
-
47
-
48
-
49
-
50
-
51
-
52
-
53
-
54
-
55
-
56
-
57
-
58
-
59
 |
 |
