Philips LC4433 User Guide
Philips LC4433 - cSmart SVGA LCD Projector Manual
 |
View all Philips LC4433 manuals
Add to My Manuals
Save this manual to your list of manuals |
Philips LC4433 manual content summary:
- Philips LC4433 | User Guide - Page 1
Stabnyd A MVute Volume Lamp RC Keystone Menu OK Philips multimedia projector cSmart Series User guide English - Philips LC4433 | User Guide - Page 2
0. Controls and connections Keystone @ $ a b c de f g h Volume Lamp RC Stabnyd A MVute OK 1 2 3 4 Menu OK AV Mute Stand by Source Lamp RC Keystone 5 6 7 8 9 Menu 0 ! @ # fig. 1 Audio out USB Video audio-in Data audio-in Video S-Video Data out Data in l k j i 1 2 3 4 5 6 - Philips LC4433 | User Guide - Page 3
Audio Video adapter (not for USA version) - Remote control + batteries - Soft bag - User Guide, Projection Assistant and more on CD-ROM - Quick set up Card Note: This equipment has been tested to comply with the limits for a class A digital device in accordance with Part 15 of the FCC Rules as well - Philips LC4433 | User Guide - Page 4
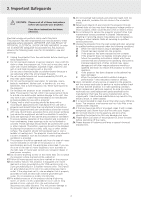
18. Upon completion of any service or repairs to the projector, ask the service technician to perform a routine safety check to check that the projector is in safe operating condition. 19. When replacement parts are required, be sure the service technician has used replacement parts specified by the - Philips LC4433 | User Guide - Page 5
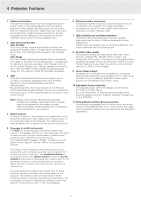
Macintosh computer users could experience incomplete or erratic USB -functionality. These problems are not related to the performance of your projector. 4. Digital features The digital features of the projector are of great value for an attractive presentation. With 'digital zoom' a specific part of - Philips LC4433 | User Guide - Page 6
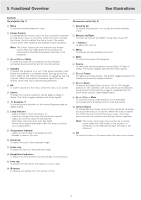
is in standby mode, the ring around the button lights up red. When the projector is operating, the ring is green. When the projector receives a signal from the remote control the ring is fast blinking green/red. 5 OK To confirm actions in the menu when the menu is on screen. 6 Source To select - Philips LC4433 | User Guide - Page 7
video camera or TV with AV output socket. Other connections g Data out To connect to an external monitor (or a second projector). The image projected is simultaneously shown on the monitor. i Lamp compartment j Lock slit To insert an optional locking device (Kensington lock). k Power To connect the - Philips LC4433 | User Guide - Page 8
As default factory setting, the projector has been set up for front projection. You can change to rear or ceiling projection via the OSD menu. See 'Rear screen projection' and 'Ceiling-mount projection' under 'Operation - Display and picture control' for further instructions. • Choose a screen size - Philips LC4433 | User Guide - Page 9
' batteries as indicated inside the battery compartment. 3. Replace the lid and snap it into place. Note: The maximum range of the remote control is approximately 15 m (± 50 feet). Moving the projector 1. Press the Stand by On button to put the projector in stand by. The standby indicator lights up - Philips LC4433 | User Guide - Page 10
in the connection diagrams on the following pages. Optional accessories: • LCA3115/00 - 120 W replacement lamp; • LCA4117/00 - trackerball remote control; • LCA4119/00 - RS-232 mouse receiver; • LCA2210/00 - ceiling mount; • LCA5300/00 - VGA extension cable (15 m); • LCA5311/00 - component/HD input - Philips LC4433 | User Guide - Page 11
possible to: - control the cursor of the computer via the projector remote control, and - the display settings of the computer will be changed to fit the capability of the projector. Note: If you experience problems using the USB connection, please refer to the user guide or support information of - Philips LC4433 | User Guide - Page 12
figures in the accessories diagram. The characters in brackets (a) correspond to the characters in fig. 2 of 'Controls and connections'. S-VHS (c) (f) Caution! Always switch off the projector before making any connections. Audio out USB Vvideo audio-in DDaattaa audio-in Video S-Video Data - Philips LC4433 | User Guide - Page 13
to Component video equipment Note: The characters in brackets (a) correspond to characters in fig. 2 of 'Controls and connections'. Caution! Always switch off external equipment and projector before making any connections. (h) Audio out USB Video audio-in Data audio-in Video S-Video Data out - Philips LC4433 | User Guide - Page 14
equipment Note: The characters in brackets (a) correspond to the characters in fig. 2 of 'Controls and connections'. Caution! Always switch off the projector before making any connections. Always turn down the volume control of the connected amplifier before switching it on, to prevent damage to the - Philips LC4433 | User Guide - Page 15
projector will switch off automatically. the message display. Suggestion(s) to solve the Please contact a service centre for repair. problem are displayed in the gray part and with help of Menu, OK and Cursor Control on the projector or the remote control. 1. Press Menu. - The menu bar appears - Philips LC4433 | User Guide - Page 16
connecting the projector to your PC for the first time, be sure to adjust the phase control for optimal readability of the projected text. Tip for Windows users: To adjustments can be made: - Digital Freeze captures a moving picture (still picture); - Digital Zoom enlarges a part of the picture; - - Philips LC4433 | User Guide - Page 17
can only be selected with the AV mute button on the projector or on the remote control. A/V mute then appears on the screen. For example: Data sequence of actions, or may need some further explanation. Digital Zoom Digital Zoom is used to enlarge a part of the picture. 1. Press Menu. - The menu - Philips LC4433 | User Guide - Page 18
SCREEN Front projection SCREEN Audio Control The projector's sound is set to Control to select Audio in the menu bar. 4. Use Cursor Control to select the item to be adjusted. 5. Use Cursor Control with the - Volume + keys on the remote control. Rear projection Caution! Always reduce/check - Philips LC4433 | User Guide - Page 19
or suppress the default Philips start-up screen upon the projector's start up. 1. Press Menu. - The menu bar appears on the screen. 2. Use Cursor Control to move the lock is used to de-activate all remote and local controls. To disable the keylock function keep the OK button pressed for 10 - Philips LC4433 | User Guide - Page 20
up the cover. LLAAMMPP A Notes: - We advise you to clean the filter every 100 hours. - Operating the projector without filter or with a torn or damaged filter may seriously damage the projector. - When the filter is damaged replace it with a filter of the same type (12 nc: 3122 434 01180). - The - Philips LC4433 | User Guide - Page 21
. Multimedia projectors Warning: Lamplife has almost expired It is suggested to have a spare lamp available. The lamp type is indicated in the user guide. The lamplife remaining can be checked using the OSD menu. 1. Press the Menu. - The menu bar appears on the screen. 2. Use Cursor Control to - Philips LC4433 | User Guide - Page 22
in the guiding slots and insert into the lamp compartment. 3. Use cursor control to select Lamp counter in the sub menu. Display Picture Audio Settings Language Keystone correction Start-up screen Lamp counter System informatyion... Factory reset (more) Lamp 0 hours Projector 2453 hours - Philips LC4433 | User Guide - Page 23
10. Troubleshooting If a fault occurs, first check the points listed below before taking the projector for repair. If you are unable to remedy a problem by following these hints, consult your dealer or service organisation. Warning: Under no circumstances should you try to repair the projector
-
 1
1 -
 2
2 -
 3
3 -
 4
4 -
 5
5 -
 6
6 -
 7
7 -
8
-
9
-
10
-
11
-
12
-
13
-
14
-
15
-
16
-
17
-
18
-
19
-
20
-
21
-
22
-
23
 |
 |

Philips multimedia projector
cSmart Series
User guide
English
Menu
OK
AV
Mute
Keystone
Volume
Stand
by
Lamp
RC