Philips LC5241 User Guide
Philips LC5241 - UGO X-Lite Impact XGA DLP Projector Manual
 |
UPC - 037849924334
View all Philips LC5241 manuals
Add to My Manuals
Save this manual to your list of manuals |
Philips LC5241 manual content summary:
- Philips LC5241 | User Guide - Page 1
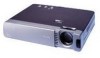
StatusStandby/On Input Auto image Philips Multimedia projector LC5241, LC5231 User guide English - Philips LC5241 | User Guide - Page 2
0. Controls and connections 1 y I Status Standby/On Input Auto image 2 4 3 @ Status Standby/On Input Auto image OPEN # y StSattuasndby/On Input Auto image Mouse Audio in Data / YCbCr S Video in Video in ! 0 9 8 7 6 5 ™ ¡ ) ( fig. 1 $ Audio in Mouse Data / YCbCr S-Video in - Philips LC5241 | User Guide - Page 3
0. Controls and connections £ º ª ≤ Mouse Standby /On Menu • Video Data ∞ Cancel ≥ § ° Mouse Video Menu Cancel Standby /On Data ‡ Auto image D-Freeze A/V Mute ⁄ fl D-Zoom D-Keystone Volume ¤ fi › ‹ 3 fig. 3 - Philips LC5241 | User Guide - Page 4
15 minutes. Important note for users in the U.S.A. The responsible party of this multimedia projector is the following: Philips Consumer Electronics Company One Philips Drive Knoxville, TN 37914 Telephone (1888) 873-4672 Lamp replacement Be sure to replace the lamp when the status indicator comes - Philips LC5241 | User Guide - Page 5
projector, observe the following basic rules for its installation, use and servicing. 1. Unplug the projector from the wall outlet before cleaning or lamp replacement projector should be operated only from the type of power source indicated on the bottom of the projector or in the specifications and - Philips LC5241 | User Guide - Page 6
compression technology. The advanced intelligent compression technology enables these projectors to present clear compression SXGA images without any line omission. UGO S-lite Impact; LC5231 Fully compatible with true S-VGA; support for XGA using advanced intelligent compression technology. The - Philips LC5241 | User Guide - Page 7
projected image. ) Power socket To connect the projector to the mains. ¡ Lock slit To insert an optional locking device (Kensington lock). ™ IR sensor Receives the signals from the remote control. Remote control (fig. 3) £ LED The red LED lights during infrared transmission. ≤ Mouse To activate the - Philips LC5241 | User Guide - Page 8
will operate at slow speed and the standby status will be activated. Note: The standby indicator lights up orange, the projector is now in the Standby/On mode. 2. Slide the lens cap open. UGO S-lite Impact; LC5231 Lens surface Screen size 120" 100" 80" 60" 40" 25" Wide (max) 150" Tele (max) 200 - Philips LC5241 | User Guide - Page 9
distortion of the vertical keystone type by internal scaling. By pressing the D-Keystone +/- buttons of the remote control you can Keystoned image fine adjust the projected image. Adjusting height and level of the projector • Use the Height/Level Adjuster to adjust the vertical angle of the - Philips LC5241 | User Guide - Page 10
shorter than four meters (13 feet). Caution! Do not mix old and new batteries (also never mix alkaline and manganese batteries). Using the remote control as PC mouse The remote control of this projector can be used as the PC mouse (wireless mouse function) by connecting the Mouse connector of this - Philips LC5241 | User Guide - Page 11
cables These accessories (1 to 7) are supplied with the product for connecting the projector to computer/AV equipment. The numbers in the left-hand column correspond with the numbers in the connection diagrams on the following pages. Optional cables and adapter: - Programmable VGA MAC adapter - Philips LC5241 | User Guide - Page 12
instruction manual or contact the manufacturer concerning the method used to set your PC. Connecting to PC mouse connector General - The remote control of this projector , it may not be possible to use the standard pointing device (track ball, etc.) of the PC when connected to the Mouse connector. - Philips LC5241 | User Guide - Page 13
in brackets like (2) correspond to the figures in the accessories diagram. The figures in circles like # correspond to the figures in fig. 2 of 'Controls and connections'. Caution! Always switch off the projector before making any connections. COMPOSITE VIDEO SIGNAL S-VIDEO SIGNAL (3) Scart - Philips LC5241 | User Guide - Page 14
Y (green), Cb (blue) and Cr (red) connectors of a DVD player or other component video equipment to the corresponding Data/YCbCr connector % of the projector. For this, use a YCbCr Component cable (optional). 3. To use the built-in audio system, connect one end of the computer audio cable (3) to the - Philips LC5241 | User Guide - Page 15
use) For lamp cartridge replacement see the section under Maintenance. - When the lamp is on, the Standby/On indicator lights up green. 2. Select the required source (Data/YCbCr, Video or S-Video) by pressing the Input selection button on the projector or the Video/Data buttons on the remote control - Philips LC5241 | User Guide - Page 16
0 CONTRAST 0 PICTURE ADJ 0 FINE PICTURE 0 -POSITION- Menu structure - data input IMAGE INFORMATION -RESET- -LAMP USAGE HOURS RESET- RESOLUTION 1024 X 768 FREQUENCY H: 48.4 KH z V: 60 Hz LAMP USAGE 34 STATUS -0.02 12 POSITION Note: The IMAGE and INFORMATION features are also - Philips LC5241 | User Guide - Page 17
Mouse Video Menu Cancel Standby /On Data IMAGE INFORMATION BRIGHTNESS 0 CONTRAST 0 COLOR 0 TINT 0 SHARPNESS 1 IMAGE INFORMATION -RESET- -LAMP USAGE HOURS RESET- LAMP USAGE 34 STATUS 21212.13361 Note: The IMAGE and INFORMATION features are also accessible in the Advanced menu - Philips LC5241 | User Guide - Page 18
projector's picture is set to standard specifications at the factory. However, you can adjust the image to suit your own preferences. The projector button on the Remote control unit, the manual users: To adjust size and phase correctly: 1. Select 'Start' and then 'Shut down'. 2. Adjust the projectors - Philips LC5241 | User Guide - Page 19
portion. Input a signal that is rated SXGA (XGA for S-lite) to RGB/YCbCr connector and then set the partial display position MENU Press the Menu button with the flip cover of the remote control closed, to display the normal menu, then use pixel replacement; - AUTO: projection after automatic input signal zoom-in - Philips LC5241 | User Guide - Page 20
- REAL: input signal projection without pixel replacement; - AUTO: projection after automatic input setting for enjoying video in a dark or light room. This feature emphasises the White which is remote control when COLOR SYSTEM is addressed in the COLOR setting menu. Other Settings The projector - Philips LC5241 | User Guide - Page 21
usage time - D-KEYSTONE adjustment values (including the D-KEYSTONE setting value: page 19) - SOURCE CHANGE - LAMP USAGE HOURS RESET This function is used to reset the hours of lamp usage after replacing the lamp. 1. Press Menu. - The menu bar appears on the screen. 2. Use Cursor Control to move the - Philips LC5241 | User Guide - Page 22
with the securing screw. Lamp replacement Be sure to replace the lamp when the Status indicator comes on. If you continue to use the lamp after 1000 hours of usage, the lamp will turn off. 1. Press the Standby/On button to switch off the projector. - The standby indicator lights up red. 2. Wait at - Philips LC5241 | User Guide - Page 23
the Philips replacement lamp cartridge. Order this from your Philips dealer using the unit model number (see 'Note' under 'Lamp replacement'). - Be very careful. The lamp and lampholder may still be too hot to touch. - Do not loosen any screws except for those mentioned in the instructions below - Philips LC5241 | User Guide - Page 24
10. Troubleshooting If a fault occurs, first check the points listed below before taking the projector for repair. If you are unable to remedy a problem by following these hints, consult your dealer or service organisation. Warning: Under no circumstances should you try to repair the projector
-
 1
1 -
 2
2 -
 3
3 -
 4
4 -
 5
5 -
 6
6 -
 7
7 -
8
-
9
-
10
-
11
-
12
-
13
-
14
-
15
-
16
-
17
-
18
-
19
-
20
-
21
-
22
-
23
-
24
 |
 |

Philips Multimedia projector
LC5241, LC5231
User guide
English
Auto image
Input
Standby/On
Status