Philips RC9800I User manual
Philips RC9800I - RC 9800i Multimedia Control Panel Manual
 |
UPC - 037849951552
View all Philips RC9800I manuals
Add to My Manuals
Save this manual to your list of manuals |
Philips RC9800I manual content summary:
- Philips RC9800I | User manual - Page 1
of the copyright owner. Royal Philips Electronics is not liable for omissions or for technical or editorial errors in this manual or for damages directly or indirectly resulting from the use of the RC9800i Touch Screen Remote Control. The information in this user guide may be subject to change - Philips RC9800I | User manual - Page 2
.com/support if you experience technical difficulties. If your problems cannot be solved by consulting the website, contact your Philips retailer. Website To consult the latest User Manual and to find information on the most recent firmware updates, please check the RC9800i Touch Screen Remote - Philips RC9800I | User manual - Page 3
The RC9800i Touch Screen Remote Control box contains the following items: ■ The RC9800i; ■ A cradle and an adapter; ■ A USB cable; User Manual 3 ■ A User Manual that helps you to start using the RC9800i and getting the most out of it; ■ A Quick Start Guide that supports you in getting the device - Philips RC9800I | User manual - Page 4
Networking 11 Home Networking and Connected Devices 11 Wireless Connectivity 12 What You Should Know About Activity-Based Control 12 Watch Activities 13 Listen Activities 13 Getting the Settings Right 14 RC9800i Settings 14 Calibrating the Touch Screen 14 End User License Agreement - Philips RC9800I | User manual - Page 5
51 Upgrading the Firmware 52 List of Symbols 53 Tips and Troubleshooting 54 Online Information 56 Support for Your Philips Connected Planet Product 56 Technical Specifications 57 Environmental Information 58 Communications Regulation Information 58 Glossary 60 User Manual Index - Philips RC9800I | User manual - Page 6
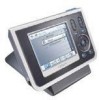
Take a Good Look Congratulations on the purchase of your new RC9800i Touch Screen Remote Control! This device is a "must have" if you want to enjoy a real state-of-the-art home entertainment experience. You will see that using the RC9800i is very easy. Before going into details, let's first have - Philips RC9800I | User manual - Page 7
's touch screen you will find several hard keys. Volume Channel Mute Page Cursor Home Back After you have properly set up the RC9800i, you can use the hard keys for the following functions: ■ Channel: Press this hard key to go one TV Channel up or down. ■ Volume: Press this hard key to control the - Philips RC9800I | User manual - Page 8
RC9800i The battery level of the RC9800i is displayed on the touch screen. At any time you can charge the device as follows: 1 Plug the power adapter into the cradle. 2 Dock the RC9800i in the cradle. The RC9800i music Media Adapter. Note The audio extension cable is not included. User Manual 8 - Philips RC9800I | User manual - Page 9
Dock the RC9800i in the cradle. If the RC9800i is playing music via its speaker, the RC9800i RC9800i. You will be using this USB connector to connect to a PC in order to download new firmware when it becomes available. For further information, see 'Upgrading the Firmware' on page 52. User Manual - Philips RC9800I | User manual - Page 10
is a universal remote control that can control a wide variety of devices, such as TVs, VCRs, DVD players and so on. In the home plan above, you can see the RC9800i functioning as a universal remote control: it is controlling the audio system, the flat screen TV, the VCR and the DVD. User Manual 10 - Philips RC9800I | User manual - Page 11
You Should Know About Home Networking Home Networking and Connected Devices The RC9800i goes one step further than ordinary universal remotes. The RC9800i is revolutionary in that it can also operate most of the connected devices in your home network. Connected devices are devices that comply with - Philips RC9800I | User manual - Page 12
entertainment devices, such as Philips Connected Planet TVs or audio systems; ■ connect to PCs (the PC should be equipped with appropriate UPnP A/V compliant software); ■ connect to bridge devices like UPnP A/V compliant Media Adapters; ■ access the Internet to download Electronic Program Guide - Philips RC9800I | User manual - Page 13
the content. Next, the RC9800i will show you a screen with all of the relevant TV and DVD control buttons, as if it were the TV's and DVD's remotes in one. ■ You want to watch television, but don't know what is on. Take your RC9800i and launch the Electronic Program Guide (EPG). You can select any - Philips RC9800I | User manual - Page 14
recalibrate the touch screen. See 'Screen Settings', on page 43. End User License Agreement The RC9800i will display a message informing you of the existence of the End User License Agreement (EULA), included in the RC9800i box. Read this EULA carefully. Your use of the RC9800i and its software is - Philips RC9800I | User manual - Page 15
the Electronic Programming Guide, the remote control codes database and the questions asked during setup. 1 Select either North America or Europe. The RC9800i will automatically restart to configure the location settings and will then display the following welcome screen. User Manual 15 2 Choose - Philips RC9800I | User manual - Page 16
Getting the Settings Right User Manual 16 Change Network Settings 1 In the screen, 'RC9800i Network Settings', enter the SSID number of your wireless network. 1 Choose Find to find all available wireless networks. 2 Select the SSID of the network you want the RC9800i to connect to. 2 Select the - Philips RC9800I | User manual - Page 17
, or you can set the date and time yourself. User Manual 17 Use a dedicated time server on the Internet 1 Select Get time from Internet. 2 Choose NTP settings. The NTP settings appear: 3 Select RC9800i Default Time Server from the list. -orSelect a Custom Server and fill in the server's address - Philips RC9800I | User manual - Page 18
to find out which rooms contain audio-video equipment that you want to control with the RC9800i, as well as to learn more about the nature of this equipment. Set Up Rooms 1 To continue, tap Next. The screen 'Set Up Rooms' appears. 2 Choose Add. The screen to add rooms appears. User Manual 18 - Philips RC9800I | User manual - Page 19
list, select a room that most closely matches your room and rename it. 4 Choose OK. The screen 'Set Up Rooms' appears again. The newly added room is displayed in the list Up Devices For each room you have added, you can now add the A/V devices you want to control with your RC9800i. User Manual 19 - Philips RC9800I | User manual - Page 20
(Radio) ■ VCR 4 Select a device located in the room currently selected that you want to control with the RC9800i and choose Next. For example, let's select a TV. The following screen appears: User Manual 20 5 Choose the alphabet buttons to jump to the appropriate brand list. Note These buttons - Philips RC9800I | User manual - Page 21
-screen instructions until an animated picture appears. 1 Aim your device's original remote control to the RC9800i's infrared sensor. Keep it at a distance of approximately 5 cm / 2 inches. Make sure to aim at the area between the two white stripes. User Manual 21 2 On the original remote control - Philips RC9800I | User manual - Page 22
of remote control codes by automatically sending codes to your device to find out which codes your device reacts to. Make sure that your device is on and follow the on-screen instructions, until a progress bar appears: 1 When the device reacts, choose My Device Reacted. A confirmation screen will - Philips RC9800I | User manual - Page 23
to try. Once you have identified the best matching codeset for your device, you can manually learn incorrect or missing functions (missing functions have no remote control codes assigned to them; they are marked in red.) 4 When finished, choose Next. A confirmation screen will appear. User Manual 23 - Philips RC9800I | User manual - Page 24
, channel switching and input selection After having determined the correct remote control codes for a device, the RC9800i will now determine the most appropriate methods for powering on, switching channels and selecting inputs on the device. Note In the following paragraph, the example of a TV is - Philips RC9800I | User manual - Page 25
including the TV's internal tuner, have been screen will automatically appear. 1 Choose Next twice. The following screen will appear. 2 Check the activities that are relevant for you (i.e. things that you want to do with your equipment and that you want to control with the RC9800i). User Manual - Philips RC9800I | User manual - Page 26
the Homepage, the current room (in this case the living room) is displayed. The Homepage itself lists the 3 available activities: Watch, Listen and Browse. User Manual 26 Controlled room Possible activities you can perform in this room Tap this button to turn off all devices in the selected room - Philips RC9800I | User manual - Page 27
a series of screens with remote control functions is available. ■ Settings allows you to change your RC9800i settings, add or edit rooms and A/V devices information, and set up Internet services. ■ About contains information on the software version of your RC9800i. ■ Smart Navigation The Home, Page - Philips RC9800I | User manual - Page 28
can perform in this room Choose Watch. Remote Control screen, first page: Level 2 Press the Page hard key to cycle through the different remote control screens. Remote Control screen, second page: Level 2 Choose Search. User Manual 28 Press the Home hard key. Remote Control screen, Level 3 - Philips RC9800I | User manual - Page 29
through the pages. These are the typical controls for watching television via a cable box. User Manual 29 3 Choose the digits corresponding to the channel you want to watch, the one that broadcasts the movie. The RC9800i will send remote control codes to tune the cable box to the appropriate - Philips RC9800I | User manual - Page 30
controls. An example page of a combined control screen: The most frequently used controls for the television and the cable device. User Manual 30 The following elements are part of a combined control screen icon of your choice. Below is a list of all activities. Watching broadcast TV Watching - Philips RC9800I | User manual - Page 31
up when remote control codes are being sent. In the event that the RC9800i has no remote control code available for the button pressed, the IR indicator will turn red and the RC9800i will beep. You can find out which codes are missing. See 'Changing the remote control codes of a device' on page - Philips RC9800I | User manual - Page 32
as follows: 1 On the Homepage of your RC9800i, choose Watch. 2 Select the internal tuner , the cable box or the satellite box as the applicable broadcast source. A combined control screen will then appear. 3 Choose the Guide button. The EPG screen will appear. Note Make sure your date, time - Philips RC9800I | User manual - Page 33
User Manual 33 Getting the Most Out of It ■ TV station call signs are listed vertically according to their channel number. In grids, the horizontal axis represents time in 2-hour slots. In lists, time slots are displayed in 30-minute slots. ■ Color coding is used for the various program genres. ■ - Philips RC9800I | User manual - Page 34
About Home Networking' on page 11. You must also install the Philips Media Manager software. For further information, please check 'Installing the Software' on page 51. 1 On the Homepage of your RC9800i, choose Watch. 2 Select PC . The combined control screen WatchlUPnP will appear. User Manual 34 - Philips RC9800I | User manual - Page 35
be displayed on the current display device. Watching Digital Pictures From Your PC on the RC9800i Note To be able to watch digital pictures, you must install the Philips Media Manager software first. For further information, please check 'Installing the Software' beginning on page 51. 1 On the - Philips RC9800I | User manual - Page 36
change the room controlled by the RC9800i, proceed as follows: 1 On the Homepage, choose to access the System Management Area. The 'System Management Area' screen will appear. 2 Choose Select a Different Room. The screen with the available rooms will appear. Current room Note The list of rooms - Philips RC9800I | User manual - Page 37
device you want to listen to. 2 Select CD from the list of sources. The corresponding combined control screen will appear. The CD starts playing. You can control the Volume with the RC9800i's hard keys: Volume Up/Down, Mute. The Home the radio (tuner), select the Satellite Radio . User Manual 37 - Philips RC9800I | User manual - Page 38
list will appear. User Manual 38 6 Select the song you want to listen to and press the OK hard key or choose Play . The song will start playing. Listening to MP3 Files From Your PC via the RC9800i Note To be able to listen to MP3 files, you must first install the Philips Media Manager software - Philips RC9800I | User manual - Page 39
the activity has not been correctly set up. In this case, revisit the settings for that activity and the devices that are used for it, see 'Add/Edit A/V Devices' on page 44. Also check that remote control codes use the correct timing, see 'Changing other device settings' on page 46. User Manual 39 - Philips RC9800I | User manual - Page 40
used functions than the combined control screens that you get when controlling activities. Follow the steps below to use Individual Device Control: 1 On the Homepage, tap . The System Management Area will appear. 2 Choose Individual Device Control. A list of available devices that you can watch or - Philips RC9800I | User manual - Page 41
key. For each device, there is also one screen with 8 user-defined buttons. These are buttons to which you can assign remote control functions yourself. For further information on user-defined buttons, please see 'Changing the remote control codes of a device' on page 45. "Device Off", "Activity Off - Philips RC9800I | User manual - Page 42
: ■ Your RC9800i; ■ Your equipment e.g. editing, deleting or adding devices and rooms; ■ The available Internet services. ■ Accessing screen will appear. ■ RC9800i Setup To change the settings of your RC9800i, choose RC9800i Settings. The 'RC9800i Settings' screen will appear: User Manual - Philips RC9800I | User manual - Page 43
the steps as explained in 'Date & Time Settings' on page 17. 3 Choose Back. ■ Set Up Rooms & A/V Devices To change your equipment settings, choose Rooms & A/V Devices. The 'Rooms & A/V Devices' screen will appear. User Manual 43 You can choose between two different options: ■ Add/Edit Rooms - Philips RC9800I | User manual - Page 44
(the 'Activities' button turns green). Adding a Device To add a device, perform the steps as explained in 'Set Up Devices' on page 19. Deleting a Device 1 On the screen 'Set Up A/V Devices', choose the device you want to delete. The selected device is highlighted. 2 Choose Delete. User Manual 44 - Philips RC9800I | User manual - Page 45
room you selected. Changing the remote control codes of a device 1 On the screen 'Set Up A/V Devices', select a device and choose Edit. The 'Modify a Device' screen will appear. 2 Choose IR Codeset. The 'Codes Setup' screen will appear. User Manual 45 The screen displays 3 possibilities to change - Philips RC9800I | User manual - Page 46
To do so, proceed as follows: 1 Choose Control Delays. The 'Control Delay Settings' screen will appear. 2 To edit the delays, click on the field. ■ Electronic Program Guide (EPG) Your RC9800i comes with a 1 year free-of-charge subscription to the Philips Internet EPG Service. Before you can use the - Philips RC9800I | User manual - Page 47
key later on to activate the EPG on your RC9800i. Personalizing the EPG You can personalize your EPG by indicating the stations you want to include in the EPG. This list of stations is called a lineup. The EPG application on your RC9800i will download and display only stations that are in the lineup - Philips RC9800I | User manual - Page 48
Program Guide. The 'Electronic Program Guide Service Setup' screen will appear. User Manual 48 5 Choose Activation. The 'Electronic Program Guide Activation' screen will appear. 6 Enter your Activation Key and choose Activate. The RC9800i will now be linked to your EPG subscription on the EPG web - Philips RC9800I | User manual - Page 49
Done. The 'Setup Program Guide Service' screen will appear again. In this case, consult 'Tips and Troubleshooting' on page 54. If you have only one TV signal source, your RC9800i will now be ready to download program data from the Philips Internet EPG Service. See 'Downloading EPG Data' below. If - Philips RC9800I | User manual - Page 50
multiple lineups when personalizing your EPG subscription, you should now assign your chosen lineup IDs to the corresponding devices in your home. Note Before attempting to assign lineups to devices, make sure that you have properly set up the RC9800i to control the activities that involve the - Philips RC9800I | User manual - Page 51
You need Windows 2000 or Windows XP on your PC to use this software. ■ Installing Philips Media Manager This software makes the music, photo and movie files on your computer available for transfer to a Philips Connected Planet device. 1 Place the RC9800i CD in your PC's CD or DVD drive. The CD will - Philips RC9800I | User manual - Page 52
You can upgrade the RC9800i firmware via USB. Attention! Dock the RC9800i into its cradle while upgrading its firmware. 1 On your PC, open your Internet browser and go to http://www.homecontrol.philips.com. Follow the link to the software upgrades section. 2 Download the RC9800i Firmware Update Tool - Philips RC9800I | User manual - Page 53
User Manual 53 List of Symbols Pause Stop Play; normal speed Play reverse; normal speed Fast forward previous program Stand-by Single or multi-digit selection Movie expand, change screen size/aspect ratio Actual time on screen EPG/ Electronic Program Guide Sound muting Additional information on - Philips RC9800I | User manual - Page 54
should then recharge it, see 'Charging the RC9800i' on page 8. If after recharging your device still does not respond, you may have to reset it. Under normal circumstances you'll never have to reset the RC9800i. However on rare occasions, if the touch screen freezes or if you notice unusual behavior - Philips RC9800I | User manual - Page 55
Tips and Troubleshooting User Manual 55 I don't have a WiFi network at home. Can I use the RC9800i as a remote? Of course you can. The RC9800i can also be used as a remote control for your non-networked audio-video devices. For further information, please check 'Controlling Legacy Audio/Video - Philips RC9800I | User manual - Page 56
software upgrades section. 2 Download and start the RC9800i Firmware Upgrade Tool; 3 Connect the RC9800i to your PC via the USB cable; 4 Switch the RC9800i off and on again, and keep the Back key pressed while the device starts up; 5 Choose your language; 6 Follow the instructions on the PC screen - Philips RC9800I | User manual - Page 57
(typical): Power Management Multimedia Application Playback formats: Still Picture Playback 5°C to 45°C ( 41°F to 113°F) -25°C to +60°C (13°F to 140°F) 102 (W) x 150 (L) x 26 (H) mm 4.01 (W) x 5.90 (L) x 1.02 (H) inch 225 g (7.94 oz) Color active matrix touch screen TFT LCD with white LED backlight - Philips RC9800I | User manual - Page 58
B digital device, pursuant to with the instructions, may user's authority to operate the equipment. Notice for Canada / Remarque pour le Canada This Class B digital apparatus complies with Canadian ICES-003. Cet appareil numérique de la Classe B est conforme à la norme NMB-003 du Canada. User Manual - Philips RC9800I | User manual - Page 59
/5/EC: ■ Radio: EN 300 328 ■ EMC: ETSI EN 301 489-1, ETSI EN 301 489-17 ■ Safety: EN60950 Finnish Philips Consumer Electronics, Remote Control Systems vakuuttaa täten että RC9800i tyyppinen laite on direktiivin 1999/5/EY oleellisten vaatimusten ja sitä koskevien direktiivin muiden ehtojen mukainen - Philips RC9800I | User manual - Page 60
Key Hard keys refer to the buttons on the right hand side of the RC9800i's touch screen. IR IR or Infrared is used to control audio-video devices. For instance, when you press a button on a TV's remote control, the remote control sends an Infrared (IR) signal to the TV. The TV receives this signal - Philips RC9800I | User manual - Page 61
, 8 Date settings, 17, 43 Device add, 44 change, 44 change Remote control codes, 45 legacy device, 10 move, 45 settings, 43 DHCP, 16, 61 DNS, 61 dynamic IP address, 16 Encryption, 16 Environmental Information, 59 EPG, 46 activation, 47 display, 50 download data, 49 information screen, 33 line up - Philips RC9800I | User manual - Page 62
58 Interfaces, 58 Memory, 58 Power Management, 58 Wireless Connectivity, 58 Time settings, 17, 43 Time zone settings, 17 Touchscreen, 7 calibrate, 14 clean, 56 Troubleshooting, 55 Upgrade firmware, 52 UPnP, 61 USB, 9 firmware, 9 Upgrading, 52 Watch, 13 broadcast program, 29 digital pictures, 34 EPG
-
 1
1 -
 2
2 -
 3
3 -
 4
4 -
 5
5 -
 6
6 -
 7
7 -
8
-
9
-
10
-
11
-
12
-
13
-
14
-
15
-
16
-
17
-
18
-
19
-
20
-
21
-
22
-
23
-
24
-
25
-
26
-
27
-
28
-
29
-
30
-
31
-
32
-
33
-
34
-
35
-
36
-
37
-
38
-
39
-
40
-
41
-
42
-
43
-
44
-
45
-
46
-
47
-
48
-
49
-
50
-
51
-
52
-
53
-
54
-
55
-
56
-
57
-
58
-
59
-
60
-
61
-
62
 |
 |

User Manual
1
RC9800i Touch Screen Remote Control User Manual
© Copyright 2004 Royal Philips Electronics, Interleuvenlaan 72 - 74, 3000 Leuven (Belgium).
Remark:
All rights are reserved. Reproduction in whole or in part is prohibited without prior consent of the
copyright owner.
Royal Philips Electronics is not liable for omissions or for technical or editorial errors in this manual
or for damages directly or indirectly resulting from the use of the RC9800i Touch Screen Remote
Control.
The information in this user guide may be subject to change without prior notice. All brand or
product names are trademarks or registered trademarks of their respective companies or
organizations.