Pioneer AVH-P3200BT Owner's Manual - Page 69
Source - navigation
 |
UPC - 012562975719
View all Pioneer AVH-P3200BT manuals
Add to My Manuals
Save this manual to your list of manuals |
Page 69 highlights
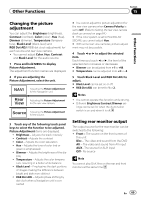
Other Functions Section 15 Other Functions Changing the picture adjustment You can adjust the Brightness (brightness), Contrast (contrast), Color (color) ,Hue (hue), Dimmer (dimmer), Temperature (temperature), Black Level (black level) and RGB Dot ADJ (RGB dot clock adjustment) for each source and rear view camera. ! You cannot adjust Color, Hue, Contrast and Black Level for the audio source. 1 Press and hold MENU to display Picture Adjustment. The adjustment function names are displayed. 2 If you are adjusting the Picture Adjustment, select the unit. NAVI Rear View Adjusting the Picture Adjustment for the Navigation unit. Adjusting the Picture Adjustment for the rear view camera. Source Adjusting the Picture Adjustment for the source. 3 Touch any of the following touch panel keys to select the function to be adjusted. Picture Adjustment items are displayed. ! Brightness - Adjusts the black intensity ! Contrast - Adjusts the contrast ! Color - Adjusts the color saturation ! Hue - Adjusts the tone of color (red or green is emphasized) ! Dimmer - Adjusts the brightness of the dis- play ! Temperature - Adjusts the color tempera- ture, resulting in a better white balance ! Black Level - Emphasizes the dark portions of images making the difference between bright and dark more distinct ! RGB Dot ADJ - Adjusts phase shifting by dot clock when a Navigation unit is connected # You cannot adjust the picture adjustment for the rear view camera when Camera Polarity is set to Off. (Refer to Setting the rear view camera (back up camera) on page 64.) # If the color system is set to PAL/PAL-M/ SECAM, you cannot adjust Hue. # With some rear view cameras, picture adjustment may not be possible. 4 Touch c or d to adjust the selected item. Each time you touch c or d, the level of the selected item increases or decreases. # Dimmer can be adjusted from +1 to +48. # Temperature can be adjusted from +3 to -3. 5 Touch Black Level and RGB Dot ADJ to adjust. # Black Level can be set on or off. # RGB Dot ADJ can be set to 1 or 2. Notes ! You cannot operate this function while driving. ! Different Brightness/Contrast/Dimmer set- tings can be set for when the illumination switch is on and when it is off. Setting rear monitor output The output source for the rear monitor can be switched to the following: ! Front - The source on the front screen of this unit Disc - The video and sound from the DVD AV - The video and sound from AV input AUX- The source for AUX input Off- No source Note You cannot play DivX files on the rear and front monitors at the same time. En 69
-
 1
1 -
2
-
3
-
4
-
5
-
6
-
7
-
8
-
9
-
10
-
11
-
12
-
13
-
14
-
15
-
16
-
17
-
18
-
19
-
20
-
21
-
22
-
23
-
24
-
25
-
26
-
27
-
28
-
29
-
30
-
31
-
32
-
33
-
34
-
35
-
36
-
37
-
38
-
39
-
40
-
41
-
42
-
43
-
44
-
45
-
46
-
47
-
48
-
49
-
50
-
51
-
52
-
53
-
54
-
55
-
56
-
57
-
58
-
59
-
60
-
61
-
62
-
63
-
 64
64 -
 65
65 -
 66
66 -
 67
67 -
 68
68 -
 69
69 -
 70
70 -
 71
71 -
 72
72 -
 73
73 -
 74
74 -
75
-
76
-
77
-
78
-
79
-
80
-
81
-
82
-
83
-
84
-
85
-
86
-
87
-
88
-
89
-
90
-
91
-
92
-
93
-
94
-
95
-
96
 |
 |