Pioneer AVH-P5200BT Owner's Manual
Pioneer AVH-P5200BT Manual
 |
UPC - 012562975900
View all Pioneer AVH-P5200BT manuals
Add to My Manuals
Save this manual to your list of manuals |
Pioneer AVH-P5200BT manual content summary:
- Pioneer AVH-P5200BT | Owner's Manual - Page 1
Operation Manual DVD AV RECEIVER AVH-P5200DVD AVH-P5200BT English - Pioneer AVH-P5200BT | Owner's Manual - Page 2
Bluetooth telephone operations 30 Bluetooth audio operations 31 Detailed instructions Storing and recalling stations 33 Storing the strongest stations 33 Tuning in to strong signals 33 Tuning in to strong HD Radio signals 33 Using iTunes tagging 34 Switching the media file type 34 Operating the DVD - Pioneer AVH-P5200BT | Owner's Manual - Page 3
phone 52 Voice recognition 53 Connecting a Bluetooth audio player 53 Connecting to a Bluetooth device automatically 53 Displaying BD (Bluetooth Device) address 53 Menu operations Introduction of menu operations 54 Audio Adjustments 55 Setting up the DVD player 58 System settings 62 Entertainment - Pioneer AVH-P5200BT | Owner's Manual - Page 4
external unit 71 Additional Information Troubleshooting 72 Error messages 74 Understanding auto EQ error messages 77 Understanding messages 78 Indicator list 80 Handling guideline 82 Compressed audio compatibility (disc, USB, SD) 84 iPod compatibility 85 Sequence of audio files 86 Using the display - Pioneer AVH-P5200BT | Owner's Manual - Page 5
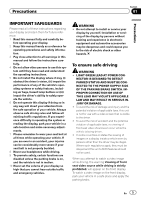
disabled unless the parking brake is on, and the vehicle is not in motion. 10 Never set the volume of your display so high that you cannot hear outside traffic and emergency vehicles. WARNING ! Do not attempt to install or service your display by yourself. Installation or servicing of the display - Pioneer AVH-P5200BT | Owner's Manual - Page 6
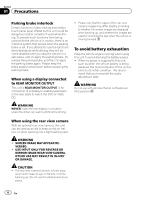
then (3) apply the parking brake again. Please keep the brake pedal pushed down before releasing the parking brake. When using a display connected to REAR MONITOR OUTPUT This unit's REAR MONITOR OUTPUT is for connection of a display to enable passengers in the rear seats to watch the DVD or Video CD - Pioneer AVH-P5200BT | Owner's Manual - Page 7
.: AVH-P5200BT IC it is desirable that it should be installed and operated with at least 20 interference received, including product or cords associated with accessories sold with the product may Keep this manual handy for future reference. ! Always keep the volume low enough to warranty card. En 7 - Pioneer AVH-P5200BT | Owner's Manual - Page 8
EN300328 ETC test temperature: -20 °C and +55 °C (-4 °F and 131 °F) After-sales service for Pioneer products Please contact the dealer or distributor from where you purchased this unit for after-sales service (including warranty conditions) or any other information. In case the necessary information - Pioneer AVH-P5200BT | Owner's Manual - Page 9
Before You Start Section 02 Removing the front panel % Pinch the top and bottom of its right must be reset in the following situations: ! Before using this unit for the first time after installation ! If the unit fails to operate properly ! When strange or incorrect messages ap- pear on the - Pioneer AVH-P5200BT | Owner's Manual - Page 10
Auto EQ microphone input jack a Use to connect an auto EQ microphone. USB port b When connecting, open the USB con- nector lid. c RESET d SD memory card slot Optional remote control The remote control CD-R55 is sold separately. For details concerning operations, see the remote control manual - Pioneer AVH-P5200BT | Owner's Manual - Page 11
Radio - Digital Radio tuner ! Radio - Radio ! AV - AV input ! Disc - Built-in DVD player ! USB/iPod - USB/iPod ! SD - SD memory card ! EXT1 - External unit 1 ! EXT2 - External unit 2 ! AUX - AUX ! TEL - Bluetooth telephone/audio (Function of AVH-P5200DVD) ! When the source icon is not displayed, it - Pioneer AVH-P5200BT | Owner's Manual - Page 12
Basic Operations ! An external unit refers to a Pioneer product, such as those which will be available in bar is grayed out.) Operating the scroll bar and the scrubber bar 1 Audio Fader/Balance Graphic EQ Auto EQ Sonic Center Control Loudness Subwoofer F/R 0 L/R 0 Super Bass On L/R:0 Off 21 - Pioneer AVH-P5200BT | Owner's Manual - Page 13
by touching same icon when playing audio. 2 Viewing the hidden touch panel keys. 3 Shorten the touch panel area. Common operations for menu settings/lists (AVH-P5200BT only) Starting the Bluetooth telephone menu. Refer to Introduction of Bluetooth telephone operations on page 25. Displaying - Pioneer AVH-P5200BT | Owner's Manual - Page 14
Section 04 Basic Operations - Removing or attaching the front panel will automatically close or open the LCD panel. (Refer to page 64.) ! When the ignition switch is turned OFF after - Pioneer AVH-P5200BT | Owner's Manual - Page 15
Operations Ejecting an SD 1 Removing the front panel Refer to Removing the front panel on page 9. 2 Push an SD. 3 Ejecting an SD Setting the clock 1 Switch to Clock Adjustment display. Refer to Basic Operations on page 11. 2 Select the item to set. 3 Touch a or b to set the correct date and time - Pioneer AVH-P5200BT | Owner's Manual - Page 16
for more than two seconds to turn the auto-equalizer on or off. Refer to Using the auto- equalizer on page 56. Displaying the preset chan the broadcasting station to your iPod. Refer to Using iTunes tagging on page 34. Manual tuning (step by step) using the buttons 1 Press c or d (TRACK). - Pioneer AVH-P5200BT | Owner's Manual - Page 17
Section 06 Playing moving images Introduction of video playback operations You can view DVD/DVD-R/DVD-RW/CD/CD-R/ CD-RW/USB/SD/iPod. 01 01 01 L+R Abcdeabcdeabcdeabcdeab Wed 28 may 12:45 PM 8 12 01:45 -02:45 Return DVD video Return Video CD iPod ALL Songs S.Rtrv Abcdeabcdeabcdeabcdeab - Pioneer AVH-P5200BT | Owner's Manual - Page 18
on DVD video/Video CD. Speeding down the playback h speed in four steps, during slow motion playback on Video CD. Returning to the specified scene to which the DVD cur- 35. Switching between media file types to play on DVD/CD/ m USB/SD. Refer to Switching the media file type on page 34. - Pioneer AVH-P5200BT | Owner's Manual - Page 19
videos 1 Insert the disc into the disc loading slot with the label side up. Playback will automatically start. ! If you are playing a DVD or Video CD, a menu may appear. Refer to Operating the DVD , the iPod battery is not charged when you select an SD as the source. ! While the iPod is connected to - Pioneer AVH-P5200BT | Owner's Manual - Page 20
audio Introduction of sound playback operations You can listen to DVD-R/DVD-RW/CD/CD-R/ CD-RW/USB/SD and hold for more than two seconds to turn the auto-equalizer on or off. Refer to Using the autoequalizer Displaying iPod menus. Refer to Browsing for a video/music on the iPod on page 36. Pausing - Pioneer AVH-P5200BT | Owner's Manual - Page 21
audio video/music by category on page 36. Starting Album Link Play on your iPod i when you touch the artwork display. Refer to Displaying lists related to the currently playing song (Link Search) on page 40. Playing back sound 1 Insert the disc into the disc loading slot bit rate) files an SD as - Pioneer AVH-P5200BT | Owner's Manual - Page 22
ACC or ON. However, the USB storage device that can be charged via USB will not be recharged when you select an SD as the source. ! Disconnect the USB portable audio player/ USB memory when you are done using it. ! When you select Clock or Speana on Selecting the background display on - Pioneer AVH-P5200BT | Owner's Manual - Page 23
You can view still images saved in CD-R/CDRW/USB/SD. 123 4 Photo Off Full Wed 28 may 12:45 PM Abcdeabcdeabcde Abcdeabcdeabcde 2 2 on page 34. Playing still images 1 Insert the disc into the disc loading slot with the label side up. Playback will automatically start. 1 If a disc - Pioneer AVH-P5200BT | Owner's Manual - Page 24
saved in CD-R/CDRW/USB/SD as a slideshow when listening to another source. 1 23 4 5 Off Full Capture 6 78 The table DVD player ! USB - USB ! SD - SD memory card # To cancel searching, touch Cancel. Notes ! When the USB or SD source is selected, this unit cannot view still images on USB/SD - Pioneer AVH-P5200BT | Owner's Manual - Page 25
Bluetooth telephone (AVH-P5200BT only). Important ! Since this unit is on standby to connect with your cellular phone via Bluetooth park your vehicle in a safe place and apply the parking brake when performing this operation. 1 Incoming call notice Indicates that an incoming call has been received - Pioneer AVH-P5200BT | Owner's Manual - Page 26
phone with this unit, and adjusting the volume level. 1 Connection First, you need to connect a Bluetooth telephone to this unit. For detailed instructions on connecting your phone to this unit via Bluetooth wireless technology, see following section. Using a Bluetooth device to pair on page 51 and - Pioneer AVH-P5200BT | Owner's Manual - Page 27
For details concerning operation, refer to the XM tuner's operation manuals. This section provides information on XM operations with this unit hold for more than two seconds to turn the auto-equalizer on or off. Refer to Using the auto- equalizer on page 56. Displaying the preset chan- - Pioneer AVH-P5200BT | Owner's Manual - Page 28
information on games for the SIRIUS tuner. Refer to Displaying game in- formation on page 46. d Team Setting Selecting teams for game alert on the 7 page 46. Touch and hold for more than two seconds to scroll the text. Manual tuning (step by step) using the buttons 1 Press c or d (TRACK). Seek - Pioneer AVH-P5200BT | Owner's Manual - Page 29
. For details concerning operation, refer to the HD Radio tuner's operation manual. 1 Touch panel keys Turning local seek tuning on 1 or off. for more than two seconds to turn the auto-equalizer on or off. Refer to Using the auto- equalizer on page 56. Displaying the preset chan - Pioneer AVH-P5200BT | Owner's Manual - Page 30
auto-equalizer on or off. Refer to Using the autoequalizer on page 56. Accepting an incoming call. Making a phone call, when selecting a phone number from the dialed and received call history. 456789a You can control the Bluetooth telephone if you connect a Bluetooth while driving. Park your vehicle - Pioneer AVH-P5200BT | Owner's Manual - Page 31
(Audio/Video Remote Control Profile): You can perform playback, pause playback, select songs, etc. ! Since there are a number of Bluetooth audio players available on the market, available operations will vary extensively. When operating your player with this unit, refer to the instruction manual - Pioneer AVH-P5200BT | Owner's Manual - Page 32
player, and pairing your Bluetooth audio player with this unit. 1 Connection First, you need to connect a Bluetooth audio to this unit. For detailed instructions on connecting your Bluetooth audio to this unit via Bluetooth wireless technology, see Connecting a Bluetooth audio player on page 53 - Pioneer AVH-P5200BT | Owner's Manual - Page 33
Section 13 Detailed instructions Storing and recalling stations You can easily store up to level setting allows re- ception of only the strongest stations; while lower settings let you receive progressively weaker stations. Tuning in to strong HD Radio signals Local seek tuning lets you tune - Pioneer AVH-P5200BT | Owner's Manual - Page 34
instructions # The larger the setting number, the higher the signal level. The highest level setting allows reception of only the strongest stations; while lower settings let you receive cannot be transferred to the iPod when a file on an SD device is being viewed as a slideshow. Storing the tag - Pioneer AVH-P5200BT | Owner's Manual - Page 35
Section 13 Detailed instructions Audio data (CD-DA) and JPEG picture files on DVD-R/RW/ROM cannot be played back on this unit. CD (audio data (CD-DA))-Music (compressed audio)-Video (DivX video files)- Photo (JPEG picture files) # Ways to display the menu will differ depending on the - Pioneer AVH-P5200BT | Owner's Manual - Page 36
audio data (CD-DA), playback is repeated within the type of data currently playing even if Disc is selected. ! If you select another folder during repeat play, the repeat play range changes to Disc. If you select USB or SD iPod video mode. Video Switching to iPod video mode. 3 Play the video from - Pioneer AVH-P5200BT | Owner's Manual - Page 37
instructions Refer to Playing audio on page 20. 2 Touch one of the categories in which you want to search for a video/music. ! Video Playlists (video playlists) ! Movies (movies) ! Music Videos (music videos) ! Video Podcasts (video frame playback (Function for DVD video/video CD) Images during - Pioneer AVH-P5200BT | Owner's Manual - Page 38
's optical digital outputs are not connected, select an audio setting other than DTS. ! Depending on the setting, the video may not be played back with the audio system used to record the DVD. ! You will return to normal playback if you change the Audio during fast forward/fast rewind, pause or slow - Pioneer AVH-P5200BT | Owner's Manual - Page 39
if a specified scene has not been preprogrammed on the DVD disc. Selecting audio output When playing DVD video discs recorded with LPCM audio, you can switch the audio output. When playing video CDs, you can switch between stereo and monaural audio output. ! This function is not available when disc - Pioneer AVH-P5200BT | Owner's Manual - Page 40
instructions Selecting files from the file name list (Function for USB/SD/DivX) File name list is a list of file names (or folder names) from which you can select a file (or folder) to play back. 1 Display the file (or folder) name list. Refer to Playing audio Some DivX VOD (video on demand) content - Pioneer AVH-P5200BT | Owner's Manual - Page 41
instructions picture. 1 Display the screen mode. Refer to Introduction of video playback operations on page 17. Refer to Introduction of still image operations on page 24. 2 Touch the desired wide mode setting. Full (full screen) The 4:3 picture is enlarged in the horizontal direction only, - Pioneer AVH-P5200BT | Owner's Manual - Page 42
instructions Normal (normal) The 4:3 picture is displayed as it is, giving you no sense of disparity since its proportions are the same as that of the normal picture. Notes ! You cannot operate this function while driving. ! Different settings can be stored for each video source. ! When a video - Pioneer AVH-P5200BT | Owner's Manual - Page 43
instructions Section 13 Detailed instructions Selecting an XM/SIRIUS channel directly You can select an XM/SIRIUS channel directly by entering the desired channel number. 1 Display the preset channel list. Refer to Introduction of XM/SIRIUS tuner operations on page 27. 2 Switch to direct input add - Pioneer AVH-P5200BT | Owner's Manual - Page 44
Section 13 Detailed instructions ! (XM playlist and then change each alert setting. Set the alert to on to receive an alert when the song is broadcast, or set it to off to to turn the alert on or off. (XM tuner) The check mark is removed, and the alert for that song is off. (SIRIUS tuner) Deleting a - Pioneer AVH-P5200BT | Owner's Manual - Page 45
Section 13 Detailed instructions 2 Select the song title that you want to delete. 3 off. The game alert function is activated for that team. # When you have already selected 12 teams, FULL is displayed and additional teams cannot be selected. In this case, first delete a selected team and then - Pioneer AVH-P5200BT | Owner's Manual - Page 46
instructions more detailed game information. ! The game score will be updated automatically. 3 Switch to the other station to listen to mode. ! To use this function, a Pioneer SIRIUS bus interface (e.g. CD-SB10) is refer to the SIRIUS plug-andplay unit's manuals. % To exit from Instant Replay mode, - Pioneer AVH-P5200BT | Owner's Manual - Page 47
is changed to D/A Auto. Calling a number in the phone book (Function of AVH-P5200BT) The phone book in AVH-P5200BT) If a lot of numbers are registered in the phone book, you can search for the phone number by alphabet search mode. 1 Switch to phone book mode. Refer to Introduction of Bluetooth - Pioneer AVH-P5200BT | Owner's Manual - Page 48
Section 13 Detailed instructions Changing the character to Russian. 2 Select Missed Calls, Dialed Calls or Received Calls. # The of Bluetooth telephone operations on page 25. Using the missed, received and dialed call lists (Function of AVH-P5200BT) The 80 most recent calls dialed, received, and - Pioneer AVH-P5200BT | Owner's Manual - Page 49
of Bluetooth telephone operations on page 25. Making a call by entering phone number (Function of AVH-P5200BT) Wed 28 may 12:45 PM 1 1 2 3 ABCDEHGHI 01 012345678901 456 789 Off *0# + C Important Be sure to park your vehicle in a safe place and apply the parking brake when - Pioneer AVH-P5200BT | Owner's Manual - Page 50
be operated unless a Bluetooth telephone is connected to this unit. Setting the private mode (Function of AVH-P5200BT) During a conversation, To cancel searching, touch Stop. # If five devices are already paired, Memory Full is displayed and pairing cannot be performed. In such cases, delete a paired - Pioneer AVH-P5200BT | Owner's Manual - Page 51
13 Detailed instructions Deleting a paired device. # Never turn the unit off while the paired Bluetooth telephone is being deleted. Using a Bluetooth device to pair (Function of AVH-P5200BT) If you cannot open the connection between your Bluetooth device and this unit from your Bluetooth device - Pioneer AVH-P5200BT | Owner's Manual - Page 52
Section 13 Detailed instructions 2 Touch Visibility to select visibility off. ! To turn visibility on, touch Visibility again. Displaying BD (Bluetooth Device) address (Function of AVH-P5200BT) This unit displays its BD address. 1 Display the Bluetooth Connection Menu. Refer to Introduction of - Pioneer AVH-P5200BT | Owner's Manual - Page 53
instruction manual that came with your cellular phone for detailed instructions. 1 Start voice recognition. Refer to Introduction of Bluetooth telephone operations on page 30. 2 Say the name of your contact aloud. Connecting a Bluetooth audio player (Function of AVH-P5200DVD) A Bluetooth wireless - Pioneer AVH-P5200BT | Owner's Manual - Page 54
of menu operations 21 Audio Fader/Balance Graphic EQ Auto EQ Sonic Center Control Loudness Subwoofer Audio/DSP function menu when the mute function is on or a JPEG file is playing. Notes ! You can display the Video setup menu when a Disc, USB or SD source is selected. ! If you start the Video - Pioneer AVH-P5200BT | Owner's Manual - Page 55
operations Audio Adjustments Notes ! When selecting FM as the source, you cannot switch to Source Level Adjuster. ! When selecting Bluetooth on the previous page. 2 Touch Graphic EQ on the audio function menu. # You can select Graphic EQ when Auto EQ function is off. 3 Touch c or updated. En 55 - Pioneer AVH-P5200BT | Owner's Manual - Page 56
unit, you can use this function. 1 Display the audio function menu. Refer to Introduction of menu operations on page 54. 2 Touch Auto EQ to turn the auto-equalizer on or off. # You cannot use this function if auto EQ has not been carried out. Using sonic center control Sound that is suited for the - Pioneer AVH-P5200BT | Owner's Manual - Page 57
you wish to adjust. 3 Touch Source Level Adjuster on the audio function menu. 4 Touch a or b to adjust the source volume. Range: +4 to -4 Notes ! The AM volume level can also be adjusted with this function. ! Video CD, CD, compressed audio and DivX are automatically set to the same source level - Pioneer AVH-P5200BT | Owner's Manual - Page 58
to Language code chart for DVD on page 89. 1 Touch 0 to 9 to input the language code. # To cancel the entered numbers, touch C. 2 Registering the code. Registering the code. Setting the audio language You can set the preferred audio language. 1 Display the Video Setup Menu. Refer to Introduction - Pioneer AVH-P5200BT | Owner's Manual - Page 59
manually Setting parental lock Some DVD video discs let you use parental lock to restrict children from viewing violent and adult-oriented scenes. You can set parental lock to the desired level. ! When you have a parental lock level set and play a disc featuring parental lock, code number input - Pioneer AVH-P5200BT | Owner's Manual - Page 60
menu operations on page 54. 2 Touch Parental on the Video Setup menu. 3 Touch 0 to 9 to input a four digit code number. # To cancel the entered refer to the instruction manual that came with the disc. Changing the level You can change the set parental lock level. 1 Display the Video Setup Menu. - Pioneer AVH-P5200BT | Owner's Manual - Page 61
, turn this function off and start playback. 1 Display the Video Setup Menu. Refer to Introduction of menu operations on page 54. 2 Touch DVD Auto Play to turn automatic playback on. # To turn automatic playback off, touch DVD Auto Play again. Displaying the deactivation code If your device is - Pioneer AVH-P5200BT | Owner's Manual - Page 62
Input on the system menu to turn AUX Input on or off. Setting AV input Activate this setting when using an external video is set for a rear full-range speaker connection (Full). 1 Turn the unit off setting, subwoofer output in the audio menu will return to the mute function is received. ! Sound from - Pioneer AVH-P5200BT | Owner's Manual - Page 63
audio adjustments can be made. ! When ATT is displayed, the sound is attenuated and only the volume can be adjusted. (No other audio fol- lowing: - System menu - Video Setup - On-screen display - Multi language Updating Bluetooth connection software (AVH-P5200BT only) This function is used to update - Pioneer AVH-P5200BT | Owner's Manual - Page 64
Introduction of menu operations on page 54. 2 Touch Bluetooth Software Update. 3 Touch Start to display the data transfer mode. # Follow the on-screen instructions to finish updating the software. Displaying the Bluetooth system version (AVH-P5200BT only) If this unit fails to operate properly, you - Pioneer AVH-P5200BT | Owner's Manual - Page 65
CAUTION Pioneer recommends the video (REAR VIEW CAMERA IN) when a rear view camera is installed Ground - When the polarity of the connected lead is negative while the gear shift is in REVERSE (R) position ! Off - When a rear view camera is not connected to this unit Auto EQ (auto-equalizing) The auto - Pioneer AVH-P5200BT | Owner's Manual - Page 66
car, or remove them from the car before carrying out auto EQ. Sounds other external amps delay the lower sounds. ! Auto EQ changes the audio settings as follows: - The fader/balance auto EQ. 2 Fix the optional microphone in the center of the headrest of the driver's seat, facing forward. The auto EQ - Pioneer AVH-P5200BT | Owner's Manual - Page 67
panel key. Canceling auto EQ measurement mode. 9 Store the microphone carefully in the glove compartment or another safe place. If the microphone is subjected to direct sunlight for an extended period, high temperatures may cause distortion, color change or malfunction. Note (AVH-P5200DVD) Do not - Pioneer AVH-P5200BT | Owner's Manual - Page 68
Section 14 Menu operations The customized color has been stored in the memory. The set color will be recalled from the memory the next time you touch the same icon. Selecting the OSD color The OSD color can be changed. 1 Display the entertainment menu. Refer to Introduction of menu operations on - Pioneer AVH-P5200BT | Owner's Manual - Page 69
Color, Hue, Contrast and Black Level for the audio source. 1 Press and hold MENU to display Adjusts phase shifting by dot clock when a Navigation unit is connected # You cannot adjust the - The video and sound from the DVD AV - The video and sound from AV input AUX- The source for AUX input Off- - Pioneer AVH-P5200BT | Owner's Manual - Page 70
screen. ! If the touch panel cannot be adjusted properly, consult your local Pioneer dealer. 1 Turn the unit off. Refer to Basic Operations on page 11 (such as the CD-V150M), you can enjoy the video contents of the connected iPod. ! A portable audio/video player can be connected by using a 3.5mm plug - Pioneer AVH-P5200BT | Owner's Manual - Page 71
input jack on this unit. For more details, refer to What's what on page 10. Using an external unit An external unit refers to a Pioneer manual for the connected external unit. Auto Switching to auto or manual connected external unit. Audio Video Switching to video and audio. Changing the screen - Pioneer AVH-P5200BT | Owner's Manual - Page 72
is low. The volume level Adjust the volume is low. level. The attenuator is Turn the attenuator on. off. The sound and The unit is not Firmly secure the video skip. firmly secured. unit. File size and Create a DivX file transmission rate that is within the are above recom- recommended - Pioneer AVH-P5200BT | Owner's Manual - Page 73
does not the audio lan- feature dialog or guage and sub- subtitles in the title language selected lansettings se- guage. lected in Video setup menu. The language cannot be switched if the selected language is not recorded on the disc. The viewing angle cannot be switched. The DVD being played - Pioneer AVH-P5200BT | Owner's Manual - Page 74
- nect the iPod and reset it. The iPod version Update the iPod is old. version. Bluetooth audio/telephone Symptom Cause Action The sound from the Bluetooth audio source is not played back. There is a call in progress on a Bluetooth-connected cellular phone. The sound will be played back - Pioneer AVH-P5200BT | Owner's Manual - Page 75
storage area is full. Select a Video frame DivX file's frame Select a file that rate not sup- rate is more than can be played. ported. 30 fps. Audio format This type of file is Select a file that not sup- not supported on can be played. ported. this unit. External storage device (USB, SD - Pioneer AVH-P5200BT | Owner's Manual - Page 76
you hear playback and sound. when you start to hear any sound. Video frame rate not supported. DivX file's frame Select a file that rate is more than can be played. 30 fps. Audio format This type of file is Select a file that not sup- not supported on can be played. ported. this unit. 76 En - Pioneer AVH-P5200BT | Owner's Manual - Page 77
power failed for the Bluetooth module of this unit. Turn the ignition switch OFF and then to ACC or ON. If the error message is still displayed after performing the above action, please contact your dealer or an authorized Pioneer Service Station. Understanding auto EQ error messages When correct - Pioneer AVH-P5200BT | Owner's Manual - Page 78
are conthe measuring nected correctly. tone of a speaker. ! Correct the input level setting of the power amp connected to the speakers. ! Plug the messages Messages CAUTION: Screen image may appear reversed. Translation Pioneer recommends the use of a camera which outputs mirrorreversed images. - Pioneer AVH-P5200BT | Owner's Manual - Page 79
Additional Information Appendix Additional Information En 79 - Pioneer AVH-P5200BT | Owner's Manual - Page 80
of the cellular phone. Indicates that Auto EQ is on. Shows when HD Radio signal is received. Shows when analog audio of HD Radio signal is received. Shows when digital audio of HD Radio signal is received. Shows when HD Radio station information is received. Shows when downloadable song information - Pioneer AVH-P5200BT | Owner's Manual - Page 81
language has been selected. Shows which viewing angle has been selected. Shows which audio output has been selected. Shows the disc title of the CD text disc currently being played. Shows the song title when receiving the tag information. Shows the track title of the track currently being played - Pioneer AVH-P5200BT | Owner's Manual - Page 82
. It is not possible to play back DVD-RAM discs. This unit is not compatible with discs recorded in AVCHD (Advanced Video Codec High Definition) format. Do not insert AVCHD discs as you may not be able to eject the disc. External storage device (USB, SD) Address any questions you have about your - Pioneer AVH-P5200BT | Owner's Manual - Page 83
, the EQ returns to the original setting. ! You cannot set Repeat to off on the iPod when using this unit. Repeat is automatically changed to All when the iPod is connected to this unit. DVD-R/DVD-RW discs Unfinalized DVD-R/-RW discs which have been recorded in the Video format (video mode) cannot - Pioneer AVH-P5200BT | Owner's Manual - Page 84
for files other than JPEG image files. Compressed audio compatibility (disc, USB, SD) WMA File extension: .wma Bit rate: 5 kbps to 320 kbps (CBR), VBR Sampling frequency: 8 kHz to 48 kHz Windows Media Audio Professional, Lossless, Voice/ DRM Stream/Stream with video: No MP3 File extension: .mp3 Bit - Pioneer AVH-P5200BT | Owner's Manual - Page 85
not guaranteed. This unit is not compatible with SD-Audio/SD-Video. CAUTION Pioneer accepts no responsibility for data lost on the USB memory/USB portable audio player/SD memory card even if that data is lost while using this unit. iPod compatibility This unit supports only the following iPod models - Pioneer AVH-P5200BT | Owner's Manual - Page 86
. For USB portable audio players, the sequence is different and depends on the player. Using the display correctly CAUTION ! If liquid or foreign matter should get inside this unit, turn off the power immediately and consult your dealer or the nearest authorized PIONEER Service Station. Do not - Pioneer AVH-P5200BT | Owner's Manual - Page 87
away from the display to prevent disruption of the video image by the appearance of spots, colored stripes the nearest authorized PIONEER Service Station. Keeping the display in good condition ! When removing dust from the up to 1 megabit per second. Bluetooth was launched by a special interest group - Pioneer AVH-P5200BT | Owner's Manual - Page 88
Appendix Additional Information DVD video distributed without a license from Microsoft Licensing, Inc. SD memory card is a trademark of DVD Format/Logo Licensing Corporation. iTunes Apple and iTunes are trademarks of Apple Inc., registered in the U.S. and other countries. MP3 Supply of this - Pioneer AVH-P5200BT | Owner's Manual - Page 89
this unit. Please inquire to your dealer or nearest authorized Pioneer service station regarding the satellite radio tuner that can be connected DIVX VIDEO: DivXÒ is a digital video format created by DivX, Inc. This is an official DivX Certified device that plays DivX video. Visit www.divx.com for - Pioneer AVH-P5200BT | Owner's Manual - Page 90
Appendix Additional Information Language (code), input code Japanese (ja), 1001 Dzongkha (dz), 0426 English 1814 Romanian (ro), 1815 Kinyarwanda (rw), 1823 Sanskrit (sa), 1901 Sardinian (sc), 1903 Sindhi (sd), 1904 Northern Sami (se), 1905 Sangho (sg), 1907 Sinhala (si), 1909 Slovak (sk), 1911 - Pioneer AVH-P5200BT | Owner's Manual - Page 91
to 44 000 Hz (with DVD, at sampling frequency 96 kHz) Signal-to-noise ratio 96 dB (1 kHz) (IHF-A network) (RCA level) Output level: Video 1.0 Vp-p/75 W (±0.2 V) Number of channels 2 (stereo) MP3 decoding format MPEG-1 & 2 Audio Layer 3 WMA decoding format ......... Ver. 7, 7.1, 8, 9, 10, 11 (2ch - Pioneer AVH-P5200BT | Owner's Manual - Page 92
format MPEG-1 & 2 Audio Layer 3 WMA decoding format ......... Ver. 7, 7.1, 8, 9, 10, 11 (2ch audio) (Windows Media Player) AAC decoding format 20 dB) Signal-to-noise ratio 62 dB (IHF-A network) Bluetooth (AVH-P5200BT) Version Bluetooth 2.0 certified Output power 4 dBm Max. (Power class 2) CEA2006 - Pioneer AVH-P5200BT | Owner's Manual - Page 93
En 93 - Pioneer AVH-P5200BT | Owner's Manual - Page 94
94 En - Pioneer AVH-P5200BT | Owner's Manual - Page 95
En 95 - Pioneer AVH-P5200BT | Owner's Manual - Page 96
. 178-184 Boundary Road, Braeside, Victoria 3195, Australia TEL: (03) 9586-6300 PIONEER ELECTRONICS OF CANADA, INC. 300 Allstate Parkway, Markham, Ontario L3R 0P2, Canada TEL: 1-877-283-5901 TEL: 905-479-4411 PIONEER ELECTRONICS DE MEXICO, S.A. de C.V. Blvd.Manuel Avila Camacho 138 10 piso Col.Lomas
-
 1
1 -
 2
2 -
 3
3 -
 4
4 -
 5
5 -
 6
6 -
 7
7 -
8
-
9
-
10
-
11
-
12
-
13
-
14
-
15
-
16
-
17
-
18
-
19
-
20
-
21
-
22
-
23
-
24
-
25
-
26
-
27
-
28
-
29
-
30
-
31
-
32
-
33
-
34
-
35
-
36
-
37
-
38
-
39
-
40
-
41
-
42
-
43
-
44
-
45
-
46
-
47
-
48
-
49
-
50
-
51
-
52
-
53
-
54
-
55
-
56
-
57
-
58
-
59
-
60
-
61
-
62
-
63
-
64
-
65
-
66
-
67
-
68
-
69
-
70
-
71
-
72
-
73
-
74
-
75
-
76
-
77
-
78
-
79
-
80
-
81
-
82
-
83
-
84
-
85
-
86
-
87
-
88
-
89
-
90
-
91
-
92
-
93
-
94
-
95
-
96
 |
 |

Operation Manual
DVD AV RECEIVER
AVH-P5200DVD
AVH-P5200BT
English