Pioneer AVH-X5500BHS Owner's Manual - Page 41
Setting the video signal, Using the Favorite menu, System settings, Favorite menu
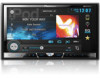 |
View all Pioneer AVH-X5500BHS manuals
Add to My Manuals
Save this manual to your list of manuals |
Page 41 highlights
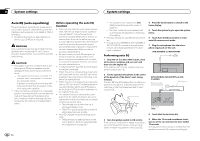
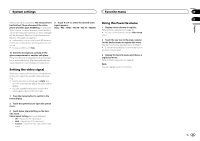
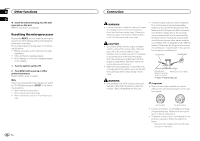
System settings Favorite menu When auto EQ is completed, The measurement has finished. Please disconnect the microphone and then push HOME key. is displayed. When the car's interior acoustic characteristics cannot be measured correctly, an error message will be displayed. (Refer to Understanding auto EQ error messages on page 56.) # It takes about nine minutes for auto EQ measurement to be completed when all the speakers are connected. # To stop auto EQ, touch Stop. 4 Touch c or d to select the desired video signal appears. Auto-PAL-NTSC-PAL-M-PAL-N-SECAM 10 Store the microphone carefully in the glove compartment or another safe place. If the microphone is subjected to direct sunlight for an extended period, high temperatures may cause distortion, color change or malfunction. Setting the video signal When you connect this unit to an AV equipment to this unit, select the suitable video signal setting. ! As this function is initially set to Auto, the unit will automatically adjust the video signal setting. ! You can operate this function only for the video signal input into the AV input. 1 Press the home button to switch to the home display. 2 Touch the system key to open the system menu. 3 Touch Video Signal Setting on the function menu. Video Signal Setting items are displayed. ! AV - Adjusts the AV video signal ! AUX - Adjusts the AUX video signal ! Camera - Adjusts the rear view camera video signal Using the Favorite menu 1 Display menu columns to register. Refer to Menu operations on page 32. # You can customize menus except Video Setup menu. 2 Touch the star icon in the menu column for the desired menu to register the menu. The star icon for the selected menu is filled in. # To cancel the registration, touch the star icon in the menu column again. 3 Display the favorite menu and choose a registered menu. Refer to Menu operations on page 32. Note You can register up to 12 columns. Section 20 21 En 41 English
-
 1
1 -
2
-
3
-
4
-
5
-
6
-
7
-
8
-
9
-
10
-
11
-
12
-
13
-
14
-
15
-
16
-
17
-
18
-
19
-
20
-
21
-
22
-
23
-
24
-
25
-
26
-
27
-
28
-
29
-
30
-
31
-
32
-
33
-
34
-
35
-
 36
36 -
 37
37 -
 38
38 -
 39
39 -
 40
40 -
 41
41 -
 42
42 -
 43
43 -
 44
44 -
 45
45 -
 46
46 -
47
-
48
-
49
-
50
-
51
-
52
-
53
-
54
-
55
-
56
-
57
-
58
-
59
-
60
-
61
-
62
-
63
-
64
-
65
-
66
-
67
-
68
-
69
-
70
-
71
-
72
-
73
-
74
-
75
-
76
-
77
-
78
-
79
-
80
-
81
-
82
-
83
-
84
-
85
-
86
-
87
-
88
-
89
-
90
-
91
-
92
-
93
-
94
-
95
-
96
-
97
-
98
-
99
-
100
-
101
-
102
-
103
-
104
-
105
-
106
-
107
-
108
-
109
-
110
-
111
-
112
-
113
-
114
-
115
-
116
-
117
-
118
-
119
-
120
-
121
-
122
-
123
-
124
-
125
-
126
-
127
-
128
-
129
-
130
-
131
-
132
-
133
-
134
-
135
-
136
-
137
-
138
-
139
-
140
-
141
-
142
-
143
-
144
-
145
-
146
-
147
-
148
-
149
-
150
-
151
-
152
-
153
-
154
-
155
-
156
-
157
-
158
-
159
-
160
-
161
-
162
-
163
-
164
-
165
-
166
-
167
-
168
-
169
-
170
-
171
-
172
-
173
-
174
-
175
-
176
-
177
-
178
-
179
-
180
-
181
-
182
-
183
-
184
-
185
-
186
-
187
-
188
-
189
-
190
-
191
-
192
-
193
-
194
-
195
-
196
-
197
-
198
-
199
-
200
-
201
-
202
-
203
-
204
-
205
-
206
-
207
-
208
-
209
-
210
-
211
-
212
 |
 |