Pioneer AVIC-X930BT Owner's Manual - Page 78
Storing the strongest broadcast, frequencies, Tuning in strong signals
 |
UPC - 884938127097
View all Pioneer AVIC-X930BT manuals
Add to My Manuals
Save this manual to your list of manuals |
Page 78 highlights
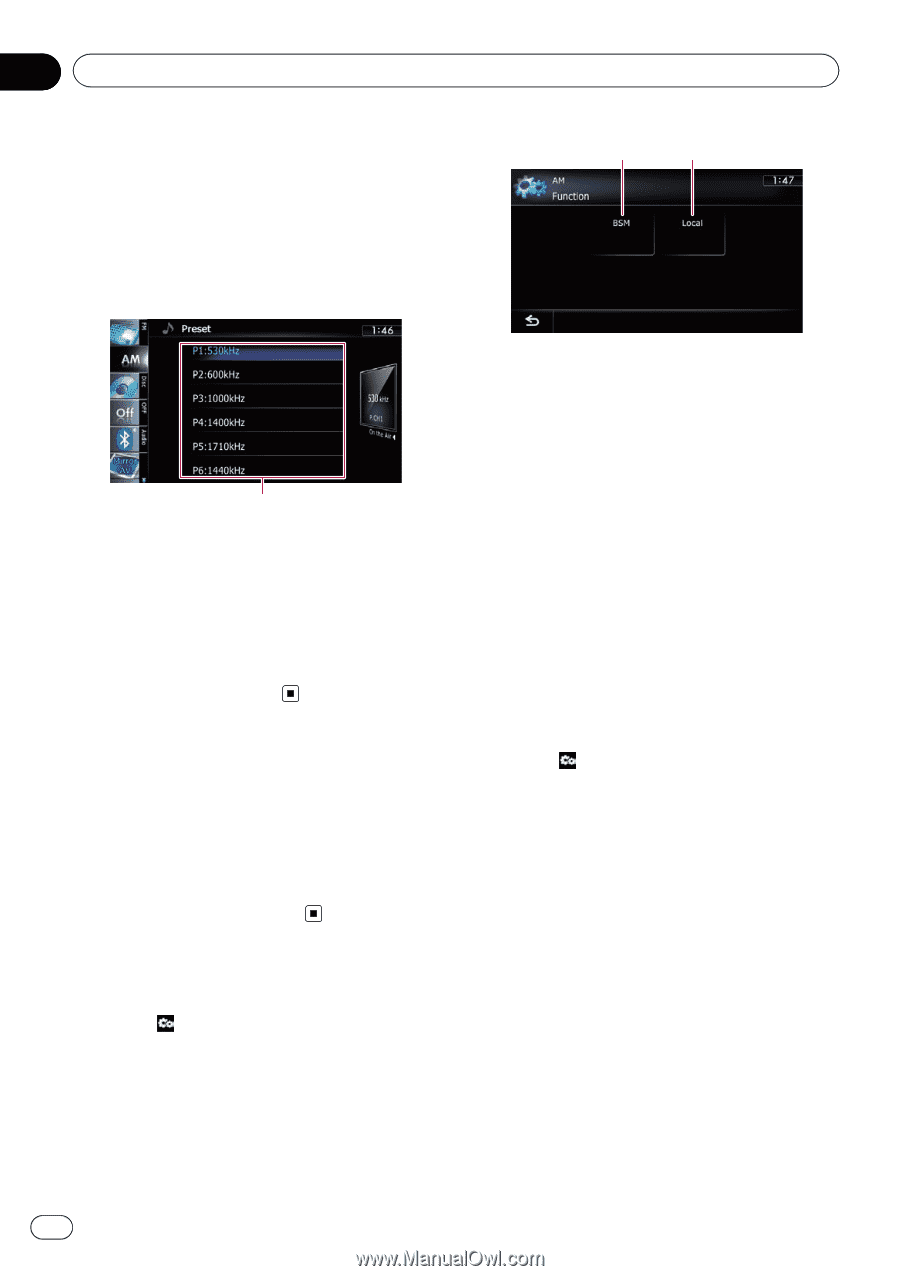
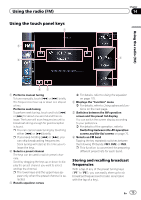
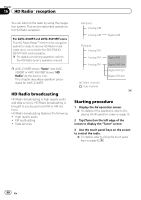
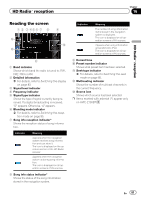
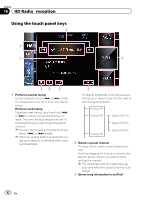
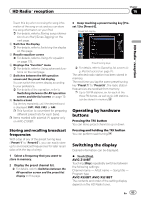
Chapter 15 Using the radio (AM) 2 Display the preset channel list. = For details, refer to Switches between the AV operation screen and the preset list display on the previous page. 3 Keep touching a preset tuning key [P1] to [P6]. Preset list display 1 2 1 Stores the strongest broadcast frequencies 2 Tunes in strong signals = For details of each function, refer to sec- tions below with the relative titles. Preset tuning keys = For details of the list operations, refer to Op- erating list screens (e.g. iPod list screen) on page 70. The selected radio station has been stored in memory. The next time you tap the same preset tuning key "P1" to "P6", the radio station frequencies are recalled from memory. Operating by hardware buttons Pressing the TRK button You can move preset channels up or down. Pressing and holding the TRK button You can perform seek tuning. Using advanced functions % Touch on the "AM" screen. The "Function" menu appears. Storing the strongest broadcast frequencies BSM (best stations memory) lets you automatically store the six strongest broadcast frequencies under the preset tuning keys "P1" to "P6" and, once stored there, you can tune into them with the touch of a key. p Storing broadcast frequencies with BSM may replace broadcast frequencies you have already saved. 1 Touch on the "AM" screen. The "Function" menu appears. 2 Touch [BSM]. 3 Touch [Start] to begin a search. "BSM" begins to flash. While "BSM" is flashing, the six strongest broadcast frequencies will be stored under the preset tuning keys "P1" to "P6" in order of their signal strength. When this is complete, "BSM" stops flashing. # If you touch [Stop], the storage process is canceled. Tuning in strong signals Local seek tuning allows you to tune in only those radio stations with sufficiently strong signals for good reception. 78 En
-
 1
1 -
2
-
3
-
4
-
5
-
6
-
7
-
8
-
9
-
10
-
11
-
12
-
13
-
14
-
15
-
16
-
17
-
18
-
19
-
20
-
21
-
22
-
23
-
24
-
25
-
26
-
27
-
28
-
29
-
30
-
31
-
32
-
33
-
34
-
35
-
36
-
37
-
38
-
39
-
40
-
41
-
42
-
43
-
44
-
45
-
46
-
47
-
48
-
49
-
50
-
51
-
52
-
53
-
54
-
55
-
56
-
57
-
58
-
59
-
60
-
61
-
62
-
63
-
64
-
65
-
66
-
67
-
68
-
69
-
70
-
71
-
72
-
 73
73 -
 74
74 -
 75
75 -
 76
76 -
 77
77 -
 78
78 -
 79
79 -
 80
80 -
 81
81 -
 82
82 -
 83
83 -
84
-
85
-
86
-
87
-
88
-
89
-
90
-
91
-
92
-
93
-
94
-
95
-
96
-
97
-
98
-
99
-
100
-
101
-
102
-
103
-
104
-
105
-
106
-
107
-
108
-
109
-
110
-
111
-
112
-
113
-
114
-
115
-
116
-
117
-
118
-
119
-
120
-
121
-
122
-
123
-
124
-
125
-
126
-
127
-
128
-
129
-
130
-
131
-
132
-
133
-
134
-
135
-
136
-
137
-
138
-
139
-
140
-
141
-
142
-
143
-
144
-
145
-
146
-
147
-
148
-
149
-
150
-
151
-
152
-
153
-
154
-
155
-
156
-
157
-
158
-
159
-
160
-
161
-
162
-
163
-
164
-
165
-
166
-
167
-
168
-
169
-
170
-
171
-
172
-
173
-
174
-
175
-
176
-
177
-
178
-
179
-
180
-
181
-
182
-
183
-
184
-
185
-
186
-
187
-
188
-
189
-
190
-
191
-
192
-
193
-
194
-
195
-
196
-
197
-
198
-
199
-
200
-
201
-
202
-
203
-
204
-
205
-
206
-
207
-
208
-
209
-
210
-
211
-
212
-
213
-
214
-
215
-
216
-
217
-
218
-
219
-
220
-
221
-
222
-
223
-
224
-
225
-
226
-
227
-
228
-
229
-
230
-
231
-
232
 |
 |