Pioneer AVIC-Z130BT Owner's Manual - Page 116
Starting procedure, Reading the screen, Using an iPod - release date
 |
UPC - 884938127806
View all Pioneer AVIC-Z130BT manuals
Add to My Manuals
Save this manual to your list of manuals |
Page 116 highlights
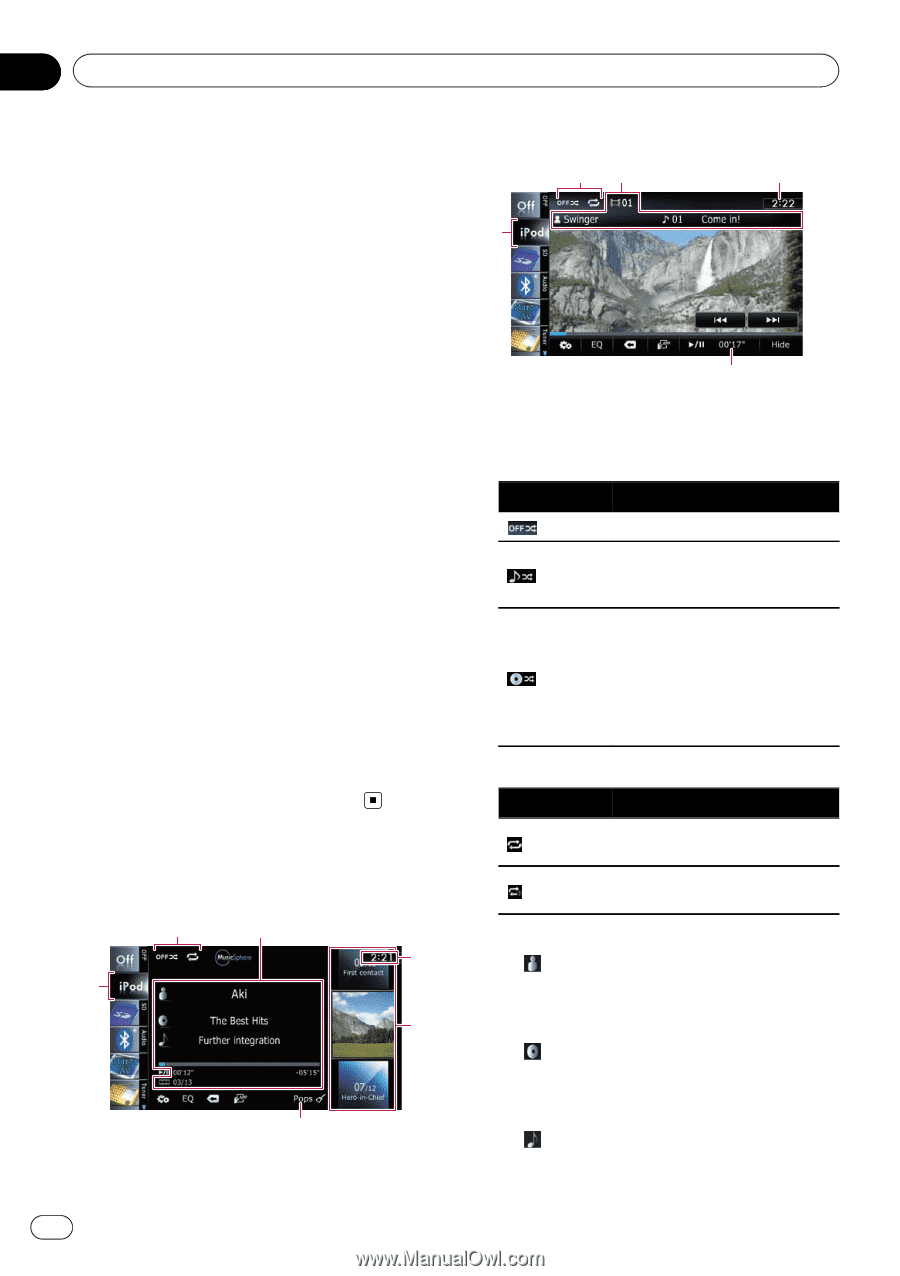
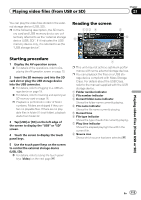
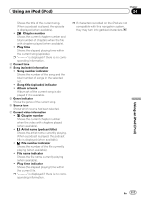
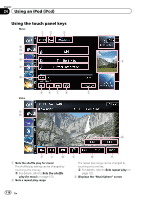
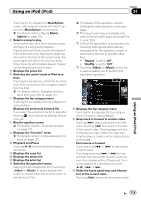
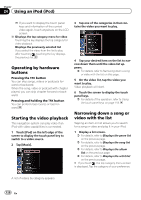
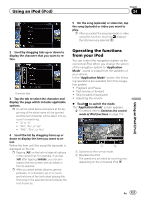
Chapter 24 Using an iPod (iPod) Using the USB interface cable for iPod en- Video ables you to connect your iPod to the naviga- 17 3 tion system. p A USB interface cable for iPod (CD-IU51V) (sold separately) is required for connection. 6 Starting procedure 1 Display the AV operation screen. = For details of the operations, refer to Displaying the AV operation screen on page 70. 2 Connect your iPod. The source changes and then playback will start. = For details, refer to Connecting your iPod on page 20. p If the iPod is already connected, tap [iPod] on the left edge of the screen. = For details, refer to Selecting a source on page 70. p If no video is output when iPod is selected as AV source, check the setting in "AV1 Input" on the "AV System Settings" menu. = For details, refer to Setting video input 1 (AV1) on page 170. 3 Use the touch panel keys on the screen to control your iPod. = For details of the operation, refer to Using the touch panel keys on page 118. Reading the screen Music 1 2 3 6 4 5 7 1 Playback condition indicator Indicates the current playback condition. Setting the shuffle play Indicator Meaning Cancels the shuffle play. Plays back songs or videos in random order within the selected list. Selects an album randomly, and then plays back all songs in that album in order. The actions while this indicator is displayed on the video operation screen vary depending on the connected iPod. Setting a repeat play range Indicator Meaning Repeats all songs or videos in the selected list. Repeats just the current song or video. 2 Current song (episode) information ! : Artist name (podcast title) Shows the artist name currently playing. When a podcast is played, the podcast title is displayed (when available). ! : Album title (release date) Shows the title of the album for the song. When a podcast is played, the release date is displayed (when available). ! : Song title (episode) 116 En
-
 1
1 -
2
-
3
-
4
-
5
-
6
-
7
-
8
-
9
-
10
-
11
-
12
-
13
-
14
-
15
-
16
-
17
-
18
-
19
-
20
-
21
-
22
-
23
-
24
-
25
-
26
-
27
-
28
-
29
-
30
-
31
-
32
-
33
-
34
-
35
-
36
-
37
-
38
-
39
-
40
-
41
-
42
-
43
-
44
-
45
-
46
-
47
-
48
-
49
-
50
-
51
-
52
-
53
-
54
-
55
-
56
-
57
-
58
-
59
-
60
-
61
-
62
-
63
-
64
-
65
-
66
-
67
-
68
-
69
-
70
-
71
-
72
-
73
-
74
-
75
-
76
-
77
-
78
-
79
-
80
-
81
-
82
-
83
-
84
-
85
-
86
-
87
-
88
-
89
-
90
-
91
-
92
-
93
-
94
-
95
-
96
-
97
-
98
-
99
-
100
-
101
-
102
-
103
-
104
-
105
-
106
-
107
-
108
-
109
-
110
-
 111
111 -
 112
112 -
 113
113 -
 114
114 -
 115
115 -
 116
116 -
 117
117 -
 118
118 -
 119
119 -
 120
120 -
 121
121 -
122
-
123
-
124
-
125
-
126
-
127
-
128
-
129
-
130
-
131
-
132
-
133
-
134
-
135
-
136
-
137
-
138
-
139
-
140
-
141
-
142
-
143
-
144
-
145
-
146
-
147
-
148
-
149
-
150
-
151
-
152
-
153
-
154
-
155
-
156
-
157
-
158
-
159
-
160
-
161
-
162
-
163
-
164
-
165
-
166
-
167
-
168
-
169
-
170
-
171
-
172
-
173
-
174
-
175
-
176
-
177
-
178
-
179
-
180
-
181
-
182
-
183
-
184
-
185
-
186
-
187
-
188
-
189
-
190
-
191
-
192
-
193
-
194
-
195
-
196
-
197
-
198
-
199
-
200
-
201
-
202
-
203
-
204
-
205
-
206
-
207
-
208
-
209
-
210
-
211
-
212
-
213
-
214
-
215
-
216
-
217
-
218
-
219
-
220
-
221
-
222
-
223
-
224
-
225
-
226
-
227
-
228
-
229
-
230
-
231
-
232
 |
 |