Pioneer DEH-1200MP Owner's Manual - Page 13
Removing the unit, Fastening the front panel, Installation - detachable
 |
UPC - 012562971131
View all Pioneer DEH-1200MP manuals
Add to My Manuals
Save this manual to your list of manuals |
Page 13 highlights
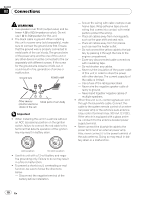
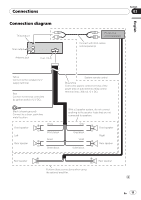
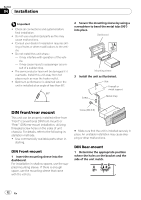
Installation 2 Tighten two screws on each side. Screw Section 04 Fastening the front panel If you do not plan to detach the front panel, the front panel can be fastened with the supplied screw. English Mounting bracket Dashboard or console ! Use either truss (5 mm × 8 mm) or flush surface (5 mm × 9 mm) screws, depending on the bracket screw holes. Removing the unit 1 Extend top and bottom of the trim ring outwards to remove the trim ring. (When reattaching the trim ring, point the side with the groove down.) Screw Trim ring ! Releasing the front panel allows easier ac- cess to the trim ring. 2 Insert the supplied extraction keys into both sides of the unit until they click into place. 3 Pull the unit out of the dashboard. En 13
-
 1
1 -
2
-
3
-
4
-
5
-
6
-
7
-
 8
8 -
 9
9 -
 10
10 -
 11
11 -
 12
12 -
 13
13 -
 14
14 -
 15
15 -
 16
16 -
 17
17 -
 18
18 -
19
-
20
-
21
-
22
-
23
-
24
-
25
-
26
-
27
-
28
-
29
-
30
-
31
-
32
-
33
-
34
-
35
-
36
-
37
-
38
-
39
-
40
-
41
-
42
-
43
-
44
-
45
-
46
-
47
-
48
-
49
-
50
-
51
-
52
 |
 |
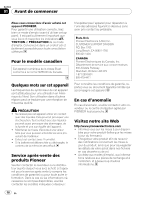
2
Tighten two screws on each side.
Screw
Mounting bracket
Dashboard or console
!
Use either truss (5 mm × 8 mm) or flush
surface (5 mm × 9 mm) screws, depending
on the bracket screw holes.
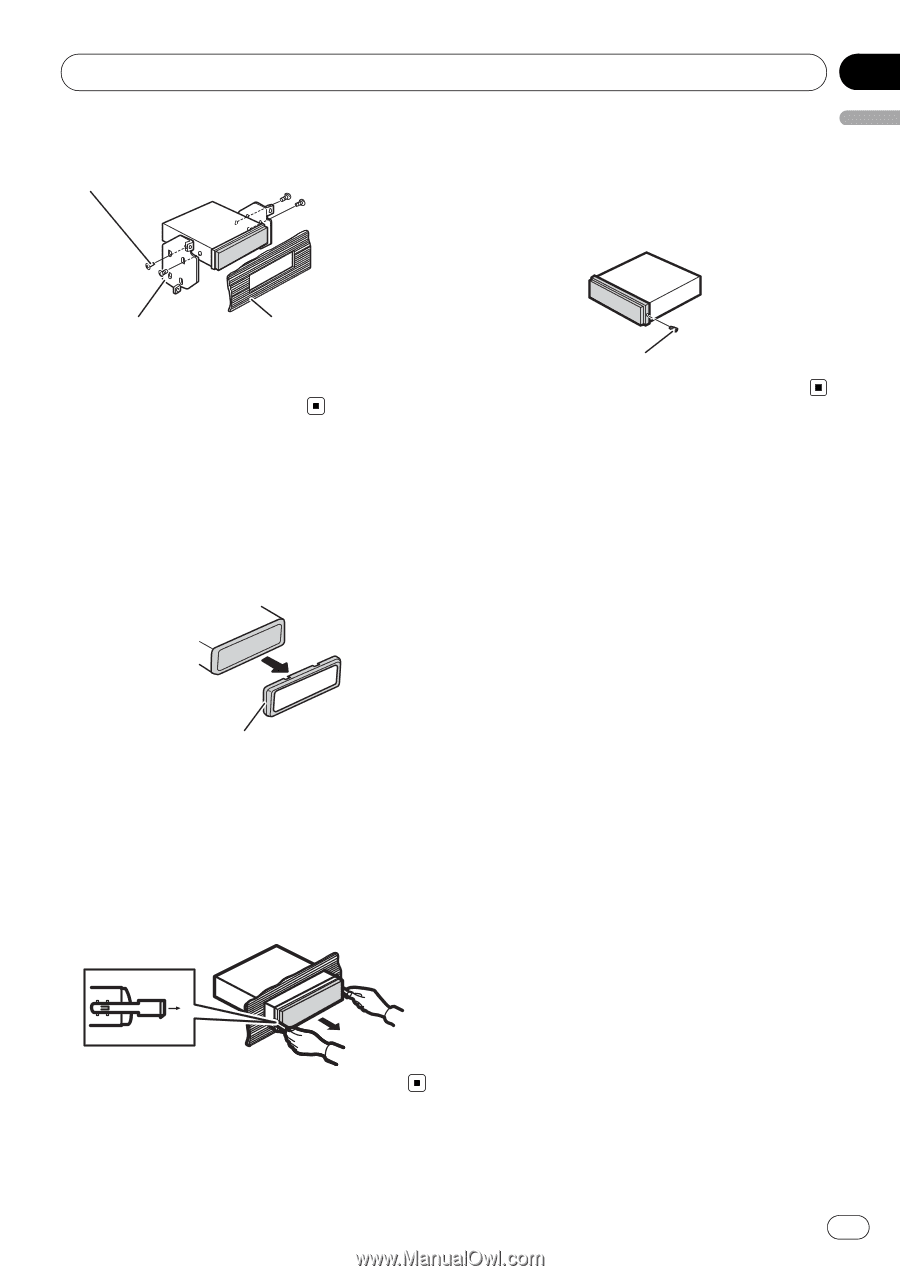
Removing the unit
1
Extend top and bottom of the trim ring
outwards to remove the trim ring. (When
reattaching the trim ring, point the side
with the groove down.)
Trim ring
!
Releasing the front panel allows easier ac-
cess to the trim ring.
2
Insert the supplied extraction keys into
both sides of the unit until they click into
place.
3
Pull the unit out of the dashboard.
Fastening the front panel
If you do not plan to detach the front panel,
the front panel can be fastened with the sup-
plied screw.
Screw
Installation
En
13
English
Section
04