Pioneer DEH-P700BT Owner's Manual - Page 35
Editing phone numbers, Assign genres to phone numbers, Clearing a phone book entry
 |
UPC - 012562886213
View all Pioneer DEH-P700BT manuals
Add to My Manuals
Save this manual to your list of manuals |
Page 35 highlights
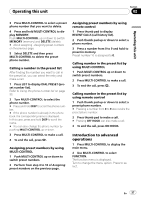
Operating this unit Section 02 Operating this unit Editing phone numbers You can edit the phone numbers of phone book entries. 1 Display the phone number list of your desired phone book entry. See step 1 to 5 on Calling a number in the phone book on the previous page for how to do this. 2 Press and hold MULTI-CONTROL to display the edit screen. 3 Turn MULTI-CONTROL to display EDIT NUMBER (number edit screen). Turning MULTI-CONTROL switches input screens in the following order: EDIT NUMBER (number edit screen)- EDIT GENRE (genre edit screen)-CLR MEMO (clear memory screen) 4 Push MULTI-CONTROL left or right to move the cursor to the number you want to change. 5 Push MULTI-CONTROL up or down to change numbers. Repeat these steps until you have finished changing the number. # Press and hold MULTI-CONTROL to add or delete + to the phone number. 6 Press MULTI-CONTROL to store the new number. After the number is stored, the display reverts to the detailed list. Assign genres to phone numbers If there are a lot of entries in the Phone Book it can be useful to assign them to specific genres (categories) for easier searching. There are four preset genres that you can assign entries to: HOME, MOBILE, OFFICE and OTHERS. 1 Display the phone number list of your desired phone book entry. See step 1 to 5 on Calling a number in the phone book on the previous page for how to do this. 2 Press and hold MULTI-CONTROL to display the edit screen. 3 Turn MULTI-CONTROL to display EDIT GENRE (genre edit screen). Turning MULTI-CONTROL switches input screens in the following order: EDIT NUMBER (number edit screen)- EDIT GENRE (genre edit screen)-CLR MEMO (clear memory screen) 4 Push MULTI-CONTROL up or down to select a genre. Each time MULTI-CONTROL is pushed up or down, the genres are switched in the following order: HOME (home)-MOBILE (mobile)-OFFICE (office)-OTHERS (other) 5 Press MULTI-CONTROL to assign a genre to the phone number. The selected genre is assigned to the phone number, and the display reverts to the detailed list. Clearing a phone book entry 1 Display the phone number list of your desired phone book entry. See step 1 to 5 on Calling a number in the phone book on the previous page for how to do this. 2 Press and hold MULTI-CONTROL to display the edit screen. 3 Turn MULTI-CONTROL to display CLR MEMO (clear memory screen). Turning MULTI-CONTROL switches input screens in the following order: EDIT NUMBER (number edit screen)- EDIT GENRE (genre edit screen)-CLR MEMO (clear memory screen) 4 Push MULTI-CONTROL right to show a confirmation display. CLEAR MEMORY YES is displayed. # If you do not want to clear the memory that you have selected, push MULTI-CONTROL left. The display reverts to normal. En 35
-
 1
1 -
2
-
3
-
4
-
5
-
6
-
7
-
8
-
9
-
10
-
11
-
12
-
13
-
14
-
15
-
16
-
17
-
18
-
19
-
20
-
21
-
22
-
23
-
24
-
25
-
26
-
27
-
28
-
29
-
 30
30 -
 31
31 -
 32
32 -
 33
33 -
 34
34 -
 35
35 -
 36
36 -
 37
37 -
 38
38 -
 39
39 -
 40
40 -
41
-
42
-
43
-
44
-
45
-
46
-
47
-
48
-
49
-
50
-
51
-
52
-
53
-
54
-
55
-
56
-
57
-
58
-
59
-
60
-
61
-
62
-
63
-
64
-
65
-
66
-
67
-
68
-
69
-
70
-
71
-
72
-
73
-
74
-
75
-
76
-
77
 |
 |
