Pioneer DEH-P800PRS Owner's Manual
Pioneer DEH-P800PRS - Premier Radio / CD Manual
 |
UPC - 012562883724
View all Pioneer DEH-P800PRS manuals
Add to My Manuals
Save this manual to your list of manuals |
Pioneer DEH-P800PRS manual content summary:
- Pioneer DEH-P800PRS | Owner's Manual - Page 1
English Français Operation Manual Mode d'emploi CD RECEIVER AUTORADIO CD DEH-P800PRS - Pioneer DEH-P800PRS | Owner's Manual - Page 2
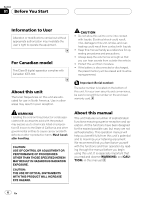
the instructions, keep this manual in a safe place for future reference. Before You Start Information to User 6 For Canadian model 6 About this unit 6 About this manual 6 After-sales service for Pioneer products 7 Visit our website 7 Features 7 About WMA 8 About AAC 8 About the SAT RADIO READY - Pioneer DEH-P800PRS | Owner's Manual - Page 3
Erasing a track from your ITS playlist 34 - Erasing a CD from your ITS playlist 34 Using disc title functions 34 - iPod 38 Introduction of advanced iPod adapter operation 39 Repeating play 39 Playing songs in a random order (shuffle) 39 Pausing a song 40 XM tuner Listening to XM Satellite Radio - Pioneer DEH-P800PRS | Owner's Manual - Page 4
46 - Selecting a channel in the channel category 46 Displaying the Radio ID 46 TV tuner Watching the television 47 Introduction of advanced TV disc playback 52 Playing tracks in random order 52 Scanning tracks of a CD and compressed audio 52 Using ITS playlist and disc title functions 52 Using - Pioneer DEH-P800PRS | Owner's Manual - Page 5
the source 75 - Setting the AUX title 75 Using the external unit 76 - Selecting the external unit as the source 76 - Basic operation 76 - Advanced operations 77 Using different entertainment displays 77 Using the PGM button 78 Additional Information Understanding built-in CD player error messages 79 - Pioneer DEH-P800PRS | Owner's Manual - Page 6
smoke, and overheating could result from contact with liquids. ! Keep this manual handy as a reference for operating procedures and precautions. ! Always keep the harm. Wash hands after handling. CAUTION: USE OF CONTROL OR ADJUSTMENT OR PERFORMANCE OF PROCEDURES OTHER THAN THOSE SPECIFIED - Pioneer DEH-P800PRS | Owner's Manual - Page 7
After-sales service for Pioneer products Please contact the dealer or distributor from where you purchased this unit for after-sales service (including Pioneer Electronics (USA) Inc. CUSTOMER SUPPORT DIVISION P.O. Box 1760 Long Beach, CA 90801-1760 800-421-1404 CANADA Pioneer Electronics of Canada, - Pioneer DEH-P800PRS | Owner's Manual - Page 8
separately) can be controlled by this unit. Please inquire to your dealer or nearest authorized Pioneer service station regarding the satellite radio tuner that can be connected to this unit. For satellite radio tuner operation, please refer to the satellite radio tuner owner's manual. Notes ! This - Pioneer DEH-P800PRS | Owner's Manual - Page 9
100 channels of digital-quality music, news, sports, talk and children's programming. ! "SAT Radio", the SAT Radio logo and all related marks are trademarks of Sirius Satellite Radio inc., and XM Satellite Radio Inc. ! When removing the front panel, be sure to hold the corrugated release button on - Pioneer DEH-P800PRS | Owner's Manual - Page 10
Section 01 Before You Start 2 Replace the front panel by clipping it into place. Resetting the microprocessor The microprocessor must be reset under the following conditions: ! Prior to using this unit for the first time after installation ! If the unit fails to operate properly ! When strange or - Pioneer DEH-P800PRS | Owner's Manual - Page 11
if the battery is incorrectly replaced. Replace only with the same or equivalent type. ! Do not handle the battery with metallic tools. ! Do not store the battery with metallic objects. ! If the battery leaks, wipe the remote control completely clean and install a new battery. ! When disposing of - Pioneer DEH-P800PRS | Owner's Manual - Page 12
remote control. But operation of FUNCTION button and AUDIO button on the remote control differs from the operation of MULTI-CONTROL on the head unit. When operating the remote control input) Note Refer to Introduction of advanced built-in CD player operation on page 21. AUDIO button operation % - Pioneer DEH-P800PRS | Owner's Manual - Page 13
CD player. Press and hold to open or close the front panel. 4 BAND button Press to select among three FM bands and one AM band and to cancel the control mode of functions. 5 DISPLAY button Press to select different displays. 6 MULTI-CONTROL Move to perform manual display. Remote control Operation is - Pioneer DEH-P800PRS | Owner's Manual - Page 14
5 f a 4b j AUDIO button Press to select various sound quality controls. c d e d DIRECT button Press to directly select the desired track the preset tuning for the tuner or disc number search for the multi-CD player. g PGM button Press to operate the preprogrammed functions for each source - Pioneer DEH-P800PRS | Owner's Manual - Page 15
is no magazine in the multiDVD player. - When AUX (auxiliary input) is set to off (refer to page 71). ! External unit refers to a Pioneer product (such as ones available in the future) that, although incompatible as a source, enables control of basic functions with this unit. Two external units - Pioneer DEH-P800PRS | Owner's Manual - Page 16
message such as ERROR-11 is displayed, refer to Understanding built-in CD player error messages on page 79. Adjusting the volume % Use VOLUME to unit, rotate VOLUME to increase or decrease the volume. With the remote control, press VOLUME to increase or decrease the volume. Turning the unit off % - Pioneer DEH-P800PRS | Owner's Manual - Page 17
local seek tuning is on. 5 Signal level indicator Shows the radio wave strength. 6 Frequency indicator Shows the frequency to which the tuner -2, FM-3 for FM or AM) is displayed. 3 To perform manual tuning, push MULTI-CONTROL left or right. The frequencies move up or down step by step. 4 - Pioneer DEH-P800PRS | Owner's Manual - Page 18
! Program service name is not displayed unless the radio receives the frequency. ! Up to 18 FM stations, six for each of the three FM bands, and six AM stations can be stored in memory. ! You can also store a broadcast frequency in memory pressing 1 to 6 on the remote control - Pioneer DEH-P800PRS | Owner's Manual - Page 19
automatically. Note Storing broadcast frequencies with BSM may replace broadcast frequencies you have saved using buttons 1 to remote control. Tuning in strong signals Local seek tuning lets you tune in only those radio stations with sufficiently strong signals for good reception. 1 Use MULTI-CONTROL - Pioneer DEH-P800PRS | Owner's Manual - Page 20
necessary to play a CD with your built-in CD player. More advanced CD operation is explained starting CONTROL left or right. Pushing MULTI-CONTROL right skips to the start of the next track. Pushing MULTI-CONTROL left once skips to the start Selecting a track directly When using the remote control - Pioneer DEH-P800PRS | Owner's Manual - Page 21
. Playing tracks in random order Random play lets you play back tracks on the CD in a random order. 1 Use MULTI-CONTROL to select Random mode in the function menu. Random mode appears in the display. 2 Press MULTI-CONTROL to turn random play on. Tracks play in a random order. # To turn random play - Pioneer DEH-P800PRS | Owner's Manual - Page 22
playback display, select Scan mode again by using MULTI-CONTROL. Note After scanning of a CD is finished, normal playback of the tracks will begin again. Pausing CD playback Pause lets you temporarily stop playback of the CD. 1 Use MULTI-CONTROL to select Pause in the function menu. Pause appears - Pioneer DEH-P800PRS | Owner's Manual - Page 23
disc titles You can display the text information of any disc that has the disc title entered. 1 Play the CD that you want to enter a title for. 2 Use MULTI-CONTROL to select TitleInput "A" in the function menu. TitleInput "A" appears in the display. 3 Press DISPLAY to select the desired character - Pioneer DEH-P800PRS | Owner's Manual - Page 24
you see the list of track titles on a CD TEXT disc and select one of them to play back. 1 Turn MULTI-CONTROL to switch to the track title list mode. # You can also perform this operation by pressing joystick on the remote control. 2 Use MULTI-CONTROL to select the desired track title. Turn to change - Pioneer DEH-P800PRS | Owner's Manual - Page 25
see Compact Disc displayed. # If no disc is loaded in the unit, you cannot select Compact Disc (built-in CD player). Insert a disc in the unit. (Refer to page 15.) 2 Push MULTI-CONTROL up or down to select a folder. # You cannot select a folder that does not have a compressed audio file recorded in - Pioneer DEH-P800PRS | Owner's Manual - Page 26
MP3/AAC/WAV Player ! The built-in CD player can play back compressed audio recorded on CD-ROM. (Refer to page 81 for files on page 74. Selecting an audio file directly in the current folder When using the remote control, you can select a track directly by entering the desired track number. 1 Press - Pioneer DEH-P800PRS | Owner's Manual - Page 27
each track of the current folder (or the first track of each folder) is played. 4 When you find the desired track (or folder) press MULTI-CONTROL to turn scan play off. The track (or folder) will continue to play. # If the display has automatically returned to the playback display, select Scan - Pioneer DEH-P800PRS | Owner's Manual - Page 28
the track you want to play. 1 Select the search method Rough search. Refer to Selecting the search method on this page. 2 Push and hold MULTI-CONTROL left or right to search every 10 tracks in the current folder. # If the current folder contains less than 10 tracks, pushing and holding MULTI - Pioneer DEH-P800PRS | Owner's Manual - Page 29
switch to the file name list mode. # You can also perform this operation by pressing joystick on the remote control. 2 Use MULTI-CONTROL to select the desired file name (or folder name). Turn to change the name of file or folder. Press to play. Push right to see a - Pioneer DEH-P800PRS | Owner's Manual - Page 30
. Press SOURCE until you see Multi-CD displayed. 2 Push MULTI-CONTROL up or down to select a disc you want to listen to. # You can also select a disc by using 1 to 6 buttons on the remote control. ! For discs 1 to 6, press the corresponding button number. ! For discs 7 to 12, press and hold the - Pioneer DEH-P800PRS | Owner's Manual - Page 31
multi-CD player operation 50-disc multi-CD player Only functions described in this manual are supported by 50-disc multi-CD players. The function name appears on the display. 3 Turn MULTI-CONTROL to select the function. Turn MULTI-CONTROL to switch between the functions in the following order. Play - Pioneer DEH-P800PRS | Owner's Manual - Page 32
to the playback display. Repeating play There are three repeat play ranges for the multi-CD player: M-CD repeat (multi-CD player repeat), Track repeat (one-track repeat) and Disc repeat (disc repeat). 1 Use MULTI-CONTROL to select Play mode in the function menu. Play mode appears in the display - Pioneer DEH-P800PRS | Owner's Manual - Page 33
the CDX-P1250 and CDX-P650, up to 24 tracks can be stored in the playlist.) 1 Play a CD that you want to program. Push MULTI-CONTROL up or down to select the CD. 2 Use MULTI-CONTROL to select ITS memo in the function menu. ITS memo appears in the display. 3 Select the desired track - Pioneer DEH-P800PRS | Owner's Manual - Page 34
playlist if ITS play is on. If ITS play is already on, skip to step 2. If ITS play is not already on, use MULTI-CONTROL. 1 Play the CD with the track you want to delete from your ITS playlist, and turn ITS play on. Refer to Playback from your ITS playlist on - Pioneer DEH-P800PRS | Owner's Manual - Page 35
see the list of disc titles entered in the multi-CD player and select one of them to play back. 1 Turn MULTI-CONTROL to switch to the disc title list mode. # You can also perform this operation by pressing joystick on the remote control. 2 Use MULTI-CONTROL to select the desired disc title. Turn to - Pioneer DEH-P800PRS | Owner's Manual - Page 36
You can also perform this operation by pressing joystick on the remote control. # If you want to display the track title list of the currently playing disc, push MULTI-CONTROL right. 2 Use MULTI-CONTROL to select the desired disc title of CD TEXT. Turn to change the disc title. Press to play. # You - Pioneer DEH-P800PRS | Owner's Manual - Page 37
You can use this unit to control an interface adapter for iPod, which is sold separately. These are the basic steps necessary to operate an iPod adapter. More advanced iPod adapter operation is explained starting on Introduction of advanced iPod adapter operation on page 39. 1 Song number indicator - Pioneer DEH-P800PRS | Owner's Manual - Page 38
to. Selecting a playlist You can select a playlist from your iPod. 1 Turn MULTI-CONTROL to switch to the top menu of the list search. # You can also perform this operation by pressing joystick on the remote control. 2 Use MULTI-CONTROL to select a Playlists from among the categories. Turn to change - Pioneer DEH-P800PRS | Owner's Manual - Page 39
Section 08 English Introduction of advanced iPod adapter operation 1 1 Function display Shows the function status. 1 Press MULTI-CONTROL to display the main menu. FUNCTION, AUDIO and ENTERTAINMENT appear on the display. 2 Use MULTI-CONTROL to select FUNCTION. Turn to change the menu option. Press - Pioneer DEH-P800PRS | Owner's Manual - Page 40
Section 08 Playing songs on iPod Pausing a song Pause lets you temporarily stop playback of a song. 1 Use MULTI-CONTROL to select Pause in the function menu. Pause appears in the display. 2 Press MULTI-CONTROL to turn pause on. Playback of the current song pauses. # To turn pause off, press MULTI- - Pioneer DEH-P800PRS | Owner's Manual - Page 41
Radio 1 2 34 5 You can use this unit to control an XM satellite digital tuner (GEX-P920XM), which is sold separately. For details concerning operation, refer to the XM tuner's operation manuals on the remote control. CHANNEL INPUT appears in the display. 2 Use 0 to 9 on the remote control to input - Pioneer DEH-P800PRS | Owner's Manual - Page 42
memory. ! You can also store stations assigned to preset tuning numbers by pressing and holding one of the preset tuning buttons 1 to 6 on the remote control. Switching the XM display % Press DISPLAY to switch the XM display. Each press of DISPLAY changes the XM display in the following order: Text - Pioneer DEH-P800PRS | Owner's Manual - Page 43
to preset tuning numbers by pushing MULTI-CONTROL up or down during the channel display. ! You can also recall stations assigned to preset tuning numbers by pressing one of the preset tuning buttons 1 to 6 on the remote control. Channel category select setting RADIO ID is provided as a channel - Pioneer DEH-P800PRS | Owner's Manual - Page 44
34 5 You can use this unit to control a SIRIUS Satellite Radio tuner, which is sold separately. When the SIRIUS tuner is used together with this unit, some operations differ slightly from those described in the SIRIUS operation manual. This manual provides information on these points. For all other - Pioneer DEH-P800PRS | Owner's Manual - Page 45
SIRIUS Satellite Radio tuner Section 10 English Introduction of advanced SIRIUS can easily store up to six broadcast stations for later recall with the touch of a button. ! Only the remote control can operate this function. % When you find a station that you want to store in memory press one of - Pioneer DEH-P800PRS | Owner's Manual - Page 46
Selecting a channel in the channel category on this page. 2 Push MULTI-CONTROL up or down to select the desired channel category. 3 Push MULTI-CONTROL left or right to select the desired channel in the selected channel category. Displaying the Radio ID If you select CH 000, the ID code is displayed - Pioneer DEH-P800PRS | Owner's Manual - Page 47
. Press SOURCE until you see Television displayed. 2 Press BAND to select a band. Press BAND until the desired band (TV-1 or TV-2) is displayed. 3 To perform manual tuning, push MULTI-CONTROL left or right. The channels move up or down step by step. 4 To perform seek tuning, push and hold MULTI - Pioneer DEH-P800PRS | Owner's Manual - Page 48
by pressing and holding one of the preset tuning buttons 1 to 6 on the remote control. Storing the strongest broadcast stations sequentially 1 Use MULTI-CONTROL and select FUNCTION to display BSSM. 2 Press MULTI-CONTROL to turn BSSM on. Searching is displayed. While Searching is displayed, the 12 - Pioneer DEH-P800PRS | Owner's Manual - Page 49
list of preset stations and select one of them to receive. 1 Turn MULTI-CONTROL to switch to the preset channel list mode. # You can also perform this operation by pressing joystick on the remote control. 2 Use MULTI-CONTROL to select the desired station. Turn to change the station. Press to select - Pioneer DEH-P800PRS | Owner's Manual - Page 50
control a DVD player or multi-DVD player, which is sold separately. For details concerning operation, refer to the DVD player's or multi-DVD player's operation manual (when playing DVD video) or track (when playing Video CD, CD or compressed audio) currently playing. 5 Play time indicator Shows - Pioneer DEH-P800PRS | Owner's Manual - Page 51
the current disc ! Chapter repeat - Repeat just the current chapter ! Title repeat - Repeat just the current title During Video CD or CD playback Press MULTI-CONTROL repeatedly until the desired repeat range appears in the display. ! Disc repeat - Repeat the current disc ! Track repeat - Repeat - Pioneer DEH-P800PRS | Owner's Manual - Page 52
play on. Tracks play in a random order. # To turn random play off, press MULTI-CONTROL again. Scanning tracks of a CD and compressed audio ! You can operate this function during CD and compressed audio playback. 1 Use MULTI-CONTROL to select Scan mode in the function menu. Scan mode appears in the - Pioneer DEH-P800PRS | Owner's Manual - Page 53
operation, refer to Entering disc titles on page 34. ! You can operate this function only when a DVD player is connected to this unit. ! When playing a CD TEXT disc on a CD TEXT compatible DVD player, you cannot switch to disc title input. The disc title will have already been recorded on - Pioneer DEH-P800PRS | Owner's Manual - Page 54
essential for a multiamp, multi-speaker system, to enable precise control over settings for each frequency range. ! The standard mode ( refer to Resetting the audio functions on page 72. Operation mode marks This manual uses the following marks to make the description clear. : This mark indicates - Pioneer DEH-P800PRS | Owner's Manual - Page 55
. Turn to change the menu option. Press to select. The audio function name appears on the display. 3 Turn MULTI-CONTROL to select the audio function. Turn MULTI-CONTROL to switch between the audio functions in the following order. BAL (balance adjustment)-NW 1 (network adjustment 1)-NW 2 (network - Pioneer DEH-P800PRS | Owner's Manual - Page 56
on/off)- SLA (source level adjustment) # You can also switch between the audio functions in reverse order by turning MULTI-CONTROL counterclockwise. # When tuner, television or AUX is selected as a source, you cannot select BMX. # When selecting FM as the source, you cannot switch to SLA. # When - Pioneer DEH-P800PRS | Owner's Manual - Page 57
Right Front Right Front seat right Up Front Front seats Down All All seats # To cancel the selected listening position, push MULTI-CONTROL in the same direction again. Using balance adjustment You can select a balance setting that provides an ideal listening environment in all occupied - Pioneer DEH-P800PRS | Owner's Manual - Page 58
the position selector mode (POSI). # When selecting TA OFF in TA1, you cannot switch to TA2. 4 Push MULTI-CONTROL left or right to select the speaker to be adjusted. Each time MULTI-CONTROL is pushed left or right, the speaker is selected in the following order: Hi L (high-range left)-Hi R (high - Pioneer DEH-P800PRS | Owner's Manual - Page 59
switching phase. This may improve the continuity of sound between speakers. Points concerning network adjustments Cut-off frequency adjustment ! With the low-range speaker installed in the rear tray, if you set Low LPF cut-off frequency high, bass sound is separated so that it appears to come from - Pioneer DEH-P800PRS | Owner's Manual - Page 60
HPF (middle-range speaker HPF)-Mid LPF (middle-range speaker LPF)-HighHPF (high-range speaker HPF) 3 Turn MULTI-CONTROL to select NW 2. NW 2 appears in the display. 4 Push MULTI-CONTROL left or right to select the cut-off frequency (crossover frequency) of the selected speaker unit (filter). Each - Pioneer DEH-P800PRS | Owner's Manual - Page 61
unit, turn the subwoofer output on. The subwoofer output phase can be switched between normal and reverse. 1 Use MULTI-CONTROL to select SW 1. SW 1 appears in the display. 2 Press MULTI-CONTROL to turn subwoofer output on. ON appears in the display. Subwoofer output is now on. # To turn subwoofer - Pioneer DEH-P800PRS | Owner's Manual - Page 62
select SW 2. SW 2 appears in the display. # When the subwoofer output is on, you can select SW 2. 2 Push MULTI-CONTROL left or right to select cut-off frequency. Each time MULTI-CONTROL is pushed left or right, cut-off frequencies are selected in the following order: 50-63-80-100-125-160 - Pioneer DEH-P800PRS | Owner's Manual - Page 63
(Hz) Only frequencies higher than those in the selected range are output from the front speakers. 5 Push MULTI-CONTROL up or down to adjust the output level of the front speakers. Each time MULTI-CONTROL is pushed up or down, the level of the front speakers increases or decreases. ±0 to -24 is - Pioneer DEH-P800PRS | Owner's Manual - Page 64
one that best enhances the playback of the track or CD that you are listening to. The COMP function balances the output of louder and softer equalizing) on page 66). You can turn the auto-equalizer on or off. 1 Use MULTI-CONTROL to select A.EQ. A.EQ appears in the display. # If auto TA and EQ has - Pioneer DEH-P800PRS | Owner's Manual - Page 65
control). 1 Use MULTI-CONTROL to select EQ 1. EQ 1 appears in the display. 2 Push MULTI-CONTROL left or right to select an equalizer curve. 3 Push MULTI-CONTROL can be created for each source. (The built-in CD player and the multi-CD player are set to the same equalizer adjustment setting - Pioneer DEH-P800PRS | Owner's Manual - Page 66
. Each time MULTI-CONTROL is pushed up or down, source volume increases or decreases. SLA +4 to SLA -4 is displayed as the source volume is increased or decreased. Notes ! The AM volume level can also be adjusted with source level adjustments. ! The built-in CD player and the multi-CD player are set - Pioneer DEH-P800PRS | Owner's Manual - Page 67
time, resulting in a drain on battery power. Be sure to place the microphone in the specified location. Before operating the auto TA and EQ function ! .) ! When this unit is connected to a power amp with input level control, auto TA and EQ may not be possible if you lower power amp replaced. En 67 - Pioneer DEH-P800PRS | Owner's Manual - Page 68
desired, place the microphone on the front passenger seat to carry out auto TA and EQ. 3 Turn the ignition switch to ON or ACC. # If the car's air conditioner or heater is turned on, turn it off. Noise from the fan in the air condi- 8 Press MULTI-CONTROL to start the auto - Pioneer DEH-P800PRS | Owner's Manual - Page 69
subjected to direct sunlight for an extended period, high temperatures may cause distortion, color change or malfunction. Note Make sure you have disconnected the microphone before pressing EJECT to open or close the panel (an alert sounds if the mic is still connected). English Section 13 En 69 - Pioneer DEH-P800PRS | Owner's Manual - Page 70
selects languages in the following order: English-Français-Español Setting the clock Use these instructions to set the clock. 1 Use MULTI-CONTROL to select Clock. Clock appears in the display. 2 Push MULTI-CONTROL left or right to select the segment of the clock display you wish to set. Pushing - Pioneer DEH-P800PRS | Owner's Manual - Page 71
on. ON appears in the display. # To turn the face auto open off, press MULTI-CONTROL again. Switching the auxiliary setting Auxiliary devices connected to this unit can be activated individually. Set each AUX source to ON when using. For more information about connecting or using auxiliary devices - Pioneer DEH-P800PRS | Owner's Manual - Page 72
. Are you sure? appears in the display. 4 Press MULTI-CONTROL to reset audio functions. Complete appears in the display and audio functions are reset. # To cancel this function on the way, press BAND. Correcting distorted sound When listening to a CD or other source on which the recording level is - Pioneer DEH-P800PRS | Owner's Manual - Page 73
starts when power to this unit is turned off while the ignition switch is set to ACC or ON. 1 Use MULTI-CONTROL to select Demonstration. Demonstration appears in the display. 2 Press MULTI-CONTROL to turn the feature demo on. ON appears in the display. # To turn the feature demo off, press MULTI - Pioneer DEH-P800PRS | Owner's Manual - Page 74
on page 11. Switching the Ever Scroll When Ever Scroll is set to ON, text information recorded on CD or iPod scrolls continuously in the display. Set to OFF if you prefer the information to scroll just once. 1 Use MULTI-CONTROL to select Ever-scroll. Ever-scroll appears in the display. 2 Press MULTI - Pioneer DEH-P800PRS | Owner's Manual - Page 75
setting is not turned on, AUX cannot be selected. For more details, see Switching the auxiliary setting on page 71. Setting the AUX title The title displayed for the AUX1 or AUX2 source can be changed. 1 After you have selected AUX as the source, use MULTI-CONTROL and select FUNCTION to display - Pioneer DEH-P800PRS | Owner's Manual - Page 76
the connected external unit's owner's manual. % Press BAND. % Press and hold BAND. % Push MULTI-CONTROL left or right. % Push and hold MULTI-CONTROL left or right for about one second and release. % Push MULTI-CONTROL up or down. % Press any of 1 to 6 on the remote control. % Press and hold any of - Pioneer DEH-P800PRS | Owner's Manual - Page 77
(function 4)-Auto/Manual (auto/manual) Notes ! You can also select the function by pressing FUNCTION on the remote control. ! To title information are not displayed simultaneously. ! Built-in CD Player ! Multi-CD Player ! DVD player/multi-DVD player ! iPod # If Display Form 3 is selected in the - Pioneer DEH-P800PRS | Owner's Manual - Page 78
can operate the preprogrammed functions for each source by using PGM on the remote control. % Press PGM to turn pause on when selecting the following sources: ! CD - Built-in CD player ! Multi-CD - Multi-CD player ! iPod - iPod ! DVD - DVD player/multi-DVD player # To turn pause off, press PGM again - Pioneer DEH-P800PRS | Owner's Manual - Page 79
English Understanding built-in CD player error messages When you contact your dealer or your nearest Pioneer Service Center, be sure to have the error message recorded. Message Cause Action ERROR-11, 12, Dirty disc 17, 30 Clean disc. ERROR-11, 12, Scratched disc Replace disc. 17, 30 ERROR - Pioneer DEH-P800PRS | Owner's Manual - Page 80
audio data (CD-DA)). ! Read the precautions with CD-R/CD-RW discs before using them. ! If the heater is used in cold weather, moisture may form on components inside the CD player. Condensation may cause the CD player to malfunction. If you think that condensation is a problem turn off the CD 80 En - Pioneer DEH-P800PRS | Owner's Manual - Page 81
Discs is not physically compatible with the general CD standard, it may not be possible to play the CD side with this unit. ! Frequent loading and ejecting of a Dual Disc may result in scratches on the disc. Serious scratches can lead to playback problems on this unit. In some cases, a Dual Disc - Pioneer DEH-P800PRS | Owner's Manual - Page 82
to be able to enjoy sound of a certain quality, we recommend using discs recorded with a higher transmission rate. ! This unit doesn't support the following formats. - Apple Lossless WMA additional information ! This unit plays back WMA files encoded by Windows Media Player version 7, 7.1, 8, 9 and - Pioneer DEH-P800PRS | Owner's Manual - Page 83
quality, we recommend using discs recorded with the larger number of quantization bits. About folders and compressed audio files ! An outline of a CD-ROM with compressed audio is shown below. Subfolders are shown as folders in the folder currently selected. 1 23 1 First level 2 Second level - Pioneer DEH-P800PRS | Owner's Manual - Page 84
Appendix Additional Information ! Compressed audio files in up to 8 tiers of folders can be played back. However, there is a delay in the start of playback on discs with numerous tiers. For this reason we recommend creating discs with no more than 2 tiers. ! It is possible to play back up to 99 - Pioneer DEH-P800PRS | Owner's Manual - Page 85
/100/125/ 160/200/250 Hz Slope 12/-18/-24/-30/-36 dB/oct Gain 6 dB to -24 dB/Mute (1 dB step) Phase Normal/Reverse CD player System Compact disc audio system Usable discs Compact disc Signal-to-noise ratio 105 dB (1 kHz) (IHF-A net- work) Number of channels 2 (stereo) MP3 - Pioneer DEH-P800PRS | Owner's Manual - Page 86
Appendix Additional Information Signal-to-noise ratio 75 dB (IHF-A network) AM tuner Frequency range 530 kHz to 1 710 kHz (10 kHz) Usable sensitivity 18 µV (S/N: 20 dB) Signal-to-noise ratio 67 dB (IHF-A network) CEA2006 Specifications Power output 14 W RMS × 4 Channels (4 W and ≦ 1 % THD+N) - Pioneer DEH-P800PRS | Owner's Manual - Page 87
mode d'emploi 92 Service après-vente des produits Pioneer 92 Visitez notre soin de la télécommande 98 - Installation de la pile 98 - Utilisation appareil 103 Syntoniseur Écoute de la radio 104 Introduction au fonctionnement avancé du du contenu d'un CD 110 Pause de la lecture d'un CD 110 Sélection - Pioneer DEH-P800PRS | Owner's Manual - Page 88
des informations textuelles sur les disques CD TEXT 127 - Défilement des informations textuelles sur l'écran 127 - Choix des plages à partir de la liste des titres de plages 127 Lecture de plages musicales sur l'iPod Écoute de plages musicales sur votre iPod 128 Recherche d'une plage musicale 128 - Pioneer DEH-P800PRS | Owner's Manual - Page 89
égorie de canal 139 Affichage de l'ID de la radio 139 Syntoniseur TV Regarder la télévision 140 Introduction à aléatoire 145 Examen des plages d'un CD et d'audio compressé 145 Utilisation de la audio 148 Fonctions additionnelles 148 Introduction aux réglages sonores 148 Basculement entre canal - Pioneer DEH-P800PRS | Owner's Manual - Page 90
service ou hors service du mode inverse 170 Mise en service ou hors service de la fonction Ever Scroll (défilement permanent) 171 Autres fonctions Mise en service ou hors service de l'affichage de l'horloge 172 Utilisation de la source AUX des messages d'erreur du lecteur de CD intégré 177 - Pioneer DEH-P800PRS | Owner's Manual - Page 91
Table des matières Comprendre les messages d'erreur du réglage TA et EQ auto 177 Soins à apporter au lecteur de CD 178 Disques CD-R et CD-RW 178 Disques Duaux 179 Fichiers audio compressé 179 - Informations MP3 additionnelles 180 - Informations WMA additionnelles 180 - Informations additionnelles - Pioneer DEH-P800PRS | Owner's Manual - Page 92
sans avoir pris contact préalable. ÉTATS-UNIS Pioneer Electronics (USA) Inc. CUSTOMER SUPPORT DIVISION P.O. Box 1760 Long Beach, CA 90801-1760 800-421-1404 CANADA Pioneer Électroniques du Canada, Inc. Département de service aux consommateurs 300 Allstate Parkway Markham, Ontario L3R 0P2 1-877 - Pioneer DEH-P800PRS | Owner's Manual - Page 93
possible que certains appareils source Pioneer ne soient pas contrôlés totalement par cet appareil. Pour avoir plus de détails, consultez votre revendeur le plus proche. Compatibilité iPod® Quand vous utilisez cet appareil avec un adaptateur interface pour iPod (CD-IB100B) (vendu séparément), vous - Pioneer DEH-P800PRS | Owner's Manual - Page 94
! iPod est une marque commerciale de Apple Inc. déposée aux É aux États-Unis et dans d'autres pays. À propos de la marque SAT RADIO READY La marque SAT RADIO READY imprimée sur la face avant indique que cet appareil peut contrôler le Syntoniseur Radio Satellite (Satellite Radio Tuner) pour Pioneer - Pioneer DEH-P800PRS | Owner's Manual - Page 95
pureté aux auditeurs, dans leur voiture et à leur domicile, sans interruption sur l'ensemble du territoire. La radio satellite cr service ce signal sonore d'avertissement. Reportez-vous à la page 167, Mise en service ou hors service du signal sonore d'avertissement. ! Vous pouvez mettre hors service - Pioneer DEH-P800PRS | Owner's Manual - Page 96
du microprocesseur Le microprocesseur doit être réinitialisé dans les conditions suivantes : ! Avant la première utilisation de cet appareil après son installation ! En cas d'anomalie de fonctionnement de l'appareil ! Quand des messages étranges ou incor- rects s'affichent sur l'écran Changement du - Pioneer DEH-P800PRS | Owner's Manual - Page 97
de la fonction démonstration des fonctions des Réglages initiaux. Pour avoir plus de détails, reportez-vous à la page 170, Mise en service/hors service de la fonction démonstration des fonctions. Mode inverse Si vous n'effectuez pas une opération dans un délai d'environ 30 secondes, les indications - Pioneer DEH-P800PRS | Owner's Manual - Page 98
Installation usagées, respectez les règlements nationaux ou les instructions locales en vigueur dans le pays ou la ré diffèrent du fonctionnement du MULTI-CONTROL sur l'appareil central. Quand vous choisir le mode désiré (par exemple, lecteur de CD intégré). Appuyez de manière répétée sur FUNCTION - Pioneer DEH-P800PRS | Owner's Manual - Page 99
-vous à la page 109, Introduction au fonctionnement avancé du lecteur de CD intégré. Utilisation de la touche AUDIO % Appuyez sur AUDIO pour choisir )-A.EQ (égaliseur de niveau automatique en/hors service)-SLA (ajustement du niveau de la source) Remarque Reportez-vous à la page 148, Introduction - Pioneer DEH-P800PRS | Owner's Manual - Page 100
sur cette touche pour éjecter le CD que contient le lecteur de CD intégré. Appuyez et maintenez la pression pour choisir un affichage différent. 6 MULTI-CONTROL Déplacez ce bouton pour exécuter les commandes SOURCE, VOLUME Cet appareil est mis en service en sélectionnant une source. Appuyez sur - Pioneer DEH-P800PRS | Owner's Manual - Page 101
1 à 6 permettent d'effectuer la sélection d'accord prédéfini pour le syntoniseur ou la recherche de numéro de disque pour le lecteur de CD à chargeur. g Touche PGM Appuyez sur cette touche pour utiliser les fonctions préprogrammées pour chaque source. (Reportez-vous à la page 175, Utilisation - Pioneer DEH-P800PRS | Owner's Manual - Page 102
CD intégré-Lecteur de CD à chargeur -iPod- CD à chargeur ne contient pas de chargeur. - Le lecteur de DVD à chargeur ne contient pas de chargeur. - L'entrée AUX (entrée pour un appareil auxiliaire) est hors service (reportez-vous à la page 168). ! Source extérieure fait référence à un produit Pioneer - Pioneer DEH-P800PRS | Owner's Manual - Page 103
face avant. ! Si un message d'erreur tel que ERROR-11 s'affiche, reportez-vous à la page 177, Explication des messages d'erreur du lecteur de CD intégré. Réglage du volume % Utilisez VOLUME pour régler le niveau sonore. Sur l'appareil central, tournez VOLUME pour augmenter ou diminuer le volume. Sur - Pioneer DEH-P800PRS | Owner's Manual - Page 104
sur une station locale est en service. 5 Indicateur de niveau du signal Indique la force du signal radio. 6 Indicateur de fréquence Indique GO), soit affichée. 3 Pour effectuer un accord manuel, poussez MULTI-CONTROL vers la gauche ou vers la droite. La fréquence augmente ou diminue pas par - Pioneer DEH-P800PRS | Owner's Manual - Page 105
pouvez aussi parcourir les fonctions dans l'ordre inverse en tournant MULTI-CONTROL dans le sens contraire des aiguilles d'une montre. # Appuyez és est annulé automatiquement. Remarques ! Le nom du service de programme n'est affiché que si la radio reçoit la fréquence. ! Vous pouvez enregistrer - Pioneer DEH-P800PRS | Owner's Manual - Page 106
sur l'écran. 2 Appuyez sur MULTI-CONTROL pour mettre la fonction BSM en service. Searching s'affiche. Pendant que Searching rappeler des stations affectées aux numéros de présélection en poussant MULTI-CONTROL vers le haut ou locale ne s'intéresse qu'aux stations de radio dont le signal reçu est suffisamment - Pioneer DEH-P800PRS | Owner's Manual - Page 107
stations locales (par exemple, Level 2) apparaît sur l'écran. # Pour mettre l'accord automatique sur les stations locales hors service, appuyez à nouveau sur MULTI-CONTROL. 3 Poussez MULTI-CONTROL vers la gauche ou vers la droite pour régler la sensibilité. En FM, la sensibilité peut prendre quatre - Pioneer DEH-P800PRS | Owner's Manual - Page 108
poussez et maintenez MULTI-CONTROL vers la gauche ou vers la droite. # Si vous sélectionnez Rough search, maintenez MULTI-CONTROL poussé vers la gauche un disque CD TEXT est inséré, le titre du disque commence à défiler automatiquement. Quand la fonction Ever Scroll est mise en service lors du - Pioneer DEH-P800PRS | Owner's Manual - Page 109
de lecture. Répétition de la lecture Il existe deux étendues de répétition pour le lecteur de CD intégré : Disc repeat (répétition du disque) et Track repeat (répétition d'une plage). 1 Utilisez MULTI-CONTROL pour sélectionner Play mode dans le menu des fonctions. Play mode apparaît sur l'écran - Pioneer DEH-P800PRS | Owner's Manual - Page 110
pour activer la lecture aléatoire. Les plages sont lues dans un ordre aléatoire. # Appuyez à nouveau sur MULTI-CONTROL pour mettre hors service la fonction lecture aléatoire. Examen du contenu d'un CD Cette fonction vous permet d'écouter les 10 premières secondes de chaque plage gravée sur le - Pioneer DEH-P800PRS | Owner's Manual - Page 111
les informations textuelles de n'importe quel disque pour lequel le titre du disque a été saisi. 1 Jouez un CD pour lequel vous voulez entrer un titre. 2 Utilisez MULTI-CONTROL pour sélectionner TitleInput "A" dans le menu des fonctions. TitleInput "A" apparaît sur l'écran. 3 Appuyez sur DISPLAY - Pioneer DEH-P800PRS | Owner's Manual - Page 112
curseur sur la dernière position en poussant MULTI-CONTROL vers la droite. Lorsque vous poussez une nouvelle fois MULTI-CONTROL vers la droite, le titre saisi est mis en . ! Si vous connectez à l'appareil un lecteur de CD à chargeur qui ne supporte pas la saisie de titres, vous ne pouvez pas utiliser - Pioneer DEH-P800PRS | Owner's Manual - Page 113
hors service de la fonction Ever Scroll (défilement permanent). Choix des plages à partir de la liste des titres de plages La liste des titres de plages vous permet de voir les titres de plages sur un CD TEXT et d'en choisir une pour la lire. 1 Tournez MULTI-CONTROL pour passer en mode liste - Pioneer DEH-P800PRS | Owner's Manual - Page 114
du débit binaire moyen est affichée. ! Vous pouvez seulement lire des fichiers WAV aux fréquences 16, 22,05, 24, 32, 44,1 et 48 kHz (LPCM), choisir Compact Disc (lecteur de CD intégré). Insérez un disque dans l'appareil. (Reportez-vous à la page 102.) 2 Poussez MULTI-CONTROL vers le haut ou vers le - Pioneer DEH-P800PRS | Owner's Manual - Page 115
CONTROL une fois vers la gauche fait sauter au début de la plage en cours. Pousser une nouvelle fois fera passer à la plage précédente. Remarques ! Quand vous jouez des disques contenant des fichiers audio compressé et des données audio (CD Ever Scroll est mise en service lors du réglage initial, - Pioneer DEH-P800PRS | Owner's Manual - Page 116
(examen du disque)-Pause (pause)-Search mode (méthode de recherche) # Vous pouvez aussi parcourir les fonctions dans l'ordre inverse en tournant MULTI-CONTROL dans le sens contraire des aiguilles d'une montre. # Appuyez sur BAND pour revenir à l'affichage des conditions de lecture. Répétition de la - Pioneer DEH-P800PRS | Owner's Manual - Page 117
l'étendue de répétition Folder repeat ou Disc repeat sélectionnée précédemment. # Appuyez à nouveau sur MULTI-CONTROL pour mettre hors service la fonction lecture aléatoire. 2 Utilisez MULTI-CONTROL pour sélectionner Scan mode dans le menu des fonctions. Scan mode apparaît sur l'écran. 3 Appuyez - Pioneer DEH-P800PRS | Owner's Manual - Page 118
en cours contient moins de 10 plages, pousser de façon prolongée MULTI-CONTROL vers la droite rappelle la dernière plage du dossier. De même, si dossier en cours contient moins de 10 plages, pousser de façon prolongée MULTI-CONTROL vers la gauche rappelle la première plage du dossier. De même, si - Pioneer DEH-P800PRS | Owner's Manual - Page 119
aux formats service de la fonction Ever Scroll (défilement permanent). Choix des plages à partir de la liste des noms de fichiers La fonction liste des noms de fichiers vous permet de voir la liste des noms de fichiers (ou de dossiers) et d'en choisir un pour le lire. 1 Tournez MULTI-CONTROL - Pioneer DEH-P800PRS | Owner's Manual - Page 120
lecteur de CD à chargeur. Appuyez sur SOURCE jusqu'à ce que Multi-CD s'affiche. 2 Poussez MULTI-CONTROL vers le haut CD TEXT sur un lecteur de CD à chargeur compatible CD TEXT, les titres du disque et des plages commencent à défiler automatiquement. Quand la fonction Ever Scroll est mise en service - Pioneer DEH-P800PRS | Owner's Manual - Page 121
de la liste des titres de disques. Introduction au fonctionnement avancé du lecteur de CD à chargeur 1 1 Afficheur de fonction Il indique l'état de la fonction. 1 Appuyez sur MULTI-CONTROL pour afficher le menu principal. FUNCTION, AUDIO et ENTERTAINMENT apparaissent sur l'écran. 2 Utilisez MULTI - Pioneer DEH-P800PRS | Owner's Manual - Page 122
aléatoire. Les plages seront jouées dans un ordre aléatoire dans l'étendue de répétition M-CD repeat ou Disc repeat sélectionnée précédemment. # Appuyez à nouveau sur MULTI-CONTROL pour mettre hors service la fonction lecture aléatoire. Examen du contenu des disques et des plages Quand vous utilisez - Pioneer DEH-P800PRS | Owner's Manual - Page 123
en pause. # Appuyez à nouveau sur MULTI-CONTROL pour mettre la pause hors service. Utilisation des listes ITS ITS (sélection instantanée des plages) vous permet de constituer une liste de lecture de vos plages favorites à partir du lecteur de CD à chargeur. Après avoir ajouté vos plages favorites - Pioneer DEH-P800PRS | Owner's Manual - Page 124
liste ITS Vous pouvez supprimer une plage de la liste de lecture ITS si la lecture ITS est en service. Si la lecture ITS est déjà en service, passez à l'étape 2. Sinon, utilisez MULTI-CONTROL. 1 Jouez le CD qui contient la plage que vous voulez supprimer de votre liste ITS, et activez la lecture ITS - Pioneer DEH-P800PRS | Owner's Manual - Page 125
de votre liste de lecture ITS quand la lecture ITS est hors service. 1 Jouez le CD que vous voulez supprimer. Poussez MULTI-CONTROL vers le haut ou vers le bas pour choisir le CD. 2 Utilisez MULTI-CONTROL pour sélectionner ITS memo dans le menu des fonctions. ITS memo apparaît sur l'écran. 3 Poussez - Pioneer DEH-P800PRS | Owner's Manual - Page 126
lecteur de CD à chargeur, puis de sélectionner un des disques en lecture. 1 Tournez MULTI-CONTROL pour CD TEXT, peuvent contenir des informations telles que le titre du CD, le titre des plages, le nom de l'interprète et le temps de lecture. Seuls ces disques CD TEXT encodés spécialement supportent - Pioneer DEH-P800PRS | Owner's Manual - Page 127
hors service de la fonction Ever Scroll (défilement permanent). Choix des plages à partir de la liste des titres de plages La liste des titres de plages vous permet de voir les titres de plages sur un CD TEXT et d'en choisir une pour la lire. 1 Tournez MULTI-CONTROL pour passer en mode liste - Pioneer DEH-P800PRS | Owner's Manual - Page 128
le début de la plage musicale en cours. 1 Appuyez sur SOURCE pour sélectionner l'iPod. Appuyez sur SOURCE jusqu'à ce que iPod s'affiche. 2 Pour une avance rapide ou un retour rapide, poussez et maintenez MULTI-CONTROL vers la gauche ou vers la droite. Recherche d'une plage musicale Les opérations - Pioneer DEH-P800PRS | Owner's Manual - Page 129
plage musicale que vous voulez écouter. Sélection d'une liste de lecture Vous pouvez sélectionner une liste de lecture à partir de votre iPod. 1 Tournez MULTI-CONTROL pour passer au menu principal de la recherche par liste. # Vous pouvez aussi effectuer cette opération en appuyant sur le joystick - Pioneer DEH-P800PRS | Owner's Manual - Page 130
Reportezvous à la page 171, Mise en service ou hors service de la fonction Ever Scroll (défilement permanent). Introduction à l'utilisation avancée de l'adaptateur iPod 1 1 Afficheur de fonction Il indique l'état de la fonction. 1 Appuyez sur MULTI-CONTROL pour afficher le menu principal. FUNCTION - Pioneer DEH-P800PRS | Owner's Manual - Page 131
CONTROL pour choisir l'étendue de répétition. Appuyez répétitivement sur MULTI-CONTROL l'iPod CONTROL pour sélectionner CONTROL pour choisir votre réglage favori. Appuyez sur MULTI-CONTROL CONTROL pour sélectionner Pause dans le menu des fonctions. Pause apparaît sur l'écran. 2 Appuyez sur MULTI-CONTROL - Pioneer DEH-P800PRS | Owner's Manual - Page 132
radio satellite XM 1 2 34 5 Vous pouvez utiliser cet appareil pour commander un syntoniseur satellite numérique XM (GEX-P920XM), vendu séparément. Pour avoir des détails sur ce mode de fonctionnement, reportez-vous aux vous poussez de façon prolongée MULTI-CONTROL vers la gauche ou vers la droite, - Pioneer DEH-P800PRS | Owner's Manual - Page 133
XM 1 1 Afficheur de fonction Indique les noms des fonctions. 1 Appuyez sur MULTI-CONTROL pour afficher le menu principal. FUNCTION, AUDIO et ENTERTAINMENT apparaissent sur l'écran. 2 Utilisez MULTI-CONTROL pour choisir FUNCTION. Channel mode apparaît sur l'écran. # Appuyez sur BAND pour revenir - Pioneer DEH-P800PRS | Owner's Manual - Page 134
être sélectionnés. Sélectionnez par catégorie pour restreindre votre recherche aux seuls canaux d'une catégorie particulière. 1 Utilisez MULTI-CONTROL pour choisir FUNCTION. Channel mode apparaît sur l'écran. 2 Appuyez sur MULTI-CONTROL pour choisir le réglage de sélection du canal désiré. Appuyez - Pioneer DEH-P800PRS | Owner's Manual - Page 135
sélectionnez un autre canal, l'affichage du code ID est annulé. # L'affichage du code ID affiche répétitivement RADIO ID et le code ID alternativement. 2 Utilisez MULTI-CONTROL pour choisir la station désirée. Tournez pour changer de station, appuyez pour sélectionner. # Vous pouvez aussi changer - Pioneer DEH-P800PRS | Owner's Manual - Page 136
5 Vous pouvez utiliser cet appareil pour commander un syntoniseur Radio Satellite SIRIUS, vendu séparément. Quand le syntoniseur et le canal suivant est sélectionné. # Si vous poussez de façon prolongée MULTI-CONTROL vers la gauche ou vers la droite, vous pouvez augmenter ou diminuer le numéro de - Pioneer DEH-P800PRS | Owner's Manual - Page 137
Section Syntoniseur Radio 10 Satellite SIRIUS Français Remarque Quand vous changez de noms des fonctions. 1 Appuyez sur MULTI-CONTROL pour afficher le menu principal. FUNCTION, AUDIO et ENTERTAINMENT apparaissent sur l'écran. 2 Utilisez MULTI-CONTROL pour choisir FUNCTION. Channel mode apparaît - Pioneer DEH-P800PRS | Owner's Manual - Page 138
Section 10 Syntoniseur Radio Satellite SIRIUS Changer le mode de défilement Vous pouvez choisir restreindre votre recherche aux seuls canaux d'une catégorie particulière. 1 Utilisez MULTI-CONTROL pour choisir FUNCTION. Channel mode apparaît sur l'écran. 2 Appuyez sur MULTI-CONTROL pour choisir le - Pioneer DEH-P800PRS | Owner's Manual - Page 139
la droite pour sélectionner le canal désiré dans la catégorie de canal sélectionnée. Affichage de l'ID de la radio Si vous sélectionnez CH 000, le code ID est affiché. % Poussez MULTI-CONTROL vers la gauche ou vers la droite pour sélectionner CH 000. Remarque Pour sélectionner CH 000, positionnez le - Pioneer DEH-P800PRS | Owner's Manual - Page 140
pour choisir la gamme. Appuyez sur BAND jusqu'à ce que la gamme désirée (TV-1 ou TV-2) soit affichée. 3 Pour effectuer un accord manuel, poussez MULTI-CONTROL vers la gauche ou vers la droite. Les canaux augmentent ou diminuent pas par pas. 4 Pour effectuer un accord automatique, poussez MULTI - Pioneer DEH-P800PRS | Owner's Manual - Page 141
des deux bandes TV. ! Vous pouvez aussi mettre en mémoire des stations affectées aux numéros de présélection P01 à P06 en appuyant de façon prolongée sur Utilisez MULTI-CONTROL et sélectionnez FUNCTION pour afficher BSSM. 2 Appuyez sur MULTI-CONTROL pour mettre BSSM en service. Searching s'affiche - Pioneer DEH-P800PRS | Owner's Manual - Page 142
le remplacement de stations précédemment enregistrées en utilisant les touches P01 à P12. sant MULTI-CONTROL vers le haut ou vers le bas pendant l'affichage du canal. ! Vous pouvez aussi rappeler des stations affectées aux numéros de présélection P01 à P06 en appuyant sur une des touches de pr - Pioneer DEH-P800PRS | Owner's Manual - Page 143
lecture d'un DVD vidéo) ou la plage (pendant la lecture d'un CD Vidéo, d'un CD, ou d'audio compressé) en cours de lecture. 5 Indicateur du temps 2 Pour une avance rapide ou un retour rapide, poussez et maintenez MULTI-CONTROL vers la gauche ou vers la droite. 3 Pour atteindre un chapitre précédent - Pioneer DEH-P800PRS | Owner's Manual - Page 144
memo et saisie du titre du disque peuvent être contrôlées. Répétition de la lecture ! Pendant la lecture PBC des CD Vidéo, cette fonction ne peut pas être utilisée. 1 Utilisez MULTI-CONTROL pour sélectionner Play mode dans le menu des fonctions. Play mode apparaît sur l'écran. 2 Appuyez sur MULTI - Pioneer DEH-P800PRS | Owner's Manual - Page 145
se met en pause. # Appuyez à nouveau sur MULTI-CONTROL pour mettre la pause hors service. Écoute des plages dans un ordre aléatoire ! Vous pouvez utiliser cette fonction pendant la lecture d'un CD et d'audio compressé. 1 Utilisez MULTI-CONTROL pour sélectionner Random mode dans le menu des fonctions - Pioneer DEH-P800PRS | Owner's Manual - Page 146
affichées d'elles-mêmes, choisissez Scan mode une fois encore en utilisant MULTI-CONTROL. Utilisation de la liste ITS et des fonctions de titre du disque ! titre du disque permet d'entrer dans le lecteur de DVD les titres de CD de dix lettres maximum. Pour des détails sur cette opération, reportez- - Pioneer DEH-P800PRS | Owner's Manual - Page 147
Réglages sonores Section 13 Français Modes de fonctionnement Cet appareil possède deux modes de fonctionnement : le mode réseau de séparation à 3 voies (NW) et le mode standard (STD). Vous pouvez passer d'un mode à l'autre comme vous voulez. Initialement, le DSP est réglé sur le mode standard ( - Pioneer DEH-P800PRS | Owner's Manual - Page 148
(BMX) Introduction aux réglages sonores 1 1 Affichage des réglages sonores Il indique l'état des réglages sonores. 1 Appuyez sur MULTI-CONTROL pour afficher le menu (BBE)-BMX (BMX et compression)-A.EQ (égaliseur automatique en service/hors service)-SLA(ajustement du niveau de la source) 148 Fr - Pioneer DEH-P800PRS | Owner's Manual - Page 149
service)-SLA (ajustement du niveau de la source) # Vous pouvez aussi parcourir les fonctions audio dans l'ordre inverse en tournant MULTI-CONTROL dans le sens contraire des aiguilles d'une montre. # Quand la source sélectionnée est le syntoniseur, la télévision ou AUX, vous - Pioneer DEH-P800PRS | Owner's Manual - Page 150
pour sélectionner le canal gauche ou le canal droit quand vous avez sélectionné le mode réglages gauche/droit indépendants. Chaque appui sur MULTI-CONTROL sélectionne le canal gauche ou le canal droit. 4 Réglez ces fonctions selon vos désirs. Utilisation du sélecteur de position Une façon d'assurer - Pioneer DEH-P800PRS | Owner's Manual - Page 151
dans le cas où seulement deux haut-parleurs sont utilisés. 3 Poussez MULTI-CONTROL vers la gauche ou vers la droite pour ajuster l'équilibre des haut-parleurs gauche (personnalisé)- Auto TA (alignement temporel automatique) -TA OFF (hors service) ! Initial est l'alignement temporel réglé en usine. ! - Pioneer DEH-P800PRS | Owner's Manual - Page 152
SubW. R quand la sortie haut-parleur d'extrêmes graves est hors service. 5 Poussez MULTI-CONTROL vers le haut ou vers le bas pour régler la distance entre haut), du niveau, de la phase et d'autres paramètres pour s'adapter aux caractéristiques de chaque unité de haut-parleur. Paramètres réglables La - Pioneer DEH-P800PRS | Owner's Manual - Page 153
é du son entre les haut-parleurs. Points concernant les réglages réseau Réglage de la fréquence de coupure ! Quand le haut-parleur de graves est installé dans le plateau arrière, si vous réglez la fréquence de coupure Low LPF à une valeur élevée, le son des graves est séparé, de - Pioneer DEH-P800PRS | Owner's Manual - Page 154
la droite pour sélectionner la fréquence de coupure (fréquence de croisement) du haut-parleur (filtre) sélectionné. Chaque fois que vous poussez MULTI-CONTROL vers la gauche ou vers la droite, une fréquence de coupure (fréquence de croisement) est sélectionnée dans l'ordre suivant : Low LPF : 25 - Pioneer DEH-P800PRS | Owner's Manual - Page 155
la sortie haut-parleur d'extrêmes graves peut être basculée entre normale et inversée. 1 Utilisez MULTI-CONTROL pour choisir SW 1. SW 1 apparaît sur l'écran. 2 Appuyez sur MULTI-CONTROL pour mettre en service la sortie haut-parleur d'extrêmes graves. ON apparaît sur l'écran. La sortie haut-parleur - Pioneer DEH-P800PRS | Owner's Manual - Page 156
d'extrêmes graves Lorsque la sortie haut-parleur d'extrêmes graves est en service, vous pouvez choisir la fréquence de coupure et régler le niveau de sortie du haut-parleur d'extrêmes graves. 1 Utilisez MULTI-CONTROL pour choisir SW 2. SW 2 apparaît sur l'écran. # Quand la sortie haut-parleur d'extr - Pioneer DEH-P800PRS | Owner's Manual - Page 157
cran. # Quand la sortie haut-parleur d'extrêmes graves est en service, vous pouvez sélectionner SW 3. 2 Poussez MULTI-CONTROL vers le haut ou vers le bas pour choisir la phase de la sortie haut-parleur d'extrêmes graves. Poussez MULTI-CONTROL vers le haut pour choisir la phase normale et NOR appara - Pioneer DEH-P800PRS | Owner's Manual - Page 158
-125-160-200 (Hz) Seules les fréquences supérieures à celles de la plage sélectionnée sont émises par les haut-parleurs arrière. 5 Poussez MULTI-CONTROL vers le haut ou vers le bas pour régler le niveau de sortie des haut-parleurs arrière. Chaque fois que MULTI - Pioneer DEH-P800PRS | Owner's Manual - Page 159
plage ou du CD que vous écoutez. La fonction COMP règle l'équilibre entre les sons les plus forts et les plus faibles aux volumes élevés. 1 Utilisez MULTI-CONTROL pour choisir BMX. BMX apparaît sur l'écran. 2 Appuyez sur MULTI-CONTROL pour mettre la fonction BMX en service. # Appuyez à nouveau sur - Pioneer DEH-P800PRS | Owner's Manual - Page 160
ne pouvez pas mettre cette fonction en service. 2 Appuyez sur MULTI-CONTROL pour mettre l'égalisation automatique en service. Auto EQ ON apparaît sur l'écran. # Appuyez à nouveau sur MULTI-CONTROL pour mettre l'égalisation automatique hors service. Rappel d'une courbe d'égalisation L'égaliseur vous - Pioneer DEH-P800PRS | Owner's Manual - Page 161
chaque source. (Le lecteur de CD intégré et le lecteur de CD à chargeur sont automatiquement placés dans CONTROL pour choisir LOUD. LOUD apparaît sur l'écran. 2 Appuyez sur MULTI-CONTROL pour mettre en service la correction physiologique. # Appuyez à nouveau sur MULTI-CONTROL pour mettre hors service - Pioneer DEH-P800PRS | Owner's Manual - Page 162
. 2 Utilisez MULTI-CONTROL pour choisir SLA. SLA apparaît sur l'écran. 3 Poussez MULTI-CONTROL vers le haut ou de cette fonction. ! Le lecteur de CD intégré et le lecteur de CD à chargeur sont automatiquement réglés sur par le haut-parleur. ! Si le microphone est placé dans une position inadéquate - Pioneer DEH-P800PRS | Owner's Manual - Page 163
réglages TA et EQ auto en utilisant le microphone fourni. L'utilisation d'un autre microphone peut empêcher la mesure, ou conduire à de puissance équipé d'un filtre passe-bas, mettez le filtre passe-bas hors service avant d'effectuer les réglages TA et EQ auto. En outre, la fréquence de - Pioneer DEH-P800PRS | Owner's Manual - Page 164
ACC. # Si la climatisation ou le chauffage de la voiture sont en service, coupez-les. Le bruit du ventilateur de la climatisation ou du chauffage microphone. Si vous le désirez, placez le microphone sur le siège du passager avant pour effectuer le réglage TA et EQ auto. 8 Appuyez sur MULTI-CONTROL - Pioneer DEH-P800PRS | Owner's Manual - Page 165
Pour arrêter les fonctions TA et EQ auto, appuyez à nouveau sur MULTI-CONTROL. # Pour annuler le réglage TA et EQ auto en cours d'exécution, Rangez soigneusement le microphone dans la boîte à gants. Conservez le microphone dans la boîte à gants ou un autre endroit sûr. Si le microphone est exposé à - Pioneer DEH-P800PRS | Owner's Manual - Page 166
glage, reportez-vous aux instructions qui suivent. # Vous pouvez aussi parcourir les fonctions dans l'ordre inverse en tournant MULTI-CONTROL dans le sens Vous pouvez choisir la langue la mieux adaptée à votre langue maternelle. 1 Utilisez MULTI-CONTROL pour choisir Language select. Language select - Pioneer DEH-P800PRS | Owner's Manual - Page 167
ces instructions pour régler l'horloge. 1 Utilisez MULTI-CONTROL pour choisir Clock. Clock apparaît sur l'écran. 2 Poussez MULTI-CONTROL vers des fonctions sont hors service met l'affichage de l'horloge en service et hors service. Mise en service ou hors service du signal sonore d'avertissement - Pioneer DEH-P800PRS | Owner's Manual - Page 168
pour choisir AUX1/AUX2. AUX1/AUX2 apparaît sur l'écran. 2 Appuyez sur MULTI-CONTROL pour mettre en service AUX1/AUX2. ON apparaît sur l'écran. # Appuyez à nouveau sur MULTI-CONTROL pour mettre la fonction AUX hors service. Réglage de la luminosité Vous pouvez ajuster la luminosité de l'écran - Pioneer DEH-P800PRS | Owner's Manual - Page 169
apparaît sur l'écran. 4 Appuyez sur MULTI-CONTROL pour réinitialiser les fonctions audio. Complete apparaît sur l'écran et les fonctions audio sont réinitialisées. # Pour annuler cette fonction en cours d'exécution, appuyez sur BAND. Mise en service ou hors service de la coupure/ atténuation du son - Pioneer DEH-P800PRS | Owner's Manual - Page 170
Internal AMP apparaît sur l'écran. 2 Appuyez sur MULTI-CONTROL pour mettre l'amplificateur interne en service. ON apparaît sur l'écran. # Pour mettre l'amplificateur interne hors service, appuyez à nouveau sur MULTI-CONTROL. Mise en service/hors service de la fonction démonstration des fonctions La - Pioneer DEH-P800PRS | Owner's Manual - Page 171
) Quand la fonction Ever Scroll est en service, les informations textuelles enregistrées sur le CD ou l'iPod défilent en permanence. Mettez la fonction hors service si vous préférez que l'information défile une fois seulement. 1 Utilisez MULTI-CONTROL pour choisir Ever-scroll. Ever-scroll appara - Pioneer DEH-P800PRS | Owner's Manual - Page 172
des fonctions sont hors service met l'affichage de l'horloge en service et hors service. Utilisation de la source AUX Deux appareils auxiliaires (magn séparément) % Utilisez un Interconnecteur IP-BUS-RCA tel que le CD-RB20/CD-RB10 (vendu séparément) pour connecter cet appareil à un équipement - Pioneer DEH-P800PRS | Owner's Manual - Page 173
-vous à la page 168, Mise en service ou hors service de l'entrée auxiliaire. Définition du titre de l'entrée AUX Vous pouvez modifier le titre affiché pour la source AUX1 ou AUX2. 1 Après avoir sélectionné AUX comme source, utilisez MULTI-CONTROL et sélectionnez FUNCTION pour afficher TitleInput - Pioneer DEH-P800PRS | Owner's Manual - Page 174
choisir External comme source. 3 Tournez MULTI-CONTROL pour sélectionner la fonction. Function1 (fonction 1)-Function2 (fonction 2)-Function3 (fonction 3)-Function4 (fonction 4)-Auto/Manual (auto/manuel) Utilisation de base Les fonctions attribuées aux opérations suivantes diffèrent suivant la - Pioneer DEH-P800PRS | Owner's Manual - Page 175
de CD intégré ! Multi-CD - Lecteur de CD à chargeur ! iPod - iPod ! DVD - Lecteur de DVD/Lecteur de DVD à chargeur # Appuyez à nouveau sur PGM pour mettre la pause hors service. % Appuyez sur PGM et maintenez la pression pour mettre la fonction BSM en service lors de la sélection du syntoniseur - Pioneer DEH-P800PRS | Owner's Manual - Page 176
lors de la sélection de la télévision comme source. Maintenez la pression sur PGM jusqu'à ce que la fonction BSSM soit en service. # Pour annuler la mise en mémoire, appuyez à nouveau sur PGM. % Appuyez sur PGM pour choisir le réglage de sélection des canaux désiré quand vous choisissez - Pioneer DEH-P800PRS | Owner's Manual - Page 177
du lecteur de CD intégré Quand vous contactez votre distributeur ou le Service d'entretien agréé par Pioneer le plus proche, réglage du niveau d'entrée de l'amplificateur de puissance connecté aux haut-parleurs. ! Placez le microphone correctement. ERR:Outside Noise Le niveau de ! Arrêtez votre - Pioneer DEH-P800PRS | Owner's Manual - Page 178
élevées. ! Ne posez aucune étiquette à la surface des disques, n'écrivez pas sur un disque, n'appliquez aucun agent chimique sur un disque. Disques CD-R et CD-RW ! Quand vous utilisez des disques CD-R/CDRW, la lecture n'est possible qu'avec des disques qui ont été finalisés. ! La lecture de disques - Pioneer DEH-P800PRS | Owner's Manual - Page 179
détaillées sur les Disques Duaux, veuillez vous reporter aux informations fournies par le fabricant du disque. Fichiers audio appareil peut lire des fichiers audio compressé sur des disques CD-ROM, CD-R et CD-RW. Les enregistrements sur disque compatibles avec le niveau 1 et premier. Fr 179 - Pioneer DEH-P800PRS | Owner's Manual - Page 180
fichiers Romeo, seuls les 64 premiers caractères peuvent être affichés. ! Quand vous jouez des soit la durée de la pause entre les plages sur le CD audio original. Important ! Quand vous donnez un nom à 9 et 10. ! Vous pouvez seulement lire des fichiers WMA aux fréquences 32, 44,1 et 48 kHz. ! La qualit - Pioneer DEH-P800PRS | Owner's Manual - Page 181
é sonore. ! Cet appareil ne supporte pas les formats suivants. - Apple compressé ! Une vue générale d'un CD-ROM contenant des fichiers d'audio compressé est ou MS ADPCM. ! Vous pouvez seulement lire des fichiers WAV aux fréquences 16, 22,05, 24, 32, 44,1 et Premier niveau 2 Deuxième niveau Fr 181 - Pioneer DEH-P800PRS | Owner's Manual - Page 182
Annexe Informations complémentaires 3 Troisième niveau Remarques ! Cet appareil attribue les numéros de dossier. L'utilisateur ne peut pas attribuer les numéros de dossier. ! Il n'est pas possible de vérifier les dossiers qui ne contiennent pas de fichiers d'audio compressé. (Ces dossiers seront - Pioneer DEH-P800PRS | Owner's Manual - Page 183
/200/250 Hz Pente 12/-18/-24/-30/-36 dB/octave Gain 6 dB à -24 dB/Silencieux (par pas de 1 dB) Phase Normale/Inverse Lecteur de CD Système Compact Disc Digital Audio Disques utilisables Disques compacts Rapport signal/bruit 105 dB (1 kHz) (Réseau IHF-A) Nombre de canaux 2 (stéréo) Format de - Pioneer DEH-P800PRS | Owner's Manual - Page 184
Annexe Informations complémentaires Syntoniseur FM Gamme de fréquence 87,9 MHz à 107,9 MHz Sensibilité utile 8 dBf (0,7 µV/75 W, mono, S/B : 30 dB) Rapport signal/bruit 75 dB (Réseau IHF-A) Syntoniseur AM Gamme de fréquence 530 kHz à 1 710 kHz (10 kHz) Sensibilité utile 18 µV (S/B : 20 dB) - Pioneer DEH-P800PRS | Owner's Manual - Page 185
Road, #04-01, Singapore 159936 TEL: 65-6472-7555 PIONEER ELECTRONICS AUSTRALIA PTY. LTD. 178-184 Boundary Road, Braeside, Victoria 3195, Australia TEL: (03) 9586-6300 PIONEER ELECTRONICS OF CANADA, INC. 300 Allstate Parkway, Markham, Ontario L3R 0P2, Canada TEL: 1-877-283-5901 TEL: 905-479-4411
-
 1
1 -
 2
2 -
 3
3 -
 4
4 -
 5
5 -
 6
6 -
 7
7 -
8
-
9
-
10
-
11
-
12
-
13
-
14
-
15
-
16
-
17
-
18
-
19
-
20
-
21
-
22
-
23
-
24
-
25
-
26
-
27
-
28
-
29
-
30
-
31
-
32
-
33
-
34
-
35
-
36
-
37
-
38
-
39
-
40
-
41
-
42
-
43
-
44
-
45
-
46
-
47
-
48
-
49
-
50
-
51
-
52
-
53
-
54
-
55
-
56
-
57
-
58
-
59
-
60
-
61
-
62
-
63
-
64
-
65
-
66
-
67
-
68
-
69
-
70
-
71
-
72
-
73
-
74
-
75
-
76
-
77
-
78
-
79
-
80
-
81
-
82
-
83
-
84
-
85
-
86
-
87
-
88
-
89
-
90
-
91
-
92
-
93
-
94
-
95
-
96
-
97
-
98
-
99
-
100
-
101
-
102
-
103
-
104
-
105
-
106
-
107
-
108
-
109
-
110
-
111
-
112
-
113
-
114
-
115
-
116
-
117
-
118
-
119
-
120
-
121
-
122
-
123
-
124
-
125
-
126
-
127
-
128
-
129
-
130
-
131
-
132
-
133
-
134
-
135
-
136
-
137
-
138
-
139
-
140
-
141
-
142
-
143
-
144
-
145
-
146
-
147
-
148
-
149
-
150
-
151
-
152
-
153
-
154
-
155
-
156
-
157
-
158
-
159
-
160
-
161
-
162
-
163
-
164
-
165
-
166
-
167
-
168
-
169
-
170
-
171
-
172
-
173
-
174
-
175
-
176
-
177
-
178
-
179
-
180
-
181
-
182
-
183
-
184
-
185
 |
 |

Operation Manual
Mode d
’
emploi
CD RECEIVER
AUTORADIO CD
DEH-P800PRS
English
Français