Pioneer F90BT Owner's Manual
Pioneer F90BT - AVIC - Navigation System Manual
 |
UPC - 012562897271
View all Pioneer F90BT manuals
Add to My Manuals
Save this manual to your list of manuals |
Pioneer F90BT manual content summary:
- Pioneer F90BT | Owner's Manual - Page 1
Operation Manual FLASH MEMORY MULTIMEDIA AV NAVIGATION RECEIVER AVIC-F90BT Notice to all users: Be sure to read "Important Information for the user" first! "Important Information for the user" includes the important information that you must understand before using this navigation system. This - Pioneer F90BT | Owner's Manual - Page 2
Thank you for buying this Pioneer product. Please read through these operating instructions so you will know how to operate your model properly. After you have finished reading the instructions, keep this manual in a safe place for future reference. Important The screens shown in the examples may - Pioneer F90BT | Owner's Manual - Page 3
location by scrolling the map 35 After the location is decided (Map Confirmation Screen) What you can do with the "Map Confirmation Screen" 36 Route... service 46 - Checking your product key 46 - Subscribing to the MSN Direct service 47 - Activating the MSN Direct function 47 Browsing gas prices - Pioneer F90BT | Owner's Manual - Page 4
Updating the Bluetooth wireless technology software 64 Playing the audio CD Reading the screen Operating the DVD menu 72 - Frame-by-frame playback 73 4 En - Slow motion playback 73 Using the "Function" menu 73 Playing a DVD-VR Reading the screen 81 DVD-Video, DVD-VR, DivX setup Displaying DVD Setup - Pioneer F90BT | Owner's Manual - Page 5
embedded text information 89 Using the "Function" menu 89 Playing the movie file (USB, SD) Starting procedures 91 Reading the screen 91 Using the touch panel keys (Video) 92 - Searching for a desired scene and starting playback from a specified time 92 Using the "Function" menu 93 Using the iPod - Pioneer F90BT | Owner's Manual - Page 6
unit (EXT1, EXT2) Reading the screen 121 Using the touch panel keys 121 Customizing preferences The options in the "Navi Settings" menu 123 - Basic operations in the "Navi Settings" menu 123 - GPS & Time Settings 123 - Time Settings 124 - 3D Settings 125 - Map Settings 125 - Displayed Info 126 - Pioneer F90BT | Owner's Manual - Page 7
navigation system to the default or factory settings 154 - Setting items to be deleted 155 Appendix Troubleshooting 156 Messages and how to react to them 161 Messages for Audio 170 Playable discs 171 - About DVD-Video and CD 171 - About AVCHD compatibility chart 175 About Bluetooth 179 About the SAT - Pioneer F90BT | Owner's Manual - Page 8
25 describes how to change the settings so as to suit your tastes. The behavior of your navigation system depends the settings for navigation and audio-visual functions. How to read this manual Finding the operation procedure from what you want to do When you have decided what you want to do, you - Pioneer F90BT | Owner's Manual - Page 9
import the original image. A wide variety of playable file formats ! Built-in DVD drive (AVIC-F900BTand AVIC-F90BT) DVD-Video (commercial-release DVDVideo), DVD-R/-RW/-R DL (DVD-Video, DVD-VR, Data), CD (commercial-release audio CD), CD-R/RW (CD-DA, Data) En - Pioneer F90BT | Owner's Manual - Page 10
is available. This system provides easy-to-operate audio functions that allow playback simply by selecting an item from the list. iPod® compatibility This product supports only the following iPod models and iPod software versions. Others may not be work correctly. ! iPod nano first generation; Ver - Pioneer F90BT | Owner's Manual - Page 11
. - This function is available for AVIC-F900BT and AVIC-F90BT. Rear view camera ready You can display what is behind the vehicle if connected to a rear view camera (e.g. NDBC2) (sold separately). Map coverage For more details about the map coverage of this navigation system, refer to the information - Pioneer F90BT | Owner's Manual - Page 12
product fails to operate properly. ! If there appear to be problems with the op- eration of the system. ! When changing the combination of the equipment. ! When adding/removing additional pro- ducts that connect to the navigation system. ! If your vehicle position shown on the map with a significant - Pioneer F90BT | Owner's Manual - Page 13
and hold to display the "Picture Adjustment" screen. = For details concerning operations, refer to Adjusting the screen brightness on page 137. 7 MULTI-CONTROL Rotating; Adjusts the AV (Audio and Video) source volume. Moving upward or downward once; Changes the map scale one step at a time. En 13 - Pioneer F90BT | Owner's Manual - Page 14
or end the phone call. Keep pressing the center of MULTI-CONTROL; Mutes the AV (Audio and Video) source. To cancel the muting, press and hold it again. 8 Bluetooth connection status indicator Lights up when your phone is paired to the navigation system by Bluetooth wireless technology. 9 "AV2" input - Pioneer F90BT | Owner's Manual - Page 15
operation sto- rage device, never remove it from this navigation system while data is being transferred. ! If is usually not possible to recover the data. Pioneer accepts no liability for damages, costs or SD memory card. p Insert the dummy SD card to keep the SD card slot free of dust when the SD - Pioneer F90BT | Owner's Manual - Page 16
interface cable for iPod enables you to connect your iPod to the navigation system. p For connection, USB interface cable for iPod (CD-IU230V) (sold separately) is required. p USB interface cable for iPod is supplied with AVIC-F90BT. 1 Pull out the USB storage device after checking that no data is - Pioneer F90BT | Owner's Manual - Page 17
Chapter 02 Basic operation 3 Touch the language that you want to use for the voice guidance. The navigation system will now restart. password. After unlocking the navigation system, the "Top Menu" appears. If you enter the navigation screen first, the disclaimer screen will appear. Read the - Pioneer F90BT | Owner's Manual - Page 18
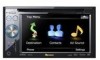
Chapter 02 Basic operation How to use the navigation menu screens The "Top Menu" appears when you boot up the navigation system for the first time. Screen switching overview 2 3 4 1 5 7 6 8 18 En - Pioneer F90BT | Owner's Manual - Page 19
-free phoning to see call histories and change the settings on the Bluetooth wireless technology connection. 6 Settings Menu You can access the screen to customize settings. 7 Map screen Press MAP button to display the navigation map screen. 8 AV operation screen When you play the AV source, this - Pioneer F90BT | Owner's Manual - Page 20
Chapter 02 Basic operation How to use the map Most of the information provided by your navigation system can be seen on the map. You need to become familiar with how the information appears on the map. How to read the map screen This example shows an example of a 2D map screen. 1 2 3 4 5 6 h - Pioneer F90BT | Owner's Manual - Page 21
navigation system, the album artwork that is playing appears. a Shortcut to the AV operation screen The AV Source currently selected is shown. Touching the indicator displays the AV operation screen route currently set is highlighted in bright color on the map. If a waypoint is set on the route, the - Pioneer F90BT | Owner's Manual - Page 22
", "Highways", "Ferries", "U-turns", "Permit Needed", "Toll Roads". For your safety, please review and obey all local traffic rules along the highlighted route. Changing the scale of the map 1 Press MAP button to display the navigation map screen. 2 Move MULTI-CONTROL down or up to zoom in or out - Pioneer F90BT | Owner's Manual - Page 23
current position. Changing the tilt and rotation angle of the map On the 3D map screen, briefly touching the map shows the tilt controls and rotation angle. 1 Press MAP button to display the navigation map screen. 2 Touch to switch the 3D map mode. Controls for tilt and rotation angle 4 Touch the - Pioneer F90BT | Owner's Manual - Page 24
characters that are entered. If there is no text in the box, an informative guide with text appears. 2 Screen title This description will provide you with a refer- ence for the next operation. 3 Keyboard: Touching the keys enables you to enter the characters. 4 Number of possible choices - Pioneer F90BT | Owner's Manual - Page 25
destination is searched. 1 Touch [Destination] on the "Top Menu". 4 Touch one of the items on the list to set the country as search area. The screen returns to the previous - Pioneer F90BT | Owner's Manual - Page 26
code. ! When a city is already set, touching [City Center] allows you to select the representative location of the city and proceed to the "Map Confirmation Screen". 9 Enter the street name and touch the desired one from the list. ! When a street is already set, touching [Street Center] allows you - Pioneer F90BT | Owner's Manual - Page 27
you to set your selected position as your destination and calculate the route up that point. = For details concerning other operations on the "Map Confirmation Screen", refer to What you can do with the "Map Confirmation Screen" on page 36. If only one option is appropriate for your entry, the - Pioneer F90BT | Owner's Manual - Page 28
for quickly telling the category of facilities with the same name. 6 Touch on of the options at the bottom of the "Map Confirmation Screen" to select the next operation. Searching for POIs along the current route p This function is available when the route is set. 1 Touch [Destination] on the "Top - Pioneer F90BT | Owner's Manual - Page 29
the list. ! Selecting an item that has already been stored allows you to overwrite it. Your selection sequence is shown on the top of the screen. 6 Recheck the sequence and touch [Save Criteria] to put it into memory. En 29 - Pioneer F90BT | Owner's Manual - Page 30
then touch [Done] to complete the entry. 4 Touch the desired POI. 5 Touch on of the options at the bottom of the "Map Confirmation Screen" to select the next operation. The storing process has completed and the shortcut is available on "Saved Criteria". Searching for POIs by using the memorized - Pioneer F90BT | Owner's Manual - Page 31
is possible by using the utility programme "AVIC FEEDS" which is available separately, on your PC. ("AVIC FEEDS" will be available on our Touch on of the options at the bottom of the "Map Confirmation Screen" to select the next operation. Touching [Route...] and [Go Here Now] sequentially enables - Pioneer F90BT | Owner's Manual - Page 32
either the latitude key or the longitude key, whichever you want to enter. The "Map Confirmation Screen" appears. 7 Touch on of the options at the bottom of the "Map Confirmation Screen" to select the next operation. The values on the latitude key or longitude key shows the coordinates on the - Pioneer F90BT | Owner's Manual - Page 33
your selected position as your destination and calculate the route up that point. = For details concerning other operations on the "Map Confirmation Screen", refer to What you can do with the "Map Confirmation Screen" on page 36. Deleting an entry in "History" Items in "History" can be deleted. All - Pioneer F90BT | Owner's Manual - Page 34
data cannot be restored, take extra care not to mistakenly delete item. 3 Touch on of the options at the bottom of the "Map Confirmation Screen" to select the next operation. Setting up a route to your home If your home location is stored, the route home can be calculated by touching a single key - Pioneer F90BT | Owner's Manual - Page 35
for a location by scrolling the map Specifying a location after scrolling the map enables you to set the position as an operable target in the "Map Confirmation Screen". 1 Press MAP button to display the navigation map screen. 2 Touch and drag the screen to scroll the map to the desired position - Pioneer F90BT | Owner's Manual - Page 36
position if a telephone number is available. (Pairing with cellular phone featuring Bluetooth wireless technology is required.) = For more details concerning the operation, refer to Dialing a phone number on the "Map Confirmation Screen" on page 58. Route... Go Here Now Calculates the new route by - Pioneer F90BT | Owner's Manual - Page 37
After the location is decided (Map Confirmation Screen) Chapter 04 After the location is decided (Map Confirmation Screen) = For more details concerning the operation, refer to Replacing the location as the new final destination on this page. Starting Point Sets the location as a starting point. - Pioneer F90BT | Owner's Manual - Page 38
enables you to view detailed information about the location by using the "Map Confirmation Screen". 1 Press MAP button to display the navigation map screen. 2 Touch and drag the screen to scroll the map to the desired position. 2 1 The address and coordinates 2 Information about a nearby POI - Pioneer F90BT | Owner's Manual - Page 39
map and displaying the "Map Confirmation Screen". 2 Touch [Save as...] on the "Map Confirmation Screen". 3 Touch [Add Pin]. The pin-shaped icon is placed on the map and the screen returns to the map screen more details concerning the operation, refer to Editing your customized POI on page 132. En 39 - Pioneer F90BT | Owner's Manual - Page 40
more details concerning the operation, refer to Selecting a location stored in "Favorites" on page 33. p "Favorites" can store up to 30 locations. 1 Search for a location or position the cursor on the desired area by scrolling the map and displaying the "Map Confirmation Screen". 2 Touch [Save as - Pioneer F90BT | Owner's Manual - Page 41
only when the route is set and your vehicle position is on the route. p You can also display the "Route Information" screen by touching "Multi-Info window" on the map screen. = For details, refer to Multi-Info window on page 21. 1 Touch [Destination] on the "Top Menu", and then touch [Route Function - Pioneer F90BT | Owner's Manual - Page 42
shows the screen for the next waypoint. Playing simulated travel at high speed This function allows you to play the simulated navigation function at Information" screen appears. 3 Touch [Fit to Screen]. A 2D map screen will appear with the current overall route fitted onto the screen. Checking - Pioneer F90BT | Owner's Manual - Page 43
information is shown. ! Instructions All turning points (where voice guidance is given) are shown. ! Road List Displays the turning points with the most simplified condition (the duplicate route names are merged into one.). p When a long distance route is calculated, your navigation system may not - Pioneer F90BT | Owner's Manual - Page 44
to the descriptions from page 25 to page 35. 2 Touch [Route...] on the "Map Confirmation Screen". 3 Touch [Add Via]. When no waypoint is set, route calculation starts immediately. = For more details concerning the operation, refer to Sorting waypoints on this page. p When you set waypoints in the - Pioneer F90BT | Owner's Manual - Page 45
[Save Route]. 3 Enter the desired name and then touch [Done] to complete the entry. Chapter 06 Editing waypoints and the destination The previous screen appears. Deleting the entry in "Saved Routes" 1 Touch [Destination] on the "Top Menu", and then touch [Saved Routes]. 2 Touch [Delete] on the - Pioneer F90BT | Owner's Manual - Page 46
service, you can check and browse various information on your navigation system, such as gas prices, movie times, weather conditions and traffic information. The information will be updated periodically. - This function is available for AVIC-F900BT and AVIC-F90BT. Notice about MSN Direct™ Pioneer - Pioneer F90BT | Owner's Manual - Page 47
performed this function previously around the current area. ! After the navigation system has been turned off for a few days. 1 Touch [Destination] on the "Top Menu", and then touch [MSN Direct]. The "MSN Direct" screen appears. 2 Touch [Gas Prices]. 3 Touch the desired tab to change the sort order - Pioneer F90BT | Owner's Manual - Page 48
2 Gas prices The information in ( ) shows how current the information is. 3 Distance from the current position 5 Touch on of the options at the bottom of the "Map Confirmation Screen" to select the next operation. = For details concerning other operations on the "Map Confirmation Screen", refer to - Pioneer F90BT | Owner's Manual - Page 49
on of the options at the bottom of the "Map Confirmation Screen" to select the next operation. = For details concerning other operations on the "Map Confirmation Screen", refer to What you can do with the "Map Confirmation Screen" on page 36. Available options; ! [Distance] (default): Sorts the - Pioneer F90BT | Owner's Manual - Page 50
. When the navigation system receives updated traffic information, it will overlay the traffic information on your map and also display weather information is displayed. Viewing the traffic list Traffic Information is displayed on a screen in the form of a list. This allows you to check how many - Pioneer F90BT | Owner's Manual - Page 51
Menu", and then touch [MSN Direct]. 2 Touch [Traffic] and then touch [Settings]. The "Traffic Settings" screen appears. How to read traffic information on the map The traffic event information displayed on the map is as follows. p Further zooming out hides the lines and icons of traffic information - Pioneer F90BT | Owner's Manual - Page 52
to the navigation system. This section describes how to set up a Bluetooth connection and how to operate a cellular phone featuring Bluetooth technology on the navigation system. Displaying The default device name displayed on the cellular phone is "Pioneer Navi". The PIN code is "1111". 52 En - Pioneer F90BT | Owner's Manual - Page 53
the navigation system and displays them in a list, and registers them for connection. 1 Activate the Bluetooth wireless technology on your cellular phone. For some cellular phones, no specific action is necessary to activate Bluetooth wireless technology. For details, refer to the instruction manual - Pioneer F90BT | Owner's Manual - Page 54
refer to the instruction manual of your cellular phone. 2 Touch [Phone Settings] on the "Phone Menu". = For details, refer to Displaying the Phone Menu on page 52. 3 Touch [Add Device], and then [Pair from the mobile phone]. The navigation system waits for a Bluetooth wireless technology connection - Pioneer F90BT | Owner's Manual - Page 55
to activate Bluetooth wireless technology. For details, refer to the instruction manual of your a connection complete message appears, the screen returns to the "Phone Settings" menu longer need to use a registered phone with the navigation system, you can delete it from the registration assignment - Pioneer F90BT | Owner's Manual - Page 56
sound once. If [Auto Answer Preference] is set to [Off], answer the call manually. Answering is available if any screen is displayed, such as the map screen or the setting screen. p You can set this navigation system to auto- matically answer incoming calls. = For details, refer to Answering a call - Pioneer F90BT | Owner's Manual - Page 57
details, refer to Displaying the Phone Menu on page 52. The direct dial screen appears. 2 Touch the number keys to enter the phone number. The phone . Continuing to press this deletes all of the numbers. : Return to the previous screen. 3 Touch to make a call. p To cancel the call after the system - Pioneer F90BT | Owner's Manual - Page 58
" You can make a call to the searched location or the location that you are selecting on the map screen if the telephone number exists. 1 To display the "Map Confirmation Screen", search for a locations or moves the cursor and touch . 2 Touch to make a call. To cancel the call after the system - Pioneer F90BT | Owner's Manual - Page 59
-411 phone service. For details about GOOG-411 service and availability, contact Google. Announcing incoming short mails While the cellular phone and the navigation system are is registered for one person, such as work place and home, each number is counted separately. p Each entry can hold up - Pioneer F90BT | Owner's Manual - Page 60
this navigation system via Bluetooth technology, this navigation system screen is displayed, and operate your cellular phone to transfer the phone book entries. p The transferred data can not be edited on the navigation touching [OK]. If your cellular phone supports one-by-one transfer only, send - Pioneer F90BT | Owner's Manual - Page 61
concerning operations, refer to Answering an incoming call on page 56. Stopping Bluetooth wave on [Bluetooth On/Off]. Touching [Bluetooth On/Off] switching between [On] and [Off]. Answering a call automatically The navigation system Respond manually [Immediately]: Answers immediately En 61 - Pioneer F90BT | Owner's Manual - Page 62
function is on, the navigation system automatically rejects all incoming and noise reduction When you are operating hands-free phoning in the vehicle Some cellular phones do not support automatic connection. Editing the on your cellular phone. (Default is [Pioneer Navi].) 1 Touch [Phone Settings] on - Pioneer F90BT | Owner's Manual - Page 63
. Registration and connection ! Cellular phone operations vary depending on the type of cellular phone. Refer to the instruction manual that came with your cellular phone for detailed instructions. ! Depending on the mobile phone, transferring phone book may not work even though your phone can be - Pioneer F90BT | Owner's Manual - Page 64
. Updating the Bluetooth wireless technology software Downloading the files of updating will be available in the future. You will be able to download the latest update from appropriate website by using your PC. p Before you download the files and install the update, read through the instructions on - Pioneer F90BT | Owner's Manual - Page 65
the navigation system. This section describes these operations. 1 Insert the disc you want to play into disc-loading slot. Playback starts from the first track of the CD. 2 Touch [DISC] on the "AV Source" menu to display the "CD" screen. = For details concerning operations, refer to Screen switching - Pioneer F90BT | Owner's Manual - Page 66
audio CD Selecting a track from the list The list lets you see the list of track titles, file names or folder names on a disc and select one of them to play. 1 Touch [List]. 2 To return to the previous screen the "CD" screen. = For details concerning operations, refer to Screen switching overview on - Pioneer F90BT | Owner's Manual - Page 67
audio files using the built-in drive of the navigation system. This section describes these operations. p AVIC-F900BT and AVIC-F90BT screen. = For details concerning operations, refer to Screen switching overview on page 18. 3 Use this ROM screen 1 Switching the playing part When playing a disc - Pioneer F90BT | Owner's Manual - Page 68
a compressed audio file. 5 or forward Keep touching [o] the equivalent operations. 6 part ("CD" or "ROM") are played randomly. p [Shuffle All] is not available for AVICF700BT and AVIC-F7010BT. p To cancel the random play, switch [Random] to [Off] on the "Function" menu. 8 Displaying the map screen - Pioneer F90BT | Owner's Manual - Page 69
= For details concerning operations, refer to Screen switching overview on page 18. 2 Touch [Func]. 1 2 3 1 Repeating play Each touch of [Repeat] changes the settings as follows: ! Folder - Repeats the current folder ! Disc - Repeats all compressed audio files ! Track - Repeats just the current - Pioneer F90BT | Owner's Manual - Page 70
Chapter 11 Playing a DVD-Video You can play a DVD-Video using the built-in drive of the navigation system. This section describes operations for playing a DVD-Video. p AVIC-F700BT and AVIC-F7010BT cannot play DVDs. Using the touch panel keys Playback screen (page1) 12 Reading the screen 12 3 45 - Pioneer F90BT | Owner's Manual - Page 71
operations. 5 Playback and Pause Touching [f] switches between "playback" and "pause". 6 Switch the display Touching [Disp] changes the indication on the information plate as follows: Disc information display - Repeat range and L/R select display 7 Displaying the map screen 8 Display the DVD - Pioneer F90BT | Owner's Manual - Page 72
DVD-Video a disc, keep touching [B.Mark] Operating the DVD menu You can operate the DVD menu by touching the menu item on the screen directly. p Depending on the contents of DVD discs, this function may not work properly. In this case, use touch panel keys to operate the DVD menu. 1 Touch the screen - Pioneer F90BT | Owner's Manual - Page 73
Playing a DVD-Video Chapter 11 Playing a DVD-Video 2 Touch [TOP M.] or [Menu] to display touch panel keys to operate the DVD menu. 3 Touch the desired menu item. Using DVD menu by touch panel keys If items on the DVD menu appears at the bottom of the screen, the touch panel keys may overlay them. - Pioneer F90BT | Owner's Manual - Page 74
Chapter 11 Playing a DVD-Video p If you perform chapter (title) search, fast forward/rewind or slow motion playback, the repeat play range changes to [Disc]. 2 Selecting audio output When playing DVDs recorded with LPCM audio, you can switch the audio output. Touch [L/R Select] repeatedly until the - Pioneer F90BT | Owner's Manual - Page 75
Playing a DVD-VR Chapter 12 Playing a DVD-VR You can play a DVD-VR (DVD Video Recording Format) using the built-in drive of the navigation system. This section describes operations for DVD-VR. p AVIC-F700BT and AVIC-F7010BT cannot play DVD-VR. Reading the screen 12 3 4 5 6 7 8 9 Using the touch - Pioneer F90BT | Owner's Manual - Page 76
you to perform the equivalent operations. 6 Playback and Pause Touching [f] switches between "playback" and "pause". 7 Switch the display Touching [Disp] changes the information as follows: Disc information display - Repeat range display 8 Displaying the map screen 9 Display the title list Displays - Pioneer F90BT | Owner's Manual - Page 77
specified interval on the video playback. This is useful to skip commercials on your recorded DVD-VR disc. % To the list. 3 To return to the previous screen, touch [List]. Frame-by-frame playback This This lets you slow down playback speed. 1 Keep touching [r] until is displayed during playback. The - Pioneer F90BT | Owner's Manual - Page 78
[DISC] on the "AV Source" menu to display the "DVD-VR" screen. = For details concerning operations, refer to Screen switching overview on page 18. 2 Touch the screen to display the touch panel keys. 3 Touch [Func]. Function menu 3 DVD setup adjustments = For details, refer to Configure the DVDVideo - Pioneer F90BT | Owner's Manual - Page 79
the built-in drive of the navigation system. This section describes that operations. p AVIC-F700BT and AVIC-F7010BT cannot play DivX files. Using the touch panel keys Playback screen (page1) 12 Reading the screen 12 3 45 6 7 8 9 3 4 5 6 7 89ab Playback screen (page2) 12 1 Source icon Shows - Pioneer F90BT | Owner's Manual - Page 80
the indication on the information plate as follows: Disc information display - Current folder display - File name display 7 Displaying the map screen 8 Switching the playing part When playing a disc containing a mixture of various media file types such, you can switch between media files types to - Pioneer F90BT | Owner's Manual - Page 81
menu to display the "DivX" screen. = For details concerning operations, refer to Screen switching overview on page 18. 2 Touch the screen to display the touch panel keys. changes to [Disc]. 2 DVD setup adjustments = For details, refer to Configure the DVDVideo/DVD-VR/DivX player. on the next page. En - Pioneer F90BT | Owner's Manual - Page 82
Chapter 14 DVD-Video, DVD-VR, DivX setup Configure the DVD-Video/DVD-VR/DivX player. Displaying DVD Setup menu 1 Play the disc that contains DVD-Video, DVD-VR or DivX. 2 Touch [DISC] on the "AV Source" menu to display the normal playback screen. = For details concerning operations, refer to Screen - Pioneer F90BT | Owner's Manual - Page 83
black bands at the top and bottom of the screen ! Panscan - The picture is cut short at the right and left of the screen to the disc's instructions. Setting the parental lock Some DVD-Video discs let you use operate. 1 Touch [DVD Setup] on the "Function" menu. = For details, refer to Displaying DVD - Pioneer F90BT | Owner's Manual - Page 84
[Clear] 10 times on the number input screen. The registered code number is canceled, letting you register a new one. cally and start playback from the first chapter of the first title. p This function is available for DVD-Video. p Some DVDs may not operate properly. If this function is not fully - Pioneer F90BT | Owner's Manual - Page 85
the characters are displayed on the next line. p Up to 126 characters can be displayed on one screen. If more than 126 characters are set, the excess characters will not be displayed. p The DivX p Up to three lines can be displayed at once. DVD-Video, DVD-VR, DivX setup Chapter 14 En 85 - Pioneer F90BT | Owner's Manual - Page 86
Chapter 14 DVD-Video, DVD-VR, DivX setup Language code chart for DVDs Language (code), input code Japanese (ja), 1001 English (en), 0514 French (fr), 0618 Spanish (es), 0519 German (de), 0405 Italian (it), 0920 Chinese (zh), 2608 - Pioneer F90BT | Owner's Manual - Page 87
Notice regarding Volume of Navigation Voice Guidance when Playing Audio Files from USB or the "AV Source" menu. = For details concerning operations, refer to Screen switching overview on page 18. p Playback is about the USB Class, refer to the manual supplied with USB storage device. 1 Source - Pioneer F90BT | Owner's Manual - Page 88
operation screen Touching the key switches between the screen to operate music files and the screen to operate movie files. This touch panel key is available only when there are both audio and video file. Fast rewind or forward Keep touching [o] or [p] to perform fast rewind or forward. p There is no - Pioneer F90BT | Owner's Manual - Page 89
- pressed audio file are not compatible with this navigation system, those characters may turn into garbled characters. Using the "Function" menu 1 Touch [USB] or [SD] on the "AV Source" menu to display the "USB" or "SD" screen. = For details concerning operations, refer to Screen switching overview - Pioneer F90BT | Owner's Manual - Page 90
Chapter 15 Playing the music file (USB, SD) Random play lets you playback tracks in random order within the current repeat range. Touching [Random] switches between "On" and "Off". p If you turn [Random] to "On" while the repeat play range is set to "Track", the repeat play range changes to "Folder" - Pioneer F90BT | Owner's Manual - Page 91
video files stored in the external storage device (USB, SD). p In the following description, the SD mem- ory card, USB memory device and USB portable audio Navigation Voice Guidance when Playing Audio folder 002.) Reading the screen 12 3 45 6 Class, refer to the manual supplied with USB storage - Pioneer F90BT | Owner's Manual - Page 92
Function" menu on the next page. 3 Switch the operation screen Touching the key switches between the screen to operate music files and the screen to operate movie files. This touch panel key is available only when there are both audio and video file in the external storage device (USB, SD). 4 Select - Pioneer F90BT | Owner's Manual - Page 93
"Function" menu 1 Touch [USB] or [SD] on the "AV Source" menu to display the "USB" or "SD" screen. = For details concerning operations, refer to Screen switching overview on page 18. 2 Touch the screen to display the touch panel keys. 3 Touch [Func]. p If the touch panel keys are not shown, touching - Pioneer F90BT | Owner's Manual - Page 94
navigation system. p For connection, USB interface cable for iPod (CD-IU230V) (sold separately) is required. p USB interface cable for iPod is supplied with AVIC-F90BT concerning operations, refer to Screen switching overview on page 18. Reading the screen Music 1 23 4 5 6 7 8 9 Video 1 - Pioneer F90BT | Owner's Manual - Page 95
the key switches between the screen to operate music files and the screen to operate movie files. After touching the key, the top category menu appears to let you select the item for playback. p This touch panel key is available only when there are both audio and video file in your iPod. 6 Display - Pioneer F90BT | Owner's Manual - Page 96
if you touch [All] after touching [Artists], you can proceed to next screen with selecting all artists in the list. p After you select Artists, Albums play. Starting the video playback This navigation system can play video if an iPod with video capabilities is connected. 1 Touch [Video]. 2 Touch one - Pioneer F90BT | Owner's Manual - Page 97
Keep touching [o] or [p] to perform fast rewind or forward. p Moving MULTI-CONTROL left or right enables you to perform the equivalent operations. 6 Playback and Pause Touching [f] switches between playback and pause. 7 Displaying the map screen 8 Display the top category menu for video Touching - Pioneer F90BT | Owner's Manual - Page 98
. p After you select the video using this function, touching [Menu] displays the list previously selected. Using the "Function" menu 1 Touch [iPod] on the "AV Source" menu to display the control screen for "iPod". = For details concerning operations, refer to Screen switching overview on page 18 - Pioneer F90BT | Owner's Manual - Page 99
as follows: ! On - Outputs the wide-screen video from iPod ! Off - Outputs the normal-sized video from iPod p Display size is changed after you change "Widescreen" setting and select the video to play. p This setting is available only during the video operation. Using the iPod® (iPod) Chapter 17 - Pioneer F90BT | Owner's Manual - Page 100
18 Using the radio (FM) You can listen to the radio by using the navigation system. This section describes operations for radio (FM). % Touch [FM] on the "AV Source" menu to display the "FM" screen. = For details concerning operations, refer to Screen switching overview on page 18. Reading the - Pioneer F90BT | Owner's Manual - Page 101
the "AV Source" menu to display the "FM" screen. = For details concerning operations, refer to Screen switching overview on page 18. 2 Touch [Func]. keys 1 When you find a frequency that you want to store in memory, keep touching a preset tuning key [P1] to [P6] until the preset number (e.g., - Pioneer F90BT | Owner's Manual - Page 102
Chapter 18 Using the radio (FM) 2 Touch [Start] to start "BSM". BSM begins to flash. While BSM is flashing, the six strongest broadcast frequencies will be stored under the preset tuning keys [P1] to [P6] in order of their signal strength. When this is complete, BSM stops flashing. p To cancel the - Pioneer F90BT | Owner's Manual - Page 103
navigation system. This section describes operations for HD Radio™. p For details concerning operation, refer to the HD Radio tuner's operation manual tuning by touching either [c] or [d] briefly. p If you keep touching [c] or [d], you can skip broadcasting frequencies. Seek tuning map screen En 103 - Pioneer F90BT | Owner's Manual - Page 104
. = For details concerning operations, refer to Screen switching overview on page 18. 2 Touch [Func]. Preset tuning keys 1 When you find a frequency that you want to store in memory, keep touching a preset tuning key [P1] to [P6] until the preset number (e.g., P.ch 1) stops flashing. The selected - Pioneer F90BT | Owner's Manual - Page 105
Using the HD Radio (Digital Radio) Chapter 19 Using the HD Radio (Digital Radio) 2 Switching the seek mode = For details, refer to this page. 3 Tuning in strong signals = For details, refer to this page. 4 Switching the reception mode = For details, refer to this page. Storing the strongest - Pioneer F90BT | Owner's Manual - Page 106
presets. 4 Perform manual tuning To perform manual tuning, touch keep touching [c] or [d], you can skip broadcasting frequencies. Seek tuning will start as soon as you release the keys. p Moving MULTI-CONTROL left or right enables you to perform the equivalent operations. 5 Displaying the map screen - Pioneer F90BT | Owner's Manual - Page 107
keys 1 When you find a frequency that you want to store in memory, keep touching a preset tuning key [P1] to [P6] until the preset number (e.g., the "AV Source" menu to display the "AM" screen. = For details concerning operations, refer to Screen switching overview on page 18. 1 2 1 Storing the - Pioneer F90BT | Owner's Manual - Page 108
Chapter 20 Using the radio (AM) 2 Touch [cPrev] or [Nextd] to set the sensitivity. There are two levels of sensitivity for AM. Level: 1 - 2 p The level "2" setting allows reception of only the strongest stations, while lower settings let you receive weaker stations. 108 En - Pioneer F90BT | Owner's Manual - Page 109
XM tuner's operation manuals. This section provides information on XM operations with the navigation system which differs from that described in the XM tuner's operation manual. Following XM satellite digital tuner units cannot be connected: GEX-P900XM, GEX-P910XM Reading the screen ALL CH MODE - Pioneer F90BT | Owner's Manual - Page 110
you keep touching [c] or [d] you can skip the broadcasting channels. 6 Select an XM band Touch [Band] repeatedly until the desired XM band is displayed: XM 1, XM 2 or XM 3. This is useful for switching the preset item. 7 Displaying the map screen 8 Preset key for receiving the traffic audio service - Pioneer F90BT | Owner's Manual - Page 111
Preset] to display the preset list. 3 Keep touching a preset tuning key [P1] to Each touch of [List] changes the screen as follows: Detail information display or . p When the list switching operation is started from the detailed information A track itself is NOT downloaded. ONLY the song title and - Pioneer F90BT | Owner's Manual - Page 112
p Notification may not be provided depend- ing on the status of the Navigation System. p If there is even a slight difference between the memorized title "AV Source" menu to display the "XM" screen. = For details concerning operations, refer to Screen switching overview on page 18. 2 Touch [Func]. - Pioneer F90BT | Owner's Manual - Page 113
Using the XM tuner Setting the memorized songs Selecting the songs to alert The list of song titles memorized for the MyMix Function (MyMix list) is displayed. You can change the notification setting when the song is broadcast again. You can enable or disable notification for each song. 1 Touch [ - Pioneer F90BT | Owner's Manual - Page 114
tuner You can use the navigation system to control a Pioneer Sirius satellite digital tuner, which is sold separately. For details concerning operation, refer to the SIRIUS tuner's operation manuals. This section provides information on SIRIUS operations with navigation system which differs from - Pioneer F90BT | Owner's Manual - Page 115
Perform manual tuning The channels move up or down one at a time. p If you keep touching [c] . 8 Displaying the map screen 9 Preset key for receiving the traffic audio service = For details, operate this function. Category Mode: You can select a channel within a selected category that you operate - Pioneer F90BT | Owner's Manual - Page 116
. 2 Touch [Preset] to display the preset list. 3 Keep touching a preset tuning key [P1] to [P6]. The song. p The track itself is NOT downloaded; only the song title and the artist name be provided depend- ing on the situation of the Navigation System. = For details, refer to Selecting the songs - Pioneer F90BT | Owner's Manual - Page 117
will be memorized. p Even if you use this with the XM satellite radio tuner, only one station can be memorized. The station memorized afterward the "AV Source" menu to display the "SIRIUS" screen. = For details concerning operations, refer to Screen switching overview on page 18. 2 Touch [Func]. 1 - Pioneer F90BT | Owner's Manual - Page 118
is displayed. A message will appear asking you to confirm the deletion. 4 Touch [Yes]. Using the Game Alert function Selecting teams for Game Alert This navigation system can alert you when games involving your favorite sports teams are about to start. To use this function you need to store the - Pioneer F90BT | Owner's Manual - Page 119
the game score information which is registered. p The game score will be updated automatically. p Touch [Tune To] to switch to the channel that broadcasts p Alerts may not be provided depending on the status of the navigation system. Displaying Game Information An alert will be displayed when a - Pioneer F90BT | Owner's Manual - Page 120
video image" output by AV1 Input or AV2 Input to the screen of the navigation system. For details of the connection method, refer to "Installation Manual". CAUTION For safety reasons, video screen to display the touch panel keys again. 3 Displaying the map screen Using the AV2 You can display "video - Pioneer F90BT | Owner's Manual - Page 121
unit 2. For details of the connection method, refer to "Installation Manual". For details concerning operation, refer to the external unit's operation manual. This section provides information on external unit operations with the navigation system that differ from those described in the external - Pioneer F90BT | Owner's Manual - Page 122
cases, some functions may not be used until you touch and hold the key.) 7 Operate the external unit by using F1 - F4 The external unit can be operated by transmitting the operating commands set to F1 - F4. p The operating commands set to F1 - F4 vary depending on the external unit. p Some functions - Pioneer F90BT | Owner's Manual - Page 123
volume setting for the navigation guidance and beep is described here, along with an operational example. 1 Press change the value. 2 Detailed setup key Displays the screen for setting the preferences in detail. 3 On-off and from how many satellites the signal is being received. % Touch [GPS & - Pioneer F90BT | Owner's Manual - Page 124
whether positioning is works normally. If the lamp lights up in another color, there is a problem related with GPS reception. In such case, check whether the connection and installation are correct. Time Settings The "Time Settings" screen provides you to set the time manually. 1 Touch [GPS & Time - Pioneer F90BT | Owner's Manual - Page 125
can be customized. 1 Touch [Visual] on the "Navi Settings" menu. The "Visual Settings" screen appears. 2 Touch [Map Settings]. The "Map Settings" screen appears. Available options; ! [Map color] Enables you to define the map color for daytime and nighttime use. Touch this key to show the next - Pioneer F90BT | Owner's Manual - Page 126
is described here along with an operational example. 1 Touch [Visual] on the "Navi Settings" menu. The "Visual Settings" screen appears. 2 Touch [Displayed Info]. The "Displayed Info" screen appears. 4 Touch your desired option. Smart Zoom Enables the navigation system to zoom in automatically when - Pioneer F90BT | Owner's Manual - Page 127
enables you to set how soon "Smart Zoom" interval will be reactivated after completion of the operations described previously. ! "Zoom In After Find" Shows the "Map Confirmation Screen" with the preset map scale after you have searched for a position using one of the methods on the "Destination Menu - Pioneer F90BT | Owner's Manual - Page 128
for entry. [Off]: Calculates the route taking into account the roads and areas where permission is needed for entry. Warnings The settings related to warning operations can be customized. % Touch [Warnings] on the "Navi Settings" menu. The "Warning settings - Pioneer F90BT | Owner's Manual - Page 129
. CAUTION The speed limit is based on the map database. The speed limit in the database may Navi Settings" menu. The "Regional Settings" screen appears. ! "Distance Units" Controls the unit Yes]. The navigation system will now restart. Set Home = For more details concerning the operation, refer to - Pioneer F90BT | Owner's Manual - Page 130
instructions and beep. Touching allows you to enter the detailed setting screen only when [On] has been selected. "Minimum speed:" Enables the navigation the value set here. Important Notice regarding Volume of Navigation Voice Guidance when Playing Audio Files from USB or SD If music files stored - Pioneer F90BT | Owner's Manual - Page 131
points of interest) icons on the map. To avoid the screen becoming crowded with POI icons, of them to set the desired visibility. When "Satellite" is selected, the POI icons will appear even though navigation system. Creating new categories If your customized POI does not match any pre-installed - Pioneer F90BT | Owner's Manual - Page 132
p If the custom POI is found on an external storage device (USB, SD), the navigation system will show a POI list which includes them. 1 Touch [Visual] on the "Navi Settings" menu. The "Visual Settings" screen appears. 2 Touch [Manage POI]. 3 Touch the desired category for editing. If there are more - Pioneer F90BT | Owner's Manual - Page 133
available only for POIs that are created on this navigation system. p The POI address is not editable. "track log"). You can review the travel history later and replay Touch the desired key to operate it. Available options; ! [Rename]: Touching this key displays the screen for entering a new name - Pioneer F90BT | Owner's Manual - Page 134
next to "Color on the map:": Touching this key displays the screen for changing the color used for " screen appears. 2 Touch [Manage Track Logs]. 3 Touch [Track Log Options]. 4 Touch the desired key to operate it Available options; ! "Update interval:" Sets how often the system updates the log. ! " - Pioneer F90BT | Owner's Manual - Page 135
, refer to Basics of Voice Oper- ation on page 147. 1 Touch [Language] on the "System Settings" menu. = For details, refer to Displaying the "System Settings" menu on this page. Changing the splash screen You can change the splash screen that appears when the navigation system starts. Copy your - Pioneer F90BT | Owner's Manual - Page 136
Back up camera The navigation system features a function that automatically switches to the full-screen rear camera image installed on your vehicle. When trailer, etc. CAUTION Pioneer recommends the use of a camera which outputs mirror reversed images, otherwise the screen image may appear reversed. - Pioneer F90BT | Owner's Manual - Page 137
Otherwise the screen may become damaged. Stylus (supplied with the navigation system) 5 Touch [OK]. Chapter 25 1 Touch [Screen Calibration] on or decreased. 3 Touch to return to the previous screen. p You can also start the adjustment by keep pressing MAP button. 3 With the stylus, touch and hold - Pioneer F90BT | Owner's Manual - Page 138
values set to "+00". 4 Touch [Memory 1], [Memory 2] or [Memory 3] to store the illumination color. 5 Touch screen. to return to the previous Checking the version information 1 Touch [Service Information] on the "System Settings" menu. = For details, refer to Displaying the "System Settings" menu - Pioneer F90BT | Owner's Manual - Page 139
Customizing preferences Customizing preferences Chapter 25 Setting "Front:" and "Rear:" to "0" is proper if two speaker system being used. When the rear output setting is [Rear SP Sub W], you cannot adjust front/rear speaker balance. = Refer to Setting the rear output on page 145. 3 Touch [c] or - Pioneer F90BT | Owner's Manual - Page 140
touching [EQ] on the AV operation screen of each source. - EXT1 updated. ! The adjusted Custom1 curve is memorized for each of the source selected, but one curve is shared for the following sources. - CD, ROM, DVD-V, DVD-VR, DivX (for AVIC-F900BT and AVIC-F90BT) - CD, ROM (for AVIC-F700BT and AVIC - Pioneer F90BT | Owner's Manual - Page 141
a desired level. Each time you touch [Loudness], the level is selected in the following order: Off - Low - Mid - High Using subwoofer output The navigation system is equipped with a subwoofer output mechanism, which can be turned on or off. p Only when "Sub Woofer" is [On], you can adjust "Phase - Pioneer F90BT | Owner's Manual - Page 142
, DivX (for AVIC-F900BT and AVICF90BT) ! CD, ROM (for AVIC-F700BT and AVICF7010BT) ! XM and SIRIUS ! AV1 and AV2 ! EXT1 and EXT2 p The different source volume level can be set between iPod and USB. p For AVIC-F900BT and AVIC-F90BT, the source volume level can be set to DVD-V and DVD-VR respectively - Pioneer F90BT | Owner's Manual - Page 143
the following items can be adjusted; [MUTE Input/GUIDE] and [Rear SP] Setting video input 1 (AV1) You can switch this setting according to the connected component. p This setting is effective for RCA inputs (AUDIO INPUT and VIDEO INPUT) on backside. Setting video input 2 (AV2) You can switch this - Pioneer F90BT | Owner's Manual - Page 144
viewed in a wide screen mode that does not match its original aspect ratio, it may appear differently. p Remember that use of this system for commercial or public viewing purposes may constitute an infringement on the author's rights protected by the Copyright Law. p The navigation map and the rear - Pioneer F90BT | Owner's Manual - Page 145
Important Notice regarding Volume of Navigation Voice Guidance when Playing Audio Files from USB or operations (such as [Shuffle], [Menu], or [Video]) are not available. p Once the cataloging is completed, you can deactivate [VR Catalog Mode] until you update the content/data on iPod. If you update - Pioneer F90BT | Owner's Manual - Page 146
as "Destination" mode, "Contacts" mode, "Settings" mode, "Phone" mode or "Map" mode. If you wish to use Voice Control for all iPod content, it is your iPod, select "iPod" as the AV source, and keep the iPod screen displayed until cataloging is completed - cataloging of iPod content should - Pioneer F90BT | Owner's Manual - Page 147
any time even when the map screen is displayed or audio is operating. (Some operations are not available.) The basic steps of voice operations are as follows. 1 Switch the screen to map screen or AV operation screen. = For details concerning operations, refer to Screen switching overview on page 18 - Pioneer F90BT | Owner's Manual - Page 148
Chapter 26 Operating Your Navigation System with Voice Starting voice operation % Press MULTI-CONTROL on map screen or the AV operation screen. The voice operation screen appears. If you lose your way... You can listen to the brief operating instruction by touching . To cancel voice operation You - Pioneer F90BT | Owner's Manual - Page 149
Basic Voice Commands The navigation system can also recognize the words in the following list. Basic commands Voice commands and operations Back d Returns the previous screen. Cancel d Cancels the voice operation. Help d Outputs the brief operating instruction by voice. Voice operation for the iPod - Pioneer F90BT | Owner's Manual - Page 150
26 Operating Your Navigation System with Voice Show playlists d Displays the playlist together with sub-screen to continue the voice operation. d source to AM. Change Source to XM Satellite Radio d Switch the AV source to XM. Change Source to SIRIUS Satellite Radio d Switch the AV source to SIRIUS - Pioneer F90BT | Owner's Manual - Page 151
Operating Your Navigation System with Voice Voice commands related to hands-free phoning p You can make a phone call by voice dialing if the cellular phone featuring Bluetooth wireless technology is being paired with the navigation on the screen also enables you to select the desired list. En 151 - Pioneer F90BT | Owner's Manual - Page 152
Chapter 26 Operating Your Navigation System with Voice Tips for Voice Operation For your voice commands to be outside the vehicle can interfere with voice operation. Position the microphone carefully For optimum pick-up, the microphone should be fixed at a suitable distance directly in front - Pioneer F90BT | Owner's Manual - Page 153
three times, the screen is locked and operations with using touch panel keys cannot be performed. 1 Enter the password. 2 Touch [Done]. The message "Antitheft is being unlocked. Do not switch off during the process." appears if you can enter the correct password and the navigation system will be - Pioneer F90BT | Owner's Manual - Page 154
navigation system is disconnected. = For details concerning operations, refer to Resetting the microprocessor on page 11. Method 2: Restore Factory Settings Clears some items in the "Navi Settings" menu. = For details, refer to Restore Factory Set- tings on page 129. Method 3: Reboot the software - Pioneer F90BT | Owner's Manual - Page 155
settings - 1 - - - - (*) This function is available for AVIC-F900BT and AVIC-F90BT. Audio functions Method 1 Method 2 Method 3 AV Settings [Wide Mode], [VR Catalog Mode] Other settings - - - 1 - - AV Sound All settings 1 - - CD, ROM, DVD-V, DVD-VR, DivX, FM, AM, SD, USB All - Pioneer F90BT | Owner's Manual - Page 156
found here, contact your dealer or the nearest authorized Pioneer service facility. Problems with the navigation screen Symptom Cause Action (See) The power doesn't turn on. The Leads and connectors are incor- navigation system doesn't oper- rectly connected. ate. The fuse is blown. Confirm - Pioneer F90BT | Owner's Manual - Page 157
Installation Manual".) Indication of the position of your vehicle is misaligned after a U-turn or reversing. Check whether or not the reverse gear signal input lead (violet) is connected properly. (The navigation system works information is intended for AVIC-F900BT and AVIC-F90BT.) The voice from - Pioneer F90BT | Owner's Manual - Page 158
Problems in the AV screen Symptom Cause Action (See) CD or DVD video configuration. This operation is not possible. (For example, the DVD playing does not feature that angle, audio system, subtitle language, etc.) The picture stops (pauses) and The reading of data is impossible the navigation - Pioneer F90BT | Owner's Manual - Page 159
audio language and subtitle language settings selected in [DVD Setup]. The DVD playing does not feature dialog or subtitles in the language selected in [DVD the navigation system back on. If this does not solve the problem, press RESET button on the navigation system. ! Update the software version - Pioneer F90BT | Owner's Manual - Page 160
If the screen becomes frozen... Park your vehicle in a safe place, and cut off the engine. Turn the ignition key back to "Acc off". Then start the engine again, and turn the power to the navigation system back on. If this does not solve the problem, press RESET button on the navigation system. 160 - Pioneer F90BT | Owner's Manual - Page 161
. In such a case, follow the instructions given on the display. Messages for navigation functions Message When What to do (See screen. Use the appropriate data and store the data properly. (Page 135) Connection failed. The cellular phone's Bluetooth wire- Activate the target phone's Bluetooth - Pioneer F90BT | Owner's Manual - Page 162
the table below to identify the problem, then take the suggested corrective action. If the error persists, contact your dealer or your nearest Pioneer Service Center. The messages in "( )" will appear on the "Rear display". Built-in DVD drive (AVIC-F900BTand AVIC-F90BT) Message Cause Action (See - Pioneer F90BT | Owner's Manual - Page 163
is not caught in something or da- maged. Connected iPod is not supported. Please check instruction manual. The iPod is not compatible with this Use an iPod with a compatible version. navigation system. iPod connection failed. Please Communication failure reconnect. • Disconnect the cable from - Pioneer F90BT | Owner's Manual - Page 164
when the iPod basic screen (Music) is displayed.) (Page 145) Other sources Message System detected improper connection of Parking Brake lead. Please check your configuration for safety. Please see Operation Manual for more information regarding safe operation. UPDATING Cause Parking brake lead - Pioneer F90BT | Owner's Manual - Page 165
and AVIC-F90BT accurately measures your current location by combining the positioning by GPS and by "Dead Reckoning". AVIC-F700BT and AVIC-F7010BT accurately measures your current location by the GPS positioning. Positioning by GPS The Global Positioning System (GPS) uses a network of satellites - Pioneer F90BT | Owner's Manual - Page 166
. Snow buildup can also degrade the signals, so keep the antenna clear. p If a GPS signal have not been received for a long time, your vehicle's actual position and the current position mark on the map may diverge considerably or may not be updated. In such case, once GPS reception is restored - Pioneer F90BT | Owner's Manual - Page 167
traveling on and the reception status of the GPS signal, the actual position of your vehicle may differ from the position displayed on the map screen. ! If you make a shallow turn. ! If you drive in zigzags. ! If the road has connected hairpin bends. Appendix ! If there is a parallel road. ! If - Pioneer F90BT | Owner's Manual - Page 168
starting driving immediately after starting the engine. Route setting information Route search specifications Your navigation system sets a route to your destination by applying certain built-in rules to the map data. This section provides some useful information about how a route is set. 168 En - Pioneer F90BT | Owner's Manual - Page 169
destination decided by the navigation system while taking the turns, and other guide points in rapid In such cases, you are instructed to turn around, so please screen may differ from the actual number of roads. Route highlighting ! Once set, the route is highlighted in bright color on the map - Pioneer F90BT | Owner's Manual - Page 170
traffic Closed/blocked roads Accidents, constructions, etc. Road works Road narrows, lane closures Warnings, other dangers Bad weather our careful design of the product, small scratches that do not affect actual operation may appear on the disc surface as a result of mechanical wear, ambient - Pioneer F90BT | Owner's Manual - Page 171
DVD drive. DVD-Video ! Serious scratches can lead to playback problems on this navigation navigation system. ! Frequent loading and ejecting of a DualDisc may result in scratches to the disc. About Dolby Digital AVIC-F900BT and AVIC-F90BT be output, so select an audio track other than DTS sound. - Pioneer F90BT | Owner's Manual - Page 172
information about recording mode, please contact the manufacturer of media, recorders, or writing software. ! The following logo indicates that this unit is compatible with DVD-RW discs which have been recorded with the Video Recording format (VR mode). CD-R/CD-RW discs ! Unfinalized discs cannot be - Pioneer F90BT | Owner's Manual - Page 173
Notes unique to DivX files ! Only DivX files downloaded from DivX part- ner site are guarantee for proper operation. Unauthorized DivX file may not operate properly. ! DRM rental files cannot be operated until playing back is started. ! The navigation system corresponds to a DivX file display of up - Pioneer F90BT | Owner's Manual - Page 174
correctly if the displayed characters in the subtitle file include control code. ! For materials that use a high transfer rate, the subtitles and video may not be completely synchronized. ! If multiple subtitles are programmed to display within a very short time frame, such as 0.1 seconds, the - Pioneer F90BT | Owner's Manual - Page 175
. FAT16: 512 (including folders) MP3, WMA, AAC, WAV, AVI, MPEG-4 MP3 compatibility Media CD-R/-RW CD-R/-RW AVIC-F700BT, AVIC-F900BT, AVIC-F7010BT AVIC-F90BT DVD-R/-RW/R DL AVIC-F900BT, AVIC-F90BT File extension .mp3 Bit rate 8 kbps to 320 kbps (CBR), VBR Sampling frequency 16 kHz to 48 - Pioneer F90BT | Owner's Manual - Page 176
AVIC-F700BT, AVIC-F900BT, AVIC-F7010BT AVIC-F90BT .wma DVD-R/-RW/R DL AVIC-F900BT, AVIC-F90BT Bit rate 48 kbps to 320 kbps (CBR), VBR 5 kbps to 320 kbps (CBR), VBR Sampling frequency 32 kHz to 48 kHz 8 kHz to 48 kHz Note: ! There is no compatibility with the followings: Windows Media Audio - Pioneer F90BT | Owner's Manual - Page 177
Media CD-R/-RW CD-R/-RW AVIC-F700BT, AVIC-F900BT, AVIC-F7010BT AVIC-F90BT DVD-R/-RW/R DL AVIC-F900BT, AVIC-F90BT File extension .m4a Bit rate 16 kbps to 320 kbps (CBR) Sampling frequency 11 kHz to 44.1 kHz 8 kHz to 44.1 kHz Notes: ! The navigation system plays back AAC files - Pioneer F90BT | Owner's Manual - Page 178
: 480 kbps Frame rate: 24 fps MPEG-4 compatibility Media File extension Compatible video codec Compatible audio codec CD-R/-RW CD-R/-RW AVIC-F700BT, AVIC-F900BT, AVIC-F7010BT AVIC-F90BT DVD-R/-RW/R DL AVIC-F900BT, AVIC-F90BT MPEG-4 files cannot be played on the built-in drive. Recommended - Pioneer F90BT | Owner's Manual - Page 179
Pioneer service station regarding the satellite radio tuner that can be connected to this navigation system. Note: The system will use direct satellite devices. Bluetooth operates in 2.4 GHz frequency range and transmits voice and data at speeds up to 1 megabit per second. Bluetooth was launched - Pioneer F90BT | Owner's Manual - Page 180
CD-R/RW or a DVD-R/RW disc prior to burning, keep in mind that by default they will be played in alphabetical order. Official DivX® Certified product. Plays all versions of DivX® video (including About AAC AAC is short for Advanced Audio Coding and refers to an audio compression technology standard - Pioneer F90BT | Owner's Manual - Page 181
moisture to form inside the navigation unit, resulting in possible damage. ! Small black dots or white dots (bright dots) may appear on the LCD screen. These are due to the characteristics of the LCD screen and do not indicate a problem with the LCD screen. ! The LCD screen will be difficult to see - Pioneer F90BT | Owner's Manual - Page 182
Volume] [Received Calls] [Dialed Numbers] [Missed Calls] [Phone Book Transfer] [Phone Settings] [Connection] [Bluetooth On/Off] [Auto Answer Preference] [Refuse All Calls] [Echo Cancel] [Auto Connect] [Edit Name] [Clear Memory] [Bluetooth Software Update] Page 57 58 59 61 57 57 57 59 55 61 61 62 62 - Pioneer F90BT | Owner's Manual - Page 183
Appendix Settings Menu Navi Settings Appendix Appendix [GPS & Time Settings] [Time Settings] [Visual] [3D Settings] [Map Settings] [Displayed Info] [Smart Zoom] [Overview Mode] [Manage POI] [Manage Track Logs] [Route] [Method:] [U-turn penalty:] [Unpaved Roads] [Highways] [Ferries] [U-turns] [ - Pioneer F90BT | Owner's Manual - Page 184
menu AV Settings menu [Language] [Splash Screen] [Back Camera] [Screen Calibration] [Picture Adjustment] [Illumi Color] [Service Information] [Screen Off] Page 135 135 136 136 137 137 138 138 [AV1 Input] [AV2 Input] [Ant CTRL] [Wide Mode] [MUTE Input/GUIDE] [Rear SP] [VR Catalog Mode] Page - Pioneer F90BT | Owner's Manual - Page 185
Appendix AV Sound menu Shortcut menu Map Confirmation Screen Appendix Appendix [FAD/BAL] ([Balance]) [EQ] [Loudness] [Sub Woofer] [HPF] [SLA] [Bass Booster] Page 139 139 141 141 141 142 142 [Map] [Save as...] [Add Pin] [Add POI] [Add Favorite] [Route...] [Go Here Now] [Add Via] [Continue] [ - Pioneer F90BT | Owner's Manual - Page 186
Appendix Appendix DVD Setup [Language] [Assist Subtitle] [Multi Angle] [TV Aspect] [Parental] [DivX VOD] [Auto Play] [Subtitle File] Page 82 82 83 83 83 84 84 85 186 En - Pioneer F90BT | Owner's Manual - Page 187
-DA This stands for a general music CD (commercial-release audio CD). In this manual, this word is sometime used for a distinction between data CD (includes the compressed audio file) and the general music CD. Chapter Titles of DVD-Video or DVD-VR are in turn divided into chapters which are numbered - Pioneer F90BT | Owner's Manual - Page 188
using software with Audio Layer 3. It is an audio compression standard established by a working audio (Multilingual dialog) Some videos feature dialog recorded in multiple languages or audio recorded in multiple tracks. For example, dialog in up to 8 languages can be recorded on a single DVD-Video - Pioneer F90BT | Owner's Manual - Page 189
to your destination. It is highlighted in bright color on the map. Title DVD-Video or DVD-VR discs have a high data capacity, enabling recording of multiple of audio compression, it is possible to achieve compressionpriority sound quality. Voice guidance The giving of directions by navigation voice - Pioneer F90BT | Owner's Manual - Page 190
mm × 8 mm (6-3/4 in. × 3-3/4 in. × 3/8 in.) Weight: AVIC-F900BT, AVIC-F90BT 2.2 kg (4.9 lbs) AVIC-F700BT, AVIC-F7010BT 2.1 kg (4.6 lbs) NAND flash memory 2 GB Navigation GPS Receiver: System L1, C/Acode GPS SPS (Standard Positioning Service) Reception system .......... 30-channel multi-channel - Pioneer F90BT | Owner's Manual - Page 191
DVD drive (AVIC-F900BT and AVIC-F90BT) System DVD-Video, CD, MP3, WMA, AAC, DivX system Usable discs DVD-Video, AVIC-F700BT and AVIC-F7010BT) System CD, MP3, WMA, AAC system Usable discs CD, MP3, WMA, AAC Signal-to-noise ratio 94 dB (1 kHz) (IHF-A net- work) MP3 decoding format MPEG-1 & 2 Audio - Pioneer F90BT | Owner's Manual - Page 192
ELECTRONICS OF CANADA, INC. 300 Allstate Parkway, Markham, Ontario L3R 0P2, Canada TEL: 1-877-283-5901 TEL: 905-479-4411 PIONEER ELECTRONICS DE MEXICO, S.A. de C.V. Blvd.Manuel Avila Camacho 138 10 piso Col.Lomas de Chapultepec, Mexico, D.F. 11000 TEL:55-9178-4270 44號13 02) 2521-
-
 1
1 -
 2
2 -
 3
3 -
 4
4 -
 5
5 -
 6
6 -
 7
7 -
8
-
9
-
10
-
11
-
12
-
13
-
14
-
15
-
16
-
17
-
18
-
19
-
20
-
21
-
22
-
23
-
24
-
25
-
26
-
27
-
28
-
29
-
30
-
31
-
32
-
33
-
34
-
35
-
36
-
37
-
38
-
39
-
40
-
41
-
42
-
43
-
44
-
45
-
46
-
47
-
48
-
49
-
50
-
51
-
52
-
53
-
54
-
55
-
56
-
57
-
58
-
59
-
60
-
61
-
62
-
63
-
64
-
65
-
66
-
67
-
68
-
69
-
70
-
71
-
72
-
73
-
74
-
75
-
76
-
77
-
78
-
79
-
80
-
81
-
82
-
83
-
84
-
85
-
86
-
87
-
88
-
89
-
90
-
91
-
92
-
93
-
94
-
95
-
96
-
97
-
98
-
99
-
100
-
101
-
102
-
103
-
104
-
105
-
106
-
107
-
108
-
109
-
110
-
111
-
112
-
113
-
114
-
115
-
116
-
117
-
118
-
119
-
120
-
121
-
122
-
123
-
124
-
125
-
126
-
127
-
128
-
129
-
130
-
131
-
132
-
133
-
134
-
135
-
136
-
137
-
138
-
139
-
140
-
141
-
142
-
143
-
144
-
145
-
146
-
147
-
148
-
149
-
150
-
151
-
152
-
153
-
154
-
155
-
156
-
157
-
158
-
159
-
160
-
161
-
162
-
163
-
164
-
165
-
166
-
167
-
168
-
169
-
170
-
171
-
172
-
173
-
174
-
175
-
176
-
177
-
178
-
179
-
180
-
181
-
182
-
183
-
184
-
185
-
186
-
187
-
188
-
189
-
190
-
191
-
192
 |
 |

Operation Manual
FLASH MEMORY MULTIMEDIA AV NAVIGATION
RECEIVER
AVIC-F90BT
Notice to all users:
Be sure to read
“
Important Information for the user
”
first!
“
Important Information for the user
”
includes the
important information that you must understand before
using this navigation system.
This software requires that the navigation system is
properly connected to your vehicle
’
s parking brake and
depending on your vehicle, additional installation may
be required. For more information, please contact your
Authorized Pioneer Electronics retailer or call us at
(800) 421-1404.
English