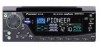
Pioneer P47DH Owner's Manual
Pioneer P47DH - DEH Radio / CD Player Manual
 |
UPC - 012562500607
View all Pioneer P47DH manuals
Add to My Manuals
Save this manual to your list of manuals |
Pioneer P47DH manual content summary:
- Pioneer P47DH | Owner's Manual - Page 1
ENGLISH FRANÇAIS Multi-CD control High power CD player with FM/AM tuner Syntoniseur FM/AM et lecteur de CD, "Puissance élevée", avec contrôleur pour lecteur de CD à chargeur Operation Manual DEH-P47DH Mode d'emploi DEUTSCH FRANÇAIS ITALIANO NEDERLANDS - Pioneer P47DH | Owner's Manual - Page 2
3 Key Finder 4 - Head Unit Before Using This Product 5 About This Product 5 About This Manual 5 Important 5 Precaution 6 After-sales Service for Pioneer Products .......... 6 When using the 50-Disc Type Multi-CD Player 6 Basic Operation 7 To Listen to Music 7 Basic Operation of Built-in - Pioneer P47DH | Owner's Manual - Page 3
Button (PGM-FUNC 40 - Setting the PROGRAM Button - Using the PROGRAM Button Displaying the Time 41 Using the AUX Source 42 - Selecting the AUX Source - AUX Title Input Cellular Telephone Muting 42 CD Player and Care 43 Precaution 43 Built-in CD Player's Error Message 43 Specifications 44 - Pioneer P47DH | Owner's Manual - Page 4
this by setting your equipment at a safe level BEFORE your hearing adapts. To establish a safe level: • Start your volume control at a low setting. • dryer, noisy restaurant 80 Average city traffic, garbage disposals, alarm clock at two feet. THE FOLLOWING NOISES CAN BE DANGEROUS UNDER CONSTANT - Pioneer P47DH | Owner's Manual - Page 5
ENGLISH Key Finder Head Unit SOURCE/OFF button Disc loading slot EQ selector EJECT button VOLUME FUNCTION button CLOCK button PROGRAM button DISPLAY button AUDIO button BAND button 5/∞/2/3 buttons Buttons 1-6 DETACH button ESPAÑOL DEUTSCH FRANÇAIS ITALIANO NEDERLANDS 4 - Pioneer P47DH | Owner's Manual - Page 6
their potential and to maximize your listening enjoyment. We recommend that you familiarize yourself with the functions and their operation by reading through the manual before you begin using this product. It is especially important that you read and observe the "Precaution" on the next page and in - Pioneer P47DH | Owner's Manual - Page 7
7 CANADA Pioneer Electronics of Canada, Inc. CUSTOMER SERVICE DEPARTMENT 300 Allstate Parkway Markham, Ontario L3R 0P2 (905) 479-4411 1-877-283-5901 For warranty information please see the Limited Warranty sheet included with your product. When using the 50-Disc Type Multi-CD Player The available - Pioneer P47DH | Owner's Manual - Page 8
order: Built-in CD player = TV = Tuner = Multi-CD player = External Unit = AUX Note: • External Unit refers to a Pioneer product (such as one . * When no disc is set in this product. * When no magazine is set in the Multi-CD player. * When the AUX (external input) is set to OFF. (Refer to page - Pioneer P47DH | Owner's Manual - Page 9
ENGLISH ESPAÑOL DEUTSCH 3. Raise or lower the volume. Rolling the VOLUME changes the volume level. Note: • Roll clockwise to raise the volume level. • Roll counterclockwise to lower the volume level. 4. Turn the source OFF. Hold for 1 second 8 FRANÇAIS ITALIANO NEDERLANDS - Pioneer P47DH | Owner's Manual - Page 10
Basic Operation Basic Operation of Built-in CD Player Disc Loading Slot The Built-in CD player plays one standard 12 cm or 8 cm (single) CD at a time. Do not use an adapter when playing 8 cm CD. Play Time Indicator Track Number Indicator Track Search and Fast Forward/Reverse • You can select - Pioneer P47DH | Owner's Manual - Page 11
ENGLISH ESPAÑOL DEUTSCH FRANÇAIS Eject Note: • The CD function can be turned ON/OFF with the disc remaining in this product. (Refer to page 7.) • (Elapsed play time) = Disc Title Note: • If you switch displays when disc titles have not been input, "NO TITLE" is displayed. 10 ITALIANO NEDERLANDS - Pioneer P47DH | Owner's Manual - Page 12
and Seek Tuning • You can select the tuning method by changing the length of time you press the 2/3 button. Manual Tuning (step by step) Seek Tuning 0.5 seconds or less 0.5 seconds or more Note: • If you continue pressing the button for longer than 0.5 seconds, you can - Pioneer P47DH | Owner's Manual - Page 13
turned ON or a new disc is selected for playback. "READY" is displayed. • If the Multi-CD player cannot operate properly, an error message such as "ERROR-14" is displayed. Refer to the Multi-CD player owner's manual. • If there are no discs in the Multi-CD player magazine, "NO DISC" is displayed. 12 - Pioneer P47DH | Owner's Manual - Page 14
, perform appropriate operations with the z buttons. When 2 is lit in the display, it indicates that you are in the Function Menu, Detailed Setting Menu or Initial Setting Menu. You can switch between each of these menus and between different modes in the menus using button x on the head unit. When - Pioneer P47DH | Owner's Manual - Page 15
page number indicated in the chart. 7 Tuner Function name (Display) Best Stations Memory (BSM) Local Seek Tuning (LOCAL) Button: Operation 5: ON ∞: OFF 1 5: ON 3 ∞: OFF 2 2 or 3: Select (Sensitivity) Page 17 17 7 Built-in CD Player Function name (Display) Repeat Play (REPEAT) Random Play (RANDOM - Pioneer P47DH | Owner's Manual - Page 16
Basic Operation 7 Multi-CD Player Function name (Display) Repeat Play (REPEAT) Selecting Discs by Disc 22 21 26 Entering the Detailed Setting Menu In the Detailed Setting Menu, you can operate convenient, complex functions for each source. 1. Enter the Detailed Setting Menu. Hold for 2 seconds 2. - Pioneer P47DH | Owner's Manual - Page 17
functions for each source in the Detailed Setting Menu. The chart also shows indications for Memory 1 2 or 3: Select (Function) 2 5: Memory Page 19 40 7 Multi-CD Player Function name (Display) Disc Title Input (TITLE IN) ITS Programming (ITS) Program Function (PGM-FUNC) Button: Operation 1 5 - Pioneer P47DH | Owner's Manual - Page 18
LOC" FM : LOCAL 1 Ô LOCAL 2 Ô LOCAL 3 Ô LOCAL 4 AM : LOCAL 1 Ô LOCAL 2 Note: • The LOCAL 4 setting allows reception of only the strongest stations, while lower settings let you receive progressively weaker stations. Best Stations Memory (BSM) The BSM function stores stations in memory automatically - Pioneer P47DH | Owner's Manual - Page 19
ENGLISH ESPAÑOL DEUTSCH Using the Built-in CD Player Repeat Play (REPEAT) Repeat Play plays the same , Repeat Play is automatically canceled. Random Play (RANDOM) Random Play plays the tracks on a CD in random order for variety. 1. Press the FUNCTION button and select the Random mode (RANDOM) - Pioneer P47DH | Owner's Manual - Page 20
the Pause ON/OFF with the 5/∞ buttons. Disc Title Input (TITLE IN) You can use "TITLE IN" to input up to 48 disc titles for CDs in the Built-in CD player. (Perform the same operation as (described) on page 24 under "Using Multi-CD Players".) Note: • After the title for 48 discs have been entered - Pioneer P47DH | Owner's Manual - Page 21
Display MCD TRK DSC Indicator -RPT DISC Note: • If you select other discs during the repeat play, the repeat play range changes to Multi-CD player Repeat. • If you perform Track Search or Fast Forward/Reverse during One-track Repeat, the repeat play range changes to Disc Repeat. Random Play - Pioneer P47DH | Owner's Manual - Page 22
Scan Play ON with the 5 button. After selecting the desired repeat play range from those referred to in "Repeat Play" on page 20, switch Multi-CD Player Scan Play ON. 3. When you find the desired track (or disc), cancel the Scan Play with the ∞ button. If the Function Menu has been canceled - Pioneer P47DH | Owner's Manual - Page 23
to search for the track you wish to play when a Multi-CD player is installed. You can use ITS to program automatic playback of up to 24 you wish to program. 2. Select the ITS Programming mode (ITS) in the Detailed Setting Menu. (Refer to page 15.) 3. Program the desired track with the 5 button. Note - Pioneer P47DH | Owner's Manual - Page 24
Using Multi-CD Players Erase a Track Program 1. Select the track you wish to erase, during ITS Play. 2. Select the ITS Programming mode (ITS) in the Detailed Setting Menu. (Refer to page 15.) 3. Erase the track program with the ∞ button. ITS is canceled and playback of the next ITS-programmed track - Pioneer P47DH | Owner's Manual - Page 25
the disc title. 2. Select the Disc Title Input mode (TITLE IN) in the Detailed Setting Menu. (Refer to page 15.) Note: • When playing a CD TEXT disc on a CD TEXT compatible Multi-CD player, you cannot switch to this mode. • A CD TEXT disc is a CD featuring recorded text information such as Disc - Pioneer P47DH | Owner's Manual - Page 26
Discs by Disc Title List (TITLE LIST) Follow the procedures below to play a disc for which you have input the title in a MultiCD player or a CD TEXT disc on a CD TEXT compatible Multi-CD player. 1. Press the FUNCTION button and select the Disc Title List mode (TITLE LIST) in the Function Menu - Pioneer P47DH | Owner's Manual - Page 27
desired mode with the 5/∞ buttons. COMP OFF = COMP 1 = COMP 2 = COMP OFF = DBE 1 = DBE 2 Note: • You can use these functions with a Multi-CD player that has them. If the player does not feature the COMP/DBE functions, "NO COMP" is displayed if you try to use them. 26 FRANÇAIS ITALIANO NEDERLANDS - Pioneer P47DH | Owner's Manual - Page 28
can use these functions when playing a CD TEXT disc on a CD TEXT compatible Multi-CD player. Title Display Switching • Select the Track Title = Track Artist Name Note: • If certain text information is not recorded on a CD TEXT disc, "NO ~" (e.g. "NO T-TITLE") is dis- played. Title Scroll This product - Pioneer P47DH | Owner's Manual - Page 29
Fine Adjustment" on page 30.) • You can create different "CUSTOM" curves for different sources. (The Built-in CD player and Multi-CD player are set to the same Equalizer Curve Adjustment setting automatically.) Entering the Audio Menu With this menu, you can adjust the sound quality. Note: • After - Pioneer P47DH | Owner's Manual - Page 30
when 2 speakers are in use. Equalizer Curve Adjustment (EQ-LOW/MID/HIGH) You can adjust the currently selected equalizer curve settings as desired. Adjusted equalizer curve settings are memorized in "CUSTOM". 1. Press the AUDIO button and select the Equalizer mode (EQ-LOW/MID/HIGH) in the Audio - Pioneer P47DH | Owner's Manual - Page 31
the center frequency and the Q factor (curve characteristics) of each currently selected curve band (EQ-LOW/MID/HIGH). Adjusted equalizer curve settings are memorized in "CUSTOM". Level (dB) Center frequency Q=2N Q=2W Frequency (Hz) 1. Press the AUDIO button for 2 seconds to select Equalizer - Pioneer P47DH | Owner's Manual - Page 32
"S/W CTL:EXT", you cannot switch the Subwoofer ON/OFF mode. In this case, this setting is not necessary. (Refer to page 39.) • Select the OFF setting when you do not want the Subwoofer to operate. 1. Press the AUDIO button and select the Subwoofer ON/OFF mode (SUB.W) in the Audio Menu. 2. - Pioneer P47DH | Owner's Manual - Page 33
signal does not pass through this unit's low pass filter (for the Subwoofer), but is output through the RCA output. Note: • When the Subwoofer Controller setting is only "S/W CTL:EXT", you can switch the Non Fading Output ON/OFF mode. (Refer to page 39.) 1. Press the AUDIO button and select the - Pioneer P47DH | Owner's Manual - Page 34
the Non Fading output is ON, you can adjust the level of Non Fading output. 1. Press the AUDIO button and select the Non Fading Output setting mode (NON FAD) in the Audio Menu. 2. Increase or decrease the output level with the 5/∞ buttons. The display shows "0" - "-15". Note: • You can select the - Pioneer P47DH | Owner's Manual - Page 35
control, SLA is not possible in the FM modes. • The Built-in CD player and Multi-CD player are set to the same volume adjustment setting auto- matically. • The AM volume level, which is different from the FM base setting volume level, can also be adjusted similar to sources other than tuner. FRAN - Pioneer P47DH | Owner's Manual - Page 36
Detaching and Replacing the Front Panel Theft Protection The front panel of the head unit is detachable to discourage theft. • Keep the front panel closed while driving. Detaching the front panel 1. Eject the front panel. 2. To remove the front panel, pull its right-hand side toward you. Take care - Pioneer P47DH | Owner's Manual - Page 37
ENGLISH ESPAÑOL DEUTSCH Initial Setting Entering the Initial Setting Menu With this menu, you can perform initial settings for this product. 1. Turn the source OFF. 2. Enter the Initial Setting Menu. Hold for 2 seconds 3. Select a desired mode. Each press changes the Mode ... 4. Operate a mode. - Pioneer P47DH | Owner's Manual - Page 38
display. (Refer to page 41 for details concerning the clock display.) 1. Press the FUNCTION button and select the Time setting mode in the Initial Setting Menu. 2. Select "Hour" or "Minute" with the 2/3 buttons. 3. Set as desired with the 5/∞ buttons. As soon as you switch to "Minute", the seconds - Pioneer P47DH | Owner's Manual - Page 39
mode when using external equipment with this product. 1. Press the FUNCTION button and select the AUX Setting mode (AUX) in the Initial Setting Menu. 2. Switch the AUX ON/OFF with the 5/∞ buttons. Setting the Dimmer (DIMMER) To enable this product's display from being too bright at night, when the - Pioneer P47DH | Owner's Manual - Page 40
or Subwoofer ("REAR SP:S/W") connection. If you switch Rear Speaker Lead setting to the "REAR SP:S/W", you can connect a rear speaker lead directly INT" or the auxiliary "S/W CTL:EXT". Note: • Even if you change this setting, there is no output unless you switch the Non Fading Output (refer to page - Pioneer P47DH | Owner's Manual - Page 41
the functions in the Function Menu. It is possible to memorize a different function for each source. Setting the PROGRAM Button 1. Select the PROGRAM button's setting mode (PGM-FUNC) in the Detailed Setting Menu. (Refer to page 15.) Hold for 2 seconds 2. Select the function you want to memorize in - Pioneer P47DH | Owner's Manual - Page 42
name (Display) Best Stations Memory (BSM) Local Seek Tuning (LOCAL) 7 Built-in CD Player Function Name (Display) Pause (PAUSE) Repeat Play (REPEAT) Random Play (RANDOM) 7 Multi-CD Player Function name ( OFF, the Time appears on the display. Pressing the CLOCK button switches the Time display ON/OFF. - Pioneer P47DH | Owner's Manual - Page 43
the AUX Title Input mode (TITLE IN) in the Detailed Setting Menu. Hold for 2 seconds 2. Input the AUX Title. Refer to "Disc Title Input" on page 24, and perform procedures 3 to 5 in the same way. Cellular Telephone Muting Sound from this system is muted automatically when a call is made or received - Pioneer P47DH | Owner's Manual - Page 44
your dealer or your nearest PIONEER Service Center. Message ERROR- 11, 12, 17, 30 ERROR- 11, 12, 17, 30 ERROR- 14 ERROR- 10, 11,12, 14, 17, 30, A0 HEAT Possible cause Dirty disc. Scratched disc. Unrecorded CD. Electrical or mechanical problem. CD player overheating. Recommended action Clean the - Pioneer P47DH | Owner's Manual - Page 45
DC (10.8 - 15.1 V allowable) Grounding system Negative type Max. current consumption 10.0 A Dimensions (chassis 198 (W) × 78 (H) × 135 (D) mm [7-3/4 (W) × 3-1/8 (H) × 5-3/8 (D) 80/125 Hz Slope 18 dB/oct. Gain 12 dB CD player System Compact disc audio system Usable discs Compact disc Signal - Pioneer P47DH | Owner's Manual - Page 46
cet appareil 5 Quelques mots concernant cet appareil 5 Quelques mots concernant ce mode d'emploi .... 5 Précaution 6 Service après-vente des produits PIONEER .... 6 Lors de l'utilisation du lecteur de CD à changeur 50 disques 6 Opérations de base 7 Pour écouter de la musique 7 Opérations de - Pioneer P47DH | Owner's Manual - Page 47
LOW/MID/HIGH) - Réglage fin de la courbe d'égalisation - Mise en service de la correction physiologique (LOUD) - Sortie vers le haut-parleur d'extrê AUX 42 - Choix de l'entrée AUX - Frappe du nom de l'entrée AUX Silencieux pour le téléphone de voiture .......... 42 Soins à apporter au lecteur de CD - Pioneer P47DH | Owner's Manual - Page 48
qui est plus important, sans affecter votre ouïe sensible. Le son peut être décevant. Avec le temps, le "niveau de confort" de votre ouïe s'adapte aux volumes sonores plus élevés. Ainsi, les sons "normaux" peuvent en fait être forts et affecter votre ouïe. Protégez-vous contre cela en réglant votre - Pioneer P47DH | Owner's Manual - Page 49
Tableau des commandes Élément central Touche SOURCE/OFF Fente pour le disque Sélecteur EQ Touche EJECT VOLUME Touche FUNCTION Touche CLOCK Touche PROGRAM Touche DISPLAY Touche AUDIO Touche BAND Touches 1-6 Touches 5/∞/2/3 Touche DETACH FRANÇAIS DEUTSCH FRANÇAIS ITALIANO NEDERLANDS - Pioneer P47DH | Owner's Manual - Page 50
Avant d'utiliser cet appareil Quelques mots concernant cet appareil Les fréquences d'accord de cet appareil sont attribuées pour une utilisation en Amérique du Nord. Il s'ensuit que l'utilisation de l'appareil dans d'autres régions peut donner lieu à des anomalies de réception. Quelques mots - Pioneer P47DH | Owner's Manual - Page 51
Pioneer aux adresses suivantes; N'envoyez pas le produit à réparer sans avoir, au préalable, contacté nos bureaux. 7 U.S.A. Pioneer Electronics Service, Inc. CUSTOMER SERVICE de l'utilisation du lecteur de CD à changeur 50 disques Les fonctions disponibles du lecteur de CD à changeur 50 disques sont - Pioneer P47DH | Owner's Manual - Page 52
CD intégré = Téléviseur = Syntoniseur = Lecteur de CD à chargeur = L'appareil extérieur = AUX Remarque: • L'appareil extérieur fait référence à un appareil Pioneer . * Le lecteur de CD à chargeur ne contient aucun chargeur. * L'entrée AUX (entrée extérieure) n'est pas en service. (Reportez-vous à la - Pioneer P47DH | Owner's Manual - Page 53
pour augmenter le niveau d'écoute. • Roulez la commande dans le sens contraire des aiguilles d'une montre pour diminuer le niveau d'écoute. 4. Mettez la source hors service. Appuyez pendant 1 seconde 8 FRANÇAIS ITALIANO NEDERLANDS - Pioneer P47DH | Owner's Manual - Page 54
disque de façon que la face gravée soit tournée vers le haut, le disque est éjecté quelques instants plus tard. • Si le lecteur de CD intégré ne peut pas fonctionner normalement, un message d'erreur (par exem- ple "ERROR-14") s'affiche. Reportez-vous à la page 43, "Messages d'erreur fournis par - Pioneer P47DH | Owner's Manual - Page 55
est pas nécessaire de retirer le disque pour mettre le lecteur de CD en service, ou hors service. (Reportez-vous à la page 7.) • Ne conservez pas le disque partiellement introduit dans le lecteur (après son éjection) car il pourrait être endommagé. Choix des indications affichées Chaque pression sur - Pioneer P47DH | Owner's Manual - Page 56
Fréquence Gamme F1 (FM1) = F2 (FM2) = F3 (FM3) = AM Numéro de présélection Mise en mémoire des fréquences • Les mémoires associées aux touches 1 à 6 permettent de conserver les fréquences des stations. Rappel d'une présélection Mise en mémoire d'une fréquence 2 secondes ou moins 2 secondes ou - Pioneer P47DH | Owner's Manual - Page 57
ou chargeur 12 disques) • Vous pouvez choisir un disque directement grâce aux touches 1 à 6. Il vous suffit pour cela d'appuyer sur la touche correspondant ce temps, l'indication "READY" s'affiche. • Si le lecteur de CD à chargeur ne fonctionne pas normalement, un message d'erreur tel que "ERROR - Pioneer P47DH | Owner's Manual - Page 58
à la page 28), est affiché, ces témoins permettent également de savoir aisément quelles touches 5/∞/2/3 vous pouvez utiliser pour mettre en service, ou hors service, une source, répéter une plage musicale et effectuer d'autres opérations. Les témoins et les touches correspondantes sont indiqués ci - Pioneer P47DH | Owner's Manual - Page 59
ENGLISH 2. Procédez aux réglages requis. (par exemple, la répétition de la lecture) 3. Abandonnez Hors 1 5: En 3 ∞: Hors 2 2 ou 3: Choisissez (Sensibilité) Page 17 17 7 Lecteur de CD intégré Fonction (Indication affichée) Répétition de la lecture (REPEAT) Lecture au hasard (RANDOM) Examen rapide - Pioneer P47DH | Owner's Manual - Page 60
Opérations de base 7 Lecteur de CD à chargeur Fonction (Indication affichée) Répétition de la lecture du menu des réglages détaillés Le menu des réglages détaillés permet d'avoir accès aux diverses fonctions propres à chaque source. 1. Affichez le menu des réglages détaillés. Appuyez pendant - Pioneer P47DH | Owner's Manual - Page 61
des réglages détaillés Le tableau qui suit indique les fonctions correspondant aux diverses sources du menu des réglages détaillés. Ce tableau fournit é 2 ou 3: Choisissez (Fonction) 2 5: Mémoire Page 40 7 Lecteur de CD intégré Fonction (Indication affichée) Frappe du titre d'un disque (TITLE IN) - Pioneer P47DH | Owner's Manual - Page 62
. 1. Appuyez sur la touche FUNCTION puis choisissez le mode de BSM (BSM) grâce au menu des fonctions. 2. Mettez la mémoire des meilleures stations en service au moyen de la touche 5. Les fréquences des stations dont le signal reçu par le syntoniseur est puissant sont sauvegardées par les mémoires - Pioneer P47DH | Owner's Manual - Page 63
de CD intégré Répétition de la lecture (REPEAT) Dans le cas présent, la répétition de la lecture concerne une seule plage musicale. 1. Appuyez sur la touche FUNCTION puis choisissez le mode de répétition (REPEAT) grâce au menu des fonctions. 2. Mettez la répétition de la lecture en service, ou - Pioneer P47DH | Owner's Manual - Page 64
fonctions. 2. Mettez la lecture d'examen rapide des disques en service au moyen de la touche 5. 3. Lorsque se présente CD à chargeur".) Remarque: • Après avoir entré les titres de 48 titres, les données d'un nouveau disque écraseront le plus ancien titre. • Si l'installation comporte un lecteur de CD - Pioneer P47DH | Owner's Manual - Page 65
de la lecture répétée parmi ceux mentionnés ci-dessus au paragraphe "Répétition de la lecture", mettez en service la fonction de lecture au hasard du lecteur de CD à chargeur. FRANÇAIS ITALIANO NEDERLANDS Indication affichée D-RDM M-RDM Possibilité de lecture Répétition d'un disque Répétition - Pioneer P47DH | Owner's Manual - Page 66
, le lecteur s'intéresse aux 10 premières secondes de la première plage musicale de chaque disque. 1. Appuyez sur la touche FUNCTION puis choisissez le mode d'examen rapide du disque (SCAN) grâce au menu des fonctions. 2. Mettez la lecture d'examen rapide des disques en service au moyen de la touche - Pioneer P47DH | Owner's Manual - Page 67
DEUTSCH ITS (Programmation en temps réel) Lorsque l'installation comporte un lecteur de CD à chargeur, la fonction ITS vous permet de (ITS-P) grâce au menu des fonctions. 2. Mettez la lecture ITS en service, ou hors service, au moyen des touches 5/∞. Après avoir choisi le champ de la lecture - Pioneer P47DH | Owner's Manual - Page 68
Utilisation des lecteurs de CD à chargeur Pour effacer un numéro de plage musicale 1. Pendant la lecture ITS, choisissez la plage musicale qui ne doit plus faire partie du programme. 2. - Pioneer P47DH | Owner's Manual - Page 69
d'un titre de disque (TITLE IN). (Reportez-vous à la page 15.) Remarque: • Si vous écoutez un CD TEXT sur un lecteur de CD à chargeur compatible CD TEXT, vous ne pouvez pas faire usage de ce mode. • Un CD TEXT est un disque compact qui porte en outre des informations alphanumériques telles que le - Pioneer P47DH | Owner's Manual - Page 70
de lecture. Remarque: • Vous pouvez aussi afficher le titre du disque en cours de lecture lors de la reproduction d'un CD TEXT sur un lecteur de CD à chargeur compatible CD TEXT. (Reportez-vous à la page 27.) • Commutation de l'affichage du titre du disque avec la touche DISPLAY. Chaque pression sur - Pioneer P47DH | Owner's Manual - Page 71
niveaux des graves pour donner un son plus étoffé. Mise en/hors service de la fonction (COMP/DBE) 1. Appuyez sur la touche FUNCTION puis DBE 1 =DBE 2 Remarque: • Vous pouvez utiliser ces fonctions pour les lecteurs de CD à chargeur qui en sont pourvus. Si le lecteur ne possède pas les fonctions - Pioneer P47DH | Owner's Manual - Page 72
= Titre de la plage musicale = Nom de l'interprète de la plage musicale Remarque: • Si certaines informations ne sont pas gravées sur le disque CD TEXT, "NO ~ " (par exemple "NO T-TITLE") s'affiche. Défilement du titre Cet appareil ne peut afficher que 10 caractères du titre du disque, du nom - Pioneer P47DH | Owner's Manual - Page 73
plusieurs courbes "CUSTOM" pour différentes sources. (Le lecteur de CD intégré et le lecteur de CD à chargeur font usage, automatiquement, de la même courbe d'é pression change le mode ... 2. Procédez aux réglages requis. 3. Abandonnez le menu des réglages sonores. 28 FRANÇAIS ITALIANO NEDERLANDS - Pioneer P47DH | Owner's Manual - Page 74
- vez pas régler l'équilibrage entre les haut-parleurs avant et arrière. (Reportez-vous à la page 39.) • "FADER : 0" est le réglage convenable si l'installation ne comporte que 2 haut-parleurs. Réglage de la courbe d'égalisation (EQ-LOW/MID/HIGH) Vous pouvez modifier comme bon vous semble la courbe - Pioneer P47DH | Owner's Manual - Page 75
ENGLISH 3. Augmentez ou diminuez l'amplitude dans la plage de fréquence au moyen des touches 5/∞. L'indication affichée varie de "+6" à "-6". "CUSTOM" Remarque: • Si vous modifiez une courbe d'égalisation autre que "CUSTOM", la courbe ainsi modifiée est rem- placée par la courbe précédemment - Pioneer P47DH | Owner's Manual - Page 76
au moyen des touches 2/3. LOW += MID += HI "" Sortie vers le haut-parleur d'extrêmes graves (SUB.W) Si l'enceinte d'extrêmes graves est connectée, mettez en service la sortie de l'enceinte des extrêmes graves. Au moment de quitter l'usine, l'appareil est réglé de manière que la sortie vers le haut - Pioneer P47DH | Owner's Manual - Page 77
0) Lorsque la sortie vers le haut-parleur d'extrêmes graves est en service (ON), vous pouvez choisir la fréquence de coupure et le niveau de sortie vers le haut-parleur d'extrêmes graves que si cette sortie a été mise en service (ON) grâce au paramètre qui convient. Sortie de ligne préamplifiée (NON - Pioneer P47DH | Owner's Manual - Page 78
par les enceintes avant ou arrière, mettez le filtre passe-haut en service. Seule les fréquences supérieures à celles de la plages choisies sont quence à atténuer. Précaution: • Lorsque la fonction F.I.E. est hors service, les haut-parleurs arrière peuvent émettre tous les sons possibles du spectre - Pioneer P47DH | Owner's Manual - Page 79
(Reportez-vous à la page 39.) • Si l'installation ne comporte que 2 haut-parleurs, mettez hors service la fonction d'amélioration de l'image sonore avant. signal en FM à celui d'une autre source (par exemple, le lecteur de CD intégré). 2. Appuyez sur la touche AUDIO puis choisissez le mode de réglage - Pioneer P47DH | Owner's Manual - Page 80
Dépose et pose de la face avant Protection contre le vol La face avant est amovible de manière à décourager le vol. • Laissez la face avant fermée pendant que vous conduisez. Dépose de la face avant 1. Libérez la face avant. 2. Pour retirer la face avant, tirez son côté droit à vous. Veillez à ne - Pioneer P47DH | Owner's Manual - Page 81
de fonctionnement de base de ce produit. 1. Mettez la source hors service. 2. Affichez le menu des réglages initiaux. Appuyez pendant 2 secondes fonctionnement désiré. Chaque pression change le mode ... 4. Procédez aux réglages requis. 5. Abandonnez le menu des réglages initiaux. Remarque: - Pioneer P47DH | Owner's Manual - Page 82
régler les minutes, les secondes sont comptées à partir de 00. Réglage de la tonalité d'alarme (WARN) Vous pouvez mettre en service, ou hors service, la tonalité d'alarme. (Reportez-vous à la page 35, "Tonalité d'alarme".) 1. Appuyez sur la touche FUNCTION puis choisissez le mode de fonctionnement - Pioneer P47DH | Owner's Manual - Page 83
. 1. Appuyez sur la touche FUNCTION puis choisissez le mode de fonctionnement de l'entrée auxiliaire (AUX) grâce au menu des réglages initiaux. 2. Mettez l'entrée auxiliaire en service, ou hors service, au moyen des touches 5/∞. Réglage de la luminosité (DIMMER) Un réglage est prévu, qui permet de - Pioneer P47DH | Owner's Manual - Page 84
aucun signal n'est présent en sortie aussi longtemps que vous n'avez pas mis en service la sortie sans équilibrage (reportez-vous à la page 32), ou la sortie vers le Quand aucune enceinte d'extrêmes graves n'est connectée aux câbles d'enceintes arrière, choisissez "REAR SP:FUL". • Quand une - Pioneer P47DH | Owner's Manual - Page 85
ENGLISH FRANÇAIS DEUTSCH Autres fonctions Utilisation de la touche PROGRAM (PGM-FUNC) Vous pouvez attribuer une des fonctions du menu des fonctions à la touche PROGRAM. Par ailleurs, la fonction attribuée peut être différente pour chaque source. Attribution d'une fonction à la touche PROGRAM 1. - Pioneer P47DH | Owner's Manual - Page 86
secondes En Adoption du mode de réglage de la sensibilité 7 Lecteur de CD intégré Fonction (Indication affichée) Pause (PAUSE) Répétition de la lecture quand les sources sont hors service, l'heure apparaît sur l'afficheur. Appuyer sur la touche 41 CLOCK affiche et efface l'heure sur l'afficheur. - Pioneer P47DH | Owner's Manual - Page 87
). Pour écouter le signal fourni par une source auxiliaire, mettez en service le mode de source auxiliaire grâce au menu des réglages initiaux puis choisissez la source. Choix de l'entrée AUX • Choisissez l'entrée AUX. (Reportez-vous à la page 7.) Chaque pression change la source ... Frappe du nom - Pioneer P47DH | Owner's Manual - Page 88
• Lisez les précautions relatives aux disques CD-R avant d'utiliser de tels disques. • Essuyez soigneusement tout disque sale ou humide en déplaçant le perturber le fonctionnement du lecteur. En ce cas, mettez le lecteur hors service pendant environ une heure et si le disque est humide, essuyez-l à - Pioneer P47DH | Owner's Manual - Page 89
15,1 V possibles) Mise à la masse Pôle négatif Consommation maximale 10,0 A Dimensions (Châssis 198 (W) × 78 (H) × 135 (D) mm (Panneau avant) ........ 50/80/125 Hz Pente 18 dB/octave Gain 12 dB Lecteur de CD Système Système audio disque compact Disques utilisables Disque compact Format du - Pioneer P47DH | Owner's Manual - Page 90
- Pioneer P47DH | Owner's Manual - Page 91
- Pioneer P47DH | Owner's Manual - Page 92
Del Valle, Mexico D.F. C.P. 03100 TEL: 5-688-52-90 Published by Pioneer Corporation. Copyright © 1999 by Pioneer Corporation. All rights reserved. Publication de Pioneer Corporation. Copyright © 1999 Pioneer Corporation. Tous droits de reproduction et de traduction réservés. Printed
-
 1
1 -
 2
2 -
 3
3 -
 4
4 -
 5
5 -
 6
6 -
 7
7 -
8
-
9
-
10
-
11
-
12
-
13
-
14
-
15
-
16
-
17
-
18
-
19
-
20
-
21
-
22
-
23
-
24
-
25
-
26
-
27
-
28
-
29
-
30
-
31
-
32
-
33
-
34
-
35
-
36
-
37
-
38
-
39
-
40
-
41
-
42
-
43
-
44
-
45
-
46
-
47
-
48
-
49
-
50
-
51
-
52
-
53
-
54
-
55
-
56
-
57
-
58
-
59
-
60
-
61
-
62
-
63
-
64
-
65
-
66
-
67
-
68
-
69
-
70
-
71
-
72
-
73
-
74
-
75
-
76
-
77
-
78
-
79
-
80
-
81
-
82
-
83
-
84
-
85
-
86
-
87
-
88
-
89
-
90
-
91
-
92
 |
 |

Multi-CD control High power CD player
with FM/AM tuner
Syntoniseur FM/AM et lecteur de CD, “Puissance élevée”,
avec contrôleur pour lecteur de CD à chargeur
Operation Manual
DEH-P47DH
Mode d’emploi
ENGLISH
FRANÇAIS
DEUTSCH
FRANÇAIS
ITALIANO
NEDERLANDS