Pioneer PDP-433CMX Operating Instructions
Pioneer PDP-433CMX Manual
 |
View all Pioneer PDP-433CMX manuals
Add to My Manuals
Save this manual to your list of manuals |
Pioneer PDP-433CMX manual content summary:
- Pioneer PDP-433CMX | Operating Instructions - Page 1
Display Écran à plasma PDP-503CMX PDP-433CMX Operating Instructions Mode d'emploi Contents related to system specifications, power requirements, accessories, and other information differ with respect to the country where this unit is purchased. For customers living in the U.S.A. or Canada - Pioneer PDP-433CMX | Operating Instructions - Page 2
English This unit has been designed for use as a computer display monitor. The optional video card is required if you wish to view other video signals on the monitor. For details consult your local retail dealer. Français Cet appareil est conçu pour une utilisation comme moniteur d'affichage d' - Pioneer PDP-433CMX | Operating Instructions - Page 3
Thank you very much for purchasing this PIONEER product. Before using your Plasma Display, please read the "Safety Precautions" and these "Operating Instructions" carefully so you will know how to operate the Plasma Display properly. Keep this manual in a safe place. You will find it useful - Pioneer PDP-433CMX | Operating Instructions - Page 4
and service personnel of this equipment to any potentially dangerous conditions. IMPORTANT NOTICE The serial number for this equipment is located on the rear panel. Please write this serial number on your enclosed warranty card and keep it in a secure area. This is for your security. CAUTION: WHEN - Pioneer PDP-433CMX | Operating Instructions - Page 5
÷ When the power-supply cord or plug is damaged. ÷ If liquid has been spilled, or objects have fallen into the product. ÷ If the product has been exposed to rain or water. ÷ If the product does not operate normally by following the operating instructions. Adjust only those controls that are covered - Pioneer PDP-433CMX | Operating Instructions - Page 6
undesired operation. Product Name: Plasma Display with Video Card Model Number: PDP-503CMX / PDP-433CMX (Plasma Display) PDA-5002 (Video Card) Product Category: Class B Personal Computers & Peripherals Responsible Party Name: PIONEER ELECTRONICS (USA) INC. Customer Support Division Address: P.O. BOX - Pioneer PDP-433CMX | Operating Instructions - Page 7
Manual 3 Checking Supplied Accessories 5 Part Names and Functions 6 Main Unit 6 Remote Control Unit 7 Connection Panel 8 Installation and Connections 10 Installation of the Unit 10 Connection to INPUT1 and INPUT2 12 Audio Connections 14 Control Cord Connection 15 Power Cord Connection - Pioneer PDP-433CMX | Operating Instructions - Page 8
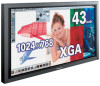
Pioneer products). In addition, when the Power Control function is selected, power consumption is reduced by 20% compared to the normal operating mode (MODE 1, with color-bar signal input). PDP-433CMX ¶ Introduces newly developed 43" Wide Plasma Panel The new wide high-precision 43" plasma panel - Pioneer PDP-433CMX | Operating Instructions - Page 9
operations associated with adjusting the plasma display picture to match the requirements of specific components and personal preferences. Screen Displays The example screen displays provided in this manual are those for the PDP-503CMX model. The PDP-433CMX display differs as shown: Example - Pioneer PDP-433CMX | Operating Instructions - Page 10
English Before Proceeding About operations in this manual Operations in this manual are outlined in step by step numbered procedures. Most of the procedures are written in reference to the remote control unit unless the button or control is only present on the main unit. However, if a button or - Pioneer PDP-433CMX | Operating Instructions - Page 11
that the following accessories were supplied. 1 Power cord 2 Remote control unit 3 AA (R6) batteries (x 2) 7 Display stands (x 2) Before Proceeding 8 Washers (x 2) 9 Hex hole bolts (x 2) 0 Remote control unit holder 4 Cleaning cloth (for wiping front panel) 5 Speed clamps (x 2) 6 Bead bands - Pioneer PDP-433CMX | Operating Instructions - Page 12
1 Display stand 2 Remote control sensor Point the remote control toward the remote sensor to operate the unit (page 8). 3 STANDBY/ON indicator This indicator is red during standby mode, and turns to green when the unit is in the operation mode (page 19). Flashes green when Power-Management function - Pioneer PDP-433CMX | Operating Instructions - Page 13
Use to select and enlarge one part of the screen (page 23). - VOLUME (+/-) buttons Use to adjust the volume (page 20). Inserting the batteries in the remote control unit While pressing down lightly, slide in the direction of the arrow. Two AA (R6) batteries CAUTION ¶ Insert batteries so that the - Pioneer PDP-433CMX | Operating Instructions - Page 14
. Connection Panel The connection panel is provided with two video input jacks and one video output jack. Audio input and speaker output jacks are also provided, together with a CONTROL IN/OUT connector for connecting to PIONEER components bearing the Î mark. For instructions regarding connections - Pioneer PDP-433CMX | Operating Instructions - Page 15
Illustration depicts PDP-503CMX model. Part Names and Functions AC INLET - = 8Ω ~16Ω SPEAKER + - L ~ R 8Ω ~16Ω S+PEAKE-R CONTROL IN OUT COMBINATION IN OUT RS-232C INPUT1 (ON SYNC) ANALOG RGB OUTPUT (ANALOG RGB) G B INPUT2 (H/V SYNC) R HD VD 7Ω5Ô2k.Ω2 AUDIO INPUT OUTPUT - Pioneer PDP-433CMX | Operating Instructions - Page 16
available M8 bolts . 3 Fix this unit using the supplied washer and bolt. Front Use a 6 mm hex wrench to bolt them. PDP-503CMX: 798 mm (31-7/16 in.) PDP-433CMX: 768 mm (30-1/4 in.) Rear 110 mm (4-5/16 in.) 2 Set this unit in the stand. CAUTION This display unit weighs at least 67 lbs (30 kg - Pioneer PDP-433CMX | Operating Instructions - Page 17
please refer to the instruction manual provided with the stand or installation bracket. Installation using accessories other than the PIONEER stand or installation bracket (sold separately) ÷ When possible, please install using parts and accessories manufactured by PIONEER. PIONEER will not be held - Pioneer PDP-433CMX | Operating Instructions - Page 18
on the computer type. When connecting, please thoroughly read the computer's instruction manual. Before making connections, be sure to make sure that the personal computer's power and this unit's main power is off. For the PC input signals and screen sizes that this unit is compatible with, please - Pioneer PDP-433CMX | Operating Instructions - Page 19
model being connected, a conversion connector or adapter etc. provided with the computer or sold separately may be necessary. For details, please read your PC's instruction manual video signal will not be output from the OUTPUT (INPUT1) terminal when the main power of this unit is off or in standby. - Pioneer PDP-433CMX | Operating Instructions - Page 20
output. The following chart shows the video inputs and the corresponding audio input jacks. Video Audio input jacks input Sound output INPUT1 INPUT2 Stereo mini jack (L/R) Sound of the selected video input is output from the • SPEAKER terminals • Stereo mini jacks (L/R). Audio connections - Pioneer PDP-433CMX | Operating Instructions - Page 21
remote control sensor on this unit to control. Notes ÷ Make sure the power is turned off when making connections. ÷ Please complete all component connections before making control cord connections. Main unit CONTROL IN OUT CONTROL IN OUT CONTROL IN OUT CONTROL IN OUT Power Cord Connection - Pioneer PDP-433CMX | Operating Instructions - Page 22
speed clamps to the main unit Connect the speed clamps using the 4 holes marked with • below, depending on the situation. Illustration depicts PDP-503CMX model. Installation and Connections To remove speed clamps Using pliers, twist the clamp 90° and pull it outward. In some cases the clamp may - Pioneer PDP-433CMX | Operating Instructions - Page 23
. No manual setup is necessary for signals with other refresh rates, since adjustments are performed automatically (the SETTING item will not be displayed). 1 Switch MAIN POWER on the connection panel to the on position to turn on the unit's main power. The STANDBY/ON indicator lights red. 2 Press - Pioneer PDP-433CMX | Operating Instructions - Page 24
Make this CLAMP POSITION setting for each applicable input (INPUT1 and INPUT2). ÷ When using this setup, be sure to carefully check the signal output of the component that you are using. For details, please refer to the instruction manual supplied with the component you are connecting. SELECT SET - Pioneer PDP-433CMX | Operating Instructions - Page 25
N OUT OF R ANG E f H : 75. 7 kH z f V :120. 0 Hz ---- Operations Main Unit Operating Panel 4 Remote Control Unit 1 Switch MAIN POWER on the main unit to the on position to turn the main power on. The STANDBY/ON indicator lights red. 2 Press STANDBY/ON to put this unit in the operation mode. The - Pioneer PDP-433CMX | Operating Instructions - Page 26
unit. Use VOLUME + or VOLUME - to adjust the volume of the connected speakers. V OLU ME :5 To mute the sound Press DISPLAY on the remote control unit. The currently selected input, screen size and refresh rates will be displayed for about 3 seconds. I NPUT1 f H : 31. 5 kH z f V : 60. 0 Hz - Pioneer PDP-433CMX | Operating Instructions - Page 27
mode that best matches the video source that you are viewing. power is turned on, in order to prevent image burning. During personal computer signal input 1 DOT BY DOT The input PDP-503CMX] A 480 lines 768 lines 640 dots 1280 dots (Illustration shows 640 x 480 input.) [PDP-433CMX] * The PDP-433CMX - Pioneer PDP-433CMX | Operating Instructions - Page 28
appear on the screen. 768 lines 1024 lines Use 5/∞ to adjust the position of the video image on the screen. Moving the screen position upward or downward (*Supported only on PDP-503CMX) During personal computer input (1280 x 1024/60Hz only), even when the PARTIAL setting is selected, the position of - Pioneer PDP-433CMX | Operating Instructions - Page 29
. 4 Press the remote control unit's POINT ZOOM once again to cancel the point zoom operation. The point zoom function will also be canceled whenever the input signal changes, the menu screen is displayed, or the INPUT changes. AREA 1 display range AREA 2 display range AREA 3 display range AREA - Pioneer PDP-433CMX | Operating Instructions - Page 30
input (INPUT 1 or INPUT 2). To return to operating mode: ÷ To return to normal operation from POWER MANAGEMENT mode: either operate the computer, or press INPUT on the display or remote control unit. ÷ To return to normal operation from AUTO POWER OFF mode: Press STANDBY/ON on the display or remote - Pioneer PDP-433CMX | Operating Instructions - Page 31
seen clearly. BRIGHT Adjust so that the dark parts of the picture can be seen clearly. R. to select RESET, then press SET. Display Panel Adjustments BR I GHT. :0 ADJUST SET to exit the menu screen. Note Make these adjustments for each input (INPUT1 to INPUT2) and signals. P I CTURE YES RESET - Pioneer PDP-433CMX | Operating Instructions - Page 32
Main Unit Operating Panel Remote Control Unit Press AUTO SET UP on either the main unit or remote control unit. ÷ Optimum settings may not be possible for low- luminance and certain other kinds of signals. In this case, follow the instructions in the section "Manual Adjustment of Screen Position - Pioneer PDP-433CMX | Operating Instructions - Page 33
English Manual Adjustment of Screen Position and Clock 1 SET ENTER MENU EXIT 4 Press 2/3 to carry out the adjustment. Display Panel Adjustments 5 Press SET. Pressing SET writes the value into the memory and signal frequency that corresponds to the input video signal. PHASE Adjust so that there - Pioneer PDP-433CMX | Operating Instructions - Page 34
BEL : I NPUT 1 POWE R MA NAGEME NT : OF F CL AMP P OS I T I ON : AU T O SETT I NG : VGA SELECT SET ENTER MENU EXIT 4 Press SET to select INPUT LABEL. MAIN MENU INPUT1 I NPUT L ABEL I NPUT 1 BACK SPACE ABC DE F GH I J KL M NOP QR S T U VWX Y Z 012 34 567 89 RESET SPACE END SELECT - Pioneer PDP-433CMX | Operating Instructions - Page 35
the screen brightness regardless of the input signal. This is effective for reducing panel deterioration due to screen burning. 4 Following completion of settings, press MENU to return to normal screen display. Note The POWER CONTROL setting affects all input sources. SELECT SET CHANGE MENU EXIT - Pioneer PDP-433CMX | Operating Instructions - Page 36
selected, AUTO FUNCTION is disabled. ÷ When INPUT 1 is selected, the display input automatically switches to INPUT 1 when a signal is detected at the INPUT 1 jack. Thereafter, the input will not change even if the INPUT button is pressed on the remote control unit or display. Once the function has - Pioneer PDP-433CMX | Operating Instructions - Page 37
Vents Vents ERROR INVALID KEY ENTRY ¶ An invalid operation has been attempted. Check input signals, connections and other settings. Vents Illustration depicts PDP-503CMX model. SHUT DOWN ¶ Turn off main power, wait for 1-2 minutes, then try turning power on again. If problem persists, remove - Pioneer PDP-433CMX | Operating Instructions - Page 38
problems Problem • No power • Unit cannot be operated. • Remote control does not operate. • INPUT is not changed. • Picture is cut off. • Strange color, light color, or dark, or color misalignment • Power is suddenly turned off. • No picture Possible Solution • Is the power cord disconnected - Pioneer PDP-433CMX | Operating Instructions - Page 39
dry thoroughly before using. If the power is automatically turned off for a reason other than the above reasons, there could be a malfunction. In this case, unplug the power cord from the power outlet and request repair from your nearest sales outlet. • The plasma display panel of this unit is very - Pioneer PDP-433CMX | Operating Instructions - Page 40
lbs. 12 oz) (including display stand 39.5 kg (87 lbs. 1 oz) General (PDP-433CMX) Light emission panel 43 inch plasma display panel Number of pixels 1024 x 768 Power supply AC 100 - 120 V, 50/60 Hz Rated current 2.98 A - 2.48 A Standby power consumption 0.9 W External dimensions ........ 1070 - Pioneer PDP-433CMX | Operating Instructions - Page 41
English Additional Information Supplement 1 -1/2: PDP-503CMX PC signal compatibilty table (INPUT1, INPUT2) Resolution (Dot x Line) Refresh rate Vertical Horizontal 70Hz 75Hz 85Hz 24.8kHz 31.5kHz 31.5kHz 35.0kHz 37.9kHz 37.5kHz 43.3kHz 35.2kHz 37.9kHz 48.1kHz 46.9kHz 53.7kHz 49.7kHz 31.7kHz - Pioneer PDP-433CMX | Operating Instructions - Page 42
Supplement 1 -2/2: PDP-433CMX PC signal compatibilty table (INPUT1, INPUT2) Resolution (Dot x 31.5kHz 31.5kHz 35.0kHz 37.9kHz 37.5kHz 43.3kHz 35.2kHz 37.9kHz 48.1kHz 46.9kHz 53 ) : Input signal and screen's dot x line ratio are made to display at 1:1 ratio. Note: The PDP-433CMX is designed - Pioneer PDP-433CMX | Operating Instructions - Page 43
trademark of Microsoft Corporation. NEC and PC-9800 are trademarks of NEC Corporation. VESA and DDC are registered trademarks of Video Electronics Standards Association. Power Management and Sun Microsystems are registered trademarks of Sun Microsystems, Inc. VGA and XGA are registered trademarks of - Pioneer PDP-433CMX | Operating Instructions - Page 44
Published by Pioneer Corporation. Copyright © 2002 Pioneer Corporation. All rights reserved. 38 En
-
 1
1 -
 2
2 -
 3
3 -
 4
4 -
 5
5 -
 6
6 -
 7
7 -
8
-
9
-
10
-
11
-
12
-
13
-
14
-
15
-
16
-
17
-
18
-
19
-
20
-
21
-
22
-
23
-
24
-
25
-
26
-
27
-
28
-
29
-
30
-
31
-
32
-
33
-
34
-
35
-
36
-
37
-
38
-
39
-
40
-
41
-
42
-
43
-
44
 |
 |

プラズマディスプレイ�
PDP-503CMX
PDP-433CMX
Plasma Display
Écran à plasma
Operating Instructions
Mode d’emploi
Contents related to system specifications, power requirements,
accessories, and other information differ with respect to the
country where this unit is purchased. For customers living in the
U.S.A. or Canada, please use and refer to the instructions written
in either English or French. For customers in Japan, please use
and refer to the instructions written in Japanese.
Les caractéristiques, les spécifications d'alimentation, les
accessoires et d'autres informations diffèrent d'un pays à
l'autre. Si vous vivez au Canada ou aux États-Unis, reportez-
vous aux instructions en français ou en anglais. Si vous vivez
au Japon, reportez-vous aux instructions en japonais.
電源、付属品等の差異がありますので、日本国内でご購入・ご使
用の際は、本書の日本語ページをご覧下さい。その他の国、地
域でご購入・ご使用の際は、英語またはフランス語ページをご覧
下さい。
「据付工事」について
本機は十分な技術・技能を有する専門業者が据え付け
を行うことを前提に販売されているものです。据え付
け・取付けは必ず工事専門業者または販売店にご依頼
ください。
なお、据え付け・取り付けの不備、誤使用、改造、天
災などによる事故損傷については、弊社は一切責任を
負いません。
販売店様へ
この取扱説明書は据付け終了後お客様に必ずお渡しし
て、取扱い方法の説明を行ってください。
高調波ガイドライン適合品